May 2025 Report

Two refights, two conventions and a campaign game, it’s all happening in May!

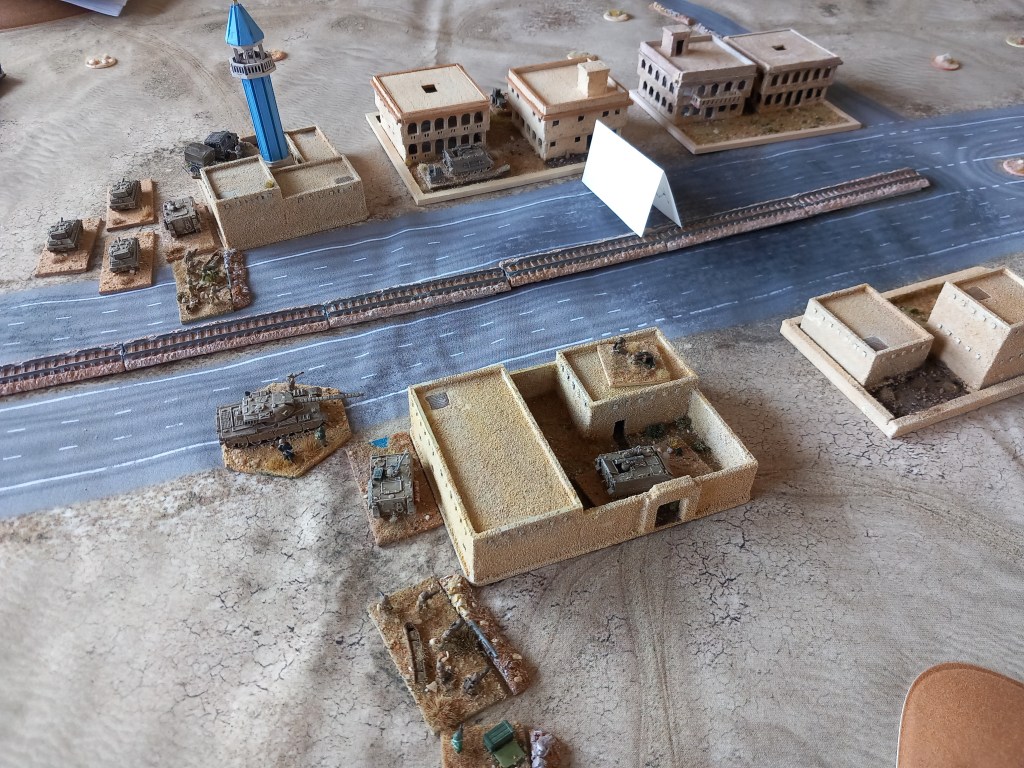
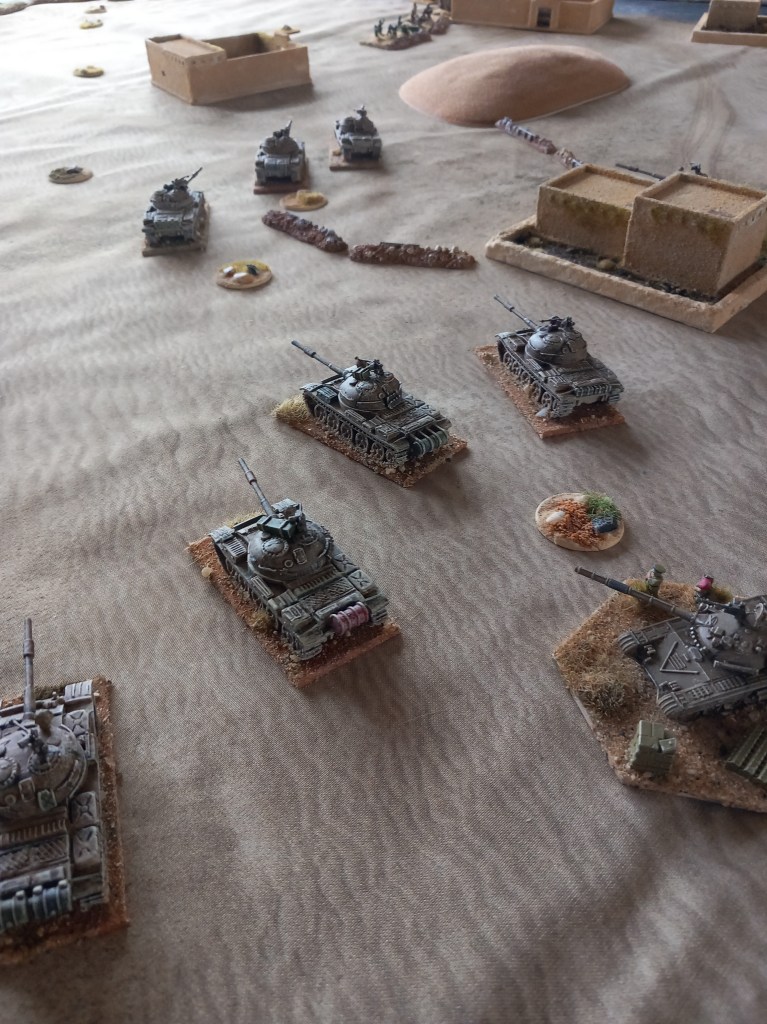
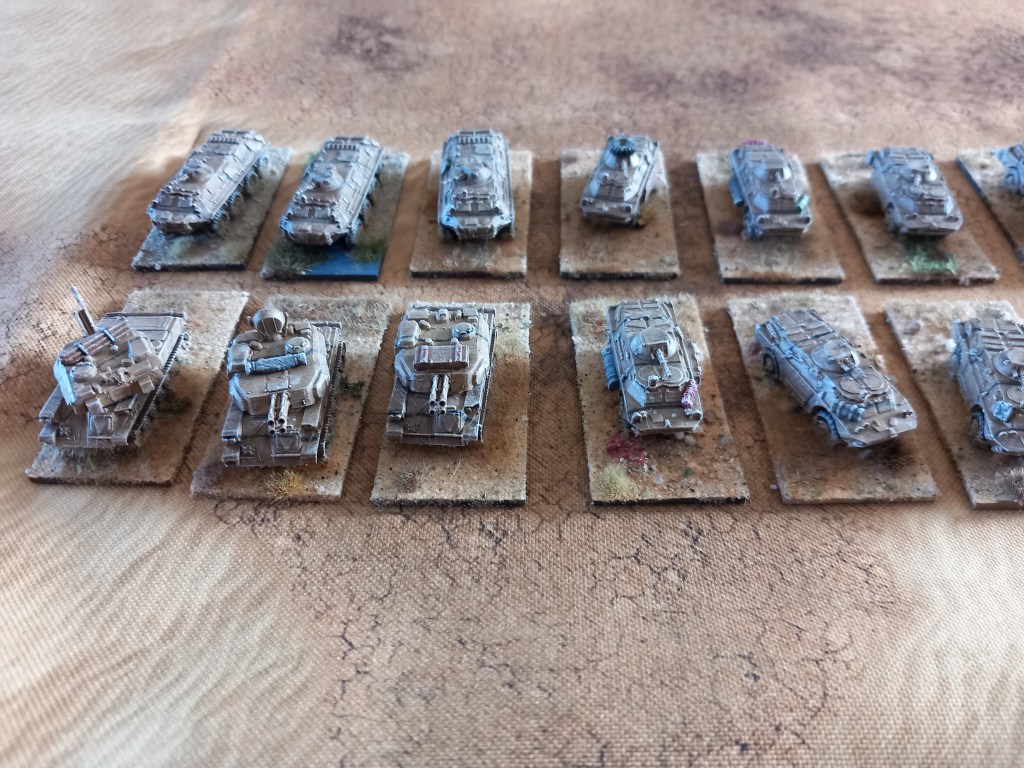
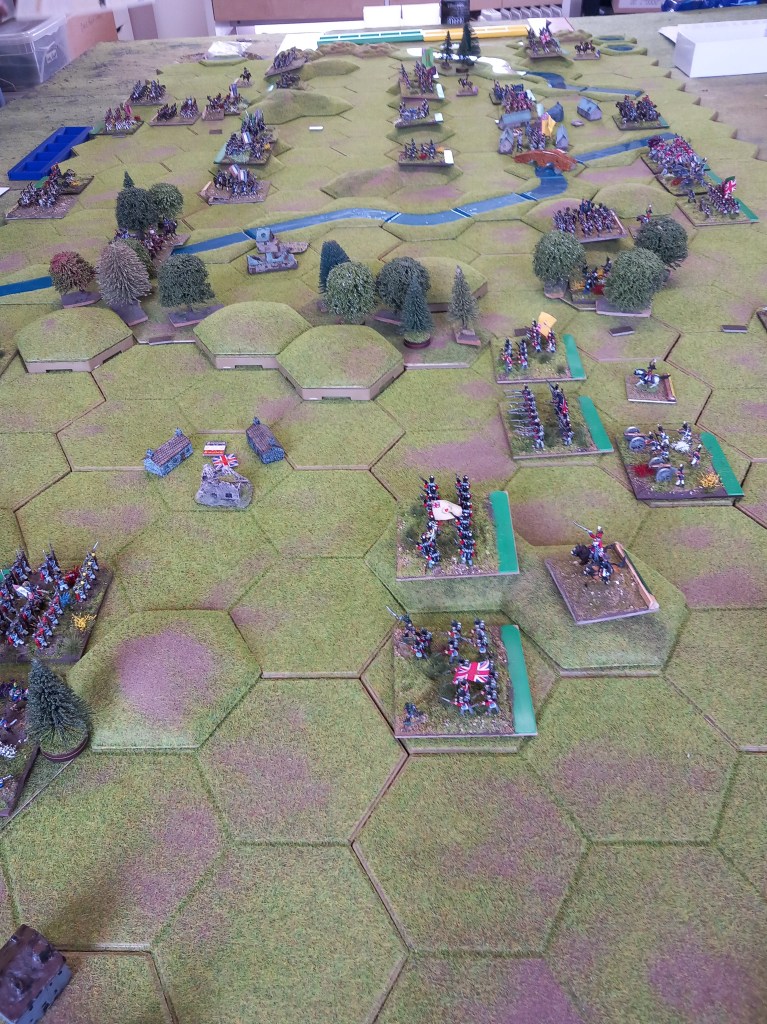
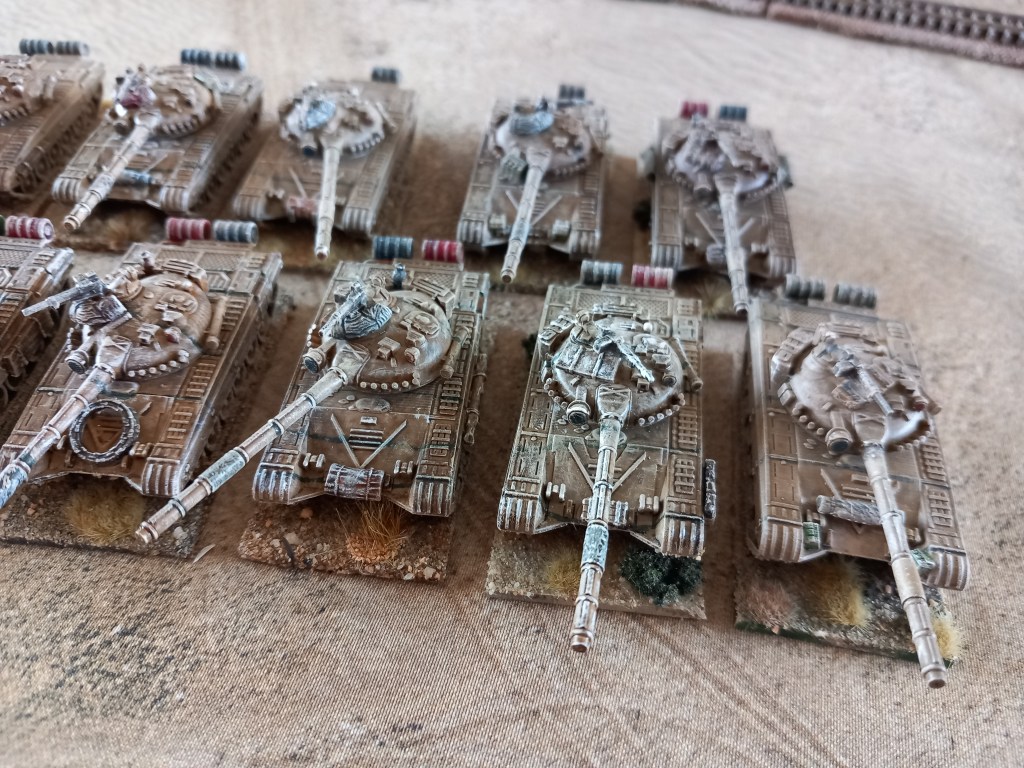
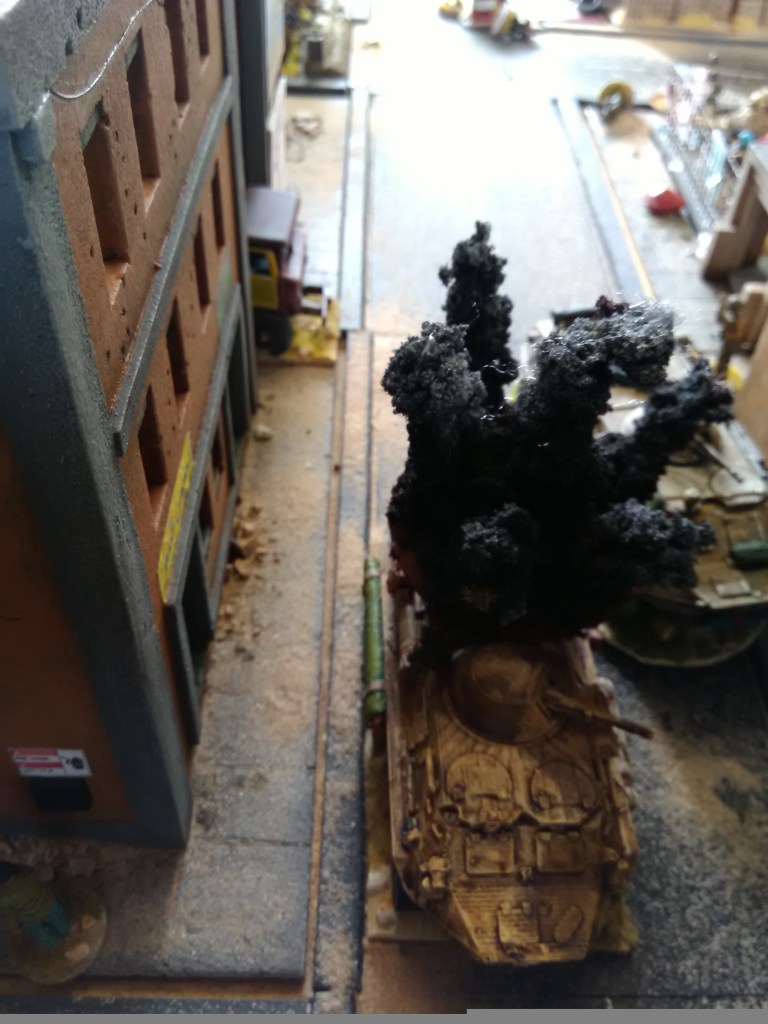
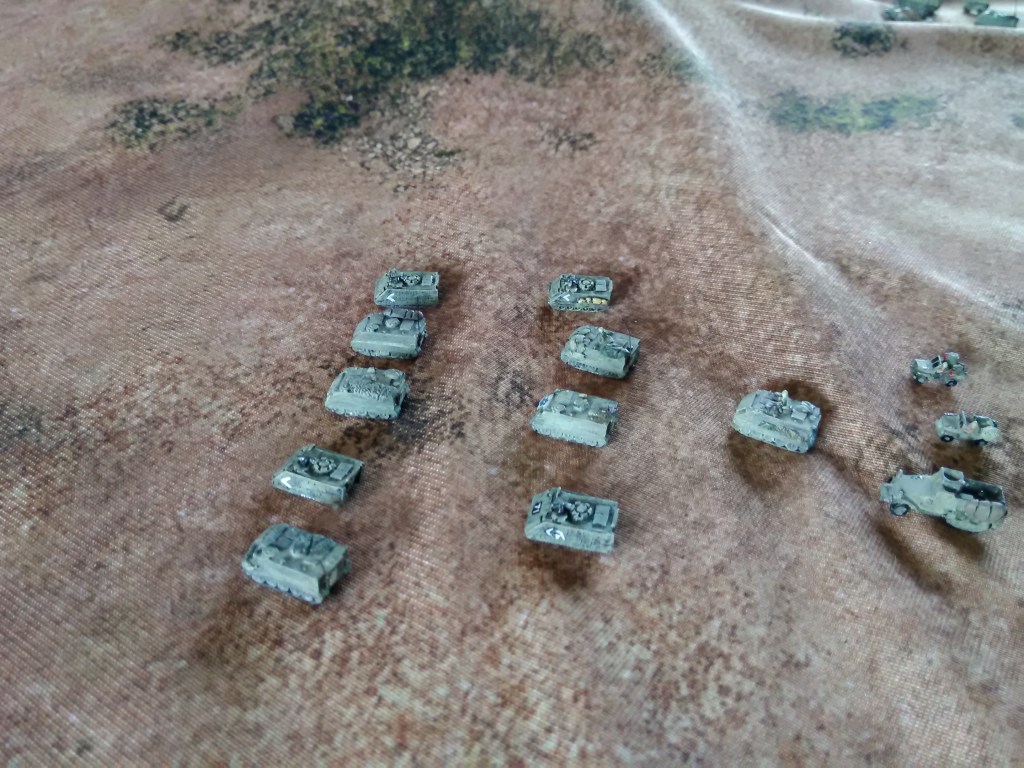
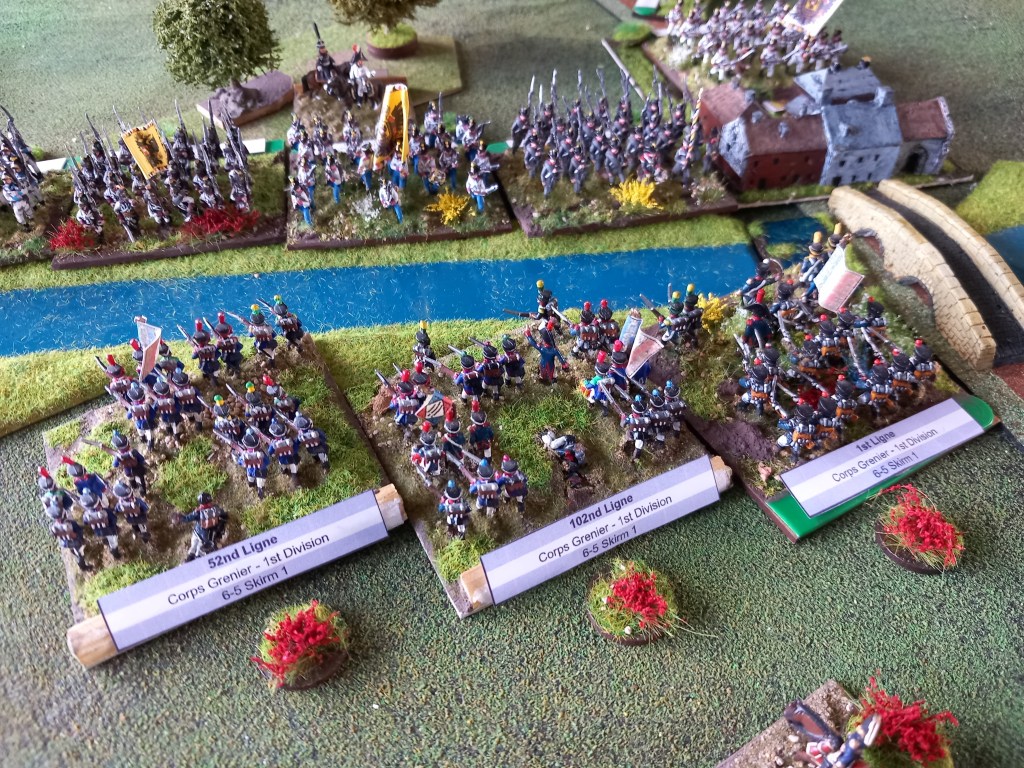
Our first game of the month was the first on table clash in our Iran Iraq campaign.

In order to facilitate some battles that weren’t of the equal points variety I set up a campaign based around ‘Operation Howeizeh’ the Iranian counter attack of January 1981. Although we have a goodly amount of kit for a small group a certain amount of ‘creative accounting’ had to be done to make what we had fit the general historical setting – frankly this wasn’t a problem, the idea was to create a different way of getting models on the table and have some off table decisions to make. The excellent Helion soft backs on the conflict were invaluable for maps and forces involved.

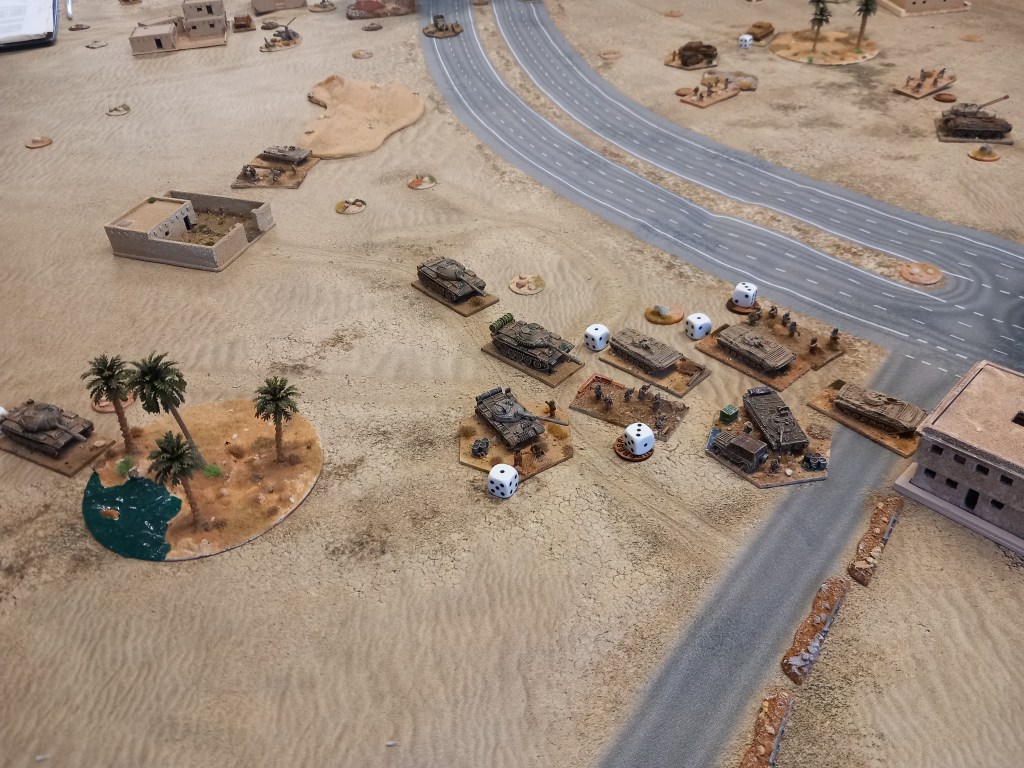
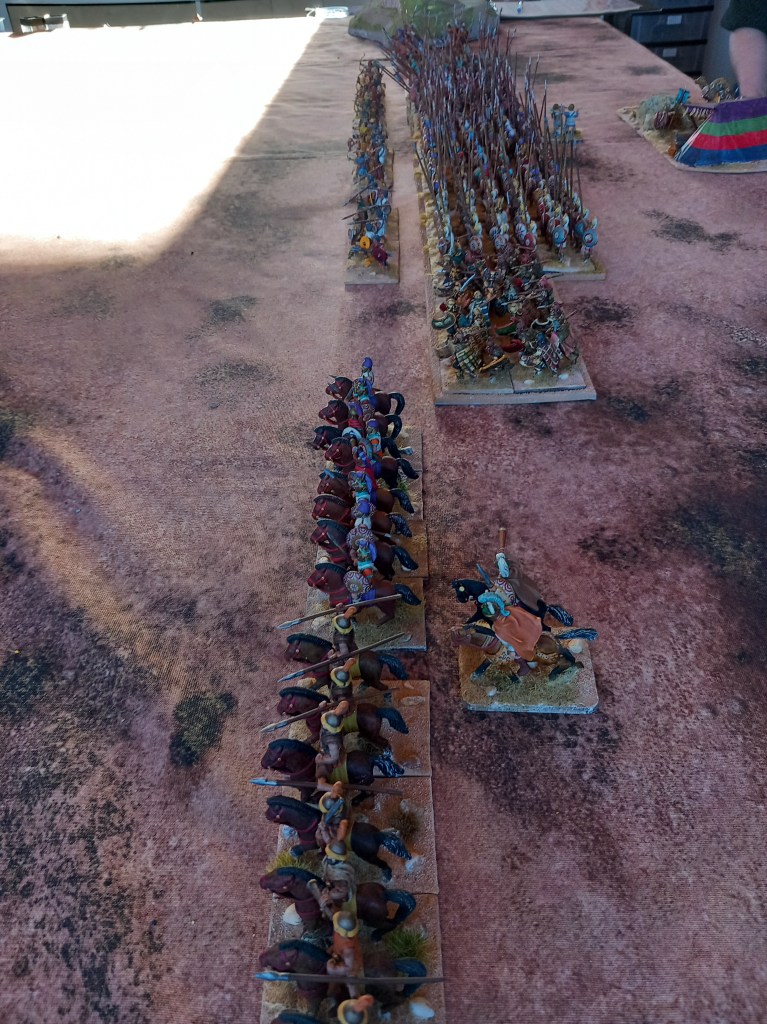
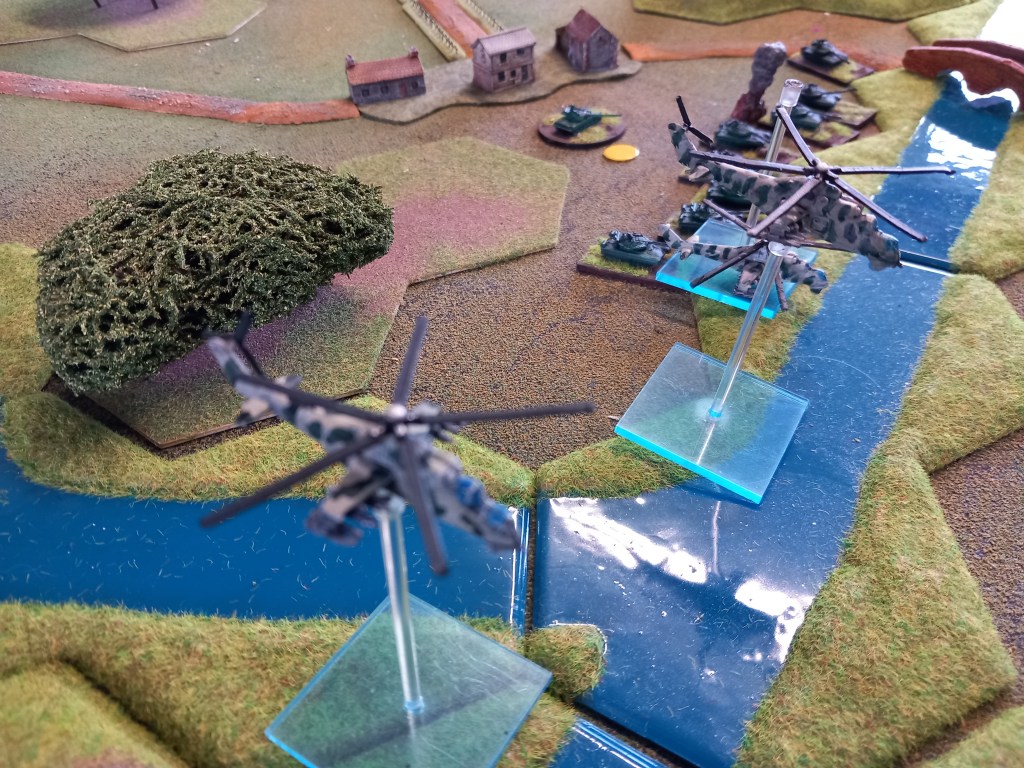
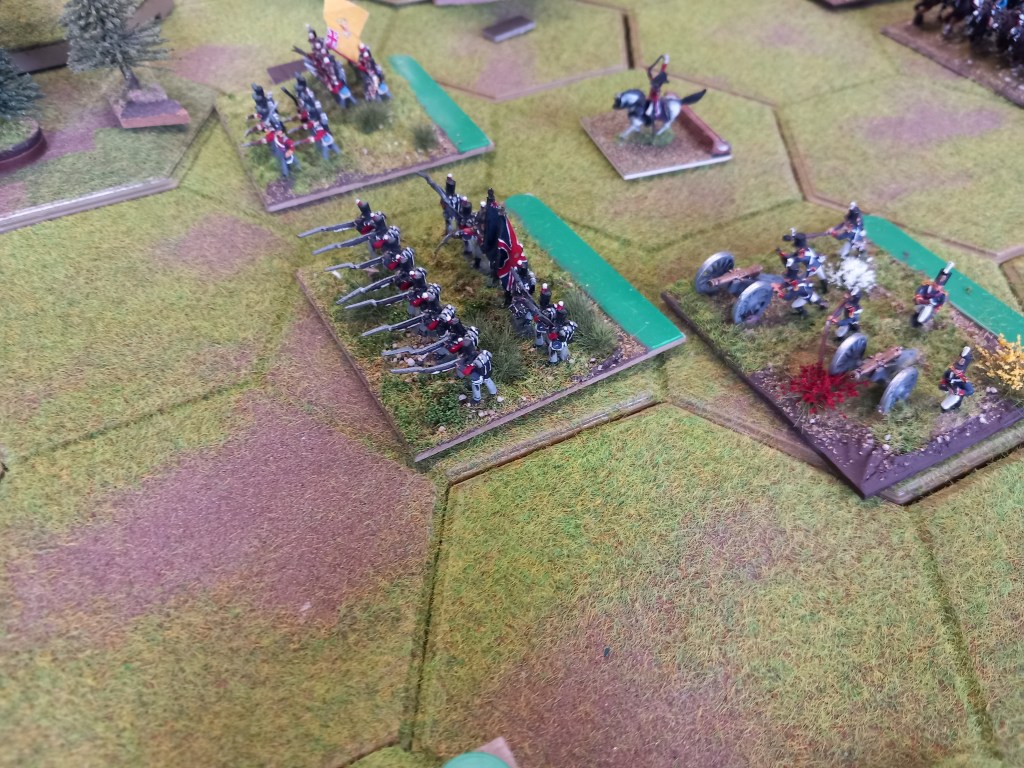
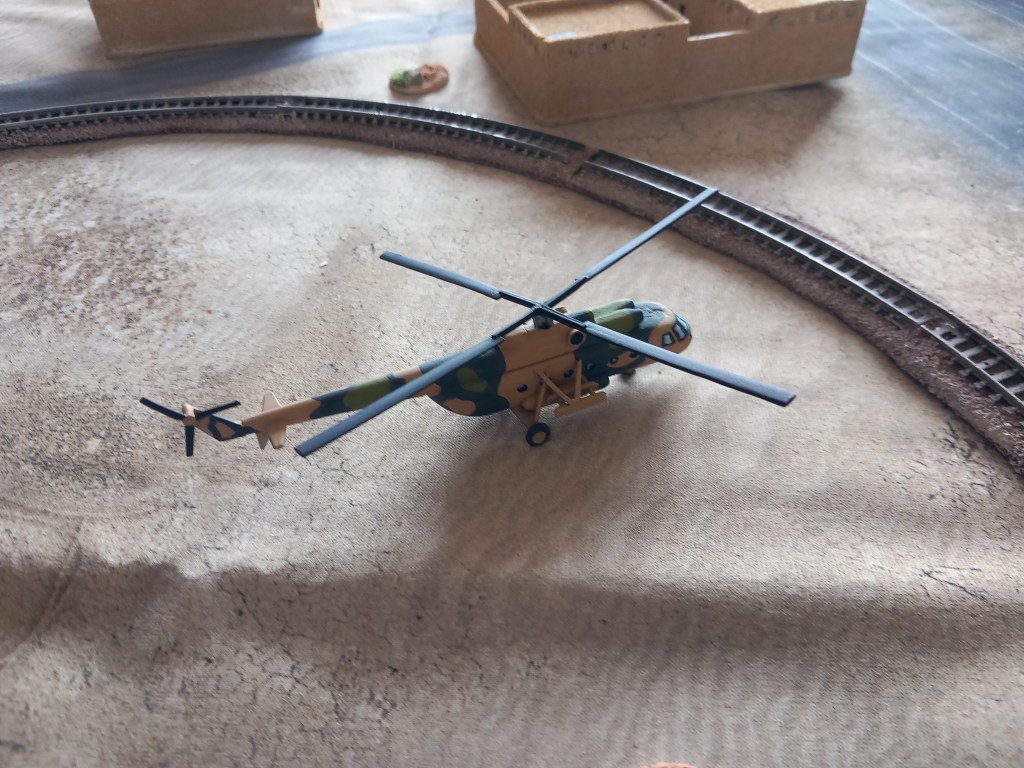
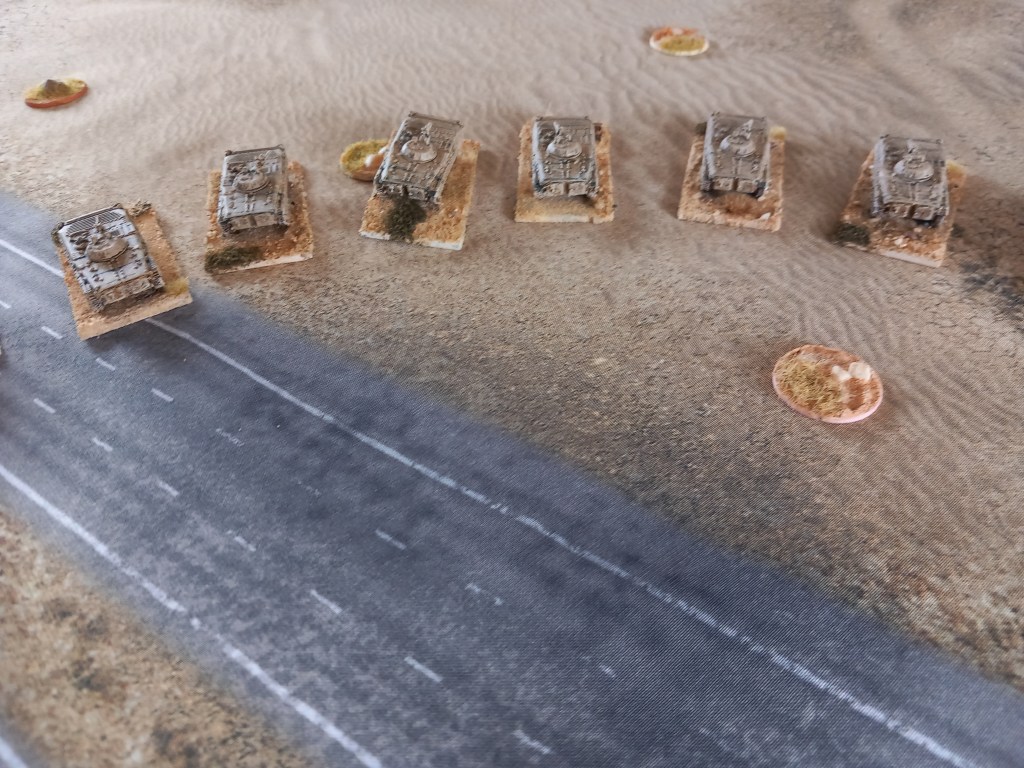
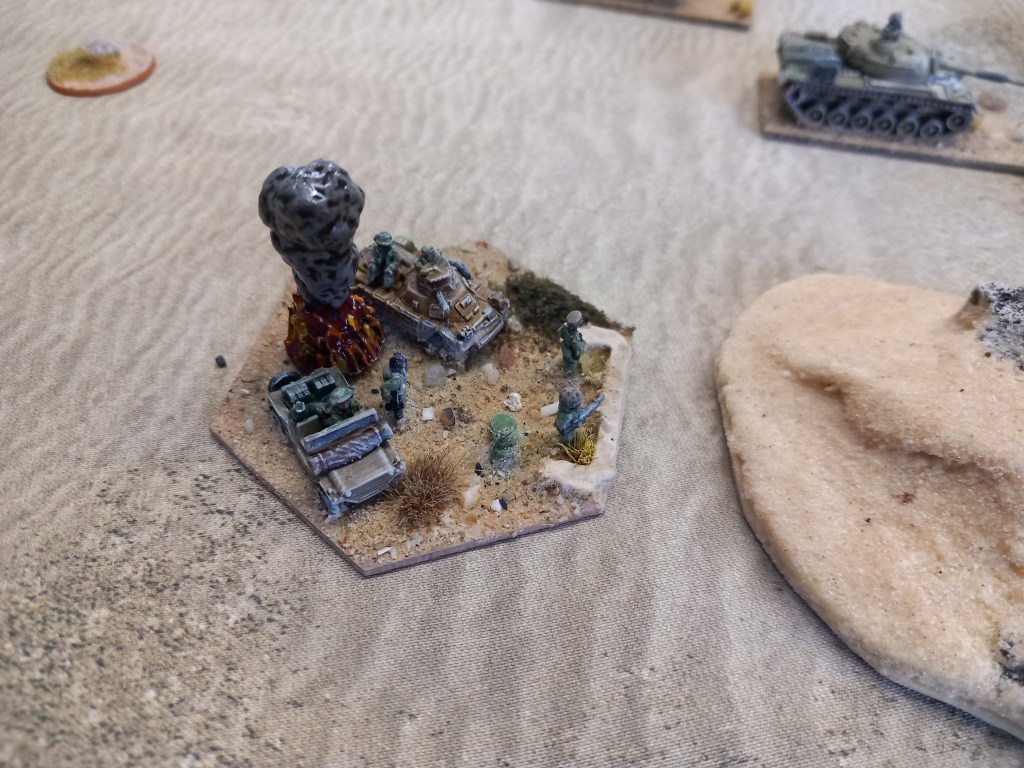
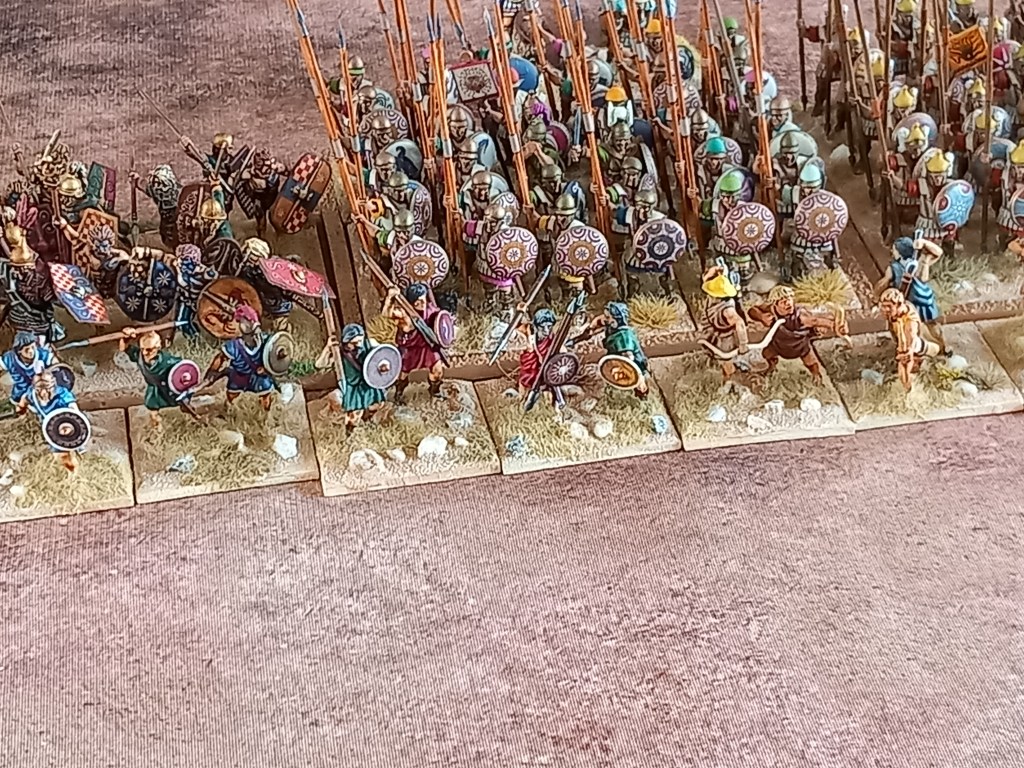
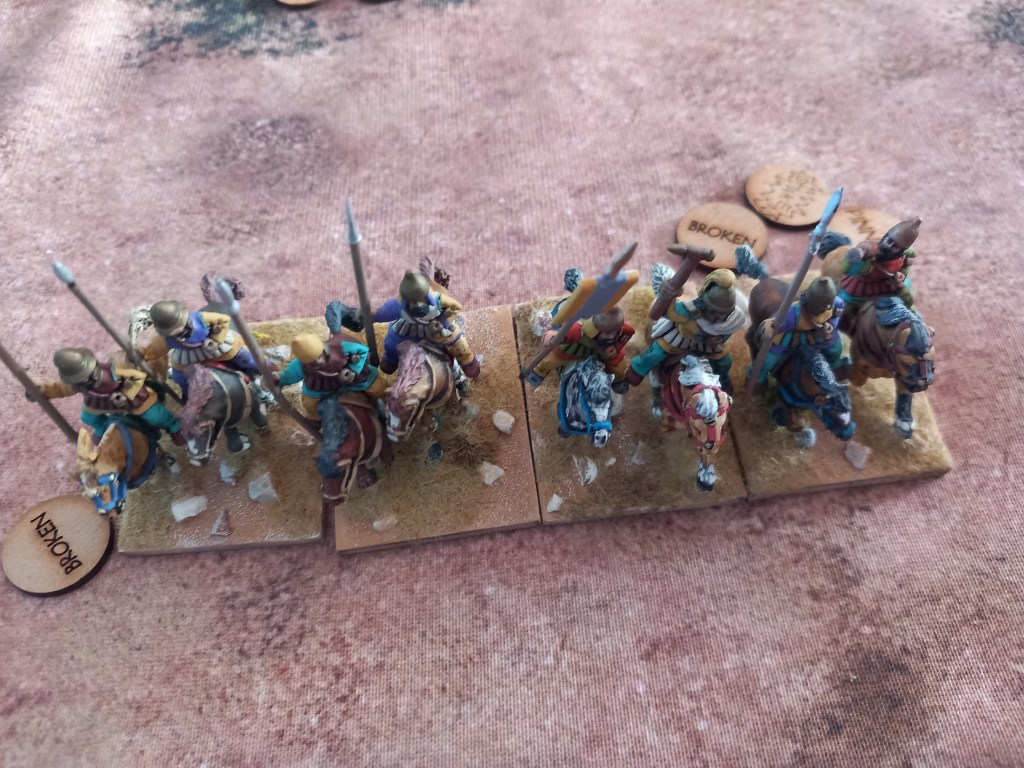
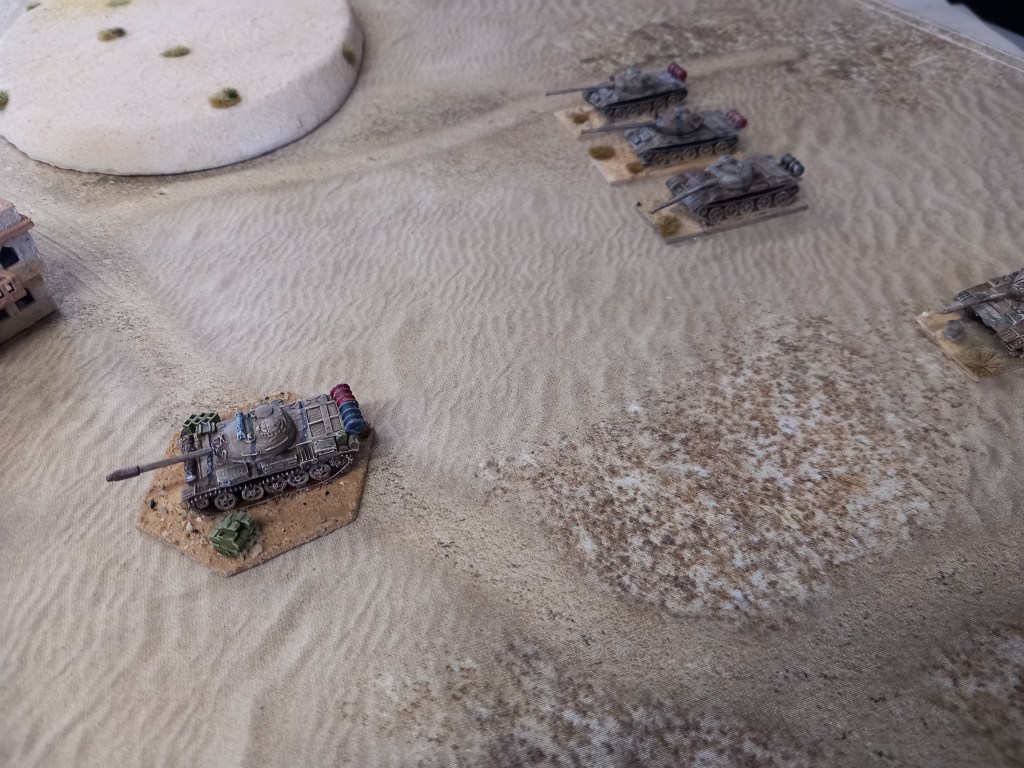
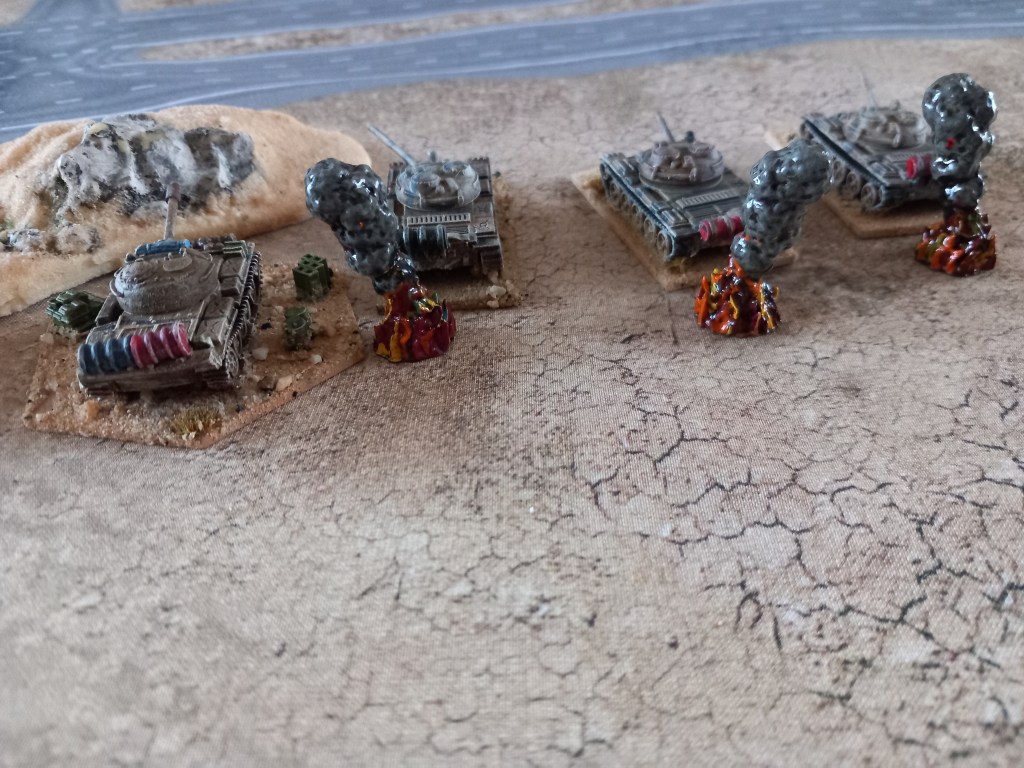
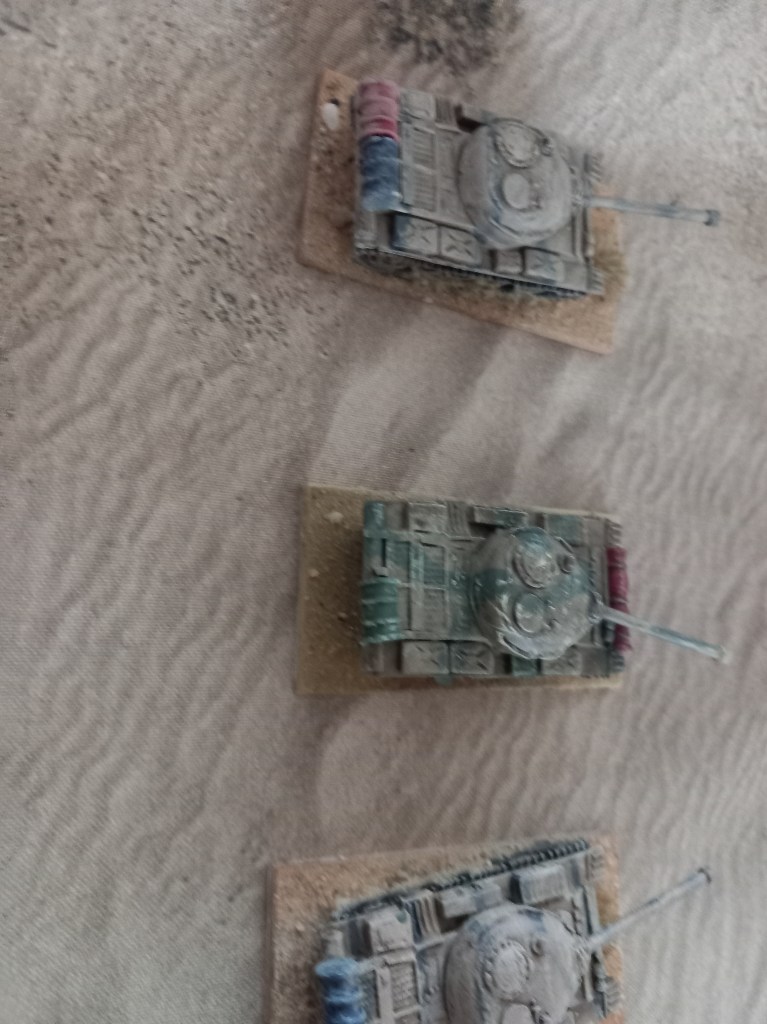
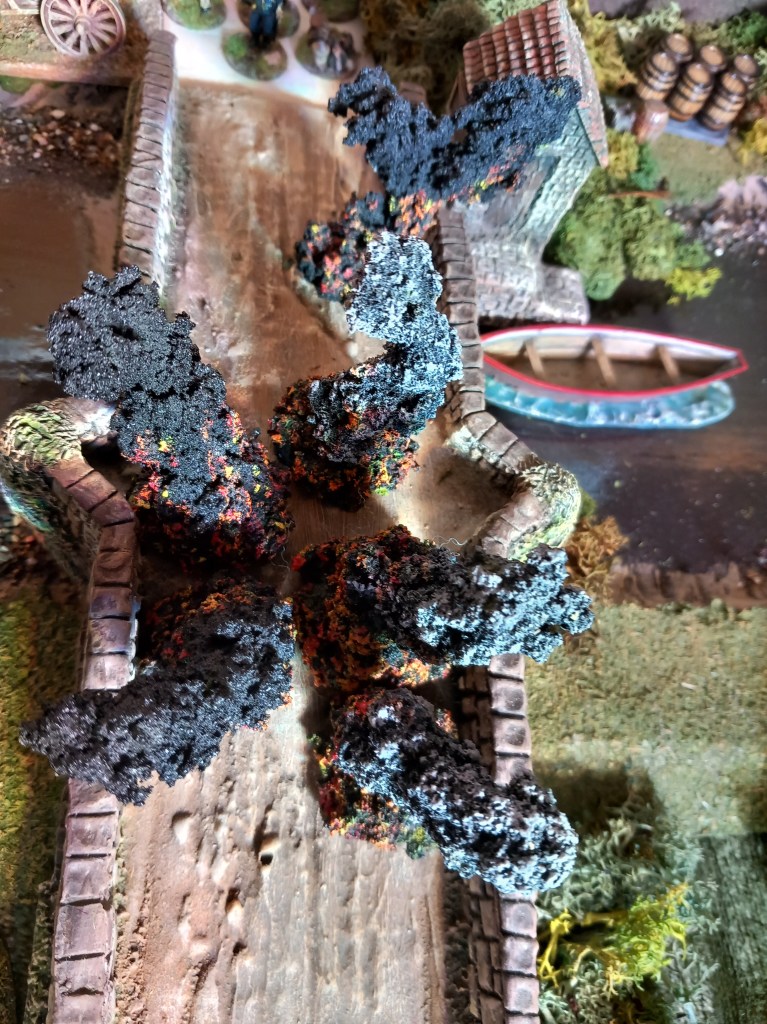
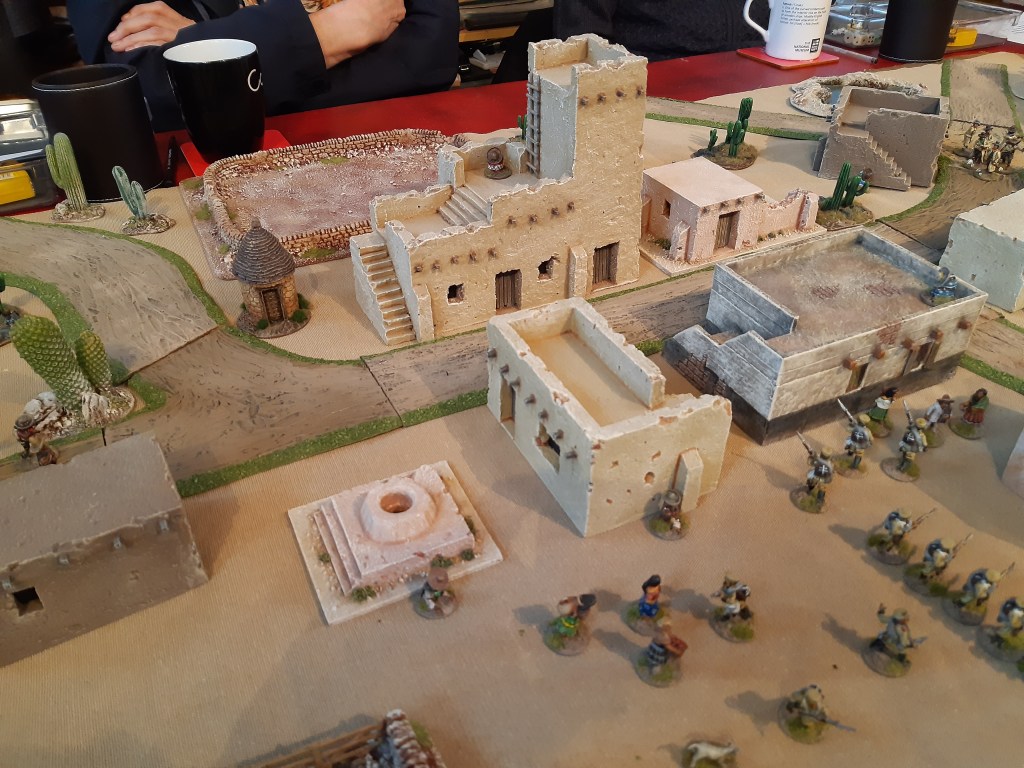
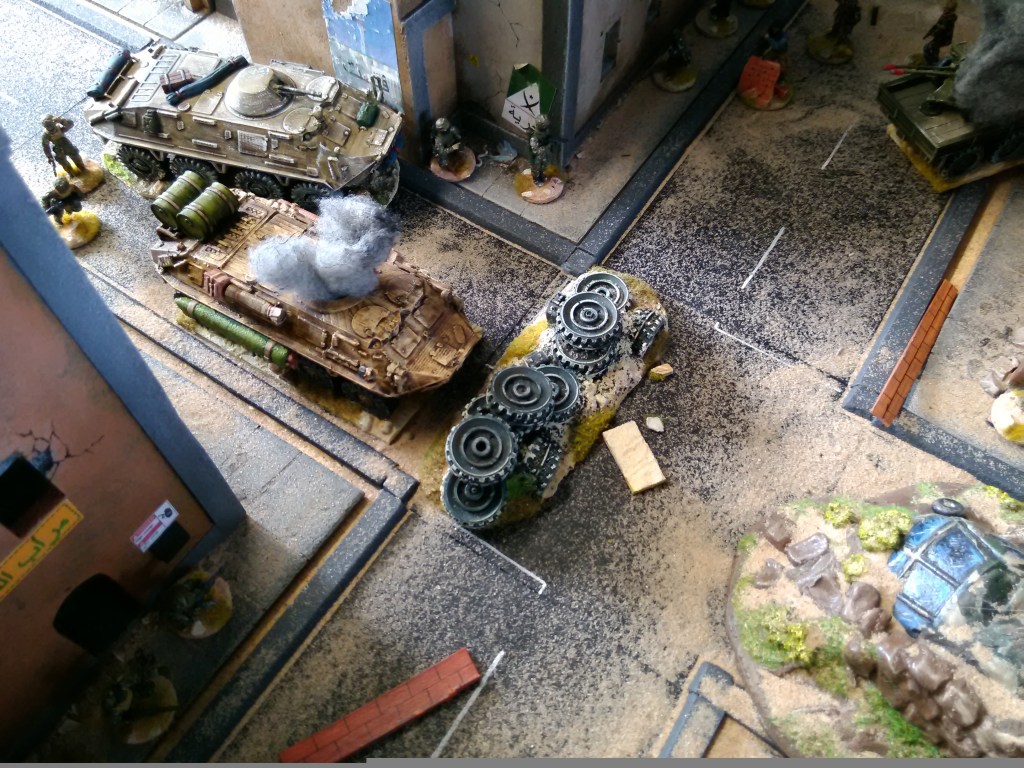
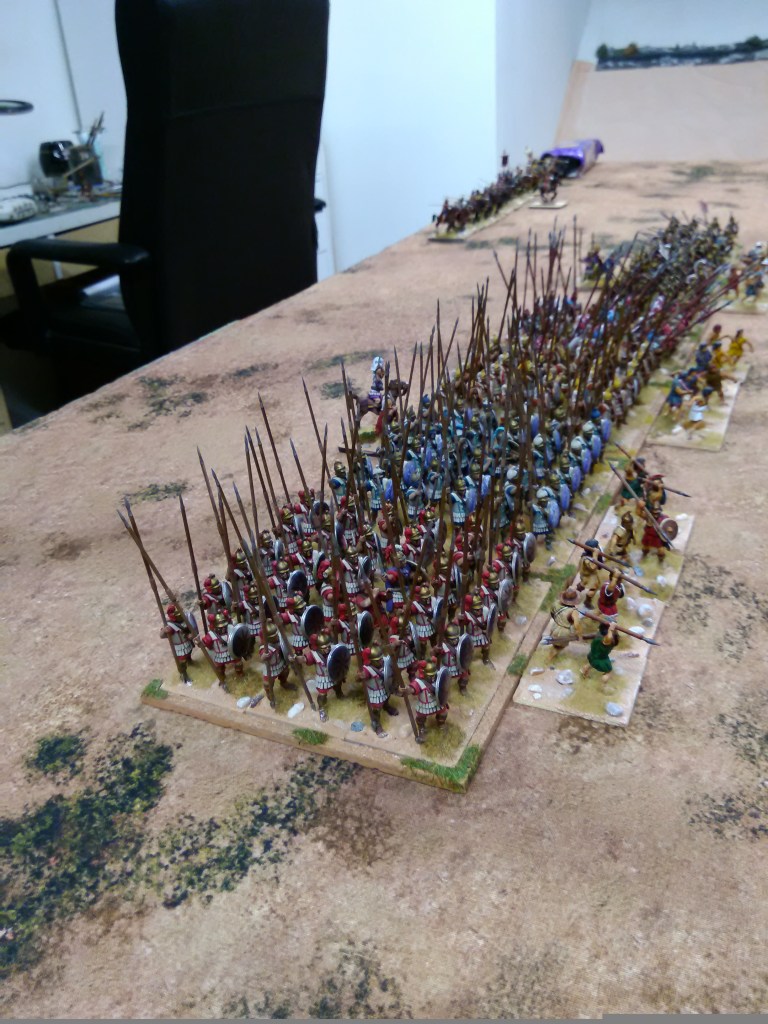
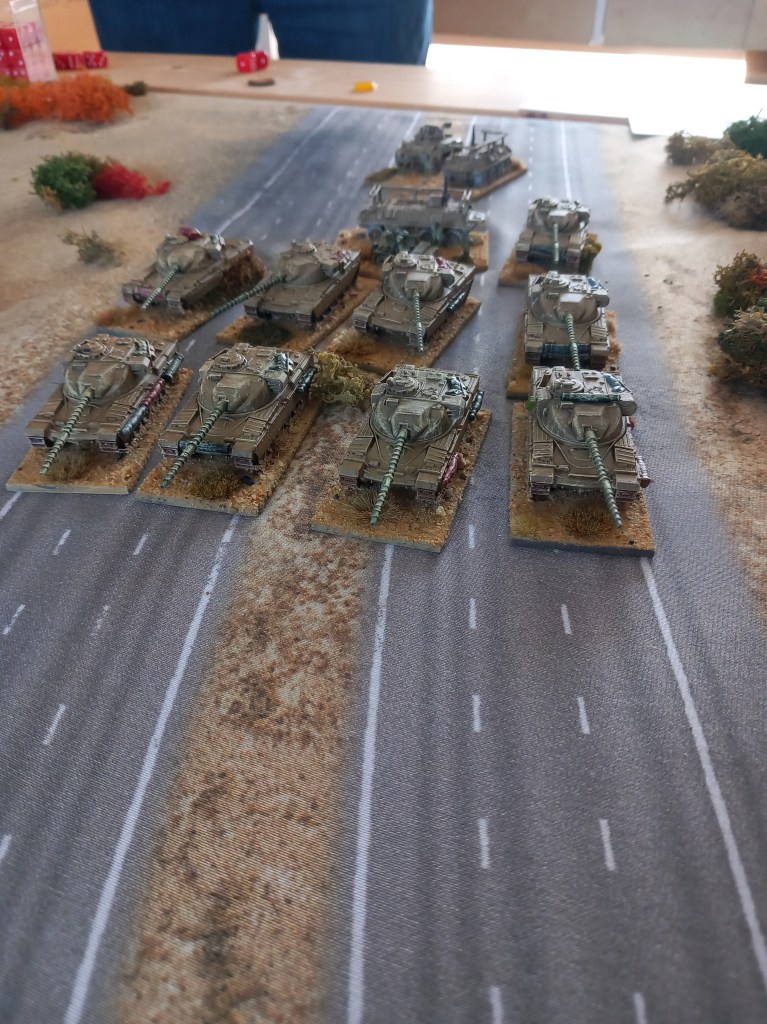
The initial manoeuvring gave us our first big battle when the Iranian 92nd Armoured Brigade approached the town of Dub-E-Said defended by the Iraqi 15th Mechanised Brigade. The 92nd were constrained by a single highway approach between a large marsh but confidence was high with 2 battalions of Chieftains leading the way.

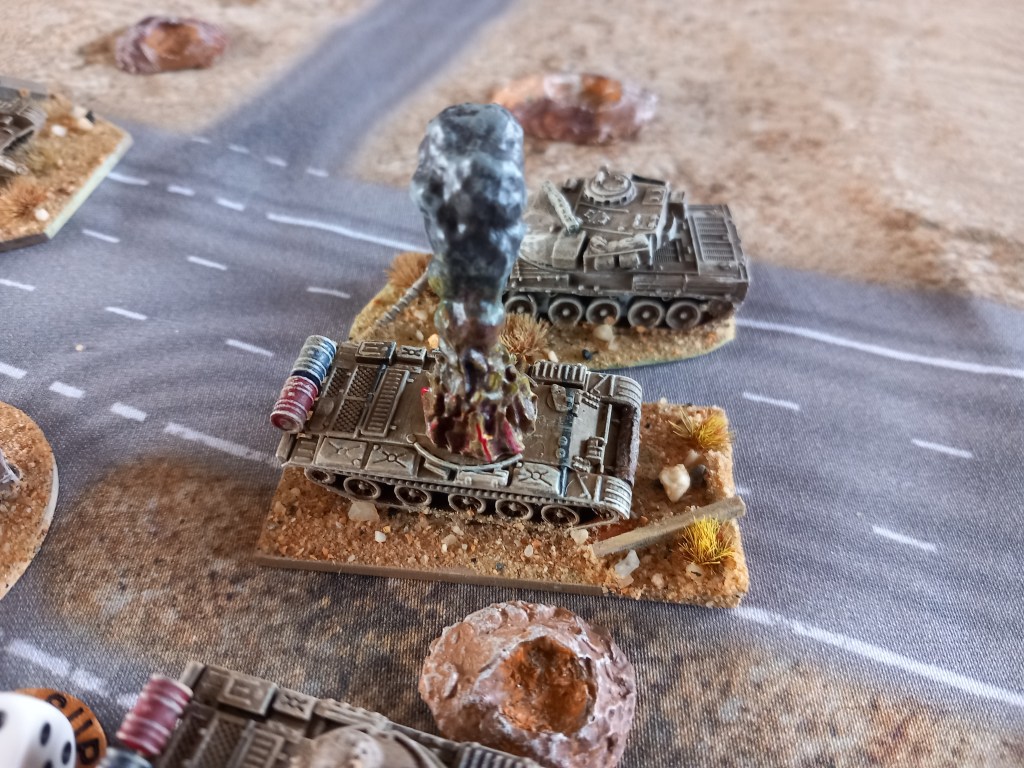
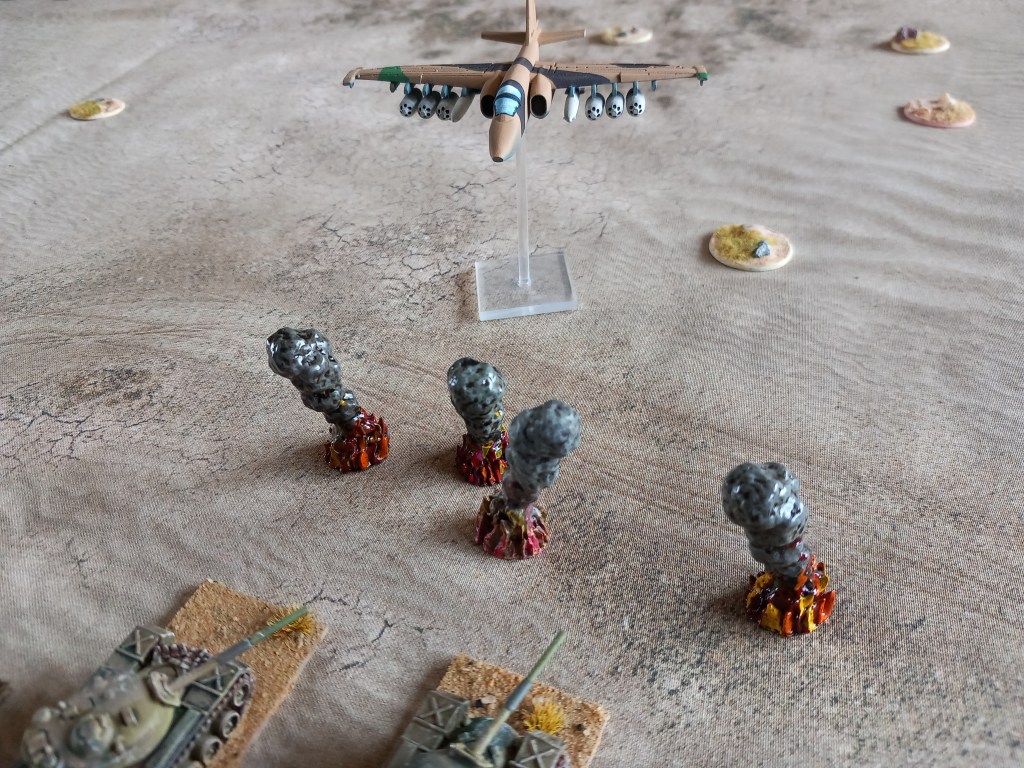
As we were using our rules of choice, Cold War Commander, we decided to use the optional weather rules and the optional air superiority rules and boy what a difference it made!

First off the air superiority roll was decidedly in favour of the Iranians which resulted in the Iraqi’s struggling to get any of their air assets off the ground – I liked this as a rule mechanism and will use it for all our games going forward.

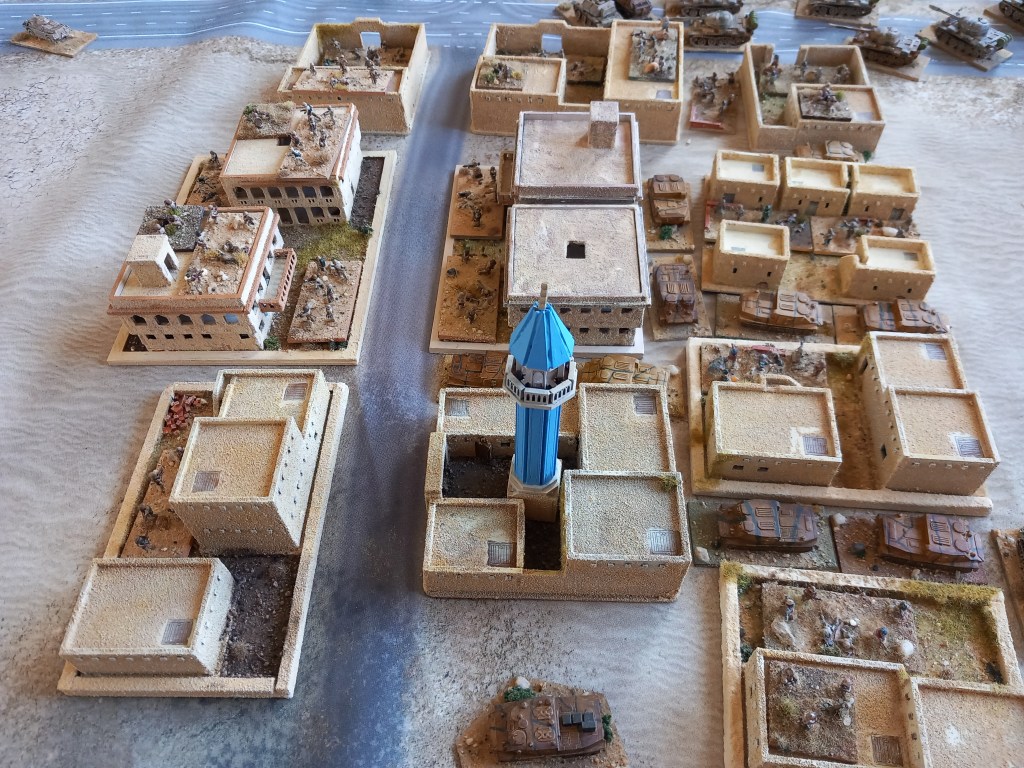
The weather rules were wild! Basically we had a raging storm throughout the battle and despite many umpire rolls it never abated. In game terms this reduced visibility and negatively affected individual command rolls which for this particular battle favoured the Iraqi’s as in a straight fight they were going to be hard pushed to do much against the Chieftains.

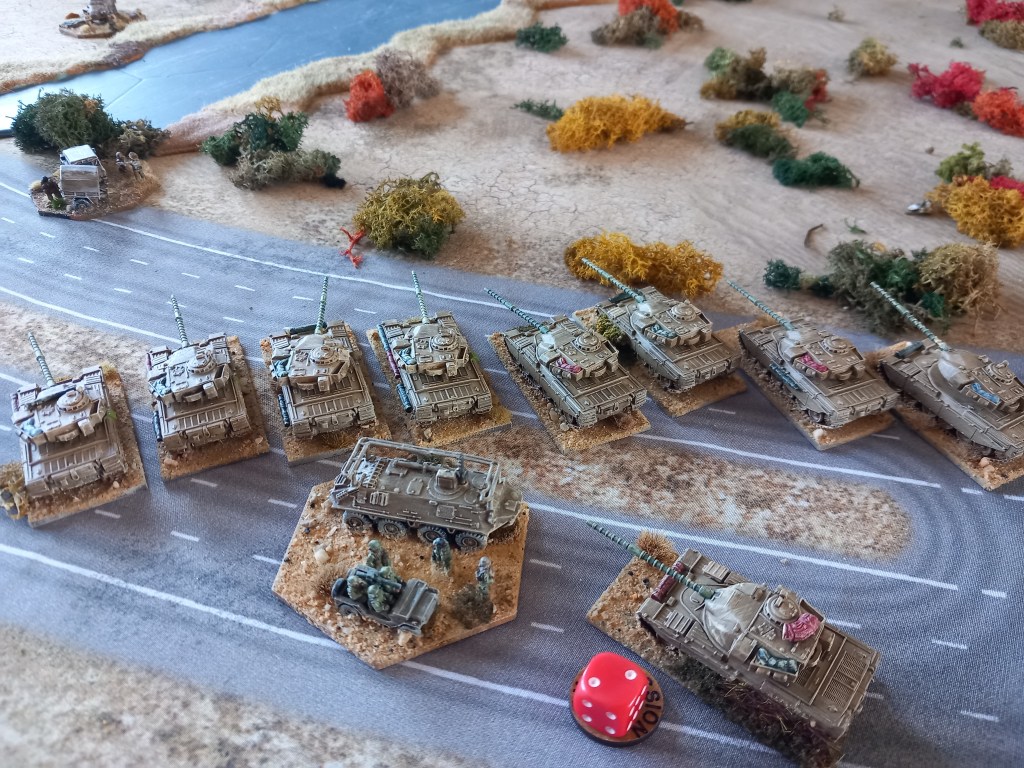
The game turned into quite the slog with the Iranians never getting off the end of the highway by the time night fell and they fell back with zero casualties having inflicted some losses on the Iraqis. Full marks go to both the commanders for playing the game through with all the disadvantages rather than saying ‘screw it, we’ll delay the attack for the next day’. Personally I really enjoyed it, the game was completely different and the tactical problems posed a real challenge. What will happen next remains to be seen, it sure as hell can’t be stormy two days in a row ๐Ÿค”

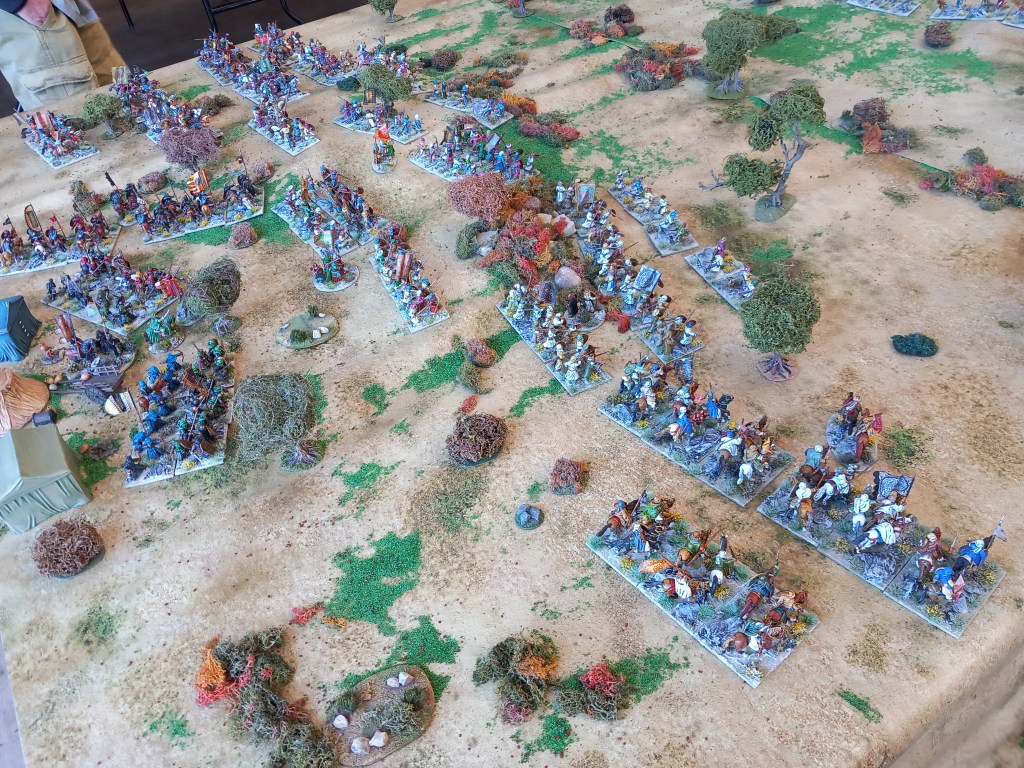
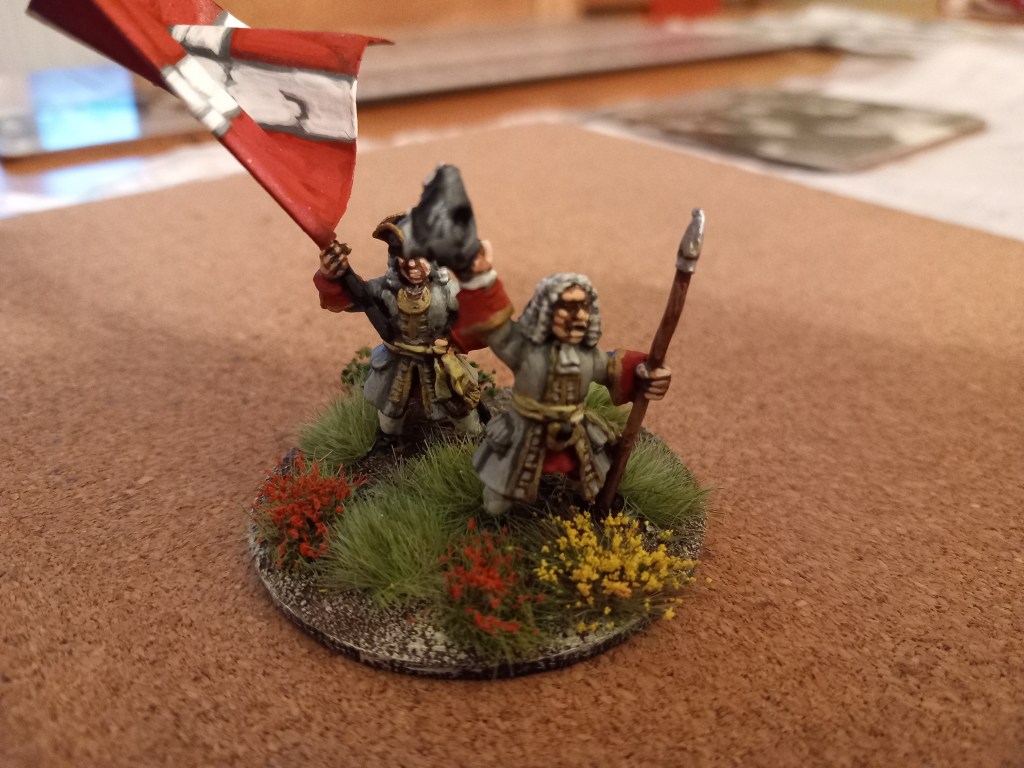
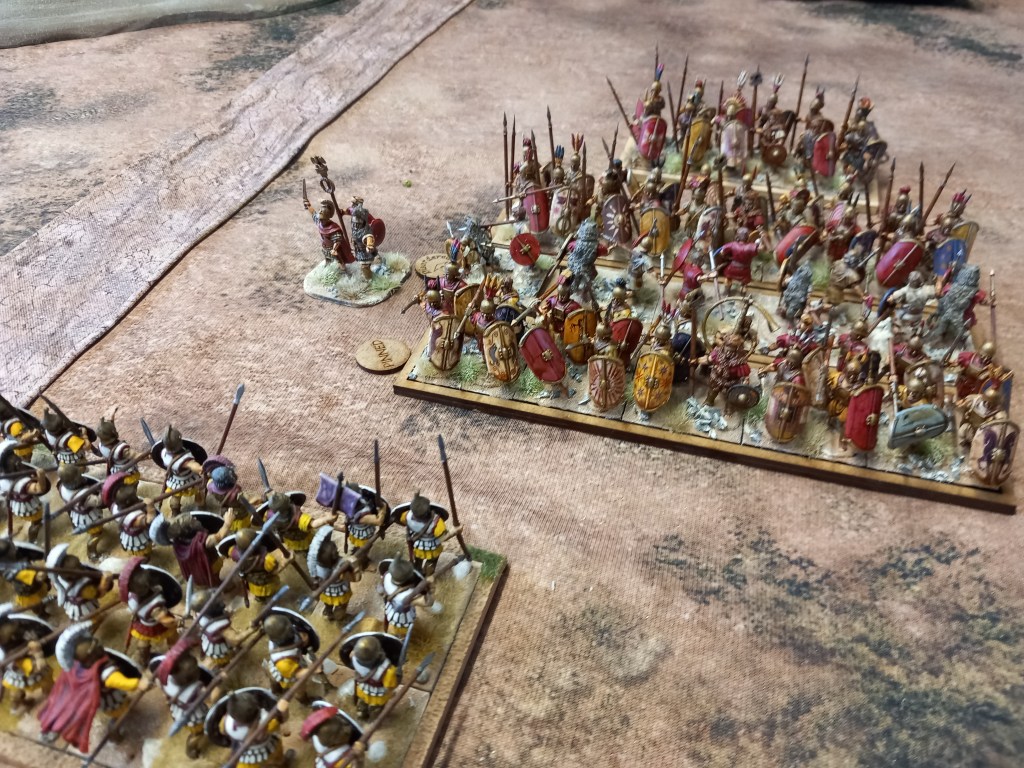
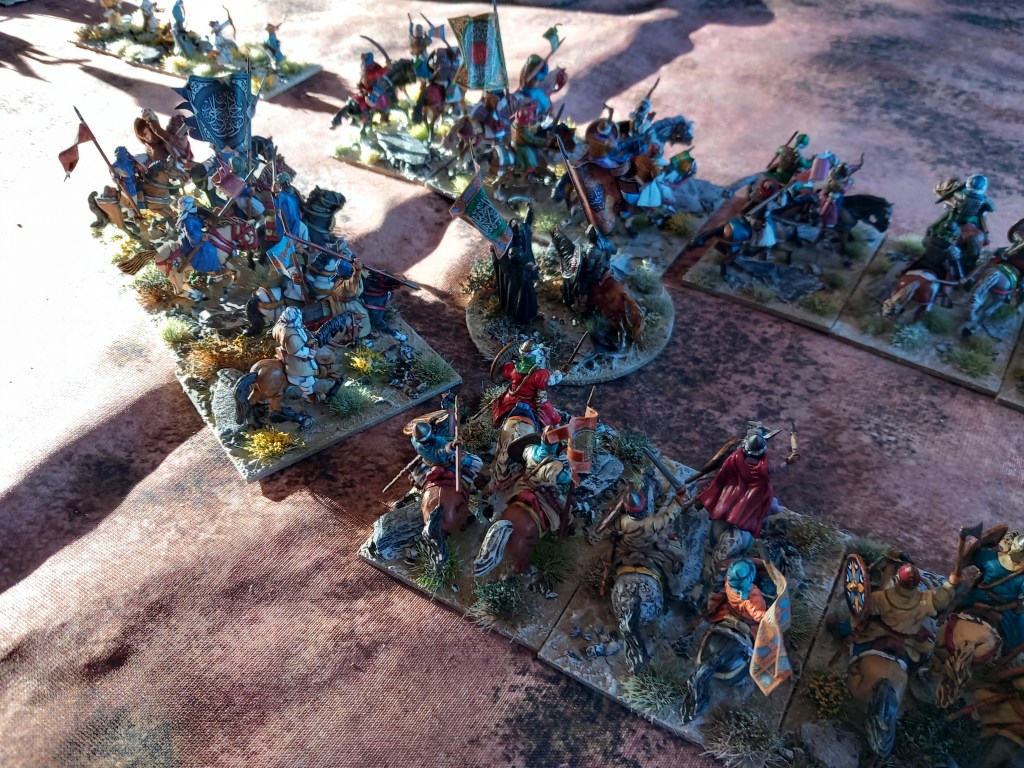
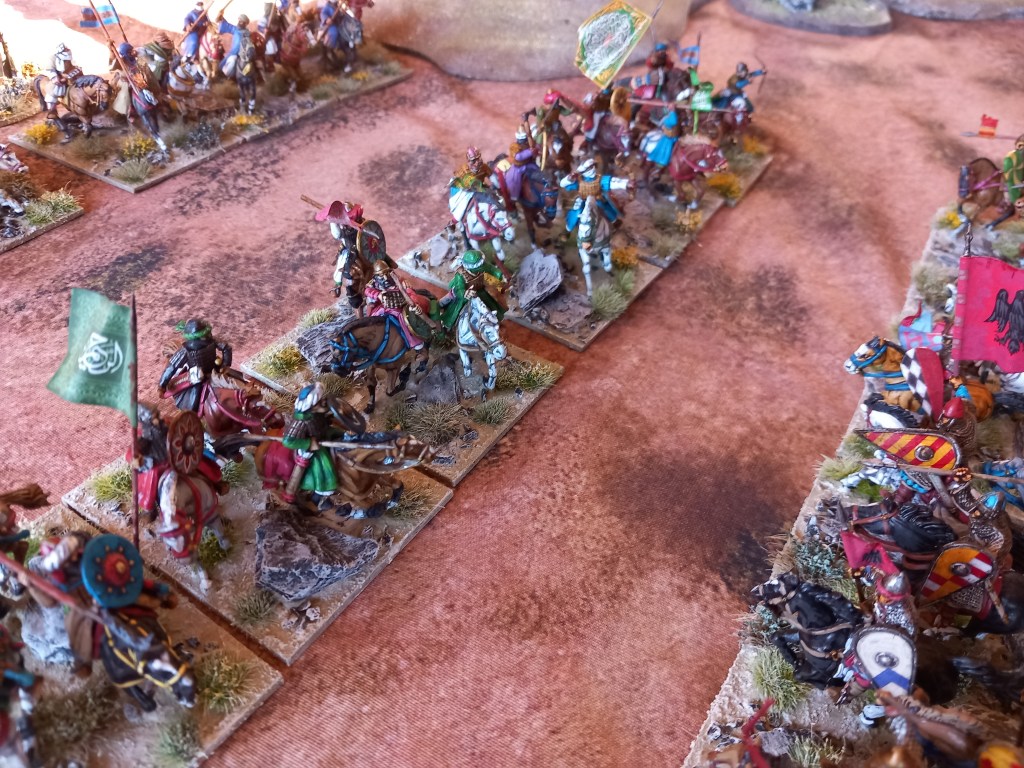
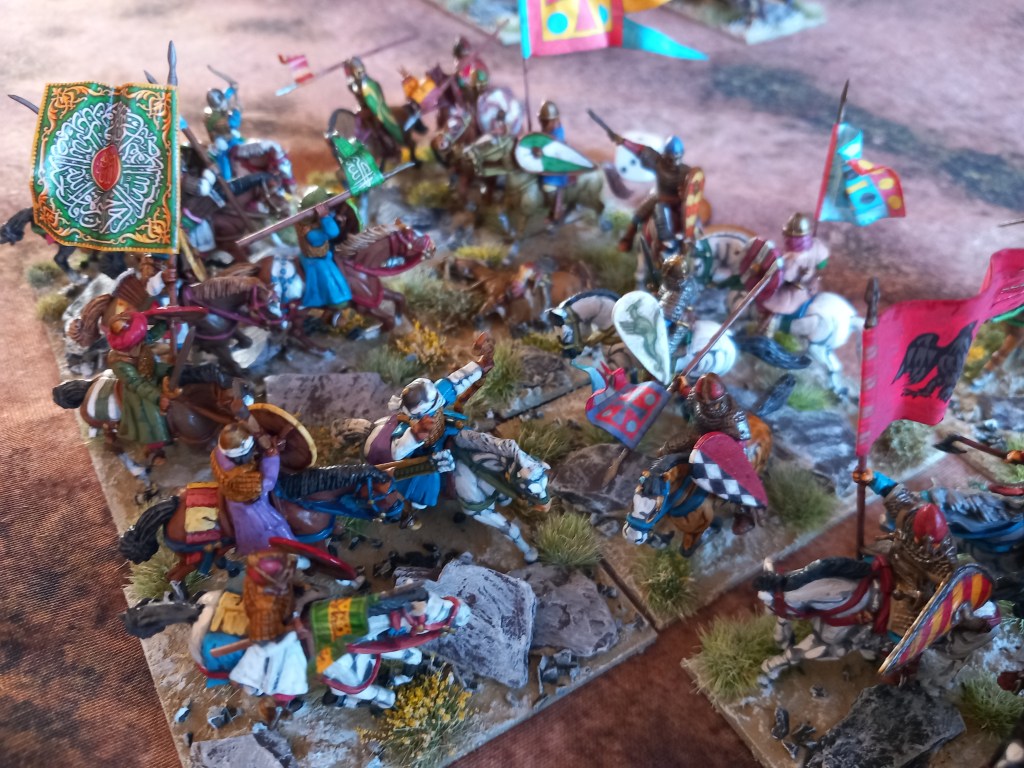
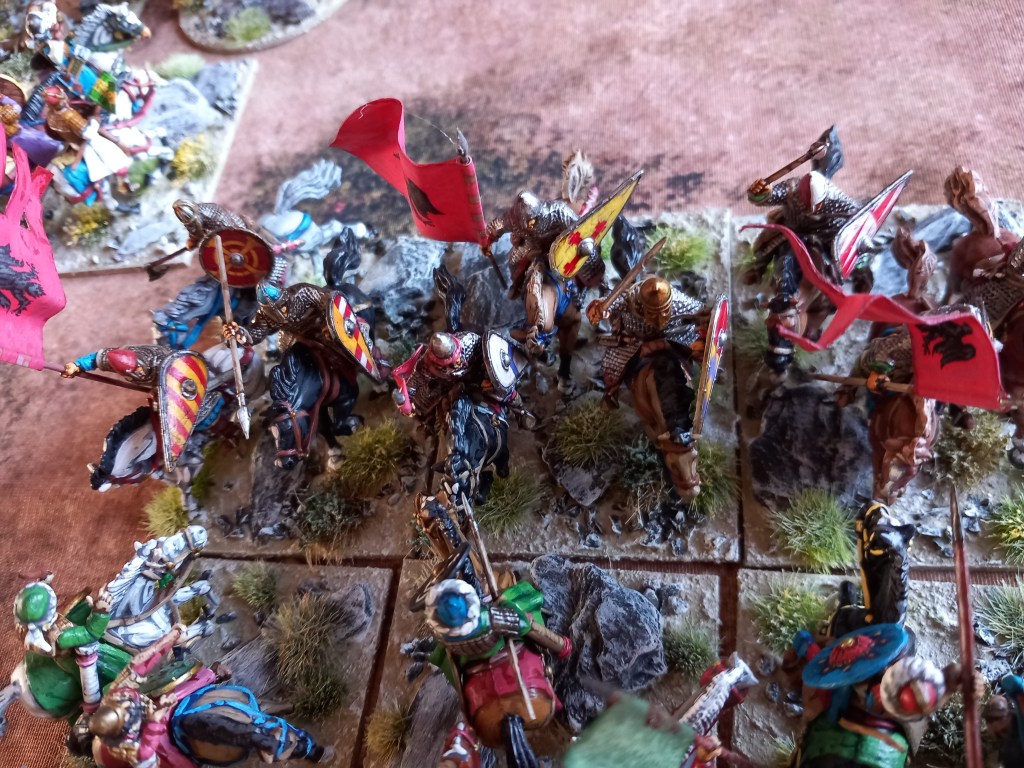
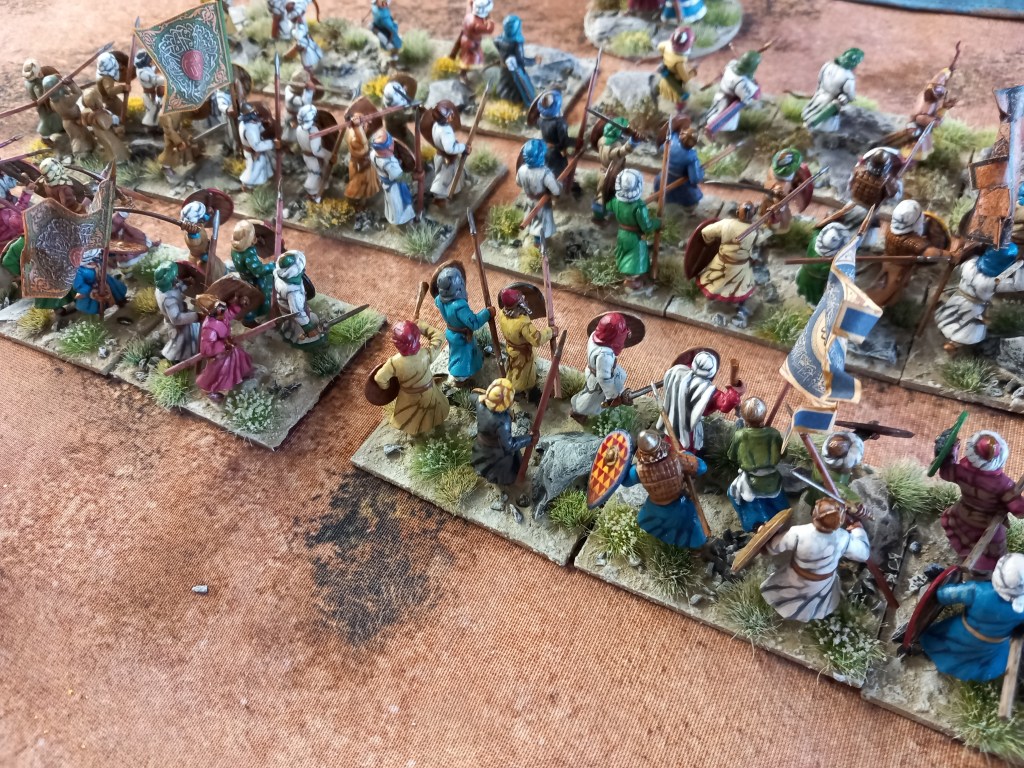
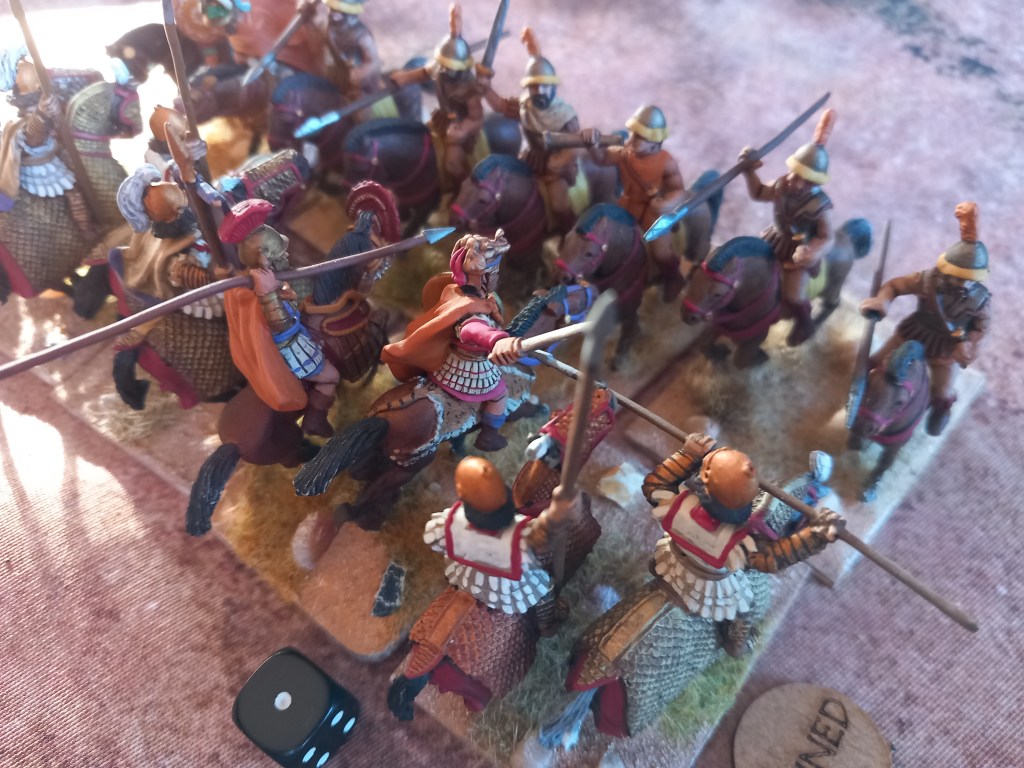
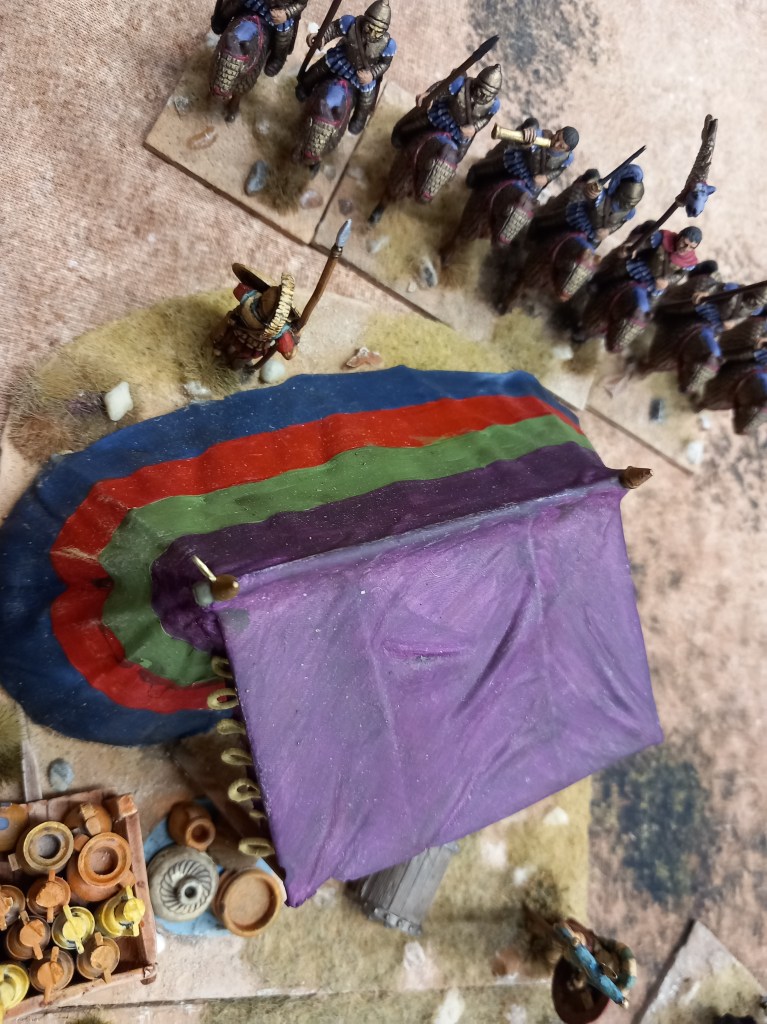
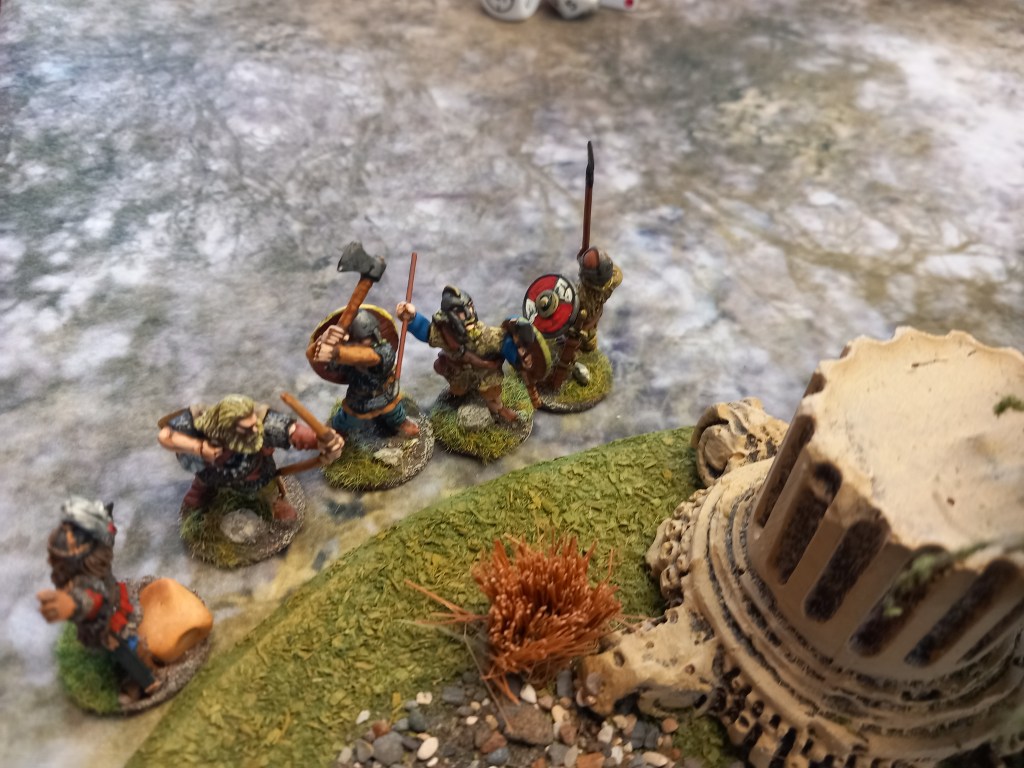
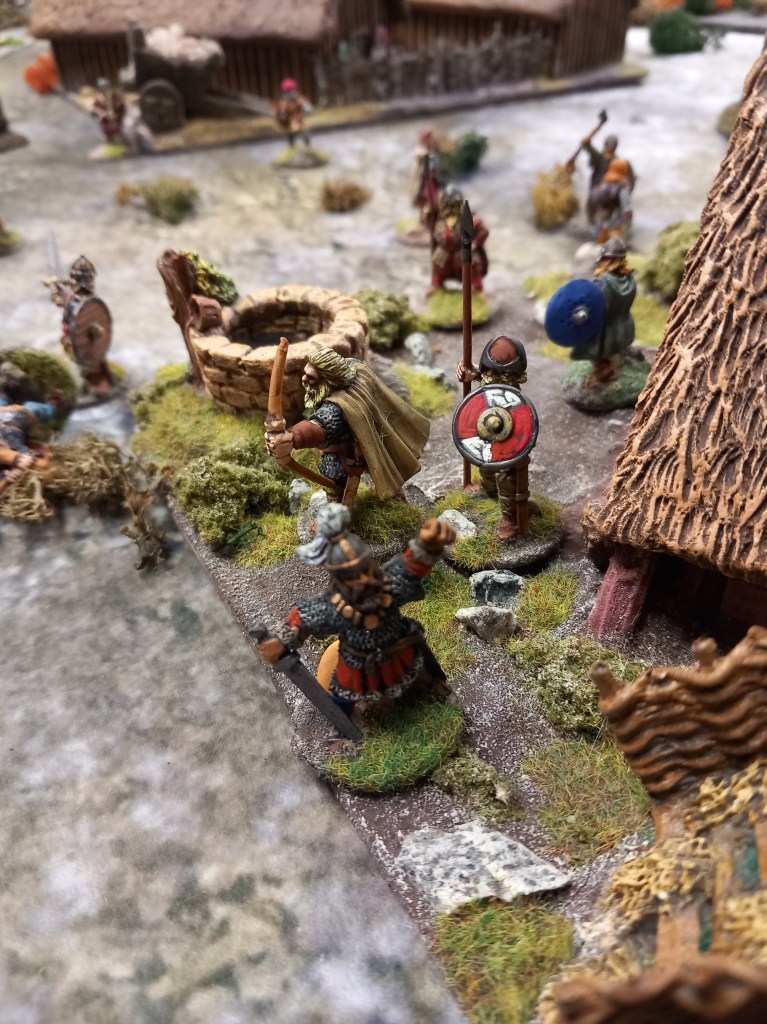
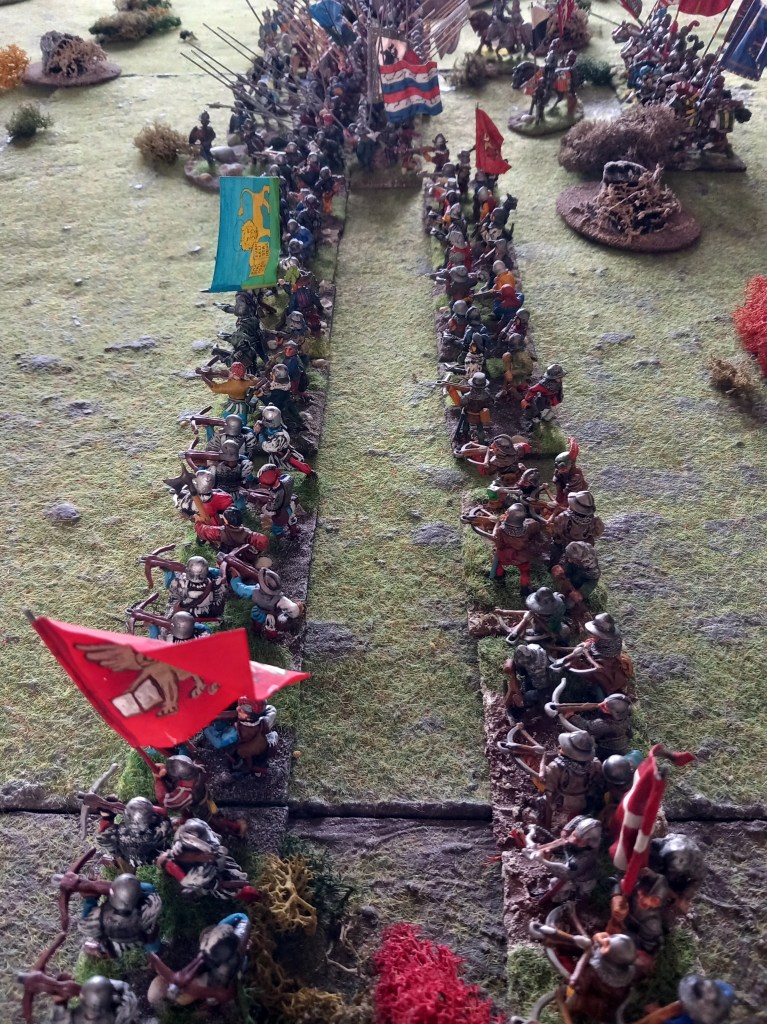
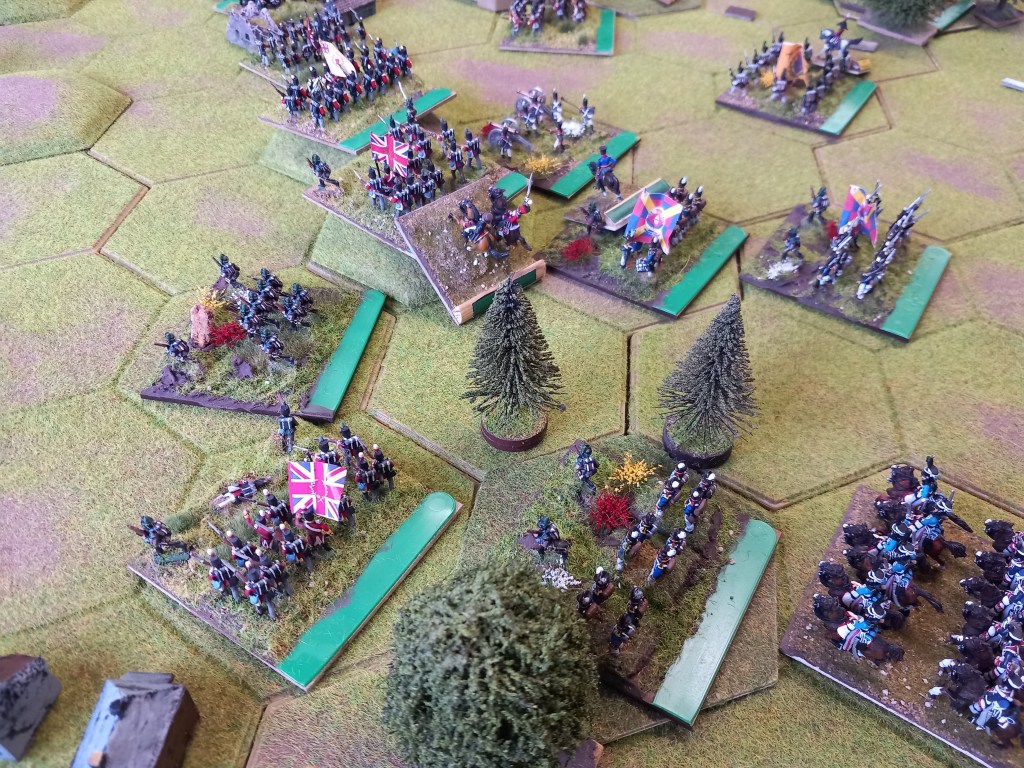
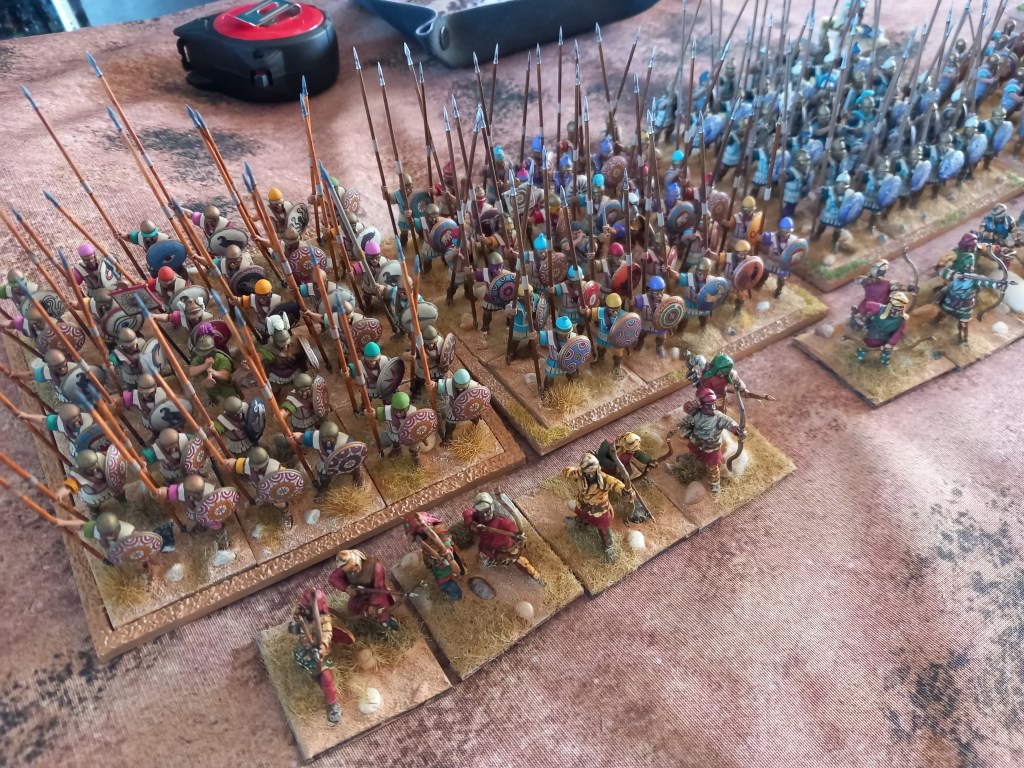
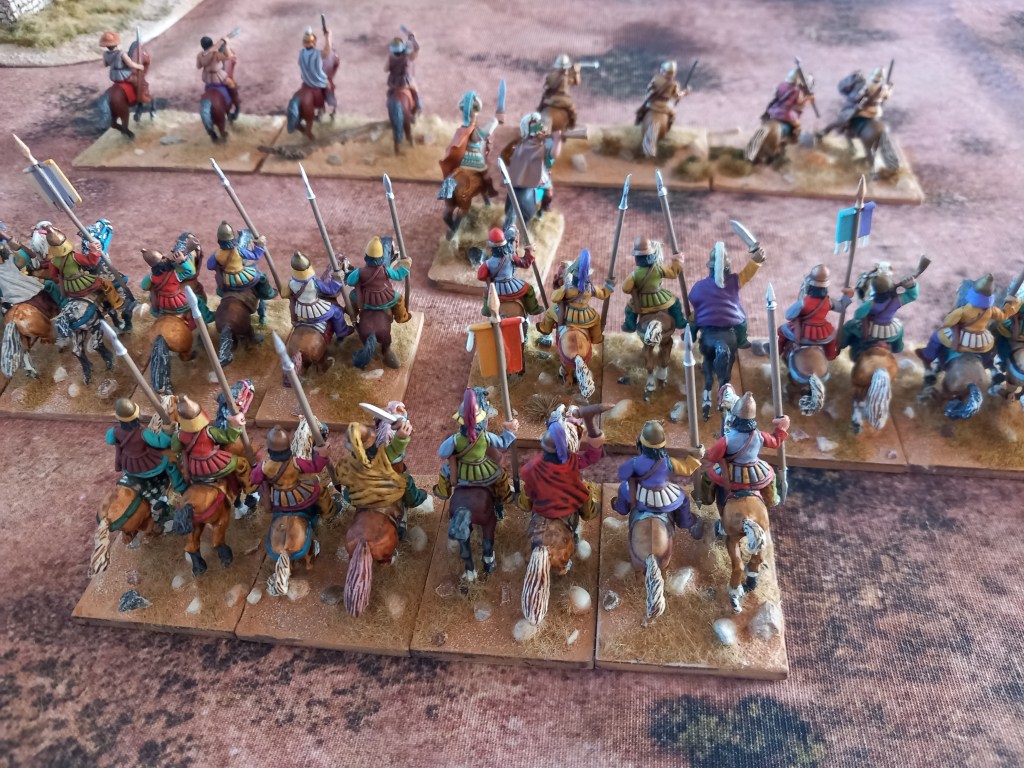
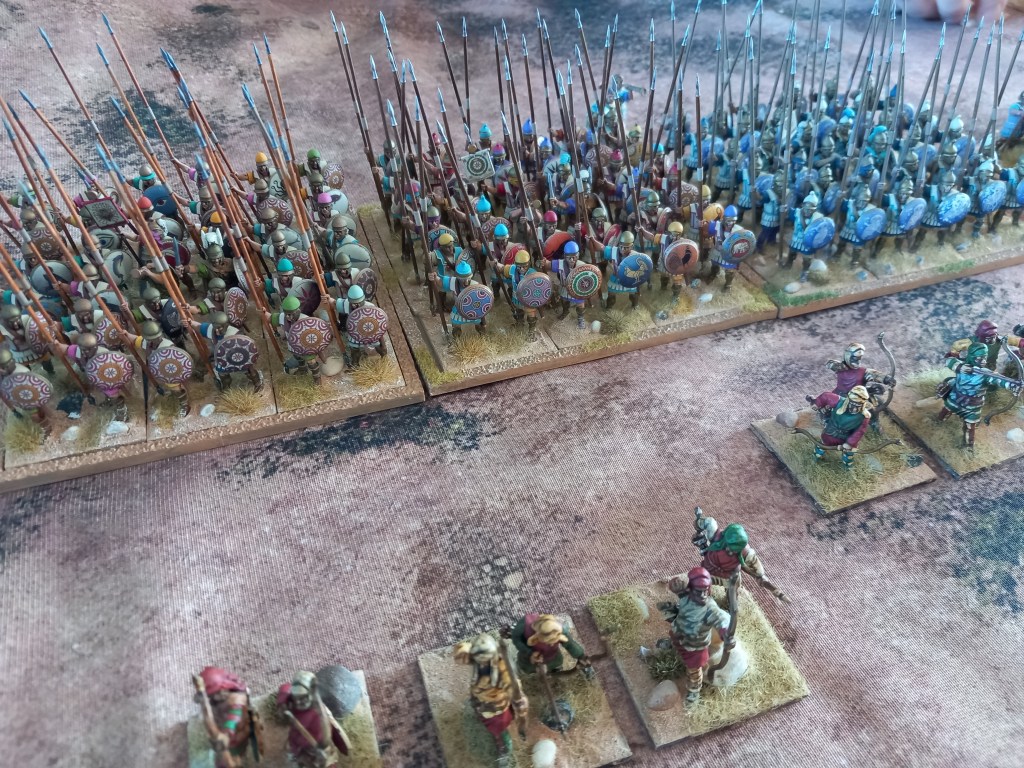
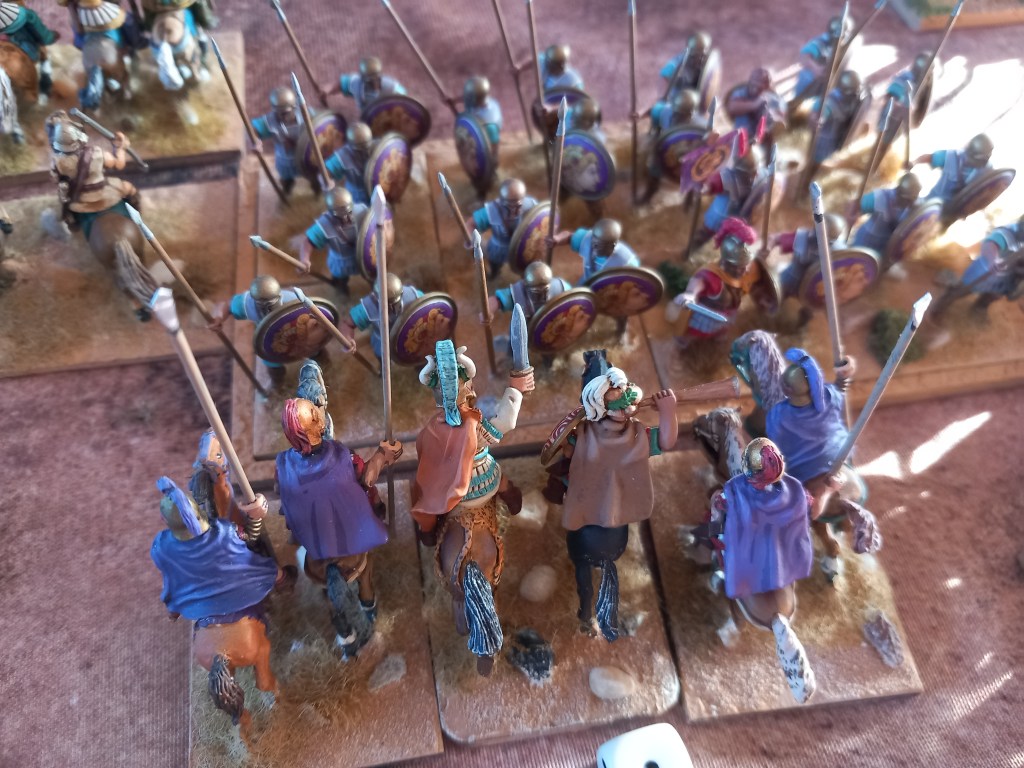
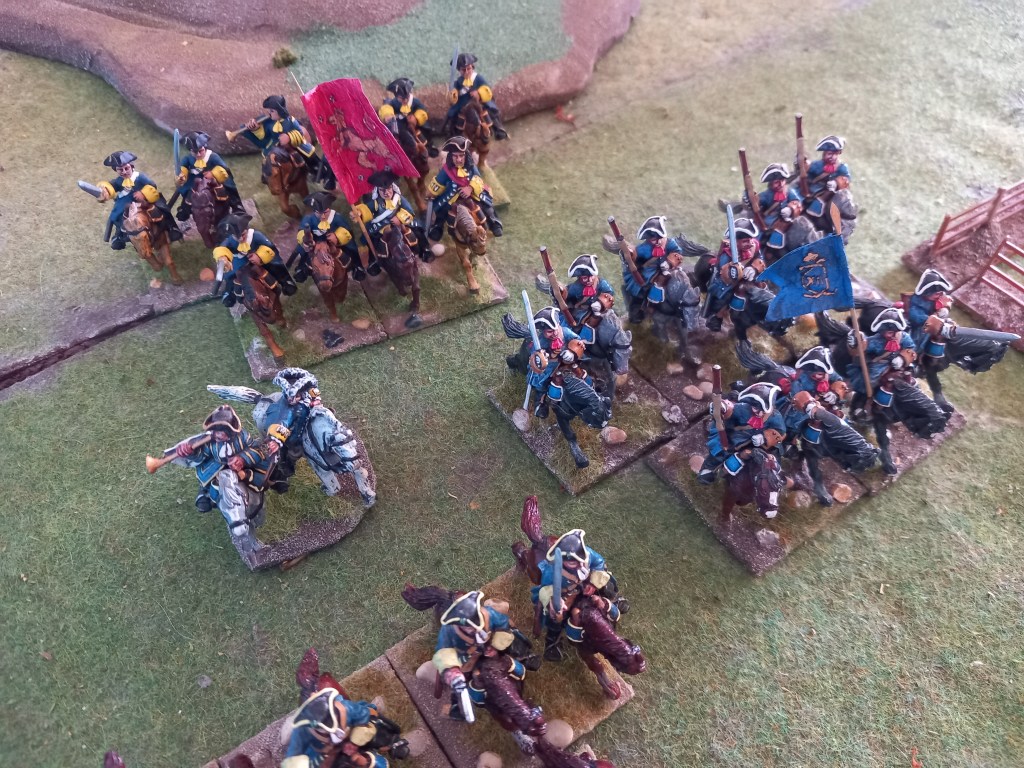
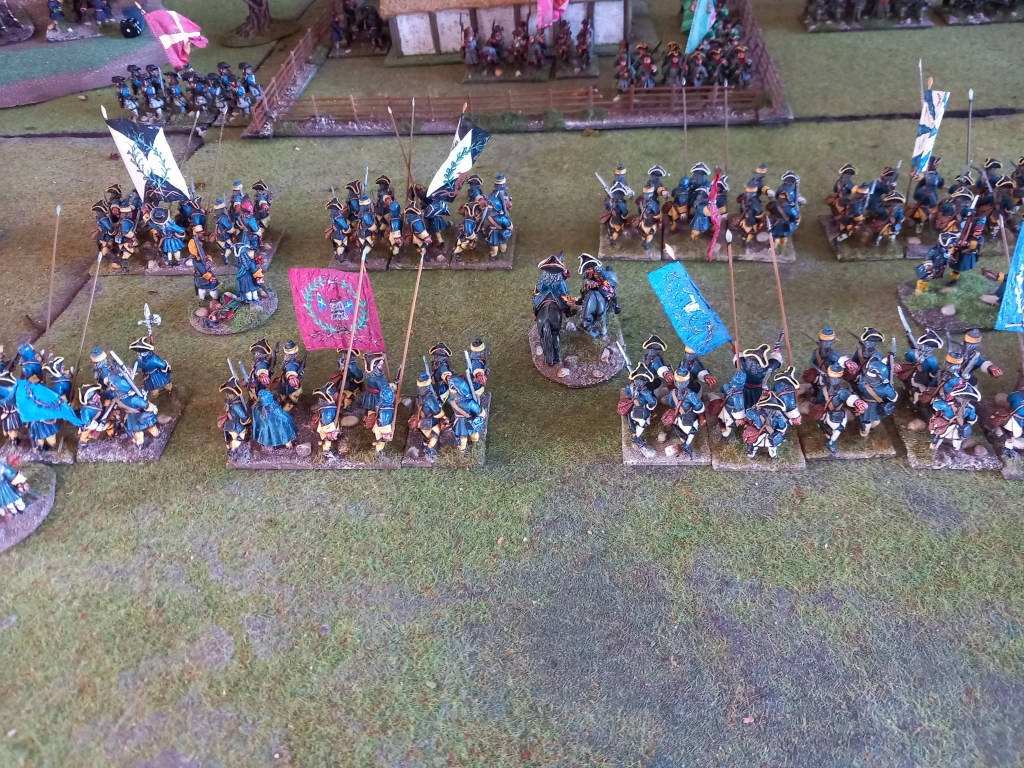
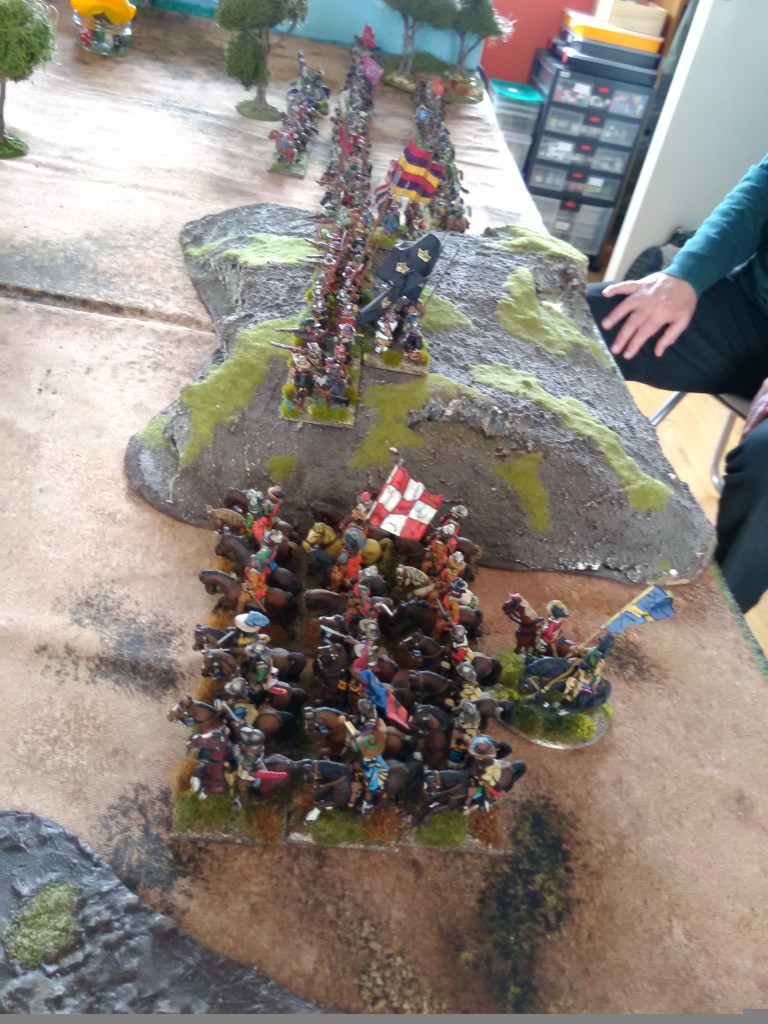
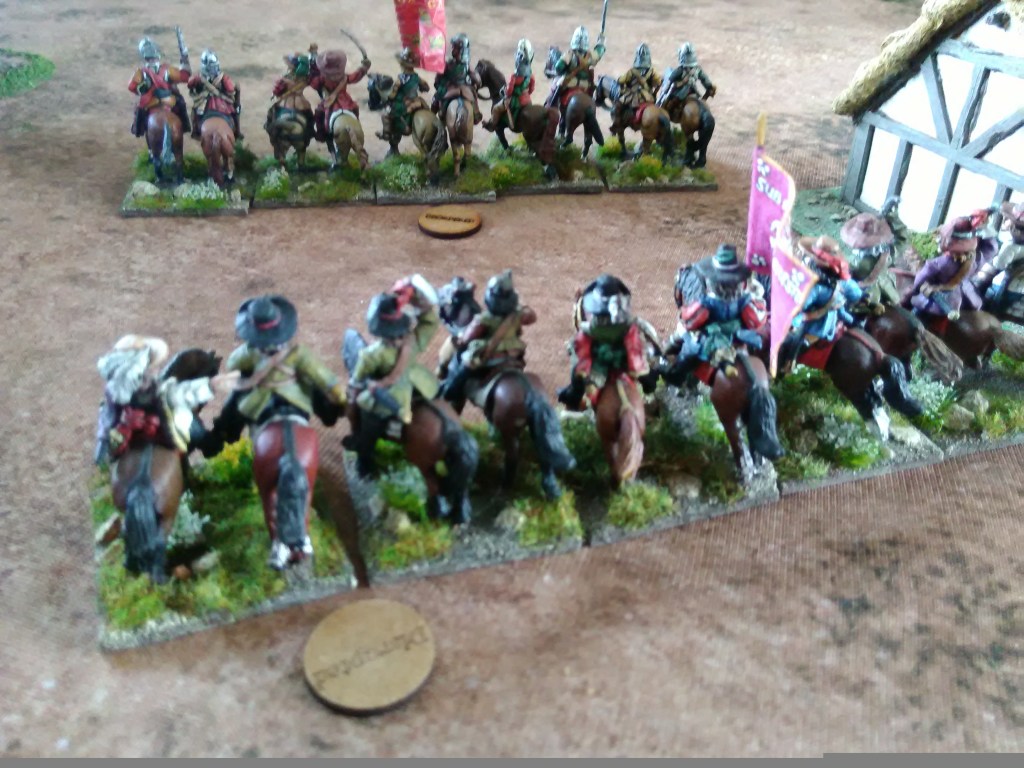
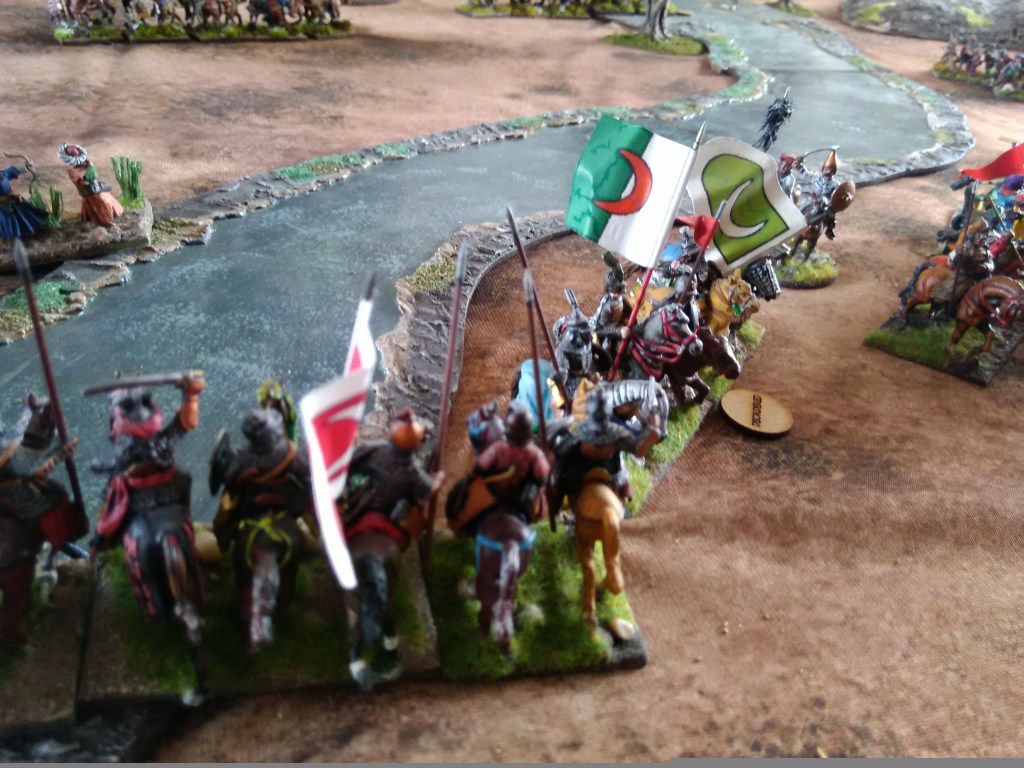
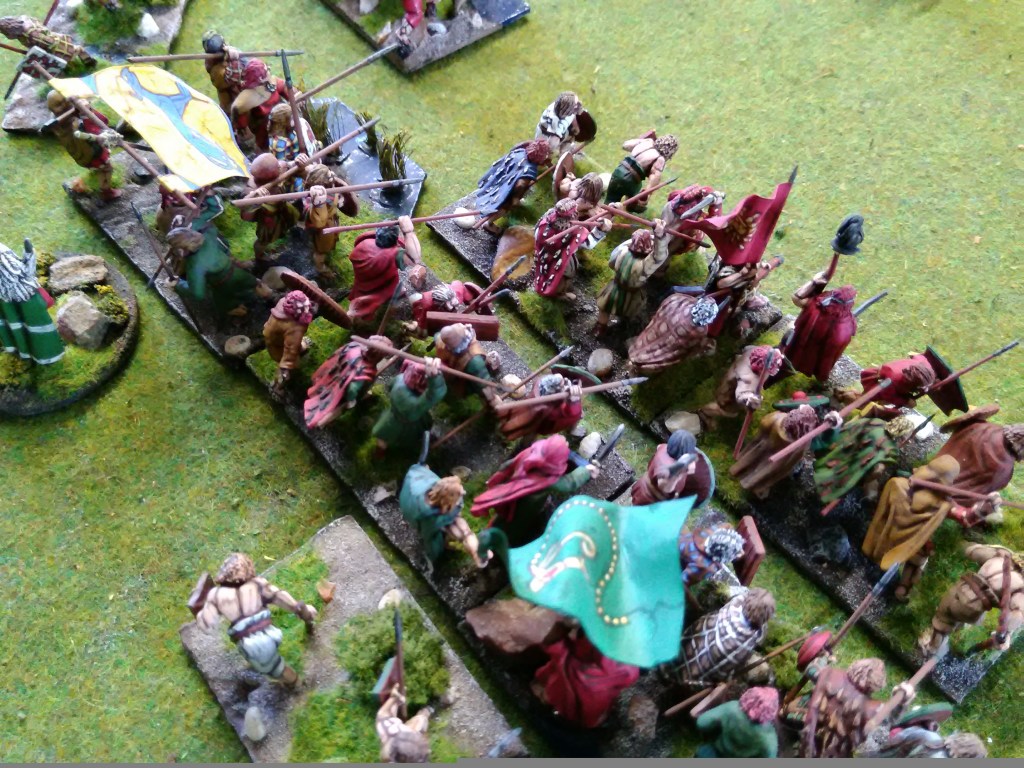
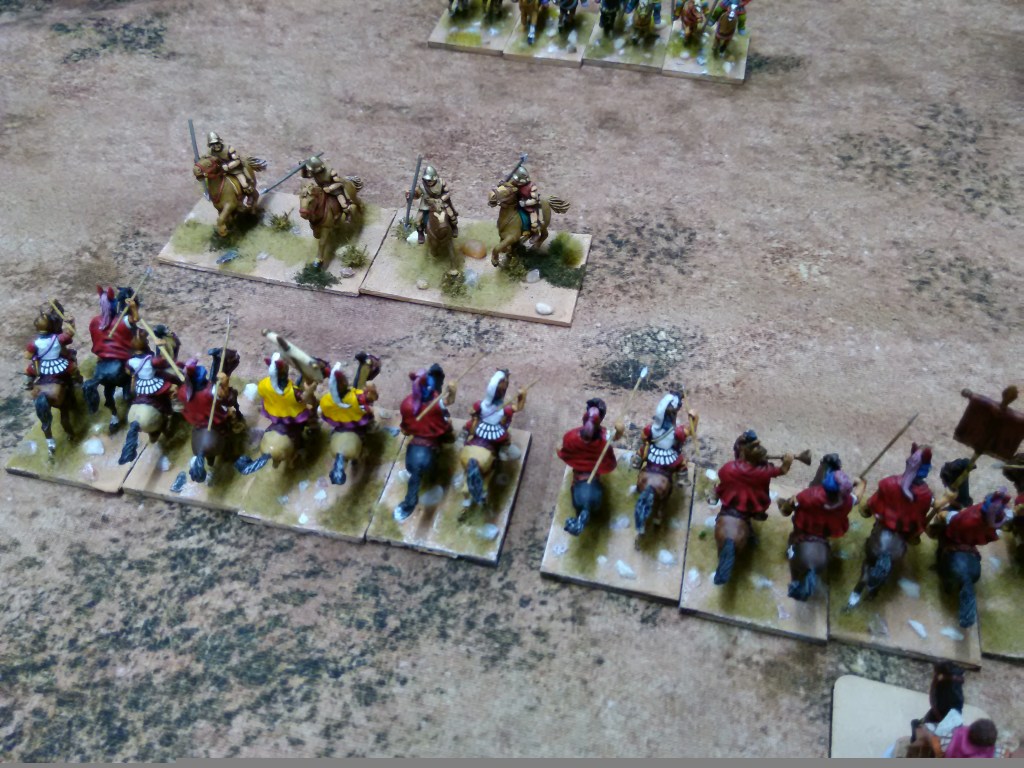
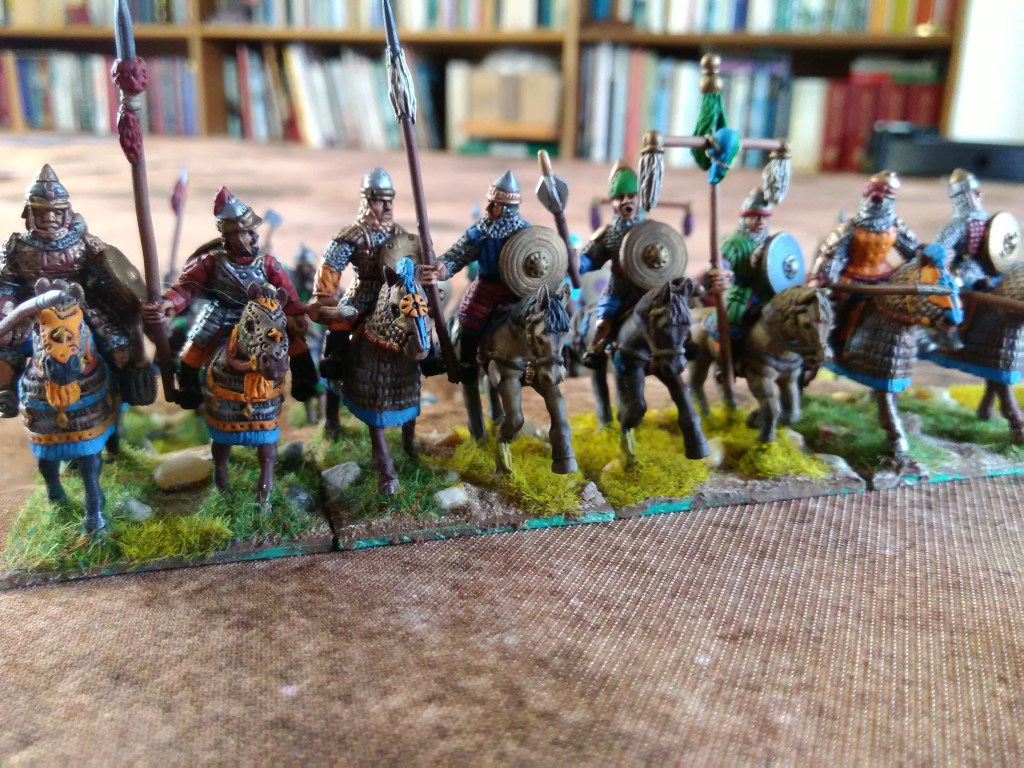
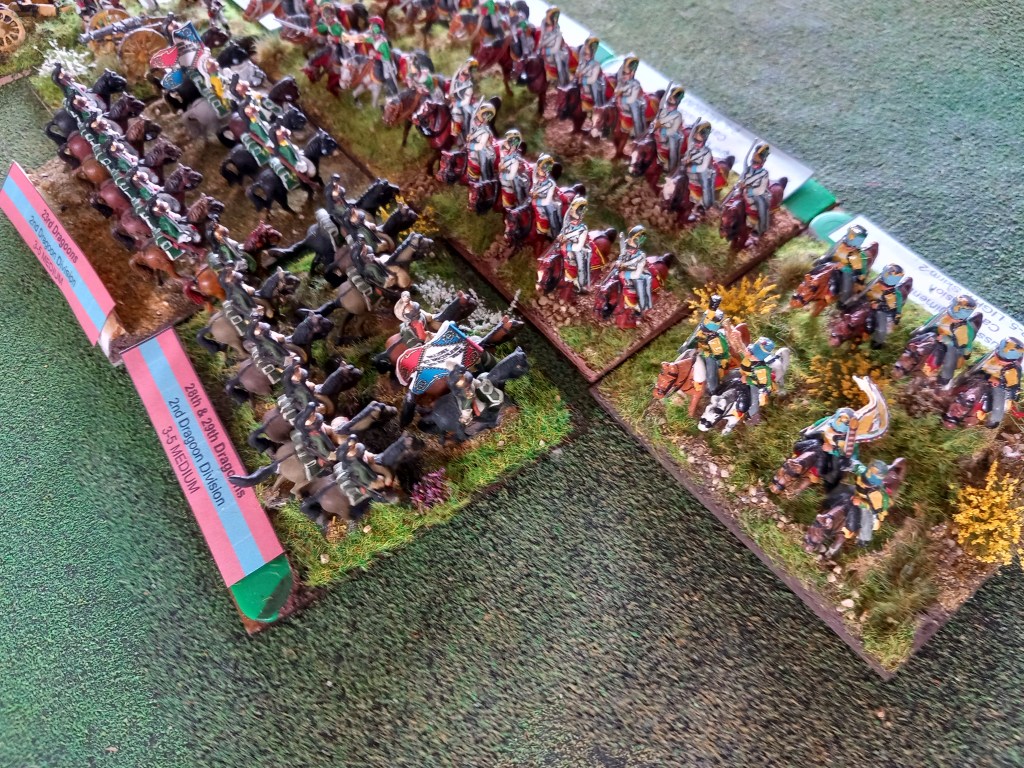
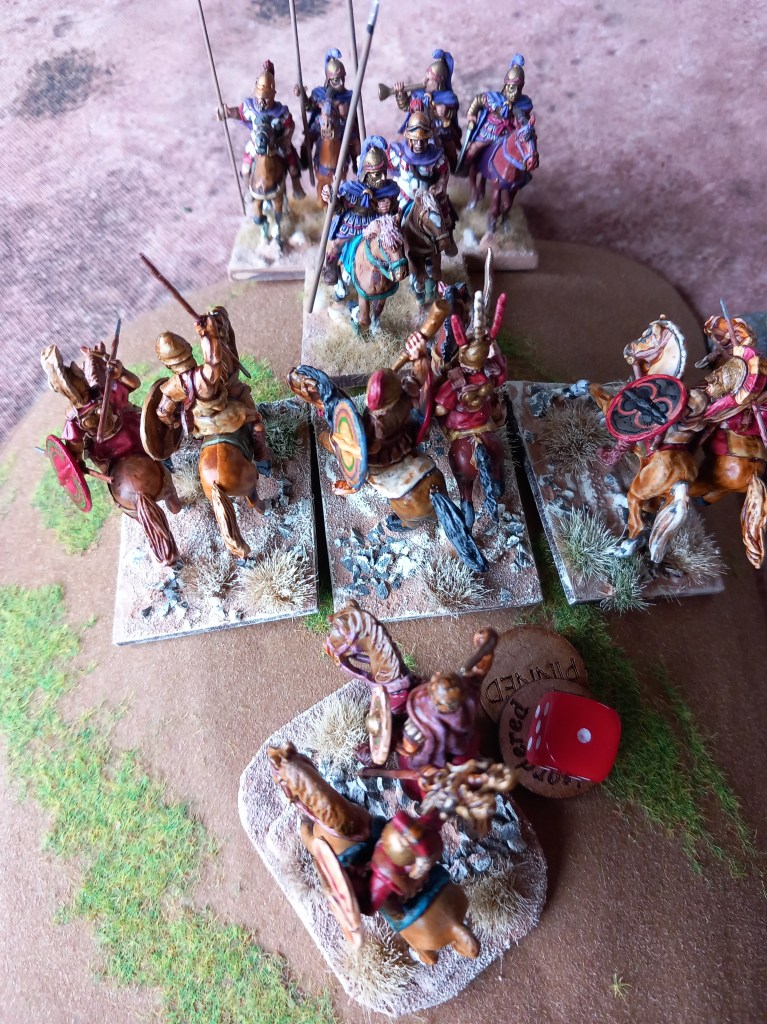
Next was our first refight of the month and our first convention when we refought the battle of Sagrajas1086 at Partizan.

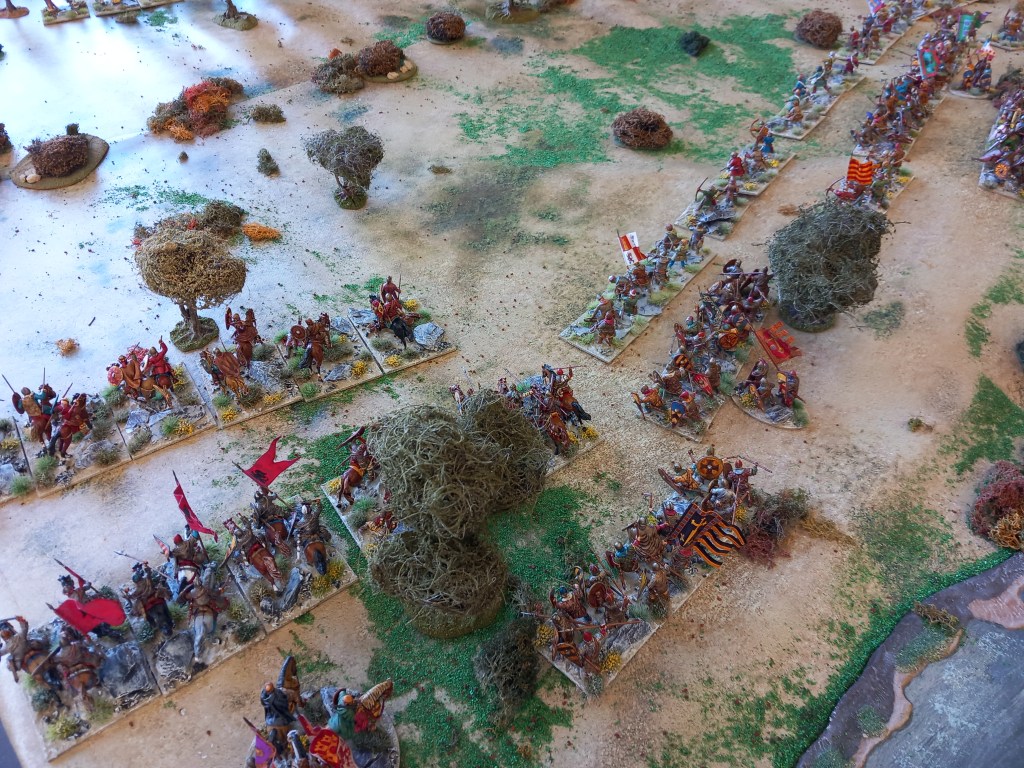
The battle was a decisive in stopping what had been a steady advance by the northern Christian forces of Alfonso VI down Al-Andalus picking off the disorganised Muslim emirates one by one. It ushered in a century of Muslim recovery spearheaded by the Almoravid dynasty of Morocco.

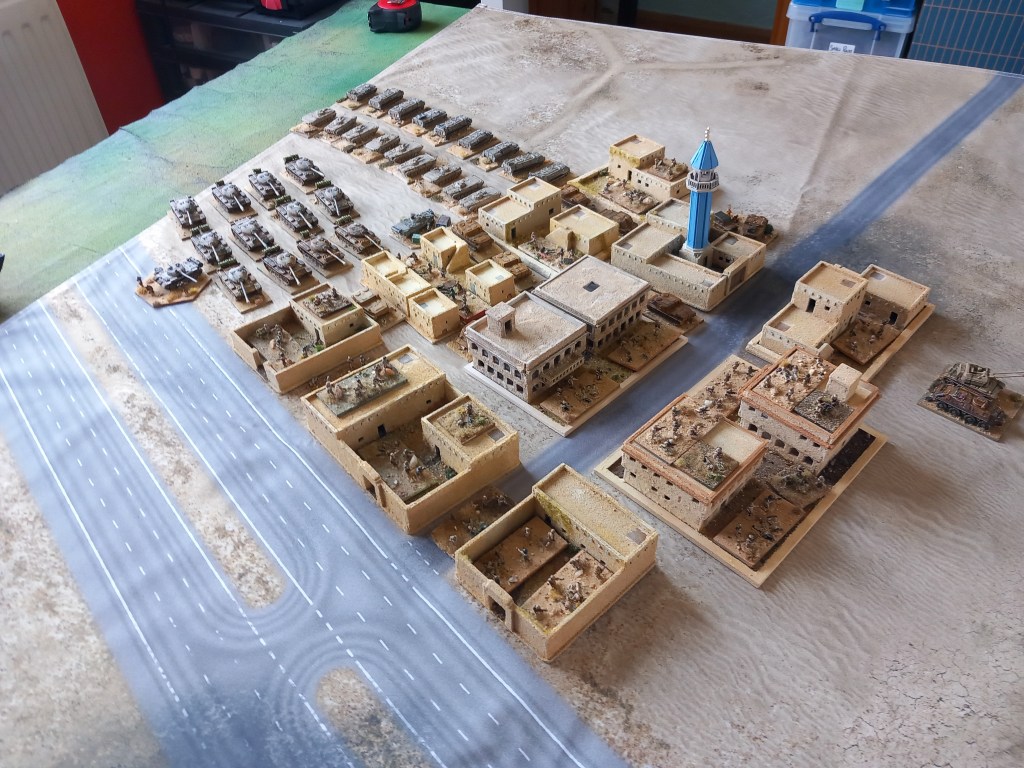
We set our game up with both sides advancing from their camps heading towards the slight rise in the ground between both forces.

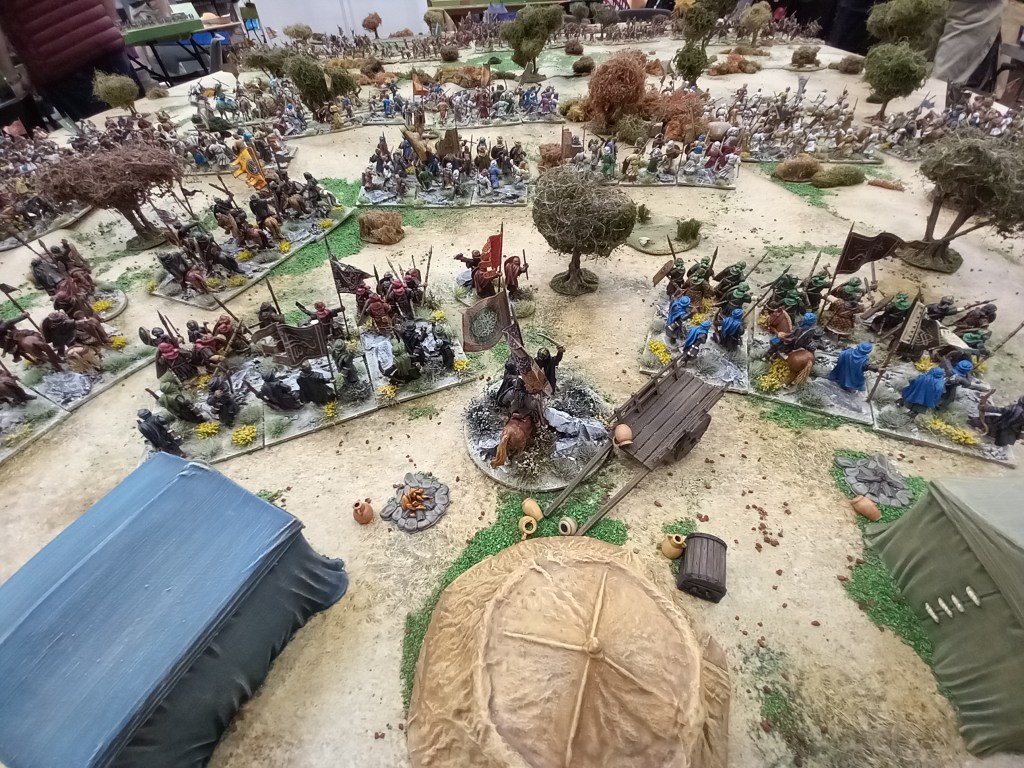
The Almoravid ace in the hole was their Black Guard infantry which were held back as a reserve should the Christians break through.

Our refight was a tale of two wings. On the Christian left the Andalusian cavalry facing the Christian knights fled after a brief melee and their fear spread even to the Black Guard who halted in camp. On the Christian right however the reverse result appertained and the victorious Muslim cavalry started turning into the centre to cut up exposed crossbowmen and archers as the Christian cavalry fled to their camp with tales of disaster.

You never get to finish a game at a show and this was no exception but all the kind words and conversations that halted proceedings were gratefully received and we thank everyone who made the effort to stop by.

As to the show itself their were some fine efforts on display, my personal favourite was the 6mm Wagram game – and I don’t even like Napoleonic’s ๐Ÿ˜‚

There were some not so fine games (in my opinion) so I didn’t take any photos of them and perhaps too many which were essentially a static display which for me is not what wargaming is all about and doesn’t do much to promote the hobby. Of course this is just an opinion and has no more validity than the next persons.

Many thanks to Lawrence and Richard for organising and we look forward to a return visit – we might even get our Minden effort on the table!

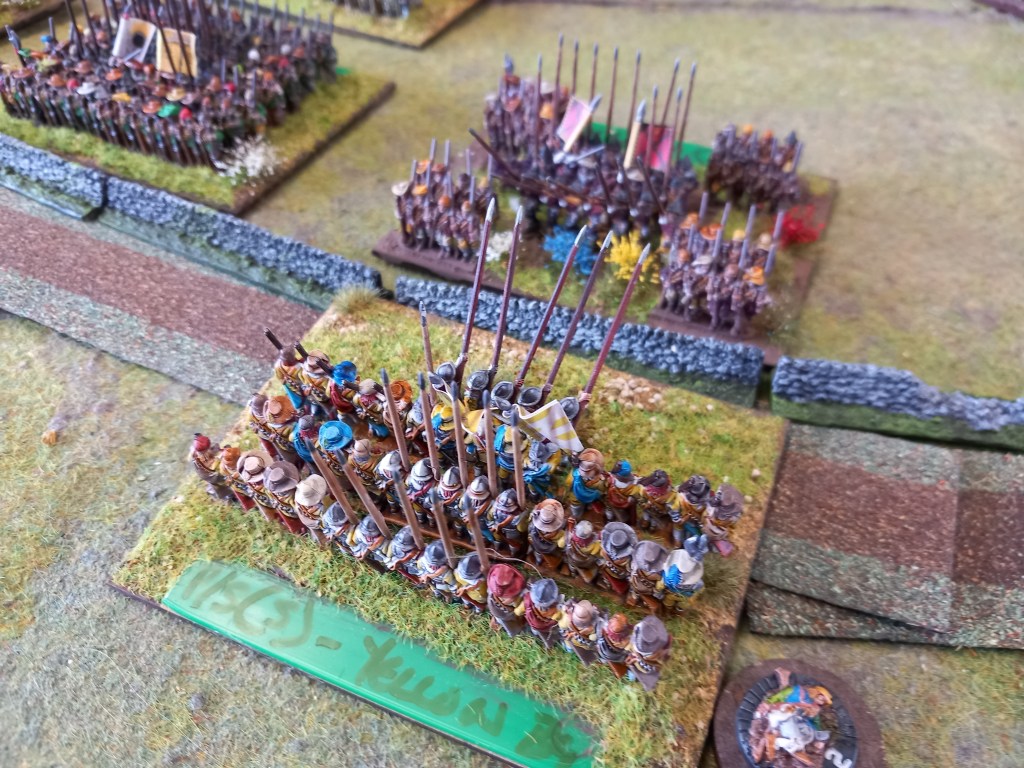
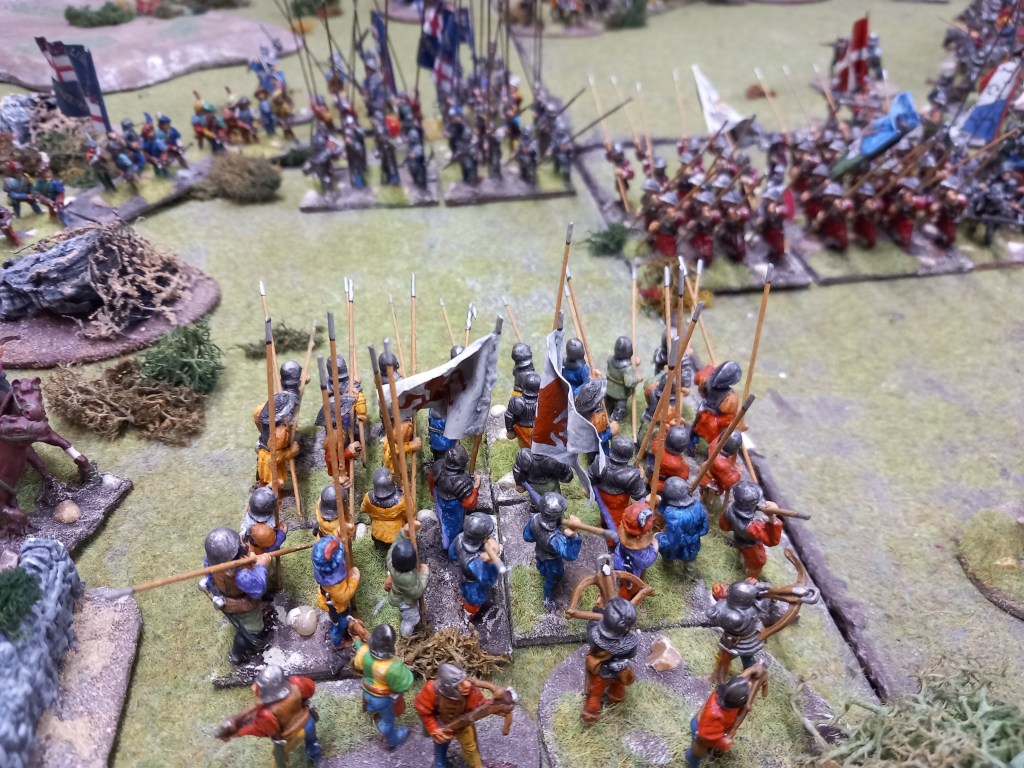
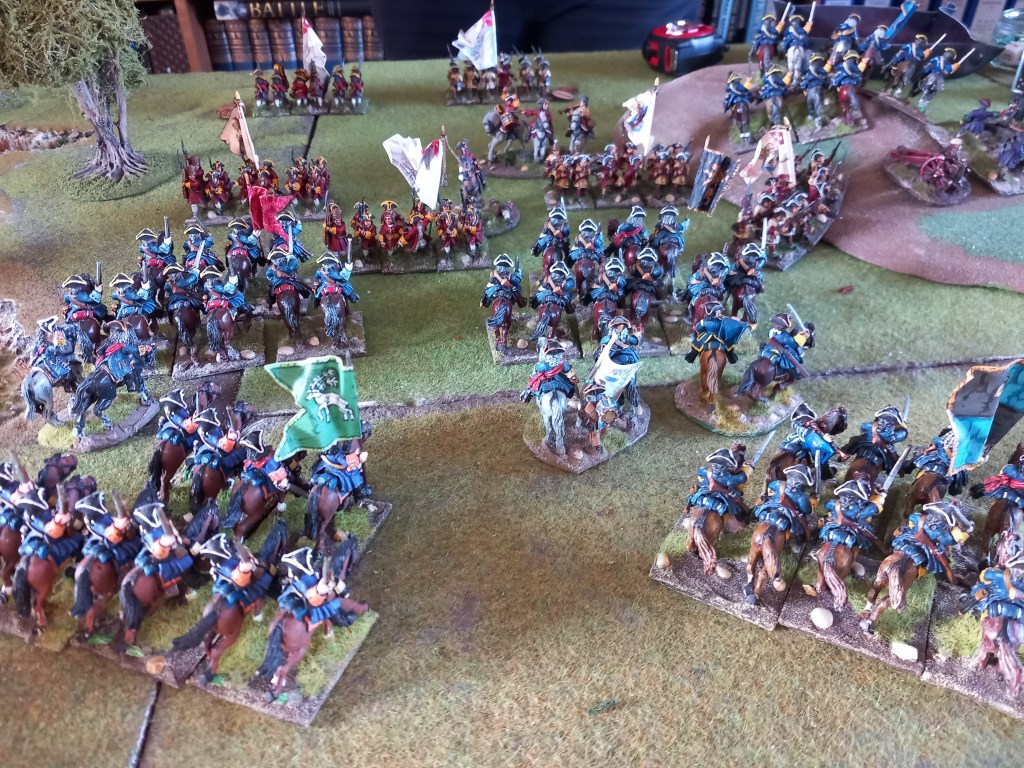
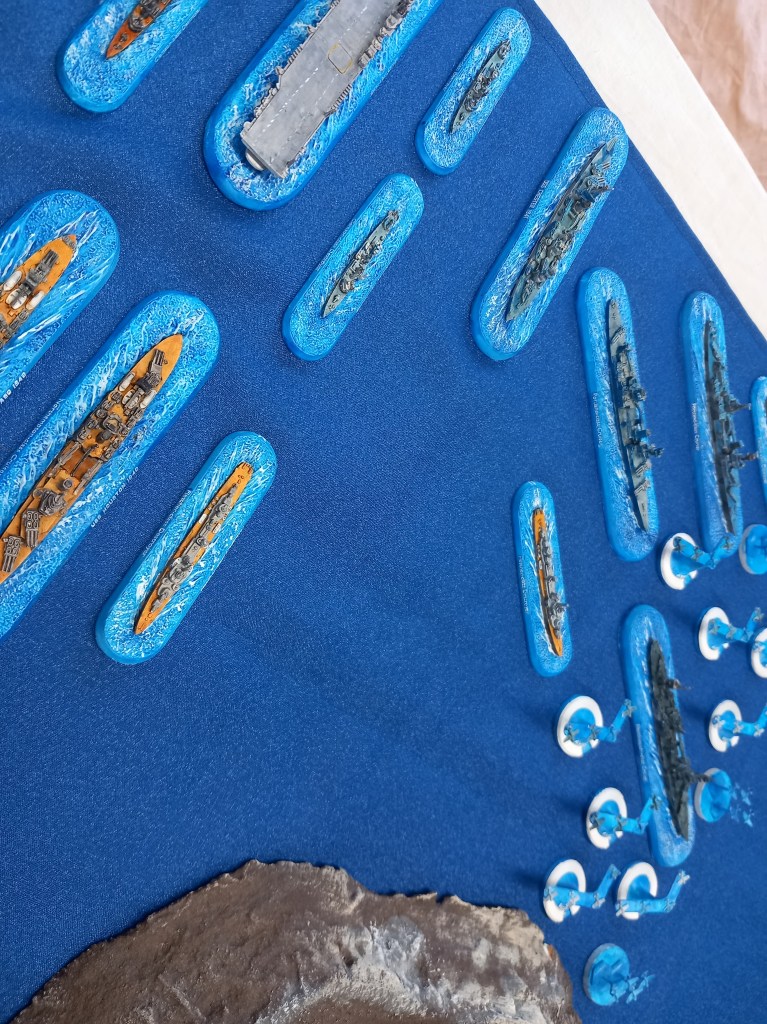
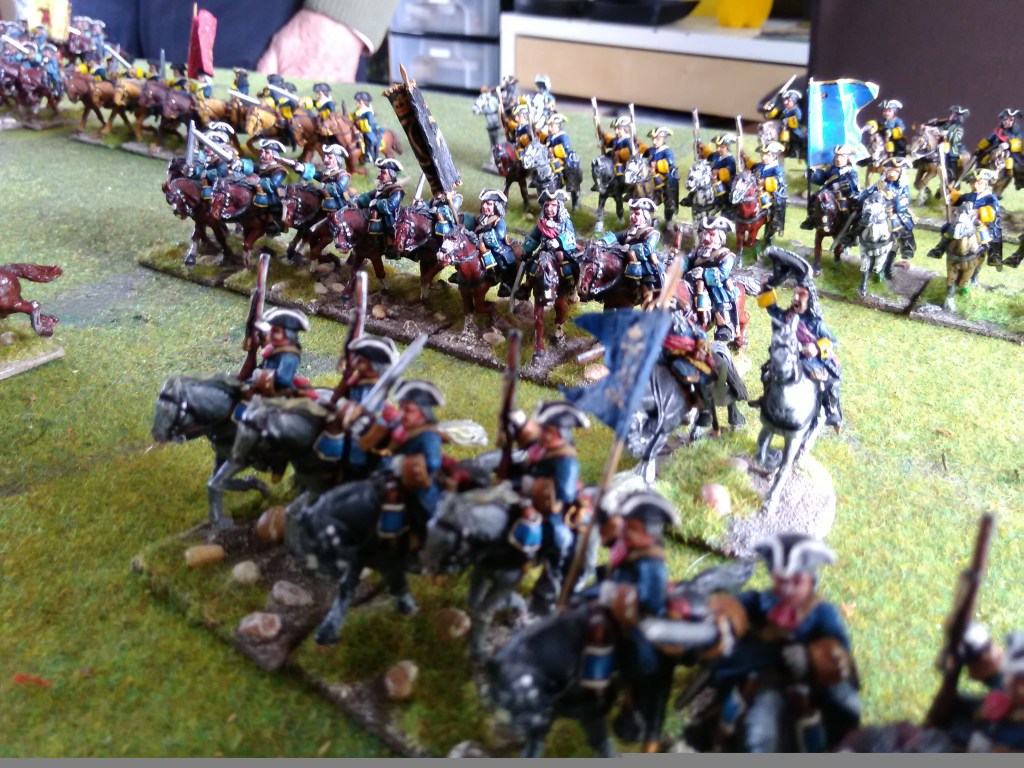
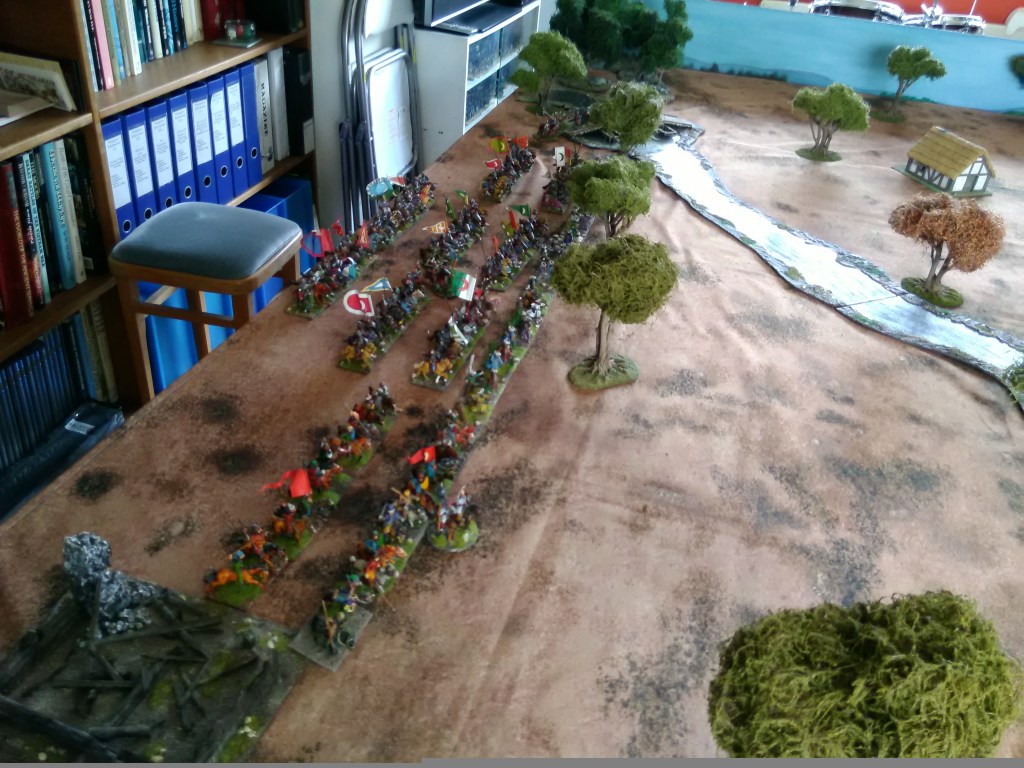
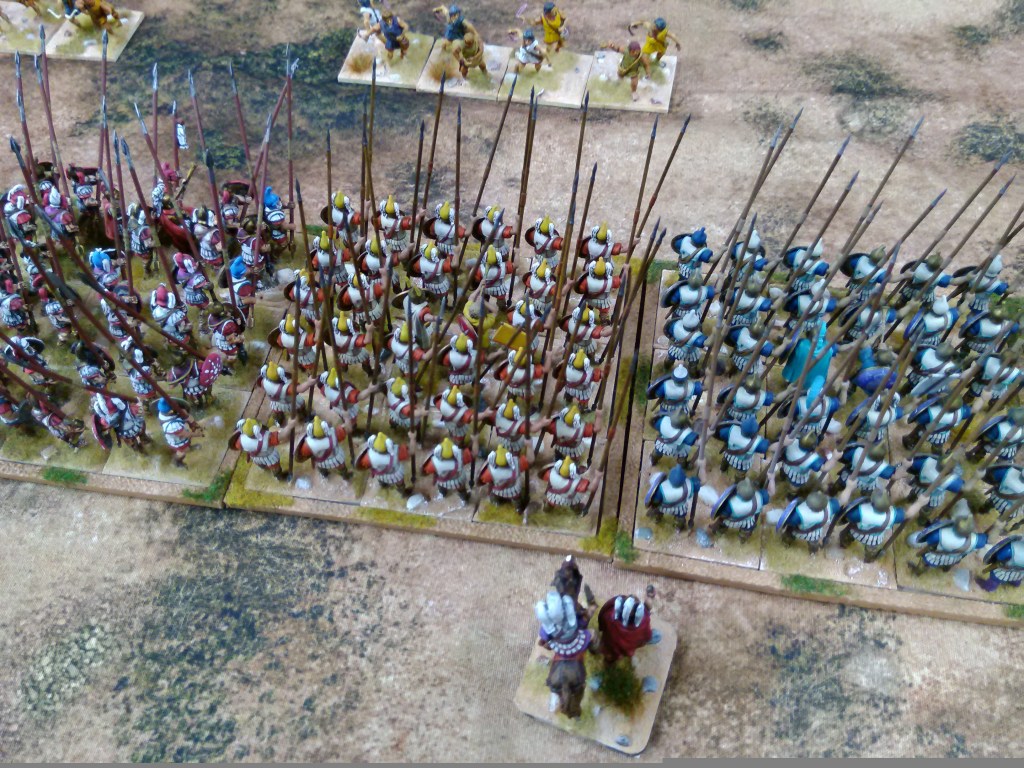
Next was our second refight and the second in our 1809 north Italian campaign refights. This time the battle of the Piave whereby Eugene raced to cross the river Piave before flood waters swept away his crossing points and his opponent Archduke John could consolidate his defence.

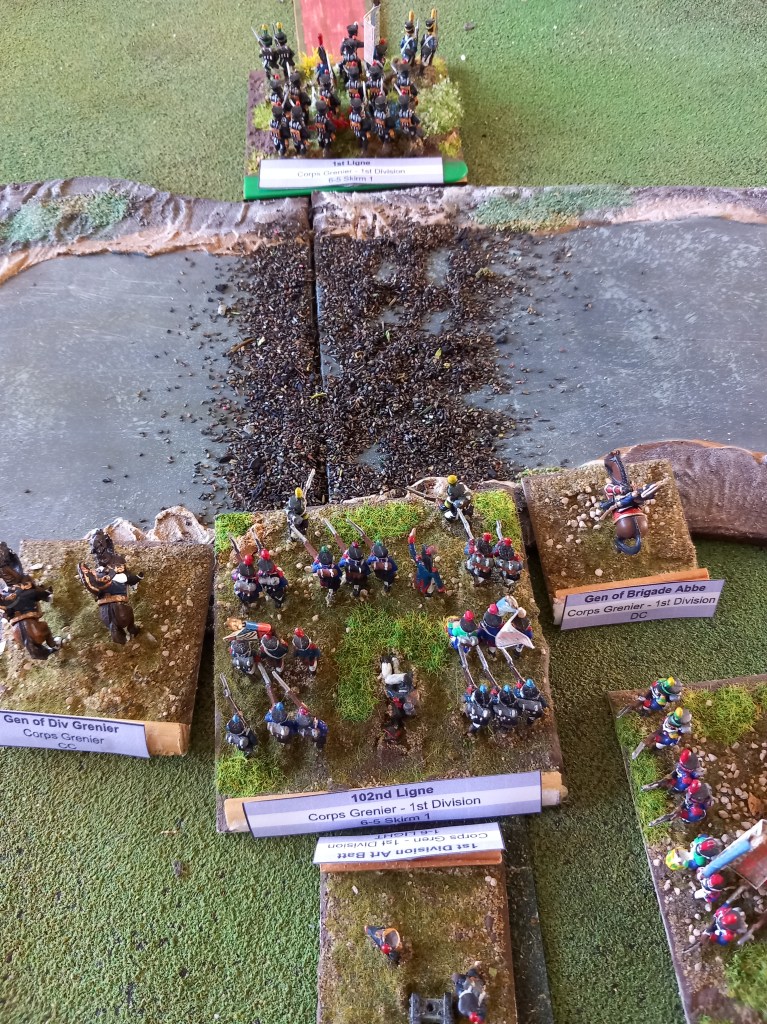
Our rules of choice for Napoleonic’s have become Volley and Bayonet and we followed the layout for the battle contained in the scenario book. In the actual battle Austrian losses were between 3,600 and 3,896 and the French between 2,000 and 3,000 – remember these figures for later.

A lot of the early moves were spent by the French in traffic management (and as it turned out managing the wrong traffic ๐Ÿ™„) which meant the Austrians were able to get up to the edge of the dike and stream further in from the main river.

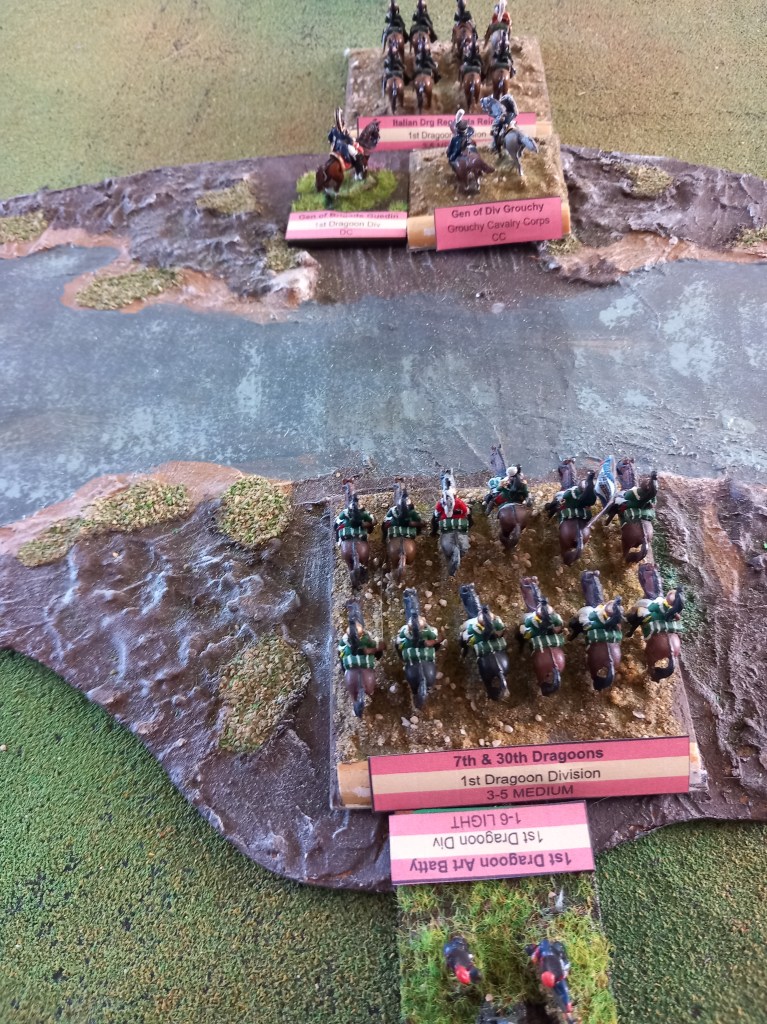
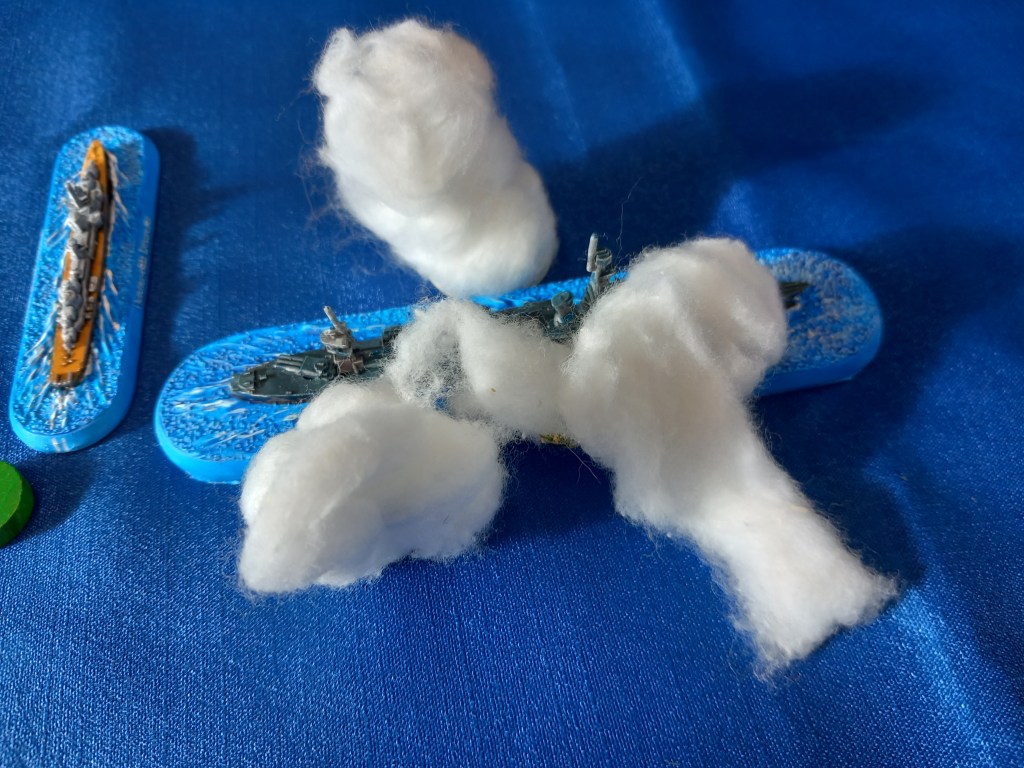
First across were Grouchy’s cavalry who should have spurred on to threaten the Austrian centre as the French infantry attacked. Instead they went off on a magical mystery tour on the extreme right flank and were of no use for several moves. When they did get into action they redeemed themselves against the Austrian cavalry but it was too late an effort.

On the French left and centre it was hard going and it was late in the game before holes began to appear in the Austrian front.

Eventually the sightseeing French cavalry made a difference and the French crossed the stream in a couple of places where Austrian numbers were weaker.

Ultimately the Austrians gave way before their entire force was surrounded but the butchers bill was high; French losses equated to 12,750 and Austrian losses to 8,750.

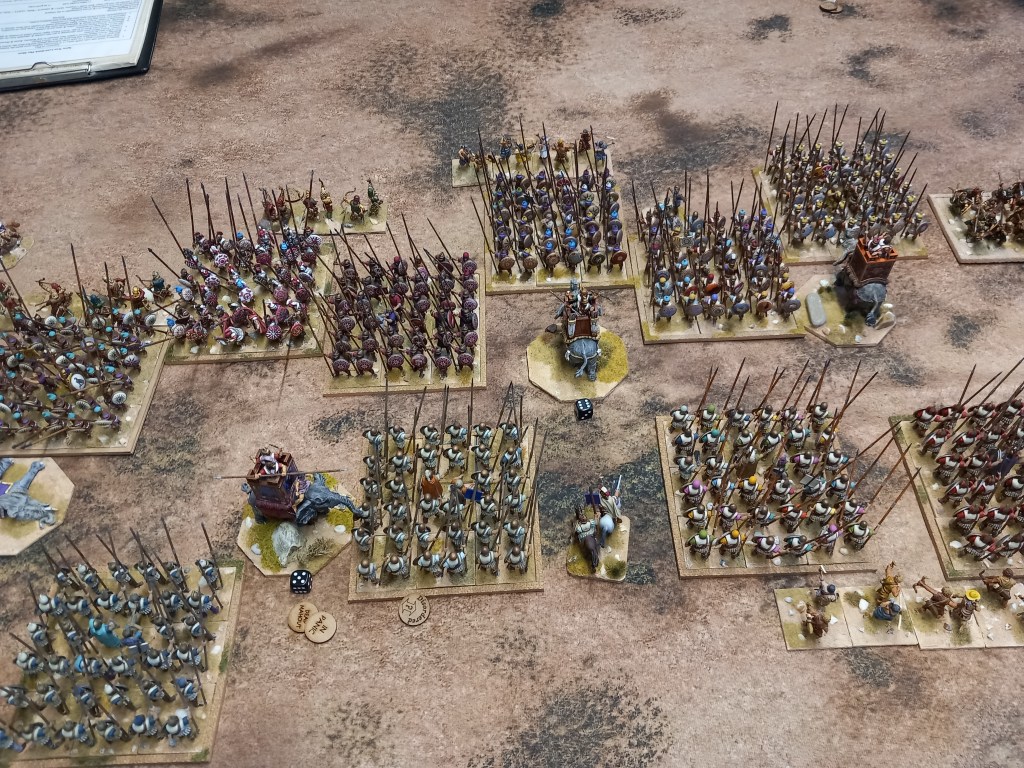
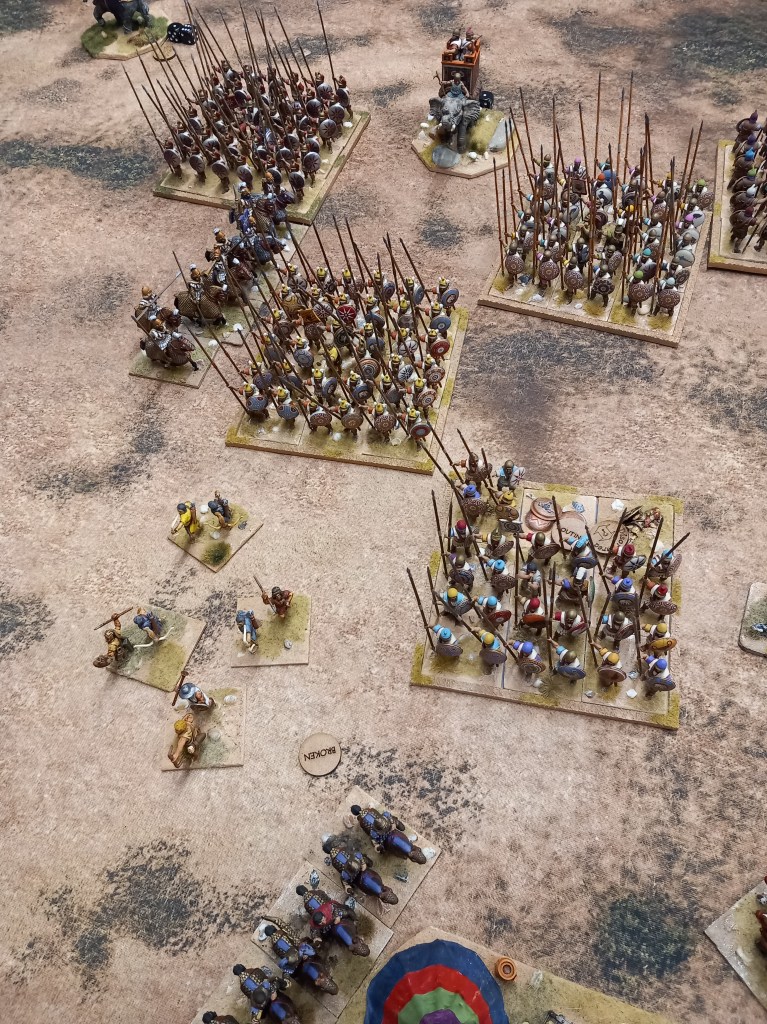
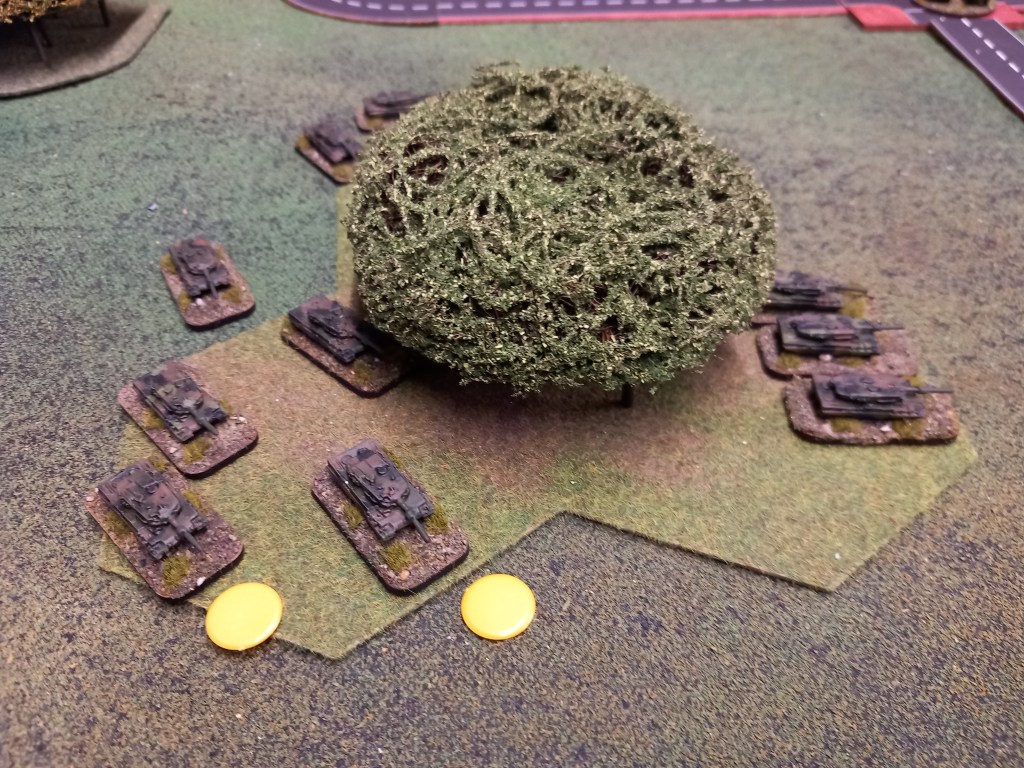
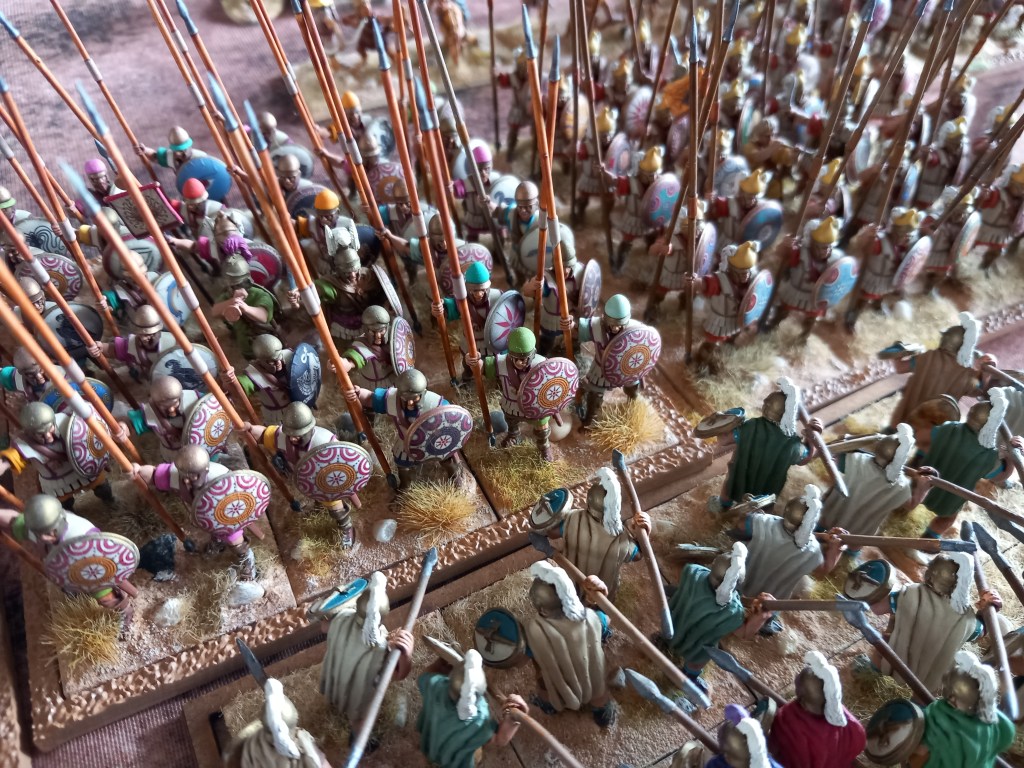
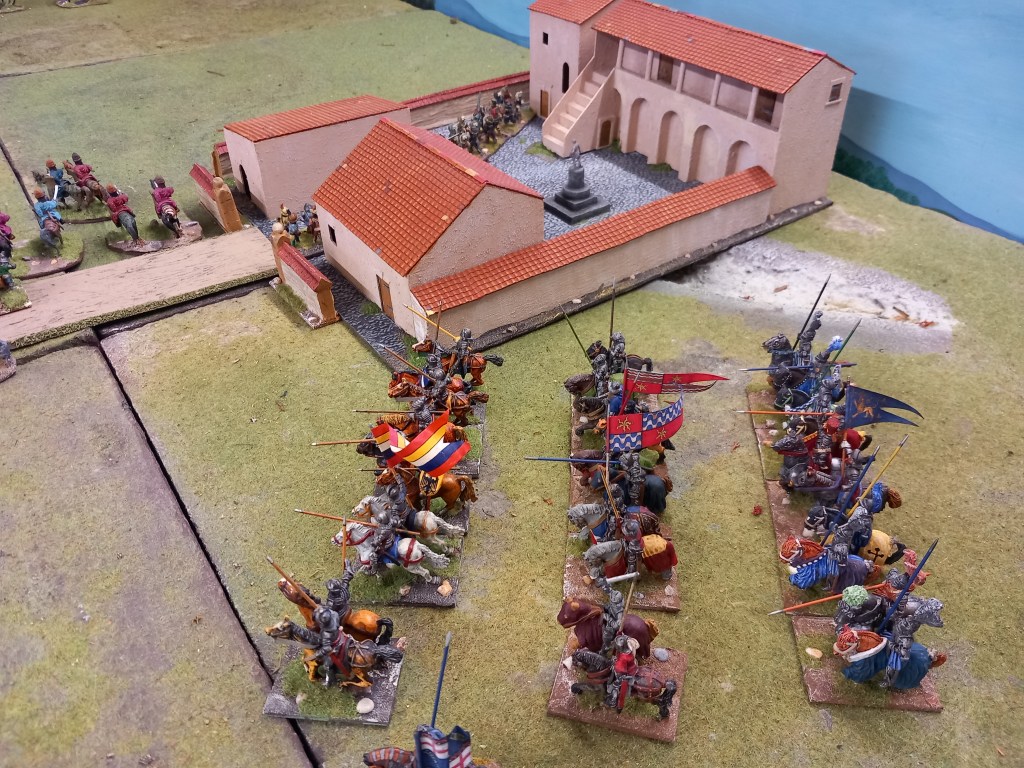
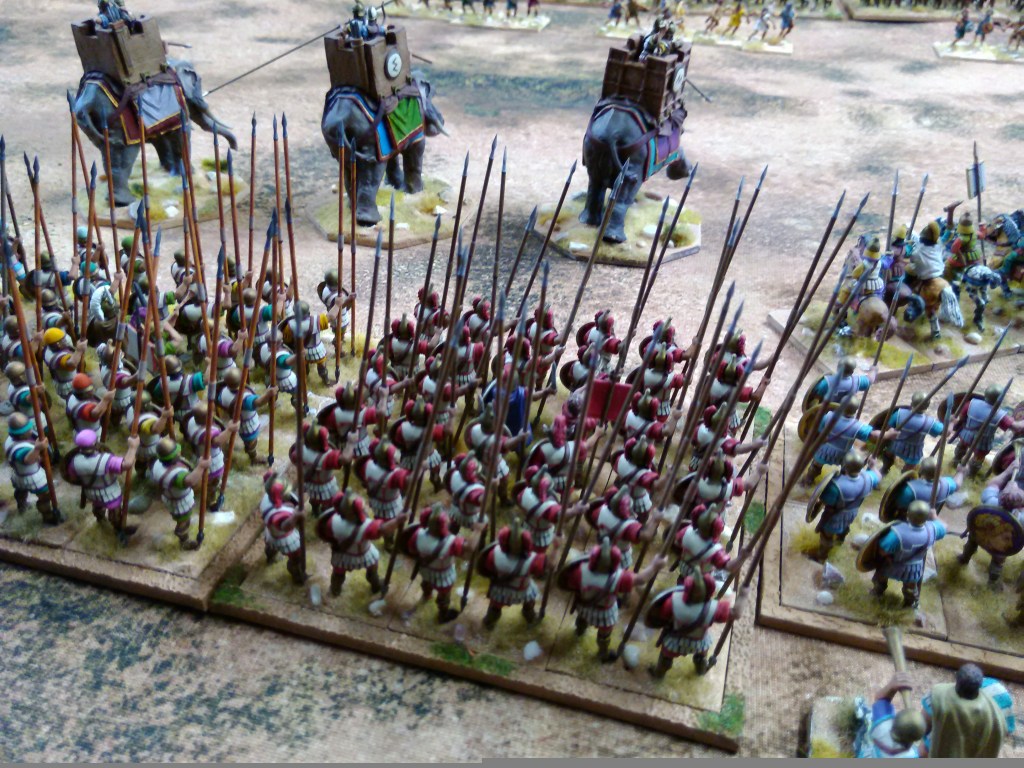
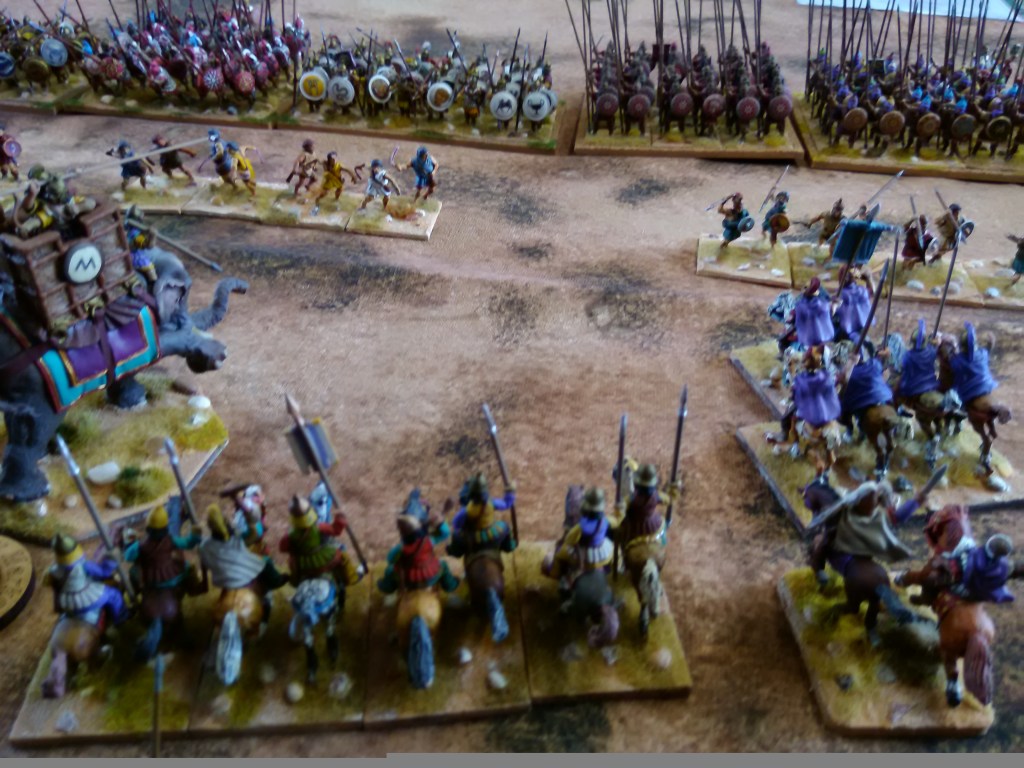
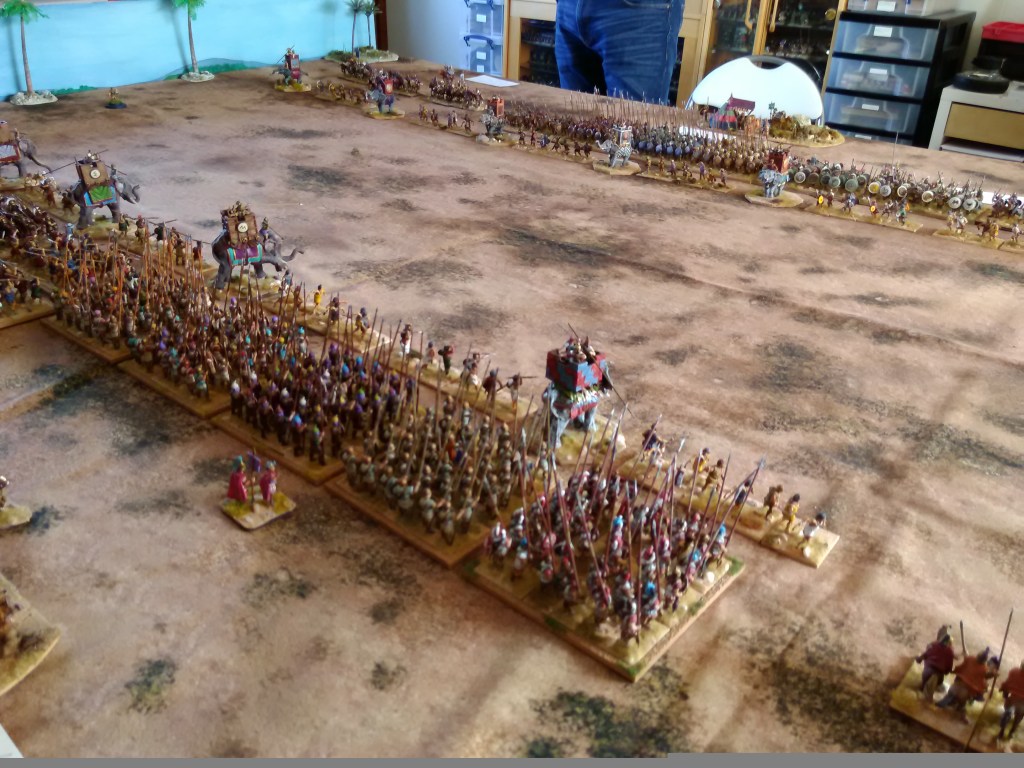
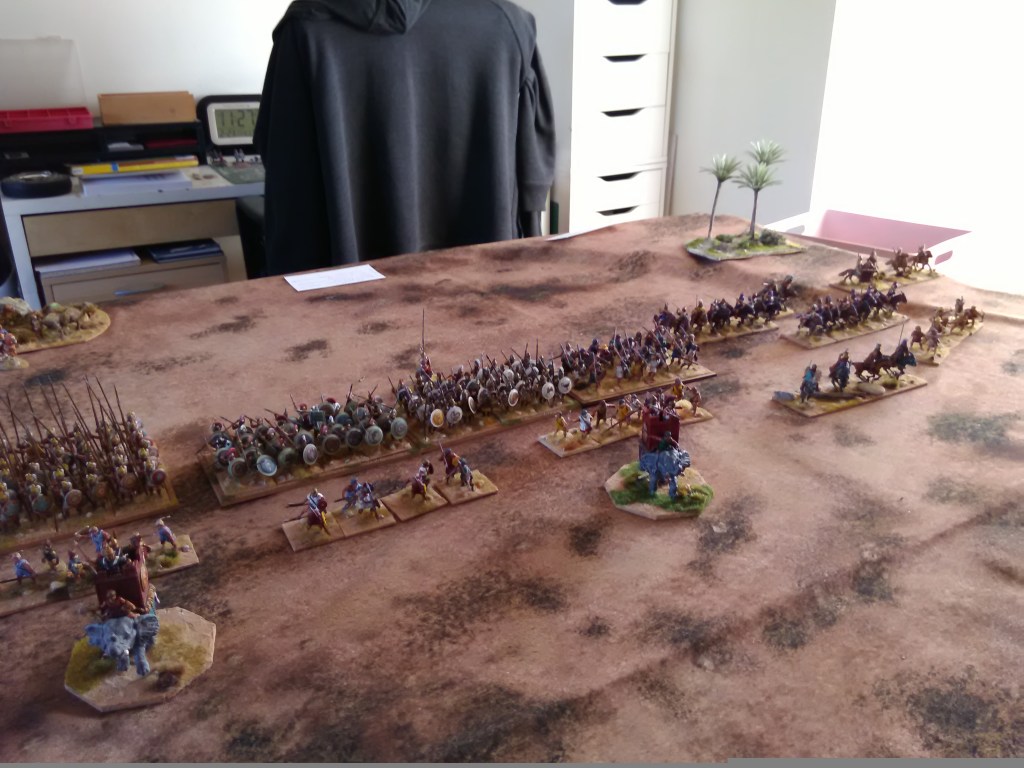
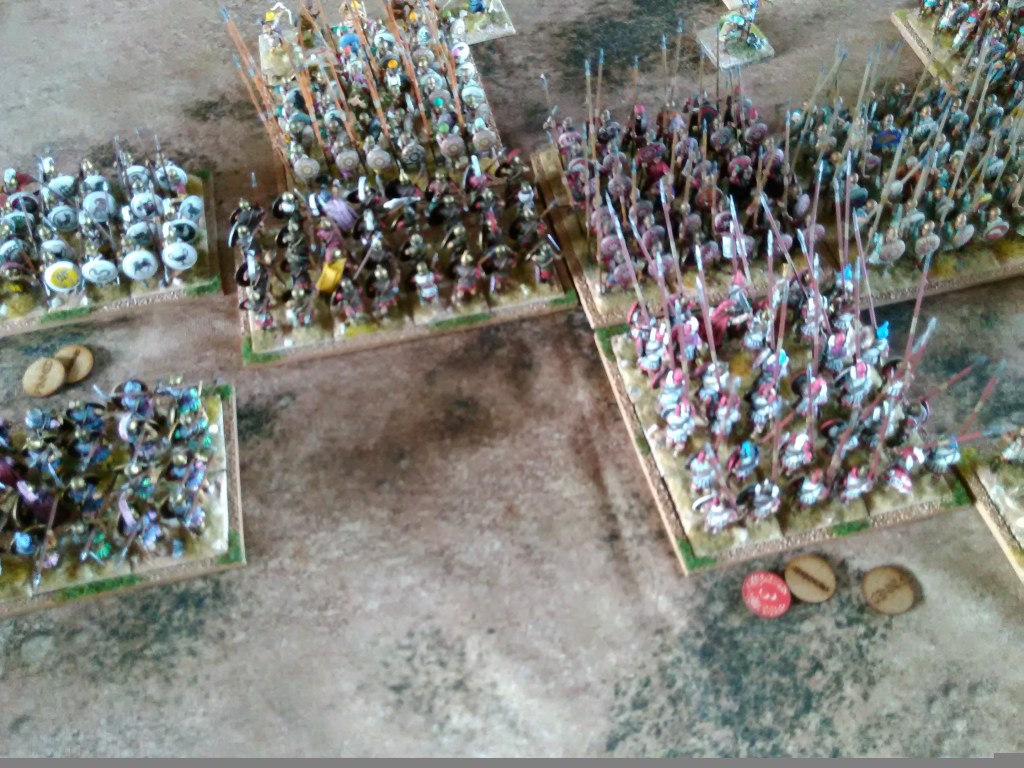
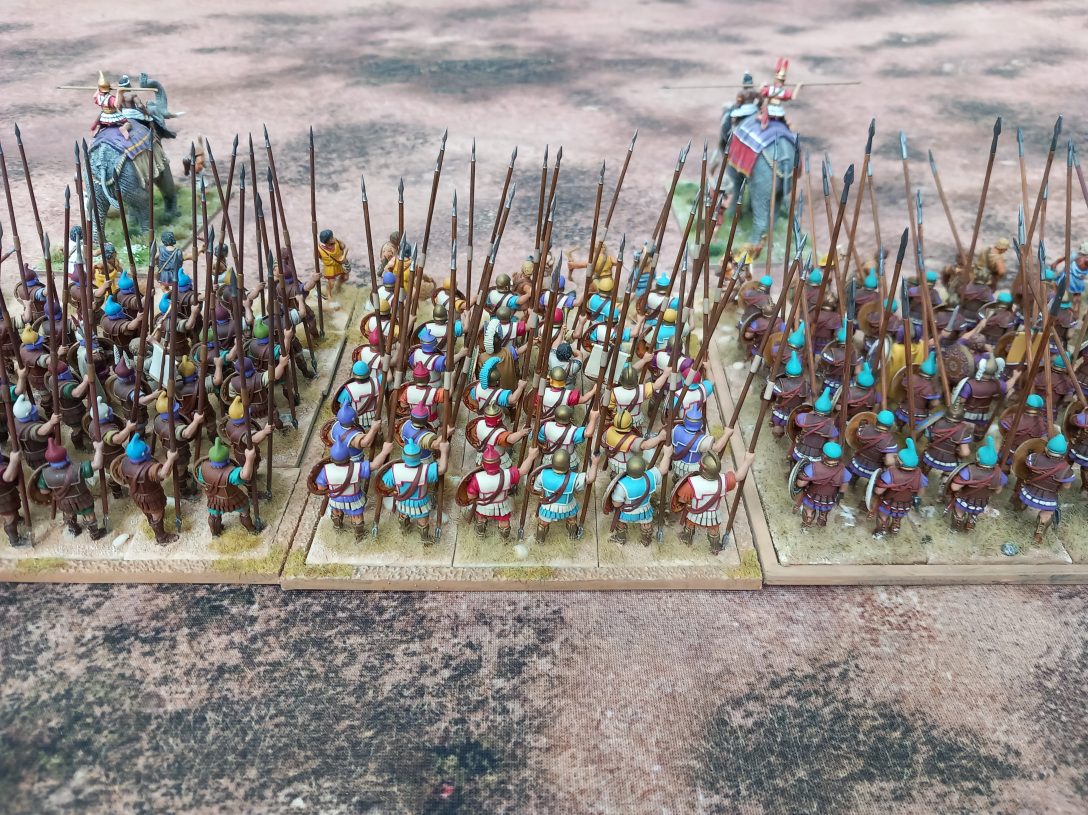
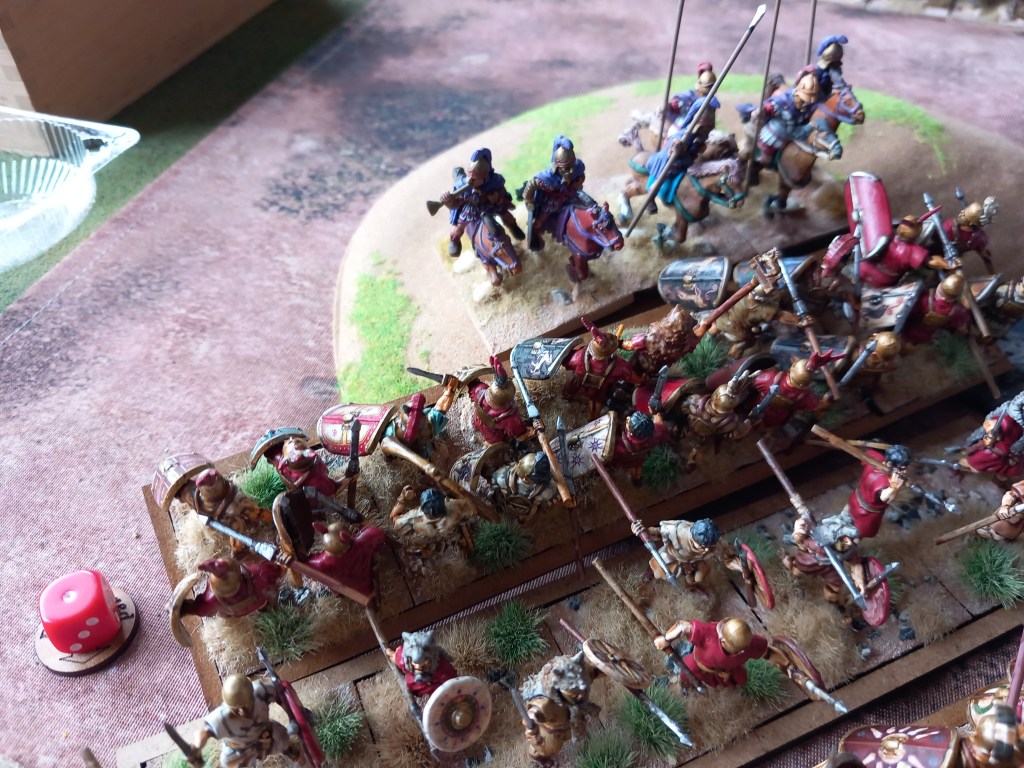
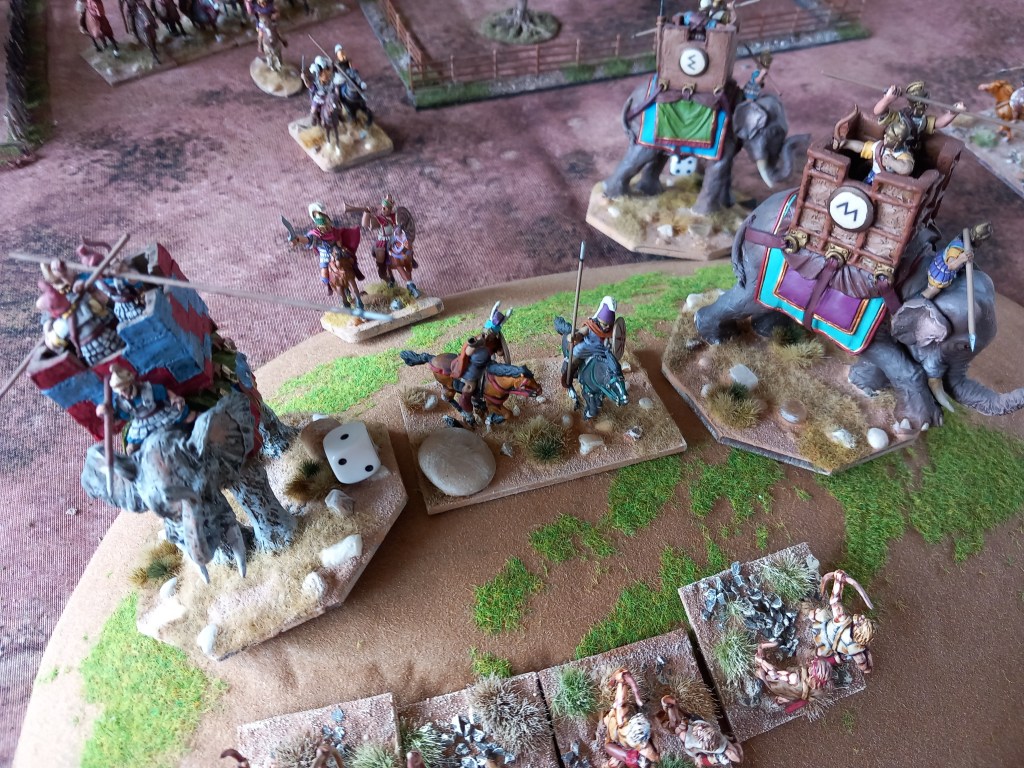
Our penultimate game was Republican Roman v Later Seleucid as I trialled some more amendments to the core rules. This game, just like the previous one featuring Romans, served to confirm my view that representing the intricacies of the early Republican formations is dammed difficult and I was right to cut off the rules prior to serious Roman/Macedonian interaction.

Be that as it may, we’ve got some nicely painted Romans so we will persevere until we get something that works well enough.

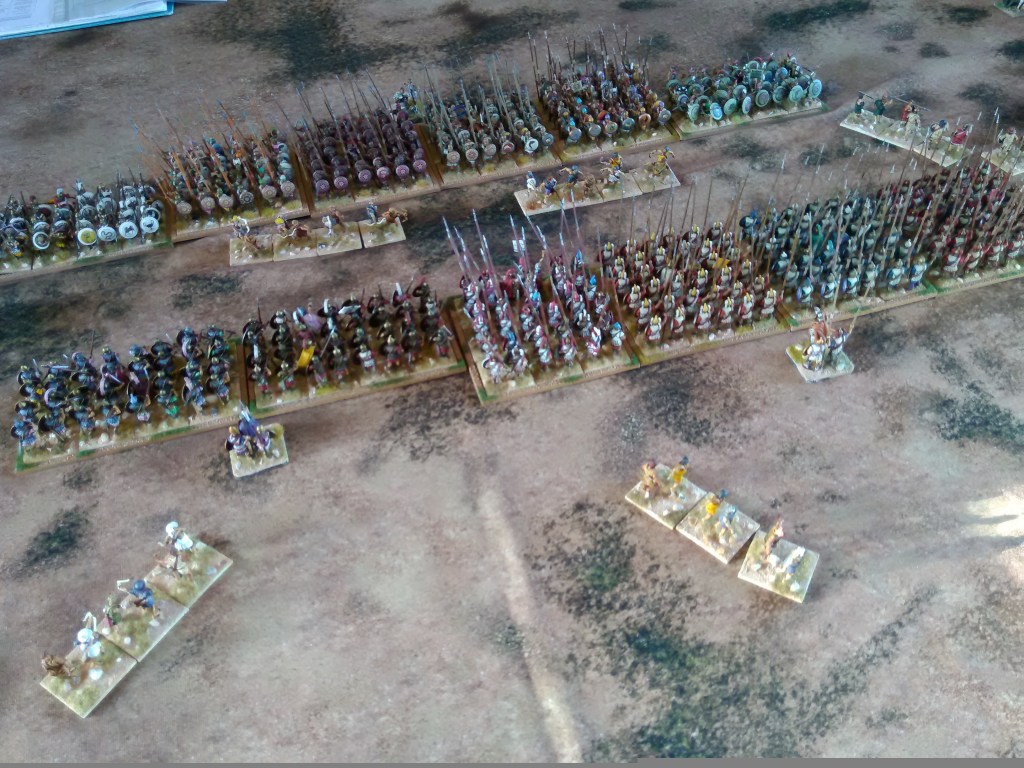
The Romans significantly out scouted the Seleucids and so got the pick of the terrain but unfortunately didn’t make the best use of it.

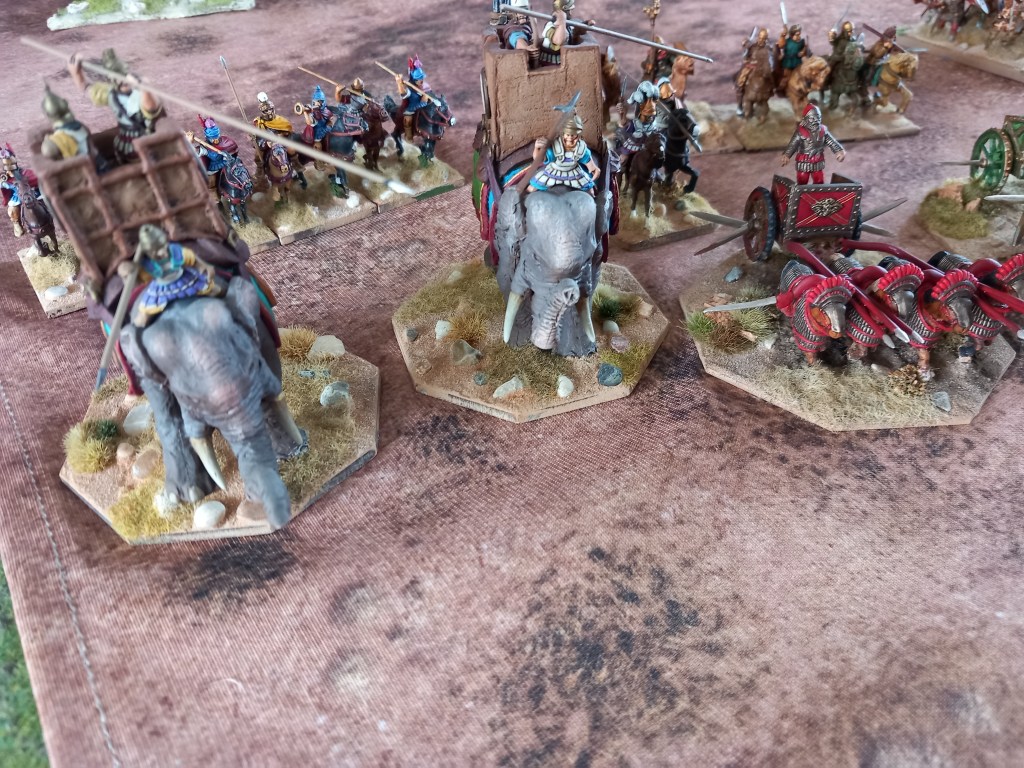
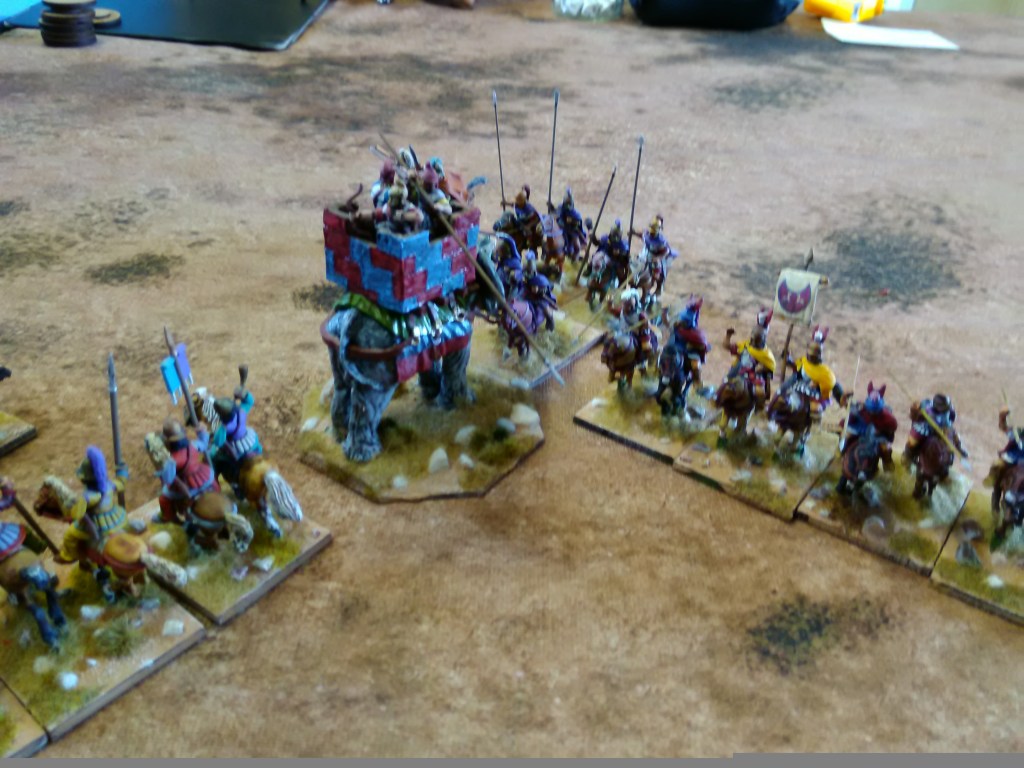
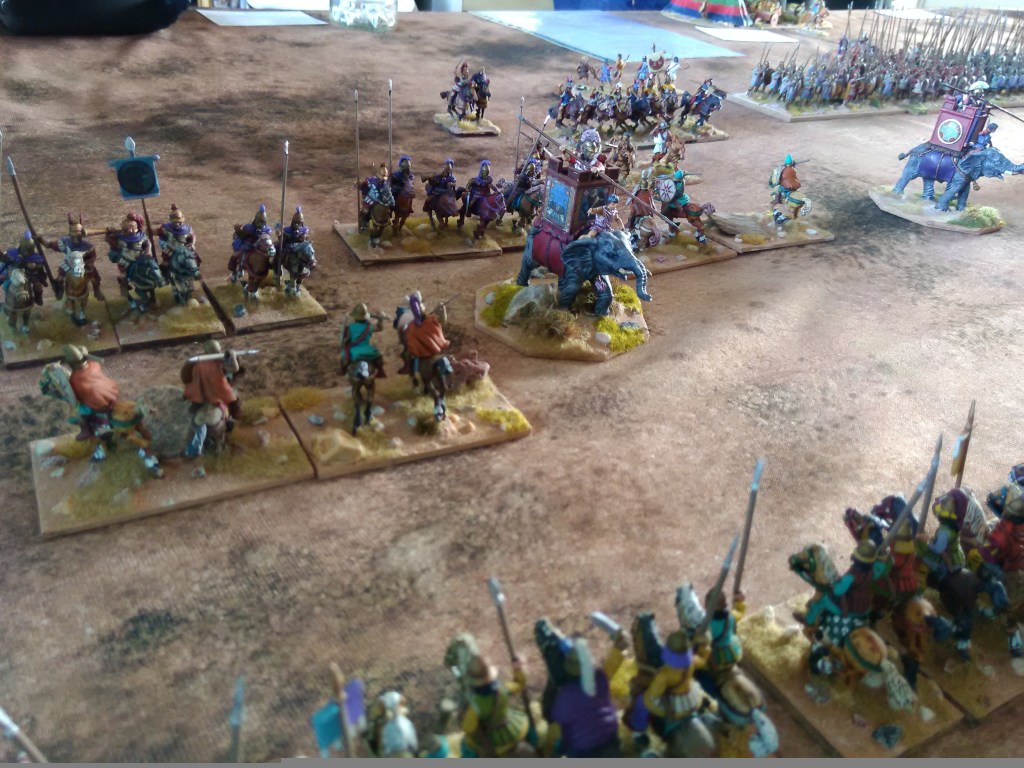
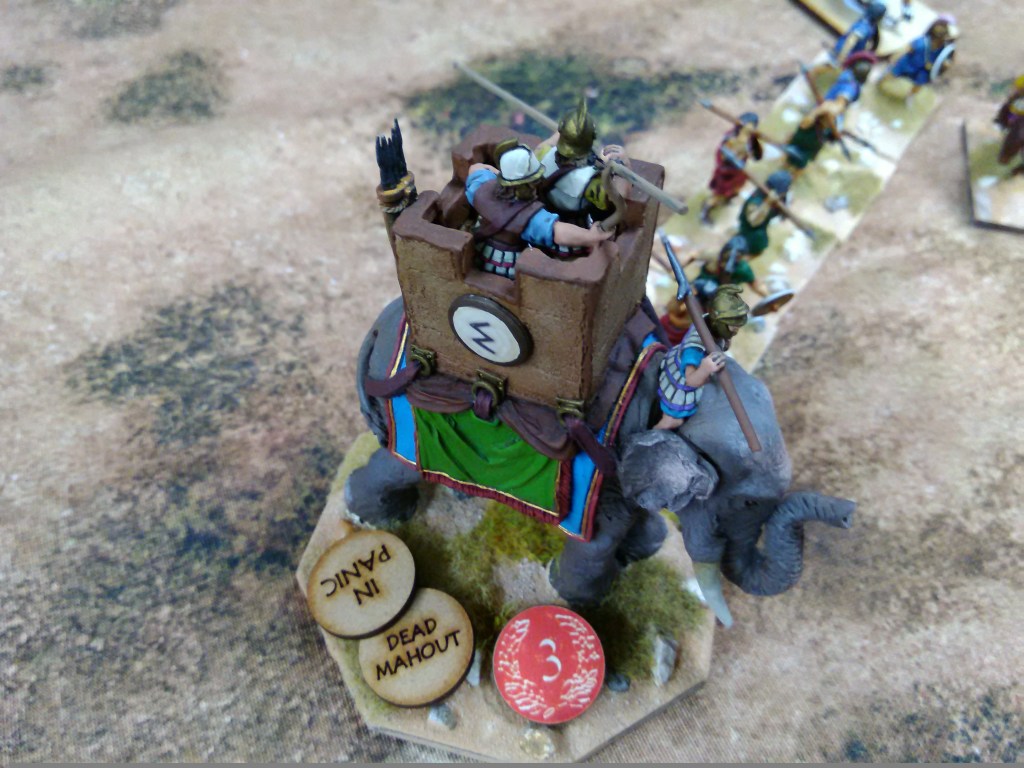
The Seleucids opted for a ‘different’ strategy. On the left they deployed their 4 pike battalions fronted by skirmishers and gave the whole division orders to hold. The elephants & Tarentines deployed in the centre aimed between two vineyards with their right covered by 2 regiments of line cataphracts while out on the far right the Agema cataphracts and the royal hetairoi deployed.

The Romans had 3 legions, 2 Italian and 1 Roman. One Italian legion and the Italian cavalry were deployed out on the left behind a ravine which ran from a hill back to the baseline effectively cutting off this third of the battlefield, the only way out was over the hill – after the battle the Roman overall commander couldn’t offer a good reason for this deployment other than ‘it was there’. The other Italian legion and the Roman legion held the centre and the Numidians and Roman cavalry the right.

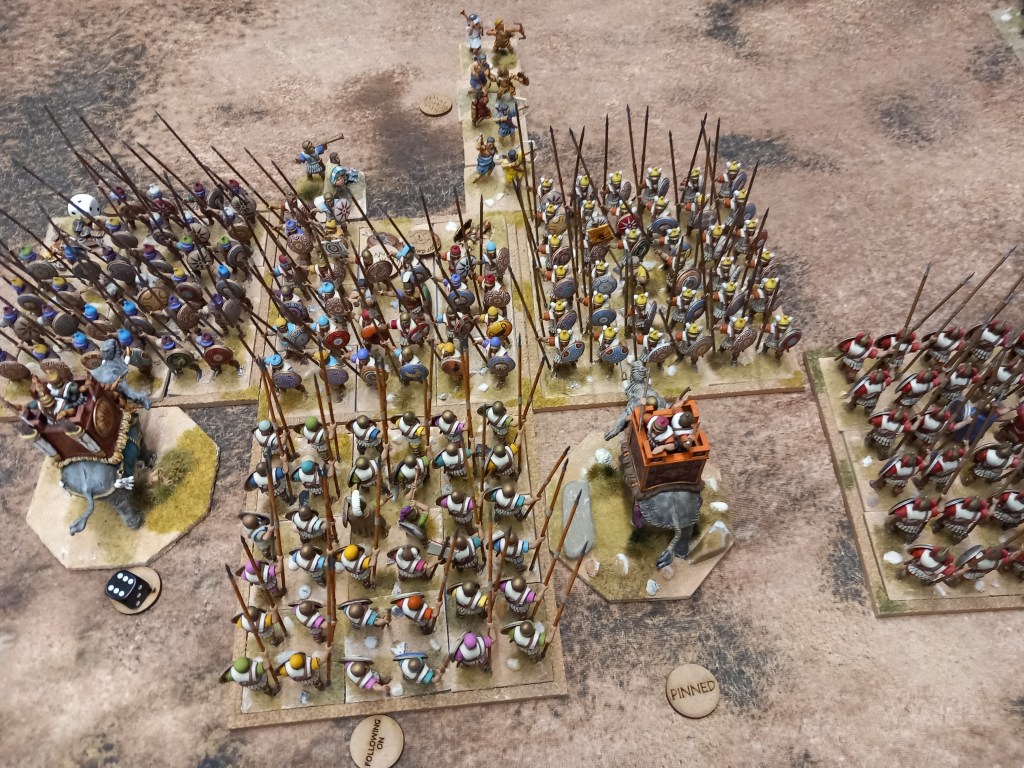
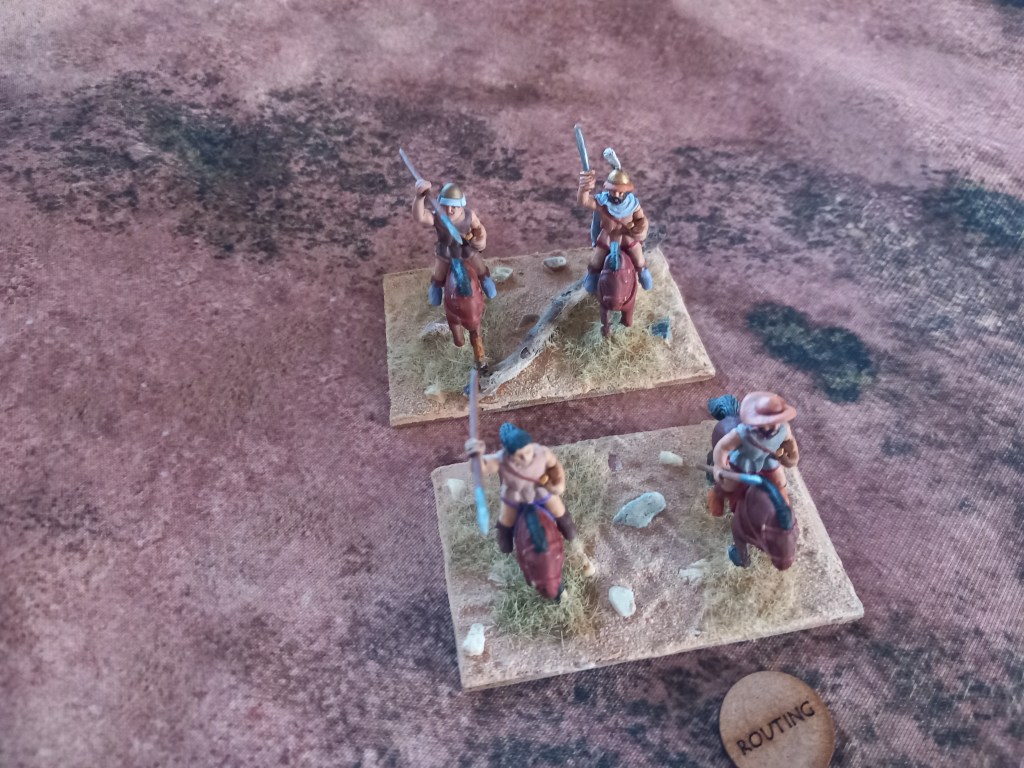
The first serious action was on the Roman left where the Italian cavalry took on the Hetairoi and the Agema, predictably they lost and lost badly, both units being destroyed.

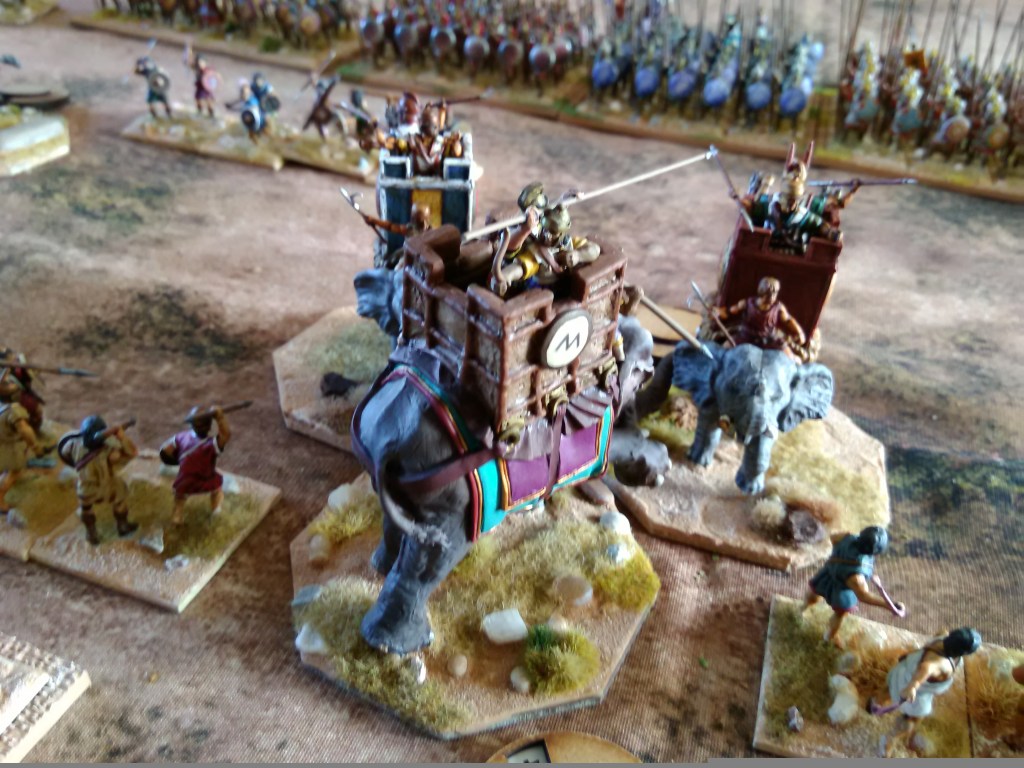
In the centre the elephants and Tarentines clashed with a unit of Cretans who did remarkably well given the disparity in strength but eventually the Cretans fled and what was left of them died in in the ravine. Out on the Roman right the cavalry realised there was nothing to fear from the pikes for a while and so joined in the developing action in the centre.

Returning to the Roman left the Seleucids played to their strength (high morale) and threw themselves against the legion. Actually it was the Hetairoi who did the heavy lifting as the Agema spent 5 turns trying to rally from being Shaken (and therefore unable to charge) – Gerard worked out that the chance of failing that particular test 5 times in a row was 1 in 1024! Oh how we laughed ๐Ÿ˜‚

Ultimately the Hetairoi were successful, the Hastatai routed, the legion commander was killed and the legion was paralysed. The action had no bearing on the rest of the battle and was almost pointless but it did allow us to play out the rule amendments which facilitated the legion rotating troops in and out of the fighting line which worked fairly well.

Back in the centre the elephants made their habitual mess, one panicked and ran into the back of the Italian legion, all 3 eventually died.

The Italian legion saw off attacks by the line cataphracts and by the end was battered on top of a hill.

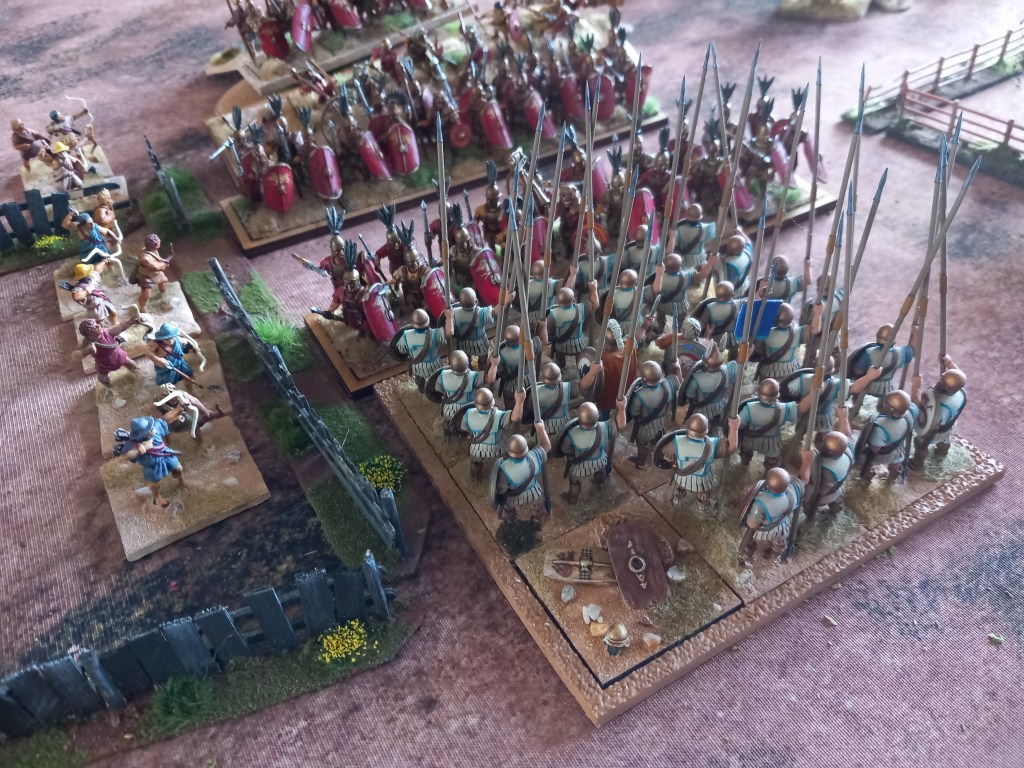
The Roman legion so nearly broke the pike battalion it eventually ended up facing off to, it just didn’t quite get the full effect of it’s pilum volley thanks to some clumsy positioning. What we saw of the mechanism changes seemed to point in the right direction, a one on one across less restricting terrain will be the real test.

In other news the Roman cavalry sacked the Seleucid camp.

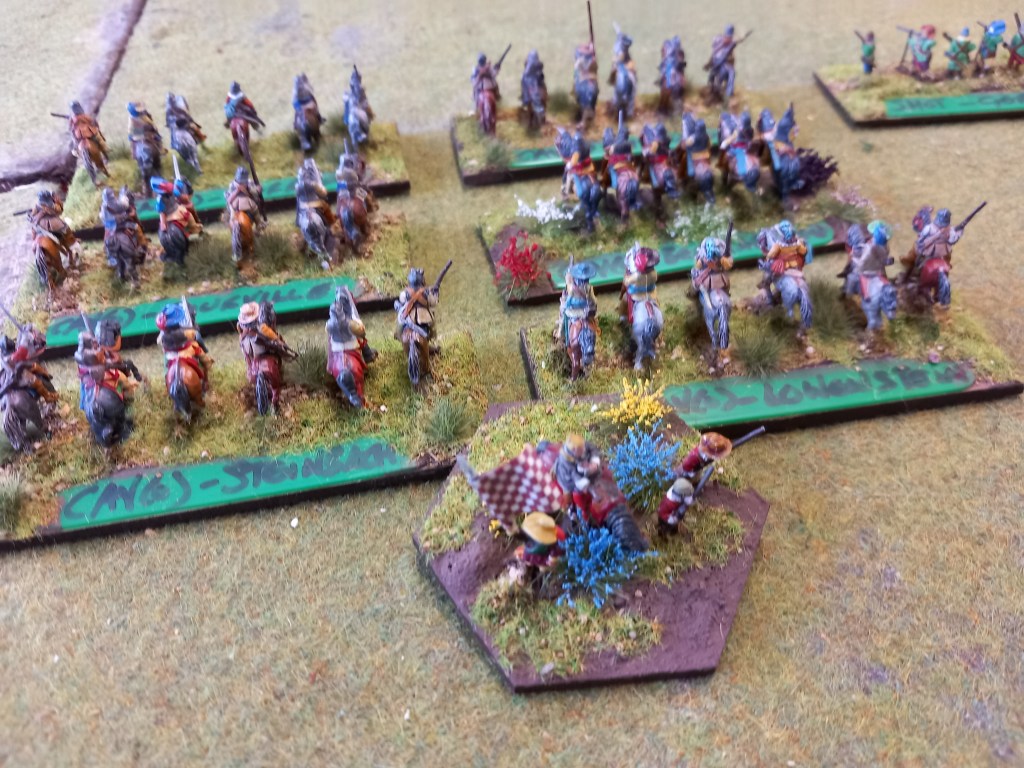
The second convention was the annual visit to Games Expo, this time spread across 4 halls at the NEC. This event is huge and is a fantastic look into the wider gaming world.

This was my 6th visit and I did teeter on the edge of not bothering but I’m glad I did, the vitality of gaming in the wider sense gives a real buzz and lets you know just how many people are into gaming in all its forms.

For me the fun of a visit is the taking part in the myriad of 20 minute to half an hour pick up games demonstrating new products, forthcoming kick-starters or just pushing an established game. I’ve learnt now to stay in my lane when it comes to being tempted to purchase something I’ve just played, I’ve got enough distractions on the figure front never mind card games, board games, horror skirmish games, etc, etc.

If you want to have a look at what do all those other types who we call fellow gamers do the take a visit next year.

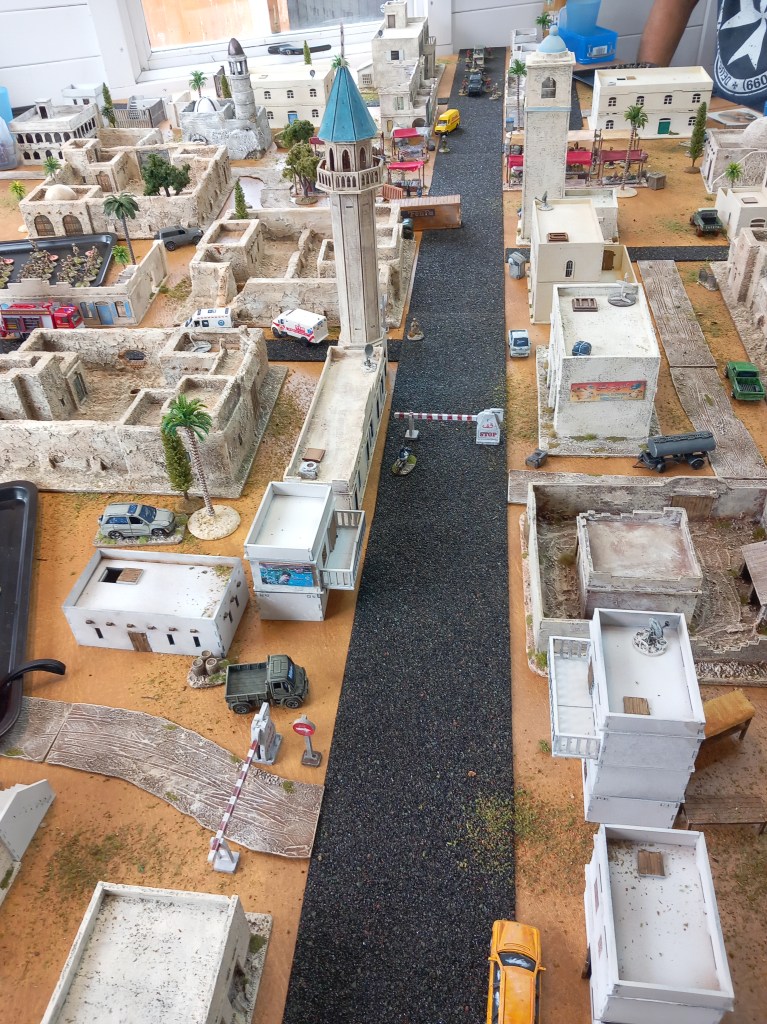
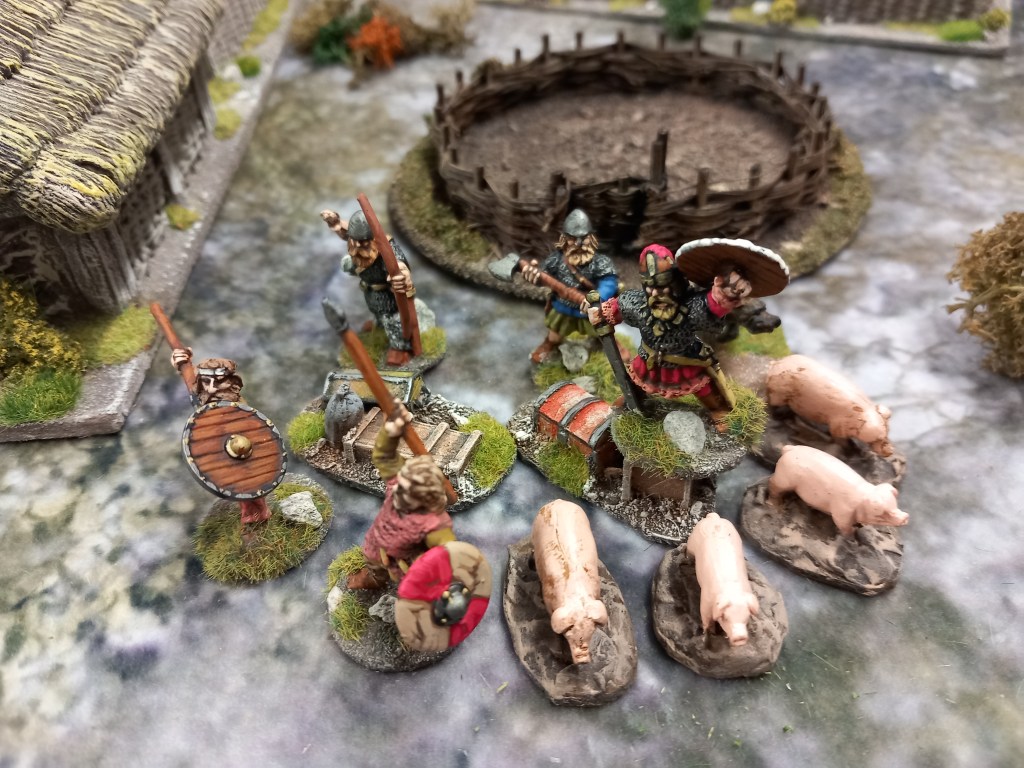
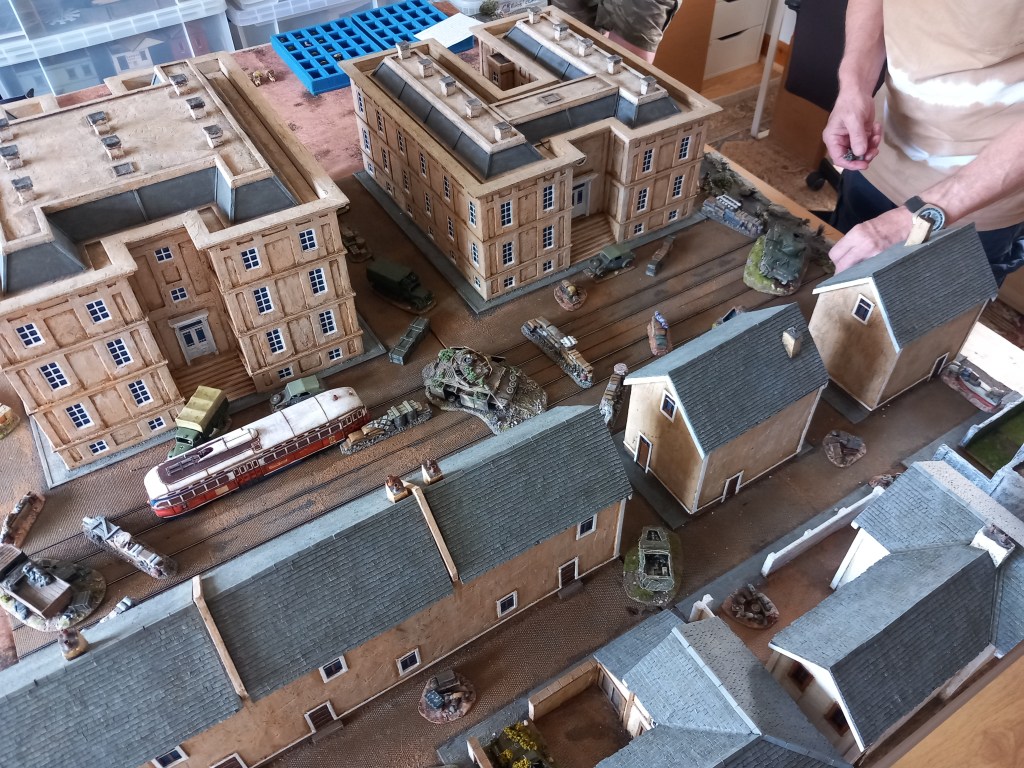
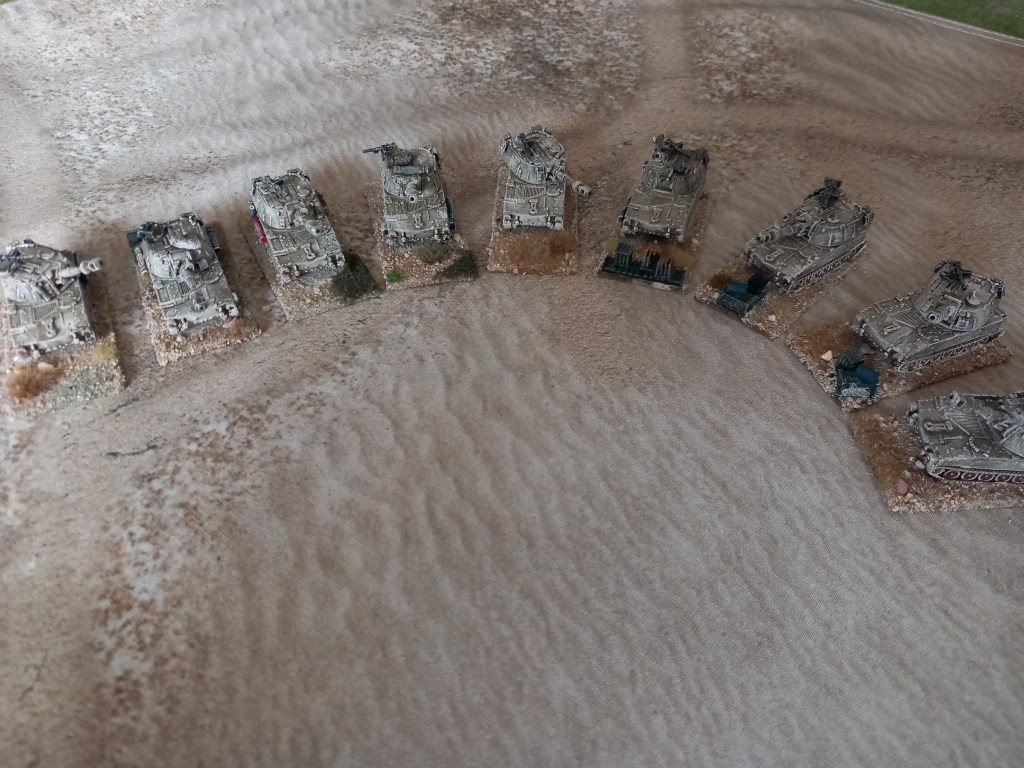
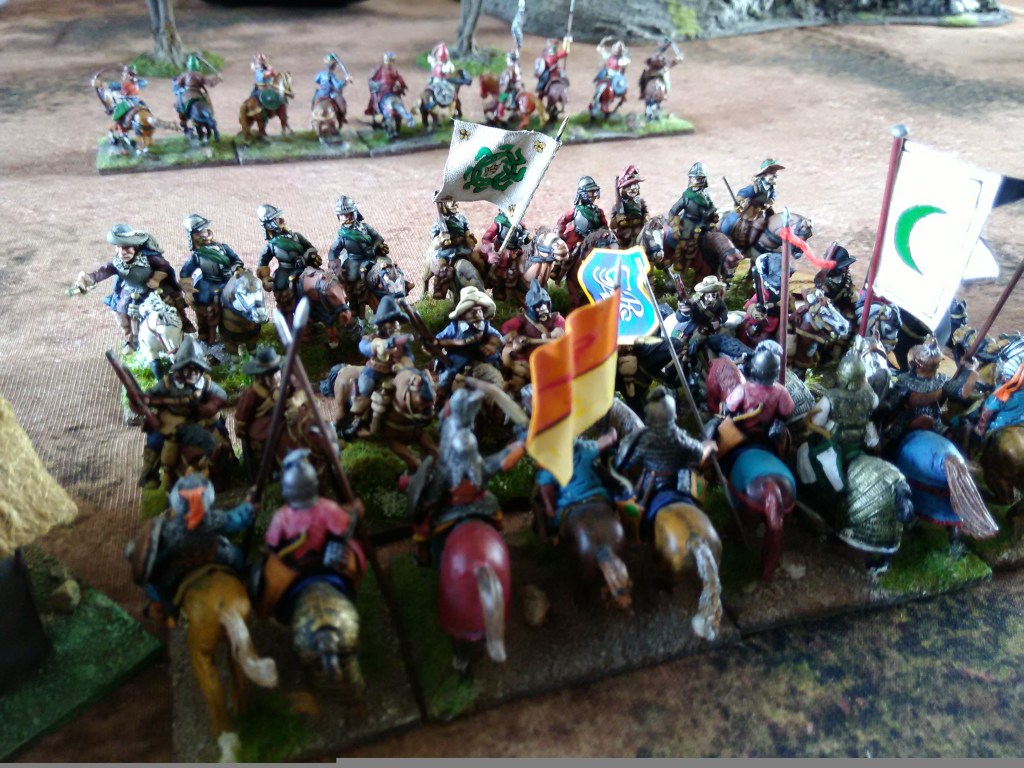
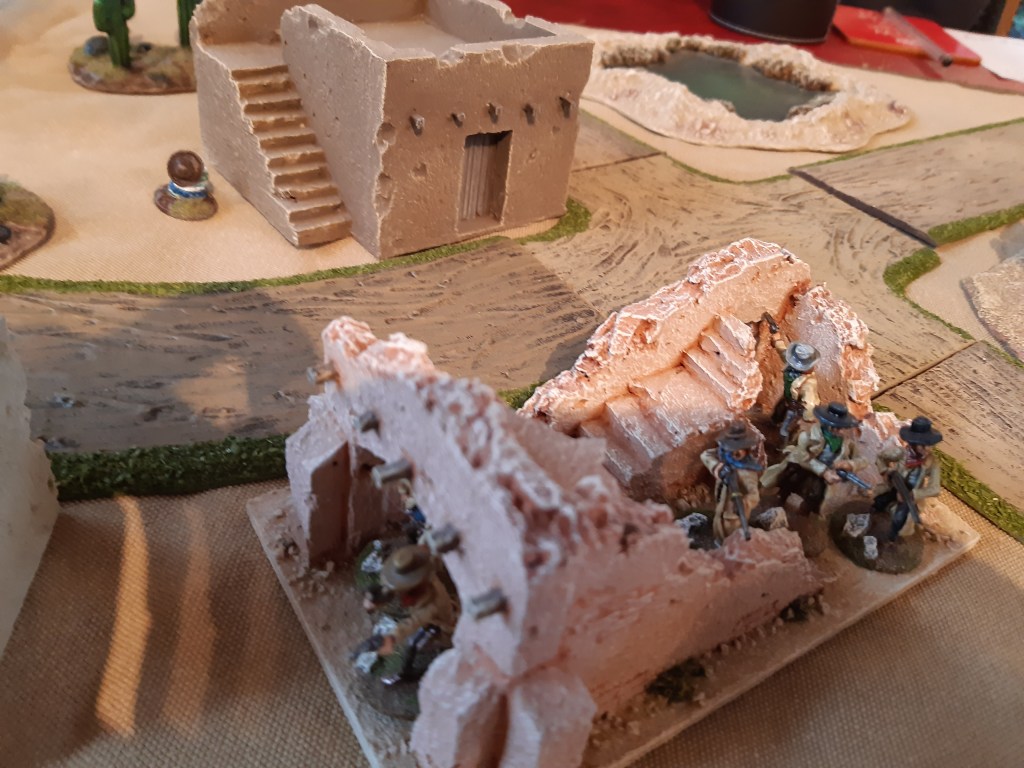
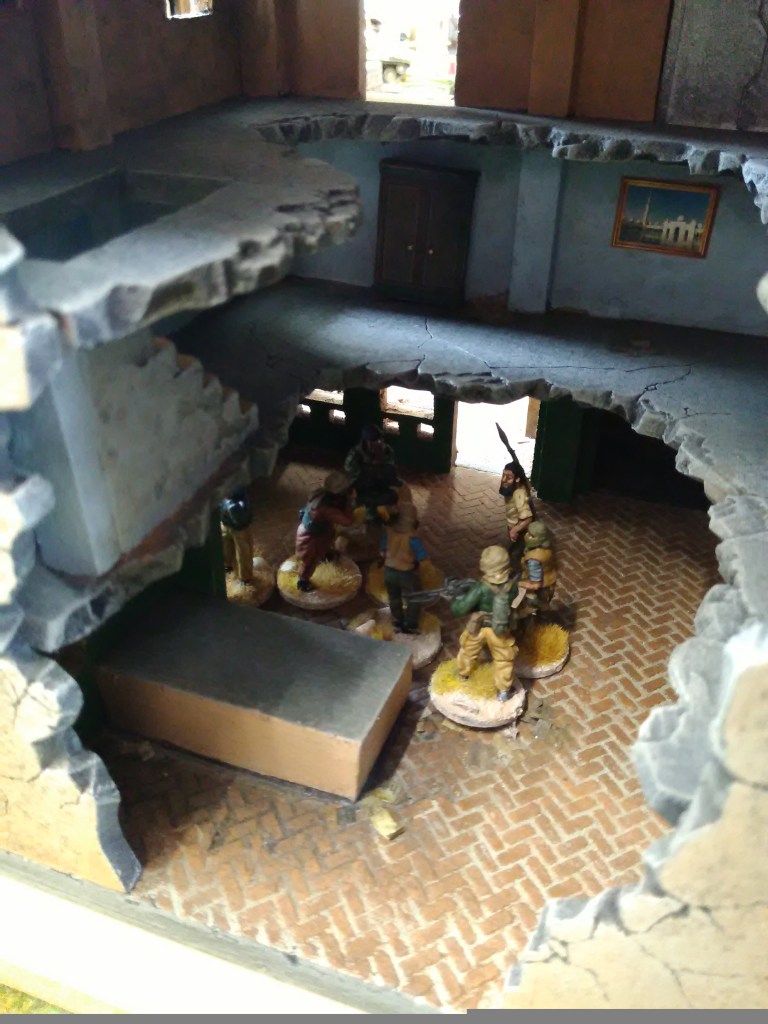
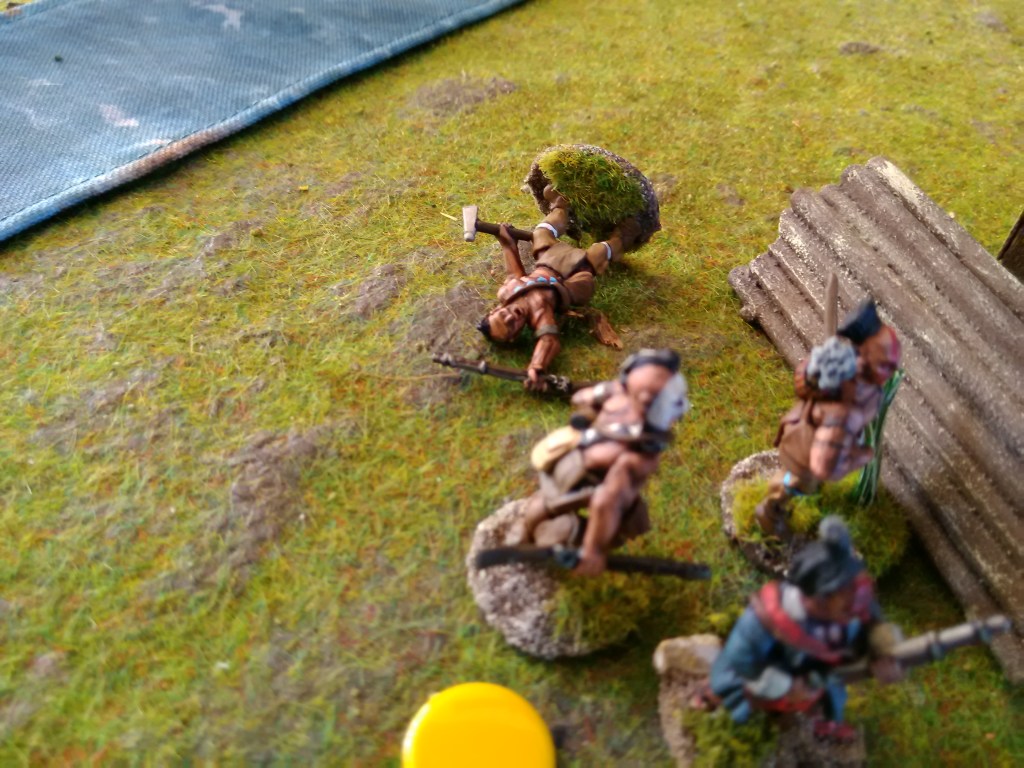
Final game was an away day with some once every now and then local gamers, this time a mass modern skirmish somewhere in a fictional African state.

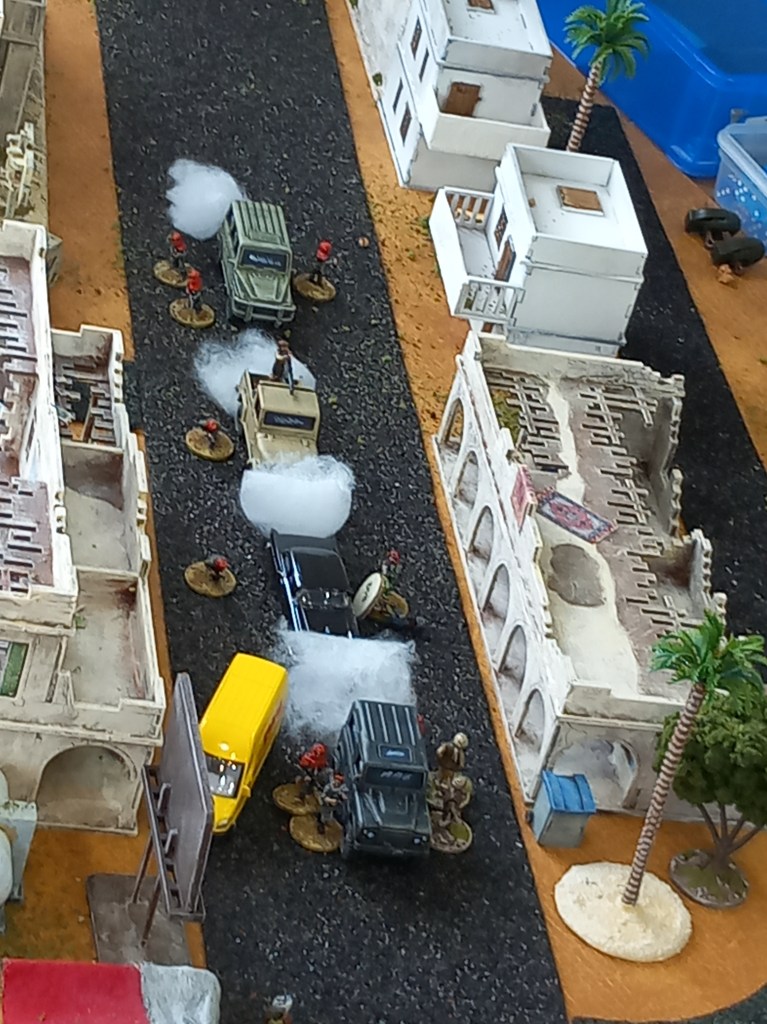
The rules were Wars of Insurgency. Simple and effective, these aren’t designed for detailed play or catering for weapon differences and for the scale of game we were doing worked perfectly ok.

The game essentially revolved around stopping or assisting the President getting to the airport and/or killing him. He survived despite the best efforts of 6 different factions. Dice were rolled, beer was drunk, sometimes that’s all you want ๐Ÿ˜€

So another month draws to a close, Holidays next month so the volume of games might be down a bit but a report will follow as always. Thanks for reading and have a good June.

February 2025 Report

Well here we are, February been and gone but thankfully the games keep flowing.

Our first game was another from our Iran Iraq collection. In this one we did a version of the opening days of the war when the Iranian 283rd Armoured Cavalry battalion, comprised of Scorpions and M150’s, held off the best part of an Iraqi division for a couple of days.

For our engagement the Iranians started with a company of Scorpion light tanks, a company of M150’s – M113’s with TOW’s, and a company of M113 mounted infantry which were dug in and around the town of Karoun. An attack helicopter was on call via an FAC. Reinforcements in the guise of a mechanised infantry battalion, a Chieftain battalion and some off table artillery, were available once the fighting started subject to contact being made.

The Iraqis were deployed south of the Iranian position and comprised a full mechanised infantry brigade and a full armoured brigade plus an FAO with access to off table artillery. Their objective was the simple historical one, crush all opposition and advance towards Khoramshahr.

The Iraqis advanced on a broad front planning to overwhelm the Iranians by the sheer weight of their armour.

Historically the TOWs were very effective and they certainly were in the game, outranging the older Soviet armour used by the Iraqis and destroying them with ease.

The Iranians were also very fortunate with their communication roles and the off table rocket battery scored a devastating success early in the game.

In an effort to avoid the devastation of the TOW’s the Iraqis went on wide sweeping movements which did have the desired effect but also meant it took them longer to get into range.

Just as the Iraqis thought they might carry the town the Chieftains arrived and hearts sank – we’ve played enough games now to know that these dammed things are pretty much invincible ๐Ÿ˜

Suffice to say the town was held and the Iraqis suffered catastrophic losses.

We always have a wash up at the end of the session especially when one side has had their arse handed to them. Was it the rules, was it the players, was it the scenario? The TOWs are certainly powerful in the rules – Cold War Commander, but when you do the reading they brewed up dozens of tanks with less vehicles, scale wise, than we used – our 3 models represented around 9 of the real thing. From a scenario perspective I think I over egged the Iranian pudding a little because I feared it would be a walk over and we would be packing away in an hour ๐Ÿ˜‚ the game could probably have played just as well and perhaps been a little bit more of a nail biter without the Iranian reinforcements. Lesson learnt.

Our next foray was the familiar ground of the Successors but on this occasion we mixed it up a bit by deploying Republican Romans so we had Pyrrhus take on a consular army.

Now there is a bit of a story around this expansion of our period. When I wrote the rules I very specifically avoided taking it to the end of the dynasties at the hands of the Romans because A) it’s another army to do a list for and once you’ve done them do you do Carthaginians, and then…. and B) Republican Romans are notoriously difficult to represent – I’ve never come across a rules set that achieves it satisfactorily unless you go to such a helicopter view that the intricacies just don’t matter. However Dave started painting Romans because “I had some of the plastics knocking around” – what! several hundred plastics just knocking around ๐Ÿ™„

Suffice to say, the figures got done (and they do look lovely) and so I put together a single sheet of amendments to the rules to enable us to play something that maybe is a bit like the real contest as best we can decipher from the sources. As I said above I still haven’t come across a set of rules that represents the difference fully.

Anyway. Pyrrhus deployed in a classic manner, pikes across the centre, mercenary hoplites on the flanks, an elephant squadron to protect one flank and a few cavalry to protect the other. The Romans deployed 3 Legions, 2 Latin, 1 Roman, each Legion with separate (but connected) units of Velites, Hastati, Principes & Triarii, cavalry on the wings.

As always the initial action was on the wings where on one flank the Romans killed the elephant and then ran into the veteran pikes and died horribly and on the other where the cavalry on cavalry fight saw the Roman commander killed and that command halt paralysed.

In the centre we got what we wanted, pikes v pilum and the combat did sway back and forth a bit but the depth of the pike blocks and the fact that they were pikes won the day for Pyrrhus although the death of the consul acting as army general and the consul commanding the Latins probably did help a bit ๐Ÿ™‚

And that was it or should have been and I think this is worth noting as a lesson in sticking to your guns. Unfortunately one our Roman players got a little over excited about the loss, taking the stance that it was a bad game because the Romans lost; a point of view I think that comes from the popularisation of the idea that the Romans were forever invincible and therefore should never lose. The fact that Pyrrhus won all 3 battles he fought and that later Roman victories were against empires in decline and on unsuitable ground were lost in the debate.

For me the rather heated discussion demonstrated the rightness of sticking to what you know you’ve written a set of rules for and not something else. That said the amendments gave us a game, tempers cooled and seeing as we’ve got some very nicely painted Romans in the collection I’m now looking at version 2 of the amendments.

Our next foray was into the Thirty Years War using Gerard’s 15mm collection to re-fight Lutzen using the Tilly’s Very Bad Day rules.

We’ve only played these as a group once before and then not all of us so this was a bit of a steep learning curve.

The armies were laid out as per the historical affair with some caveats for differing the dispositions and then we had at it. Fairly obviously it was the Swedes who were doing all the heavy lifting, all the Imperialists had to do was sit back and wait behind the ditch and hope Piccolomini turned up.

As can be seen, you are playing at a higher level of command than say a typical 28mm game, here a stand represents a cavalry regiment or an infantry brigade, there are no losses to remove just a steady wearing down to record.

In terms of the history the Swedes didn’t do quite so well. At the ditch the infantry just couldn’t make it across and by the end of the game were well and truly stuck.

On the Swedish left, Bernard and his Saxons seemed to have the odds well and truly in their favour, their cavalry were more numerous, there was a gap to be exploited but it just didn’t come together, call it bad dice rolling, call it the random nature of the combat, the fact was the command was destroyed and Bernard killed. Done.

On the Swedish right it was all very historical, the Swedish cavalry pushed on over the ditch and were clearly in the ascendancy but just needed that final push (an extra dice for a commander in the melee). So in went Gustavus and just like that he was dead! The only consolation to the Swedish players was that Holk died in the same melee.

And really that was it. Two commanders dead and an infantry battle going nowhere, the Swedes were definitively defeated.

I’m really not sure what I think of the rules. On the plus side it’s not often you can fight a battle like Lutzen to a close in a few hours and come away thinking “well that seemed something like the history” and it not have been a massive headache inducing exercise. Also when standing back there was an element of looking at those C17th engravings that accompanied so many early publications on the period. On the negative side it did feel a bit artificial, almost like a board game, all the units look and act the same, there is no visible reduction in strength because there is no concept of figure removal and it is somewhat mechanistic. I realise of course that a lot of that is to do with my wargaming journey, I’ve always played 25/28mm (big and small games), figure removal is very much a part of that tradition and in most of those games you are down with the troops and not looking above them. That said I would like to play more of the period using the rules and just try and get over my prejudices.

A quirky interlude was an away game with a few of the guys in the wider Coventry area for an ancient skirmish game using the one hour wargame rules published by Helion (I think). Probably the worst set of rules I have ever played in my wargaming life and that is a long time. A deck of cards a few figures; everything decided by the random draw of a card from the deck, no period atmosphere, no skill, no fun.

Our final effort was a 6mm cold war gone hot game using Cold War Commander.

The scenario was a riff on the scenario in Jim Storr’s ‘Battlegroup’ whereby the the Soviet Third Shock Army breaches the IDB and British & Bundeswehr divisions respond. Perforce our encounter was a little smaller so we had a Panzer Brigade taking on a Soviet Tank Regiment in a race for the bridges over the River Oker.

This was one of those games where as the scenario designer you are a couple of moves in and you are thinking ‘this just isn’t going to work’ which was exactly what one of the other players was thinking (he later confessed), then about half way through it actually came to life. Phew.

Apologies for the flying Leopard ๐Ÿ˜Because the armour could only cross the river via the suspension bridge this meant that the early phases of the game was both sides shooting across the river particularly as most of their ATGW couldn’t fire over water.

But in a bold move the Bundeswehr player stormed the suspension bridge (see previous photo) and the game changed. The Soviet flank was turned so they were scrambling all their battalions to face off to the Germans and the surprised Germans (I don’t think they thought the attack would really work) were throwing everything towards the bridge.

Annoyingly we didn’t get the game finished – a rare event these days but we agreed the Germans had probably shaded it based on losses sustained by the Soviets so far. Not completely satisfying but we learnt a couple more things in the rules we hadn’t realised were there or we just hadn’t tried so silver linings.

On the painting front I got the Iraqi support elements done so hopefully they’ll see the tabletop soon.

I got some rural built up areas done for the 6mm cold war. I was really pleased with these.

More rural delights ๐Ÿ˜€

Some military bridges got done.

And some railway lines.

And that’s it. Thanks for reading and enjoy your gaming.

January 2025 Report

Bloody hell January has gone! A better month than I thought it would be what with post Christmas & New Year activities to deal with so here are our efforts for the month.

First up was a game from our Reconquista/El Cid project which is progressing rather well.

In this one we had Christian Spanish v Moslem Andalusians, an ‘equal points’ game rather than a scenario driven game – it’s easy to deride ‘points games’ but if you are trying to formulate a set of rule mechanisms that work then this does give a level playing field to work from.

Our terrain was a line of ridges with a stream just behind running east to west, emerging from the hills and ending at one table edge, the ground opposite was fairly open.

As it was the beginning of the month our numbers were low so we actually played the game twice with different players. Strangely both sets of players chose almost exactly the same set up with no knowledge of the previous player choices.

The Moslem forces chose the ground behind the stream & ridge line and in the first game deployed their spearmen covered by skirmishers out of sight behind the hills, in the second they deployed the infantry on the left hoping to move to the stream and deny a crossing to the Christians. With their cavalry; in the first game they deployed their jinettes and two units of retainers on the left and their nobles and two other units on the right, in the second game the jinettes were behind the ridge line and all the cavalry on the right.

In both games the Christians deployed their infantry in the centre – militia spear and militia crossbows screened by skirmishing slingers and bowmen while on the right their caballeros (retainer cavalry) were deployed and on the left the military orders and noble cavalry.

In the first game it was all about the cavalry. On the Christian left the nobles and military orders swept away the opposing nobles and retainers and on their right fought a tougher but ultimately successful series of melees which saw that Moslem flank also collapse. In the centre the Moslem infantry gained the ridgeline and held off the Christian centre but with both flanks swept away it was a clear Christian victory.

In the second game it was a much more even handed contest. The attack of the caballeros at the stream was met by the spearmen who defended the stream with tenacity and despite the the caballeros forcing their way over at one point their losses were too much and they fell back. On the Christian left the veterans and military orders were met by more numerous opposition and a couple of decent class noble units which ultimately proved decisive and the Christians fled with severe losses. In the centre the Christian infantry gained the ridgeline with little hindrance but so what? and in fact the overspill of Moslem cavalry from the Andalusian right started to cause problems for the crossbowmen, one unit of which was ridden down. So with the stream held and the best Christian units seen off an Andalusian victory was declared.

Although two games of the same scenario is not really our thing this did in fact prove very useful in that we were able to prove out the last rules mods and now have something that will see us through some consistent play. The particularly positive outcome was that we now feel confident enough to do the game at the next Partizan so come and have a look if you are there.

Our next effort was a step back in time and a re-fight – the battle of Panium, 201BC.

I knew nothing of this battle until one of the guys pointed out the recent article in Wargames Soldiers & Strategy by Mark Backhouse. As it featured later Successors (Ptolemaics & Seleucids) it talked to one of our loves and as we had just finished up some more cataphracts it seemed very serendipitous!

If you want a detailed read then turn to Mark’s article or if you fancy yourself as a scholar dig out Polybius Book 16 but I warn you it is just as confusing as Mark says! A precis of the battle is as follows; the Seleucids deployed with their cataphracts on the right stationed on Mount Hermon, the centre was the usual array of pikes covered by skirmishing infantry & cavalry plus elephants and the left was a smaller cavalry force; the Ptolemaics were weak in cavalry and so deployed limited numbers on both flanks but had a strong infantry centre of pike & Thracians screened by numerous skirmishers. The Seleucids opened the battle with a furious charge of the cataphracts off the hill which swept away the opposition, seeing this the Ptolemaics pressed the attack in the centre and seemed to have gained the upper hand but the victorious cataphracts returned and enveloped the Ptolemaic left at the same time as the Seleucid left turned in on the Ptolemaic right and the game was up.

Our refight used the order of battle presented by Mark, translated into our rules and lists which came out as follows: On the Seleucid right, 3 x cataphracts under Antiochus the Younger, in the centre, under Antiochus the Great, 4 x pike (including the elite silver shields) screened by a unit of Cretan bow and a unit of Tarentine light horse with 5 x elephants placed at intervals between the pike, on the left a single unit of Agema heavy cavalry and a unit of local formed cavalry under Nicarchus (conjectural). On the Ptolemaic left was 2 x formed cavalry under Ptolemy, in the centre 6 x pike, and a unit of Thracians screened by 4 units of skirmishers of varying quality and out on the right the overall commander, Scopas, with a single unit of Agema cavalry.

Our refight was a classic example of how wargamers can break the historical narrative and the reason why we play.

As is always the case with these kind of games it’s all about the cavalry to start with. On the Seleucid right the cataphracts lumbered off the hill (hardly a furious charge ๐Ÿ˜‚) but the Ptolemaics got the initiative when it came to contact and got in first precipitating a drawn out melee which ultimately saw the one unit of cataphracts fleeing. Fast forwarding, this flank then devolved into the other Ptolemaic unit being routed by it’s opposing cataphracts and the the third cataphract unit advancing to the Ptolemaic camp and begin looting. On the other cavalry flank the clash of the Agema resulted in the destruction of the Seleucid version and their supporting cavalry was shot down by Ptolemaic skirmishers, the Ptolemaic Agema however was in no state do do anything further.

In the centre we got to do the thing we love, shove long pointy sticks at each other ๐Ÿคฃ

Both sides advanced steadily and in the initial missile exchanges the Seleucid Tarentines were quickly eliminated. The Ptolemaic levy skirmishers who made up half the total performed surprisingly well which demonstrated that crap troops can do well enough if not overly threatened. The Seleucid elephants had a good start when being used as a shooting platform and assisted in the destruction of the enemy Aetolian javelin men.

Once troops started to close then it became more hard core. The elephants had to start earning their keep and that was a bit of mixed bag. Two elephants (well squadrons) got stuck in with the veteran Ptolemaic pike and paid the ultimate price although it did slow those units down and broke up the nice neat lines. Unusually only one unit panicked and of course that ran into it’s own pike effectively pinning that unit, the other two essentially hung around never quite getting the courage up to get stuck in – well who would!

The battle of the pike battalions went pleasingly well from a game point of view but the Seleucids were having a far harder time of it than their historical prototypes. The Silver Shields destroyed the Thracians, great for them but probably a poor use of an elite unit. Further Seleucid success saw the rout of one levied pike and one mercenary pike on the Ptolemaic side with the loss of only one mercenary pike on the Seleucid side.

As we reached the prescribed number of turns assigned for the game it was clear a Seleucid victory had been obtained. The Ptolemaic camp was looted and so the focal point for rallying was lost and they had more units in the wind. Not the decisive victory of history but a dammed good game.

A bit of a sidebar note, I did speak to Mark about doing a write up of the game as a follow on from his article to offer a bit of a different perspective from his own rules but he advised that WS&S policy wasn’t to publish battle reports. Their loss your gain ๐Ÿ˜‰

Up next was another Cold War Commander this time with our growing 6mm collection, both in terms of hardware but also the terrain, I think we have made some serious progress ๐Ÿ™‚

We opted for the ‘Battle of Attrition’ scenario from the rules which is exactly that, kill more of the opposition than they kill of you within a fixed number of game turns.

Given that both sides start in fixed positions, somewhat randomised by the roll of the dice, this is a bit of a cat and mouse game and on reflection I’m not convinced of its historical veracity.

Regardless, both sides manoeuvred to try and get the advantage, the Soviets to use their superior numbers and the potentially devastating Hinds with their onboard ATGW arsenal, the Bundeswehr to get the best out of the superior range and superior armour of the Leopard 2’s.

The vulnerability of the Soviet armour was demonstrated several times although in fairness presenting your flank to enemy fire does tend to result in disaster ๐Ÿคฃ๐Ÿ˜‚

Ultimately the game was a NATO (Bundeswehr) victory but probably not one of our more satisfying games. The rules, like any set of rules, have bits where you go “really?” but I think it was the scenario that was a bit self defeating, more of a narrative game next time I think.

By way of a complete change our next effort was a Viking skirmish, two roving/allied bands out to loot a rival settlement getting ready for winter.

The raiding bands had the rather obvious objective of obtaining loot, ranging from livestock to hidden wealth, the settled Vikings the objective of seeing off the raiders and killing enough for them not to try again. Forces were positioned randomly on the board.

The raiders approached from the north and the east under Eanmund and Halfdane respectively. Eanmund headed for the isolated smithy to start while Halfdane skulked around the vegetable patches.

The village guard dogs were completely useless and it was complete luck that one of Hygellac’s crew saw Eanmund’s band at the smithy. Horns were sounded, to battle!

The game quickly became the battle for the smithy – not quite Beowulf level but hey ho ๐Ÿ˜†

The ‘battle’ eventually sucked in Hrothgar’s band from within the village and a lopsided fight saw Eanmund fleeing the scene bleeding from his wounds, his armour rent and his sword notched.

But what of Halfdane and his band I hear you ask? Well, with the guard dogs having wandered off and Hrothgar having heeded the call of the horn it was time for some easy looting.

In fact Halfdane was the clear winner, livestock taken and some of the lesser valuables looted, a fine day out ๐Ÿ˜„

Next up, Italian Wars, Florentine and Venetians squabbling about real estate in Mantua.

Both sides fielded pretty large forces. The Florentines were strong in militia crossbows & pike supported by mercenary condottierre and mounted crossbows. The Venetians slightly outmatched the Florentines in cavalry and did have the better quality Lanze Spezzate while their infantry was a more eclectic mix of professional crossbowmen and mercenary pike & crossbows. Both sides had a smattering of skirmish horse.

Both sides deployed their battle cavalry on the right flank, the Venetians screened by a wood and the Florentines planning to use the town to anchor their flank. Given the number of crossbows in their army the Florentines strung them out in one long line hoping to get the best out of their firepower, the pikes they deployed on the right centre. The Venetians had deployed their Provisionati (professional crossbow) opposite the Florentine condottiere so their plan automatically became shoot the heavy guys before they ride you down, the mercenary pike and crossbows were deployed in the centre. Both sides had formed units of crossbow cavalry, so not skirmishers, which they deployed on the flanks – history tells us there were thousands of these guys and generally ineffective they were too.

The initial aggression was shown by the Florentines who got their condottierre moving (after a bit of persuasion) in the direction of the Provisionati.

To fast forward a bit the Florentine condottiere weathered the storm of crossbow bolts that met them and ultimately swept away the Provisionati which ended the participation of both combatants for the game.

In the centre we had general disappointment, despite some fairly effective skirmishing neither side could get their pikemen to get stuck in. A mix of poor dice rolling and low rated captains meant that all they did was stand and stare – we did have a discussion about this and although not completely satisfying from a gaming perspective we had to acknowledge that historically these units weren’t that effective in the field.

The game was lost on the Venetian right. The cavalry block advanced late from behind the wood and ran into crossbow fire from the Florentine crossbows on this flank but it wasn’t the casualties that stopped them it was the death of two captains that stymied the advance and led to more casualties and ultimately morale failure.

With the centre deadlocked but the Venetian right stuck and the left lost we gave the victory to the Florentines.

Our final effort of the month was a refight of the battle of Vimeiro 1808 using Command and Colours in 15mm.

My understanding of Vimeiro is that Wellesley, with slightly superior numbers, defended his position at Vimeiro and the adjacent ridge against several uncoordinated attacks by the French under Junot and drove them off with significant losses and ended the French intervention in Portugal.

For our refight the troops were set out as per the historical prototype using the map supplied with the rules.

Being coordinated or otherwise is rather at the discretion of the cards drawn and the playing of them.

In the centre and right the British attempted to get as many units in and around the village of Vimeiro as the cards would allow as well as trying to wear down the French attackers.

On the British/Portuguese left there were a series of moves and counter moves with the French as each tried to seize a village I’ve forgotten the name of and was in fact completely unimportant.

The game was won in the centre where the British just couldn’t get enough troops around Vimeiro to defend it and the French didn’t obligingly launch piecemeal attacks. Conclusive French victory.

I’ll freely admit the rules don’t really do it for me, the card thing is just too abstract and the use of a unique dice mechanism too random. That said though the rest of the group are all Napoleonic fans and there are plenty of battles to fight so we will continue to feature these in our play.

Well that’s it I reckon, not much done on the painting scene although this Iranian armoured recon battalion did get finished along with some road sections, most of the month has been spent on terrain items for the 6mm. So, signing off, please feel free to comment and look forward to posting in a months time.

June 2024 Report

A bit of a thin month, holidays and shift patterns rather curtailing our activities, but hey, there are plenty of people out there who dream of having idle time on their hands to indulge their hobbies ๐Ÿ˜Ÿ

Our first foray was the ever growing and ever popular 10mm Iran Iraq project. For this one we had an Iranian town seized by a heli borne Iraqi commando force and reinforcements on their way – all controlled by the Umpire. The players were commanders in the 37th Armoured brigade scrambling forces together to re-take the town so they were given a list of force & points values from which each could assemble his battlegroup to a capped points total – this was all CWC and each battlegroup was 2000 points.

The Iranians chose a tank battalion each (of course!) and then one added a mechanised infantry battalion and the other an armoured artillery battalion – M109’s. Both deployed on their table edge and we set too.

The game was fast and furious with the Iraqis throwing their reinforcements in as soon as they arrived which meant their mechanised infantry were taking on tanks!

In a game that featured SU22’s missing their target, Hinds brewing up tanks, BMP1’s being on the wrong side of a tank duel and an Iranian command element being eliminated – really, really lucky dice ๐Ÿคฃ we had an exciting see saw game that finally ended with the Iraqi command failing its break point roll and retiring from the table.

This went well and the idea of giving the players a limited roster to choose from gave them more of a sense of ownership, definitely going to try this idea again although of course I now need to paint more stuff to offer more choice ๐Ÿคฃ

Our next outing was the equally popular Successors project, this time Royal Ptolemaic v Imperial Seleucid so scythed chariots, elephants, wild Galatians, Thracians, camels and of course pikes.

The armies were pre chosen and the terrain laid out – we actually had terrain! The Ptolemaic commander deployed all his foot on the left extending in an unbroken line up to the centre, his cavalry he split into two commands, one led by the army general in column on a road heading toward the Seleucid left via a ford with the intent of turning the Seleucid flank and the other, comprising the settler cavalry, deployed slightly back and facing forward which would join up with the infantry line as it advanced – none of this worked ๐Ÿ˜ฅ The Seleucids deployed more traditionally with the pikes in the centre flanked by the Thracians and Galatians and two cavalry commands on each far flank.

Early moves favoured the Ptolemaics, their advance to the ford went well, the infantry advance proceeded as planned. The Seleucids were caught on the hop a bit by the rush for the ford so had to redeploy their cavalry command to counter it but their other cavalry command sensed opportunity as the Ptolemaic infantry had no cavalry to protect the infantry line.

On the Seleucid right the commander launched his elephants and chariots into the attack dreaming of spoils and booty. However, just like history, the chariots were bloody useless ๐Ÿคฃ but they were certainly pretty and absolutely a pain in the arse when they crashed and created an obstacle. The elephants however fared better seeing off the opposing elephant and pinning one of the pike which effectively broke up the Ptolemaic line.

Back at the ford all kinds of fun was had as both sides threw troops into the fray “and the water ran red with the blood of the slain”. Eventually the Seleucids pushed the Ptolemaics back towards their camp but the victory would be decided elsewhere.

It was the centre infantry clash that decided the day. Despite being outnumbered in pikes the Seleucids gained a crushing victory; in part this was due to one of the Ptolemaic pike battalions getting distracted by elephants and in part due to the settler cavalry getting tangled up with the Thracians and so unable to help, but the real fun was the Galatians being able to charge just at the right moment onto already engaged pikes tumbling them into rout.

It really was a crushing Seleucid victory and a fine game.

Final effort was a WWII skirmish on our Dave Marshall cityscape which hasn’t seen the light of day for over a year.

American GI’s tasked with clearing the last vestiges of resistance from the next city on the way to Berlin.

Grenades were thrown, snipers open fire, lmg’s rattled from windows, resistance was tough.

Grit and determination saw the GI’s through and the allied advance continued.

The only painting completed was another battalion of Iranian infantry for the 10mm project – more choice for the next game ๐Ÿ˜‰

So that’s it. Keep well and see you in July.

January 2024 Report

The first month of a new year, which will probably be much like the last year and that’s fine by me! No New Year Resolutions or anything like that but I have promised myself a revamp of the games room and with that the clearing out of figures, terrain, books, magazines and rule sets which just aren’t being used, I think the Scandinavians call it ‘death cleaning’ ๐Ÿ˜„ Anyway, without further ado, on with this month’s events.

First out of the gate was a group favourite, Successors. This time we staged a Western Satrap army under Asander against the might of the Imperial army under Perdiccas. For a bit of a change we had a crossable stream snaking across part of the battlefield with a temple on one of it’s banks.

The Imperial army had all the good stuff; 3 units of Hetairoi, the Hypaspists, Pezhatairoi, 3 units of phalangites, Cretans, Agrianians, elephants and some lesser skirmishers, they also had a unit of Pantodapoi but the General sensibly relegated them to guarding the camp right out on a flank beyond the stream.

The Satrap army was a more numerous but more varied in quality; the cavalry featured 3 units of Satrap formed cavalry screened by units of light horse and a lone Xystophoroi unit, the foot had two units of phalangites supported by 2 units of Thracians, 2 blocks of Hoplites and 3 units of Pisidian peltasts all screened by variously armed psiloi.

Deployment revealed that Perdiccas had cunningly positioned all his pike on his right flank with it’s left anchored on the stream which meant that the more traditionally deployed Satrap cavalry were staring straight into a mass of pikes ๐Ÿ˜ฎ. The Imperial cavalry, supported by the elephants, were deployed in the centre, more or less lined up facing the opposing peltasts. The Satrap players curiously placed their hoplites off to the right, behind the stream facing the temple, which rather rendered them useless for the course of the game.

The Imperial plan was simple; power across the battlefield with the elite cavalry and sweep away the peltasts and Thracians while the massed pikes trundled forward and crushed anything in its way. The Satrap players had gone for a thin linear deployment which did not help their cause in the long run and kind of boxed themselves in to a purely response tactic.

As the game got under way it was the Imperial centre which saw the first action and it didn’t really go according to plan because the sheer weight of missile fire from the opposition (everyone had a javelin ๐Ÿ˜) saw both the elephants lose their mahouts and panic across the front and then ultimately die while one of the Hetairoi was destroyed and the other two ran off and had to be rallied further back – so much for the soft centre ๐Ÿ˜‚.

On the Satrap left the cavalry went full on suicide run and got duly duffed up by the pike juggernaut and their tattered remnants fled, never to be rallied.

The Xystophoroi tried to rescue the Satrap left but the Hypaspists ate them for breakfast. The Satrapal left no longer existed and the pikes headed for the Thracians.

As can be seen the Thracians didn’t last long either and then one of the Satrap commanders inconveniently dropped dead and his division was paralysed.

It was all bad news now for the Satrap army, routs are contagious and the big bad pikes were now swinging in, time to call it a day and leave Perdicass in charge ๐Ÿ˜€.

Our next foray was the new kid on the block, and my personal favourite currently, the 10mm Iran Iraq project; this time on our brand new Tiny Wargames desert mat.

Trying to have a bit of a narrative rather than just going bang bang we had elements of the Iranian 165th Mechanised Infantry scattered along a thinly held front trying to protect the M6 highway from advancing Iraqi armour while awaiting the arrival of the 232nd tank battalion to bolster their lines. The Iraqi 26th armoured battalion and the 7th armoured battalion could enter the battle area from anywhere along their tactical edge and had only one objective, secure the highway. Both sides had off table artillery, the Iranians had the slight advantage that their FAO was already on elevated ground overlooking the highway.

Well aware of the weakness of their T54/T55’s the Iraqis fanned out and tried to get up close before the dreaded Iranian Chieftains could arrive. PS. this failed ๐Ÿ˜‚.

The T62’s of the 7th armoured opted to roar up the metalled road that joined the highway, maybe this would work?

Well in the time honoured tradition the Chieftains shot the T55’s to pieces with no loss to themselves although this was made slightly easier by the Iraqi player inexplicably leaving one company of tanks lingering at the back – “well at least it didn’t get destroyed” was the response when asked why.

Not surprisingly the Iranians prevented the highway from falling into enemy hands but this was rather helped by the holding back of one tank company and the T62 column just roaring up the road and then just stopping to shell a village with the lead tank. What was noteworthy was the utter uselessness of both sides artillery targeting, they literally couldn’t hit a barn door between them ๐Ÿคฃ๐Ÿ˜‚.

Our next game was from our GNW collection, this time a Swedish attack on a Danish force.

This was a pretty bloody affair – mainly Danish blood I’m afraid.

Both sides deployed fairly traditionally, two cavalry wing and an infantry centre each, the Danes had the slight advantage of a farm enclosure they could defend.

The early moves were all about the cavalry and featured the Swedes charging into the Danes with their traditional gusto and the Danes repulsing the first wave but the Swedes could better absorb casualties and so when the second wave went in the Danish wings collapsed.

The Swedish infantry attack on the farm was held and settled into a long running musketry duel which the Swedes would ultimately win but it would be a long time coming.

The shocking event and the one that sealed the game was the charge of two brigades of Swedish cavalry on the large Danish Guards brigade. The Guards barely put up and fight and collapsed almost immediately, it really shouldn’t have happened but a couple of minor tactical errors and some appalling dice throwing ended the game in shocked silence.

Next was good old Italian Wars, a period we have gamed for some 30 years now ๐Ÿ˜ฎ.

For this one we had a Spanish Imperial army attacking a road between two walled towns which is defended by a Venetian force,

Despite the presence of cavalry on both sides this was much more of an infantry fight and so it took longer for the armies to close which rather favoured the Venetians who could slowly wear down the Spanish with long range crossbow fire.

The one bit of cavalry action that there was saw the Burgundian men at arms in the Spanish army drive some Mantuan mercenaries from a breached wall and then mix it up with the largely supine Venetian cavalry beyond the wall.

Unfortunately for the Burgundians the pathetic Venetian cavalry response did hold them up long enough for the Romagnol pike to redeploy and attack the cavalry in the flank and eventually cut them down.

The real action however was the attack of the Spanish pike colunella who swept the opposition from one part of the wall and broke through but further down the wall the colunella there stopped after its captain was slain and would proceed no further.

The attack of the colunella was the keystone of the Spanish attack plan and the faltering of the one meant that despite the success elsewhere it was not enough and the Venetians rightly claimed victory.

Our next game was a Napoleonic skirmish away game with one English and one Scottish company attempting to get to a bridge before it was blown by the French, the only thing in their way was a thin force of Irish in French service.

Quite frankly there was no way the British were going to get to the bridge in time (the French increased their percentage chance of blowing the bridge by 10% per turn played and the British were more than 10 turns away.

The bridge duly blew but plenty of fun was had ๐Ÿ˜€.

Our final game of the month was another Victory at Sea encounter set once again in the Pacific. This time we had a pair of enlarged fleets (Gerard was busy painting over the Christmas break) both featuring an aircraft carrier and the name of the game was don’t let your carrier get sunk.

For the first time we used the aircraft rules, which are simple but effective, and they certainly added a different tactical nuance to the game.

Ships on both sides were sunk with all hands but both players managed to protect the ‘mother ship’ – more by luck than judgement, with only the US player getting any hits in at all.

A points tally at the end gave a marginal victory to the US player but the practical reality was a draw.

In other news we had the incredibly exploding elephant! As you can see, uncured resin forced its way out and split the model catastrophically ๐Ÿ˜ญ which was bloody annoying.

On the down side, we bought 6 of these models from the manufacturer before he realised the problem (no vent hole) and 2 have gone so far which means replacing them and re-painting – Dave cried. On the plus side, said manufacturer acknowledged responsibility and has replaced the 2 dead elephants and will replace the others when they burst (if they do I guess?).

Painted some more 10mm for the collection, this time M109’s for Iran. Pretty sure I’ve done more than is needed but I’m having such fun doing them.

Nothing much else to report, the last few days have been spent starting the games room clear-out and the first week of February will probably be a bust in terms of gaming but hopefully back on track after that. In the meantime, play nice and I’ll see you in February.

April 2023 Report

Back from holiday we were into a multi command GNW game which saw two fairly evenly matched sides slug it out over a convivial afternoon of gaming.

The Russians deployed with half of their cavalry behind a stream on their right supported by a foot brigade and the rest in the centre hoping to use a patch of wooded scrub as an area where they could deploy their other cavalry dismounted to slow the Swedes. The Swedes themselves deployed all their horse on the left with the aim of smashing their way across the stream and thinly held the centre and right with their foot.

As always the Russians had the toughest job given the poor morale of their troops but the cautious advance of the Swedes rather played into their hands in the early moves.

On the Swedish left the massed cavalry attack was funnelled by the stream and marsh behind which the Russians were hiding and in the early moves they took losses from musketry fire but once they got going it was difficult for the Russians to hold on. The Swedish first wave were indeed repulsed but when the second wave crashed in the already weakened Russians collapsed and fled the scene which forced a morale test on the supporting infantry who decided that home suddenly sounded very appealing!

Across the Russian centre and left the plan of dismounting the dragoons worked and the Swedish advance in the wood slowed to a crawl but on the left where the village was located the Russian foot didn’t fare so well and after a stiff fight they gave up and fled.

All told, a strong Swedish victory. For those that are interested the bulk of the figures are Foundry with Old Glory in support.

Next up was another Successors game with the predominately Victrix collection, this time Eumenids v Antipatrid.

In this encounter Eumenes was significantly outflanked on his right so had to get on with it before the jaws closed.

Being superior in cavalry and elephants, as well as having the better quality infantry, Eumenes got a bit cocky and galloped his right wing cavalry across the face of his infantry in order to overwhelm the Antipatrid sole cavalry force on their right. Not surprisingly this was a fail, the cavalry got tangled up with the enemy foot resulting in the loss of the Xystophoroi and the slowing of the Eumenid infantry advance.

The Eumenid left wing cavalry did the job they were meant to do which was slow up the Antipatrid shock cavalry and in fact such was the accuracy of their volleys that they saw off the opposing Thessalians, although the nearby elephant might have been a bit of help ๐Ÿคจ

In the end, of course, it was the infantry centre that settled it and the better quality Eumenids burst through their opponents before the jaw could close about them although in reality this was more to do with over timid play by the commander of the Antipatrid left – problem of a Napoleonic player being more concerned about nice neat lines and not getting stuck in ๐Ÿ˜‚๐Ÿคฃ

After the intensity of a couple of big battles we changed the pace with a Franco Prussian skirmish game around two scouting parties coming to loot a monastery.

The rules were a set of amendments to an existing Napoleonic set held together by a rough narrative and making up stuff along the way that we hadn’t catered for – surprisingly it worked and both sides managed to get off with something although the French lost their officer and several troopers.

Although this was a bit of fun we reluctantly came to the conclusion that we just don’t get enough out of gaming this so the collection is going to have to be sold on. If you are interested then drop us a line on the site and we’ll get back to you with details and photos.

Another skirmish was next with a medieval away game which was a tourney to select those who would be sailing away on a campaign using the old Lamming rules. Nothing else to say really.

Final game of the month was an Ottoman v Swedes game circa early C17th.

The terrain was split by a stream which flowed between two large hills (on the Swedish deployment baseline) and had two formal crossing points (a pontoon bridge and a ford) although the stream could be crossed by anyone albeit at a reduced rate. A burnt out village and a wood anchored both flanks on the Ottoman baseline and a small village sat in the middle of the more open plain beyond the stream.

Both sides opted for the ‘smash through with all your cavalry strategy’ ๐Ÿ˜‚ The Swedes deployed almost all their cavalry to the right of the big hill (where the two landskap regiments spent the whole game) comprising 3 units of Danes, 3 units of Swedes & 1 unit of Finns covered by a skirmish screen of Transylvanians; on the other side of the hill, ready to cross the stream via the ford were 2 units of German cavalry and a Scots brigade on the other hill. The Ottomans deployed their 6 units of Feudal Sipahi and 2 units of Sipahi of the Porte in the centre, just short of the stream, screened by 3 units of Azabs, the pontoon bridge on the left was held by the Voyniks and the right by 2 units of Tartars.

In the initial stages it was all about the skirmishers; the Transylvanians got the worst of the shooting from the Azabs who had waded across the stream and retired hurt, the Tartars got tied up with the Germans in a back and forth which eventually saw the Germans retiring having been unable to get up close enough to fully utilise the caracole.

Out on the Swedish right the Finns avoided what would later become death central further over and in a brief, but too late, affair drove the Voyniks back across the bridge in rout – this was the single success the Swedes enjoyed.

In the centre the Sipahi’s took longer to get over the stream than their general would have liked but the Swedes & Danes were held up by the over enthusiastic Swedes pushing through the Danes and disordering everyone and then realising that being disordered as the arrows started to fly in wasn’t such a good idea!

The early Swedish attacks went well, sending the Azabs scuttling back across the stream but by then the Sipahi’s had dried themselves off from the crossing and, after a volley of arrows, charged in and the rot started ๐Ÿ˜“

The repulse of the initial attack wasn’t the end of the world for the Swedes and the units that retired would soon rally but in order to keep the Sipahis back the cavalry general committed his Danes to the charge rather than shooting (carbine armed). This just didn’t work out well, a couple of the units refused to charge which meant that their opponents were able to get the jump on them next turn and the one that did charge just got mashed up. Suffice to say the Sipahis “got their dander up” and were all over the Danish cavalry who then retired into the the Swedes who off course couldn’t get organised quickly enough to repulse the following on Ottomans.

Realising all was lost the Swedish commander and his downcast cavalry general conceded. A crushing Ottoman victory.

In other news some more figures were added to the future wars project, cheers Mark.

Extras for the GNW collection were recruited, thank you Neil.

Additions to our Mexican bandits for the western gunfight project, thanks Vlad.

Iraqi command stand stand for the Iran Iran Cold War Commanders project.

More for the modern skirmish collection, wonder if they’ll actually get used? This is such a rabbit hole ๐Ÿ˜‚

Well that’s it for the month, not a bad one, next month is Partizan and we’ll be taking the Successors on tour so if you’re going to be there find us and have a chat ๐Ÿ˜€

The Welsh Eumenes Triumphs At Paraetacene

After a couple of false starts we managed to get our good friend Gareth Lane up for a refight of the Battle of Paraetacene 317BC between Eumenes representing the house of Alexander and Antigonus Monophthalmus rebel and empire builder.

The battle is a fairly big one in the annals of the Successors, around 40,000 men per side, and a big one for the collection, which we just about were able to realistically represent.

Historically it was a kind of a draw with both sides claiming victory by the standards of the day. In a purely numbers sense Eumenes was the more successful, inflicting losses of around 8,000 in dead and wounded as compared to 1.500 on his own side. The protagonists at the time and later chroniclers argued the toss about who camped on the battlefield first etc, something that as gamers we can never recreate.

Gareth opted to be Eumenes and as the troops were already laid out more or less historically all that was left to do was for me to run Gareth through the nuances of the rules and then have at it. This may sound a bit glib but inside I was somewhat nervous as this was the first time someone outside of the ‘inner circle’ ๐Ÿ˜… had played the rules and I didn’t want them to have a crap time.

The armies were as follows:

Eumenes deployed himself on the right wing to start the battle where Peucestas commanded 2 x veteran lancer Xystophoroi, 1 x Cappadocian satrap cavalry, a unit of psiloi covering the front and a couple of elephants, opposing him was Peithon commanding 2 x Tarrentine skirmish cavalry and 3 x satrap cavalry. Antigonus, along with his son Demetrius, personally commanded his right wing of 3 x veteran lancer Xystophoroi facing off to Asander commanding 1 x Tarrentine skirmishers, 1 x Greek skirmish cavalry, a unit of psiloi and 2 x Cappadocians.

The Eumenid infantry centre was split between on the right the Hypaspists, the Silver Shields, and two bodies of Macedonian pike screened by 3 x psiloi and two elephants all under Antigines and on the left 2 x mercenary hoplite units, and a unit of mercenary peltasts screened by 2 x psiloi and two elephants all under Teutamus. Opposing them, again split between right and left, was Medius commanding the right phalanx consisting of 5 blocks of pike, 1 veteran, 2 normal and 2 levy screened by 3 x psiloi and two elephants and Menander commanding 2 x mercenary hoplites and 2 x mercenary peltasts screened by 2 x psiloi and two elephants.

Coffee consumed we set to and the opening phases mirrored the historical prototype. On the Eumenid right, Peucestas surged forward and although delayed by the harassing tactics of Peithon saw off all the opposition and by games end had captured Peithon and dominated his side of the table. On the Antigonid right, Antigonus took some losses from the opposing skirmishing cavalry and infantry but ultimately routed the Cappadocians and by games end was pursuing them in the direction of the Eumenid camp. On both cavalry wings all 4 commanders were committed to actively leading individual units in order to make progress and so risked death or capture.

In the infantry centre the opening phases were taken up with the psiloi exchange shots and elephants making a mess of things ๐Ÿ˜‚ Overall, the Antigonids had the better of it but eventually the psiloi had been cleared to the rear and despite the fun of elephants charging each other and mauling themselves to death it was soon time for the main event.

When it came to the nitty gritty the gods favoured Eumenes. On the strong Eumenid right the Hypaspists did nothing, being blocked by one of their own elephants being locked in a duel to the death with an opposing elephant, but the Silver Shields proved their worth and smashed the peltasts to their front and had carved a hole in this sector of the battlefield by games end.

On the Antigonid right their own veterans performed equally well and ripped through the peltasts of Teutamus’ command but this was to be the only clear Antigonid infantry victory.

It was in the centre proper that the decision was made. The two pike under Antigines were fortunate in facing off to the Antigonid levy and although there was a bit of back and forth first one levy broke and then the other, already in a mess from fighting off an elephant, broke when charged. Further along, one of Teutamus’ hoplite units held as it gave ground to the opposing pike but then a rampaging elephant hit the flank of it’s opponent and they recovered enough to send the opposing pike backwards who then failed a morale test and broke. There was now a significant hole in the Antigonid centre and with night drawing in (Gareth had a drive home to make ๐Ÿ˜ž ) we agreed that Eumenes was victorious.

It can’t be a Successors game without an elephant story or two. Of the ten elephants involved (scale wise each is a squadron of about 8) five panicked upon the death of their mahout and ran about the battlefield to a lesser or greater degree; 1 on the Eumenid right ran about on the empty plain causing minor annoyance, 2 ran into their own troops (1 each), disrupting the advance and eventually being killed off and the 2 others ran into fellow elephants and fought long drawn out melees; 3 other elephants died in separate fights or from missile fire.

As a recreation of the battle the game was pretty successful. Both sides’ right wing cavalry put their opponents to flight and by the end of our fight Antigonus was in the more advantageous position with the Eumenid infantry being far off and pushing forward. In the centre however the Eumenids definitely had the better of it and may have surpassed their historical prototypes. All in all then a success.

From a rules perspective this was really pleasing; Gareth is an experienced player and cut his teeth on ancients back in the days of Warhammer Ancients Battles so his take was important. His analysis was that the rules were fairly intuitive, easy to pick up, flowed well and nothing screamed out as a problem which was good to hear. For me, I think they are done now, a couple of clarifications in the fine print and I’m going to call it ‘mission accomplished’ which is a good feeling ๐Ÿ˜ƒ

So, game over, fun had, satisfaction obtained. I hope you’ve enjoyed the read and until next time, keep well.

January 2023 Report

So, the excesses of Christmas and New Year are long gone, although strangely the expanded waistline isn’t๐Ÿ™„, and we’re slowly back to gaming.

Our first game was actually an ‘away game’ with ‘The Regulars’ an ad hoc group of Warwickshire gamers meeting kind of regularly playing all sorts of games. On this occasion it was south of the border 1913 and the Mexican revolution where 4 separate factions vied to complete their objectives.

High point of the game was the Federales firing squad that missed the prisoner and then proceeded to chase him Keystone Cops style across the board until he ran into the arms of a revolutionary gang who exchanged a few shots and then exited the table.

Equally funny (or frustrating, depending on who you were) was the gang of gringo gunslingers hired by the government forces who did absolutely nothing to help the government. Oh well ๐Ÿ˜• Lots of laugh were had so a good start to the year.

Back at base we had a short Successors game to try a couple of rules mods which worked quite well so they’ll be incorporated into the set.

Next, the gang was back together after a very long absence and we celebrated with a French Wars of Religion game.

In this clash the Huguenots were largely cavalry based plus a couple of Legion shot units facing a Catholic army of gendarmes backed by more serious foot, namely Swiss and Spanish.

The Catholics decided to gamble all on their gendarmes sweeping away the more numerous Huguenot gentry in a series of charges and it nearly worked ๐Ÿ˜ฎ. However in a game of rolling cavalry melee’s which saw all 3 Catholic cavalry colonels killed numbers told and the gendarmes were shattered.

With their cavalry gone the Spanish and Swiss departed unharmed and the Huguenots wisely watched them go. An exciting game from a period that hasn’t seen the table for a while and the rules held up which was nice.

Next was another group game, this time our beloved Arthurian, featuring a Pict invasion of Powys & Gwynned.

The Picts deployed their infantry in the centre and left of the largely open field but placed their cavalry beyond a river on the right hoping to use this to shield them as they attempted a long flanking move – it nearly worked!

As always the nice neat battle lines soon became disjointed on both sides and bodies fell into melee piecemeal with the Romano Britons generally getting the better of it.

The Pictish cavalry attempt at turning the flank was stymied by a Powys division which managed to defend the banks in what turned into a very bloody affair.

Ultimately the loss of a sub leader undermined the Pictish assault and they returned north with nothing to show for their efforts.

Last game of the month was ourselves hosting a ‘Regulars’ meeting and we chose to get out the Syrian cityscape for a multi player game.

Our scenario was two Spetsnaz detachments heading out in BTR60’s to rescue a downed Hind crew stuck in the militia end of the city. The militia players had a number of entry points they could choose and the entry point for the BTR’s was randomly diced for.

As is always the case in these multi player games nothing quite went to plan ๐Ÿคจ

The militia plan was for two groups to advance toward the crash site, one on the road with a truck mounted ZSU for support and the other through the rubble to overlook the crash site. The third group was to ambush the BTR’s near their entry point as they came up the road. The Spetsnaz only had one plan, get up the road, get the crew, get out, shoot anything that gets in the way.

The ambush part of the militia plan failed almost immediately. The RPG shot missed and exploded in the street alerting everyone to trouble and the BTR’s kept going. Rather than then stalk the BTR’s by using the buildings as cover the militia player decided to take on the army check point (which was only there for scenic affect) and by the end of the game had lost all of his squad. Strangely this was the same player who screwed up the Mexican game with his non participating gunmen ๐Ÿคฃ

The other two militia fared better to start with. The ZSU brewed up one BTR but was itself taken out by an RPG. A brutal gunfight in the street and some desperate hand to hand fighting finished off one militia squad leaving the third to attempt to stop the rescue but superior fire power suppressed them and the rescue was complete.

It was a tough fight but enjoyable for all and great to get the buildings out.

On the project front I managed to get back into the 10mm Iran Iraq painting and some Iranian Chieftains are virtually done. A lot of time has been taken with amending the Successors rules and I’m hoping for that to be completed by the end of February.

Not a bad start to the year. See you next month!

The Successors Project: Part Five

“Are we there yet?” And I think the answer to that question is yes or certainly yes enough to be able to field full armies representing the various forces of the Diadochi to a set of rules that gives us what we want.

This week we took our time to play the rules complete, ie, choose two armies from the lists to the proposed minimum points value, choose the terrain from the listed items, work out scouting and deploy for battle. The two armies were Ptolemaic Successor (under Ptolemy I)and Eastern Satrapal (under Peithon), they didn’t met historically but certainly could have. The points gave the Ptolemaic a strong infantry core of, 1 x Agema pike, 3 x Pezhetairoi pike & 2 x mercenary Hoplites covered by Cretan archers, Rhodian slingers and Greek javelinmen; the cavalry wings were made up of 3 x Kleruchoi horse on the left and 2 x Hetairoi on the right. The Satrapal force was much more varied; their infantry centre was, 2 x Pantodapoi pike, 2 x Macedonian pike, 1 x Thracian peltasts & 2 x mercenary Hoplites covered by Cretan archers and Greek slingers & javelinmen all supported by 2 x elephants; the left wing horse comprised 1 x satrapal horse supported by 2 x horse archers and the right comprised 2 x satrapal horse, 1 x Xystophoroi and 1 x light horse javelineers.

A blow by blow account isn’t required here but how well the game reflected what we know of Successor’s battles is worth a look.

Traditionally the left wing cavalry would be lighter and would have a holding role while the right wing would be the stronger strike cavalry; the centre would be the infantry and here would be where the battle would be decided. On the face of it that was what we had although it didn’t quite develop that way….

The opening action was obviously on the cavalry wings – they moved twice as fast ๐Ÿ˜„ On the Ptolemaic right the strong strike force thing just didn’t work, the elephant was a worry, the enemy horse archers were annoying and the satrapal horse got the drop on one of them and it all went to hell in a hand cart when the commander got himself killed in a melee – lesson, don’t add your leader to a small unit, the percentage chance of dying is rather high ๐Ÿ˜ญ On the Satrapal right their strike force was evenly matched against the Kleruchoi but eventually prevailed and by the end of the game were pursuing the enemy to their camp.

Rules note; as a generalisation, elite cavalry, the Companions in all their various descriptions, are 6 figure units and the rest either 8 or 10 and no it’s not too small, go away and research just how many cavalry as a whole there were (it’s not a lot) and how many of them were Companions. For scale purposes 1 cavalry figure = 128 men, so a base of two figures is a squadron.

While all the cavalry shenanigans was going on the phalanx’s ground their way across the table with their respective skirmishers potting away at each other – the satrapal skirmishers had the best of it and drove off their opposite numbers. This worked as we wanted, a few casualties then the psiloi end up behind the pikes where they can protect the rear from any nasty cavalry that come sniffing around ๐Ÿ˜€

The main event soon followed and we were into the clash of pikes. From a rules perspective it’s all down to who gets the initiative and uses it well, as experience has shown that he who gets stuck in first will just keep on rolling, barring a stroke of real bad luck. In this clash the Ptolemaics got the initiative and ordered all six units in, huzzah! Err, no. Three units refused to charge ๐Ÿ˜ช and so when the initiative moved to the enemy there was a real sense of tension as they tried to rescue the moment but two of them refused to charge! and so instead of the nice neat straight line, so beloved by wargamers, we had a more staggered look as different merarchia advanced and gave ground independently of each other, which was rather the effect I was after.

Ultimately the Ptolemaics got their act together and superior class saw them through the initial wobble and crushed the enemy centre – both hoplite units and two of the pike units routed and Peithon was killed whilst steadying one of the pike units. In the units that routed the highest loss was at 30% and the lowest around 12%. Much like the real thing this was the end; one side had lost the bulk of its infantry and with the army general dead had no mechanism by which they could rally them until they reached the camp where they would have a single shot at redemption. On the subject of camps, neither side had lost control of theirs, the Ptolemaic camp was the more at risk due to the victorious cavalry heading its way (a Eumenes moment in the making) but it did have two cavalry units about to rally there (or not) but that was all a bit ‘if, but or maybe’, the reality was that some 13,000 men (scale wise) from the satrap army were leaving the field.

But what of those troop types not mentioned so far? Well the elephants were a worry for a while but not for long, the left wing elephant panicked when it’s mahout died (actually it’s a squadron but as a mechanism it works ๐Ÿคจ) and ended up in the way of the Agema pike who charged into it and finished it, the right wing elephant provided able support to the cavalry wing (and managed to stay out of ‘scaring the children’ range) but was ranged in on by the Cretans who shot it down. The Thracians did nothing, spending most of their time lurking behind the right wing elephant.

Once we were done we had a detailed discussion about how the game had played and where we thought we were in the project. First off, the rules; they play well, enough detail to make you think about what you are doing but swift mechanisms to resolve the contest of arms, the overall look seems right and the resolution feels right; we did have a couple of ‘oh shit this isn’t going to work’ moments, such as the failure to charge in the centre but in fact this resolved perfectly well and added a bit of suspense to the game. Secondly, the collection; it’s been quite a journey, it’s taken longer than we thought and even using the plastic figures it’s still been quite expensive which has caused a bit of tension, we’ve side tracked a couple of times – the Galatians are an obvious example, but taking a step back and taking a look at the whole we’ve got a collection to be proud of ๐Ÿฅฐ and we agreed that essentially it’s done.

What next? A display game seems the next logical step so our Partizan entry next year will be a Successors refight, either Paraitakene or Gabiene, we reckon we could put on a reasonable version of either with what we’ve got, maybe a few more elephants would be nice ๐Ÿ˜

Anyway, thank you for reading along as we’ve developed the project, all polite and useful comments gratefully received, in the meantime, enjoy your gaming, however you do it.

May 2022 Update

Partizan

A busy month, we got 7 games in and attended Partizan so pretty pleased with ourselves ๐Ÿ˜€

Indochina

First up was two games set in Indochina; the first was using the new Mourir Pour L’Indochine rules, which didn’t prove to be too successful (see previous blog) and the second using adaptations of our own WWII rules. It was a shame the commercial rules didn’t work for us as it would have saved a whole lot of work but on the upside it has spurred me on to write a ‘proper’ set rather than notes tucked into various pages of the WWII rules ๐Ÿ˜‚

Silver Shields

Next we had another playthrough of our, in progress, ancients rules for the Successors project; the game was an enjoyable clash between a Eumenid army and an Antigonid featuring rampaging elephants, dying elephants and pushes of pike and the rules are playing well, which is pleasing.

Carlist lancers

Mid way through the month we had a dry run of our Carlist game for Partizan which made us rethink a couple of our assumptions about the game; the biggest assumption of course was that we’d have time to play the game through on the day ๐Ÿ˜‚๐Ÿคฃ

Panzerschreck damage

Post Partizan we ‘relaxed’ into a WWII skirmish, Americans in France advancing on an ‘undefended’ bridge by a small hamlet. Needless to say the hamlet was defended (1 squad plus an augmented HQ squad) and the platoon of GI’s (3 squads + HQ + weapons) struggled to make progress.

Motorised column

In fact the game was a classic example of not concentrating and could have been used as a training video ๐Ÿ˜ƒ The American player roared up the road with his column not taking any time to reconnoitre the bocage or probe the hamlet buildings their side of the bridge. Result? A Panzerschreck took out the lead half track and it remained a burning wreck for the rest of the game, effectively blocking the road; the squad inside it rendered useless – by game end half had succumbed to their wounds and the other half were grateful for the fall of night.

HQ squad deploys

After that wake up call the rest of the platoon got their other vehicles off the road where they could and debussed trying to get around both flanks of the hamlet. The Panzerschreck team were disposed of (a bit late!) and the American player skilfully used the command Dodge as mobile cover for the HQ squad while the 2nd half track used it’s .50 cal to give support fire for its squad.

“Let’s go!”

However, the Germans had utilised their meagre resources well; a machine gun team hidden in a wrecked Sd.Kfz. 251 cut down a number of the HQ squad until it was itself silenced and a Panzerfaust brewed up the Dodge. An emplaced heavy machine swept the main road and forced the GI’s off into a mine field – where none of the mines exploded!๐Ÿ˜ž and a sniper took down the .50 cal gunner.

“where did that grenade come from?”

By nightfall the GI’s were up to the hamlet buildings but the defenders were still securely in place so we judged the Americans would fall back and call for armour support. We did have a vague plan to play out that scenario but reckoned a game with a Sherman pounding various buildings wouldn’t be much fun.

“who wants to stick their head out first?”

The upside to the game was that we got to use the two new Grand Manner resins we bought and painted up.

All is quiet

Our next foray was a French Indian Wars adventure which we haven’t done for well over a year. This particular game was a raid by a couple of bands of Indian tribesmen on a settlement just as the local trader turns up and a trio of frontiersmen (and their dog) stop by to exchange news.

Trader John

The Indian bands did a good job of getting close to the settlement but good old Blue, the faithful hound, sniffs a change in the wind and alerts his masters – lots of barking (actually a random die roll set against distance). Now we had a game ๐Ÿ˜ฎ

splashing across the stream

The first casualty was poor old Blue with an arrow in the throat ๐Ÿ˜ข and then the action kicked off. The Indians took some early losses to fire from the frontiersmen as the settlers scattered for their cabins but three frontiersmen against around eight braves was a tall order.

first casualty

The fight then became increasingly desperate; Trader John was dropped by the cooking fire and was quickly followed by Ma & Pa Adams as the Indians moved into the settlement, hatchets ready.

death in the wilderness

A couple of more losses to the settlers saw them fail their morale and lock themselves away in their cabins saving the last musket ball for themselves. The frontiersmen got stuck in with musket butts and hatchets and gave a good account of themselves but it was going to be a close run thing.

up close and personal

With the death of their leader one of the Indian bands broke for the trees but the frontiersmen were now down to two and the other Indian band was unhurt so with a heavy heart they faded away, the cries of the victorious Indians ringing in their ears and over that the single musket shots telling them the fate of the remaining settlers ๐Ÿ˜ง

M113’s

Our final game of the month was a 6mm Arab Israeli game. One of our occasional players blew the dust off his long buried away collection and bought it over to trial the recently released Cold War Commander V2 which I picked up at Partizan. We have no plan to do 6mm or Arab Israeli but we have been toying with the idea of doing the 80’s Iran Iraq war in 10mm, hence the buying of the rules.

Centurions

We played a very basic game to get a handle on the rules and that worked well with no problems being experienced. I did learn that Centurions completely out class T54’s!

Iranian Chieftain & Iraqi T72

With all this gaming going on did any project work get done? Well yes. The main distraction was the proposed 10mm Iran Iraq project; a lot of reading of the Helion books and the Cold War Commander rules, then some actual models purchased from Red3 and painted up – my first go at this scale. Once we’ve made a bit of progress I’ll do a separate blog post on it.

Timurids

In other news, another unit of Timurids were completed along with some civilian additions to the western gunfight and the stagecoach was finished. Some more vehicles for the Syrian moderns adventure were also finished off.

Generally a pretty successful month, let’s hope June is as productive ๐Ÿ˜