This wasn’t even on the ‘to do’ list! This build came by way of a conversation between myself and Dave about there not being any decent lengths of compound wall in mdf to use for our proposed attack on the CIA annex in Benghazi. A couple of weeks later Dave rocks up with two plastic bags full of mdf bits and some pictures of a walled mosque compound. “It was only £30 on eBay and it’s got walls” So….
First off, yes it was off eBay from one of those businesses who trade through eBay and Facebook and the guy should get a mention for such an inspiring build, so stand forth JBxrayman@yahoo.co.uk who I think is something to do with Boston Wargames Club.
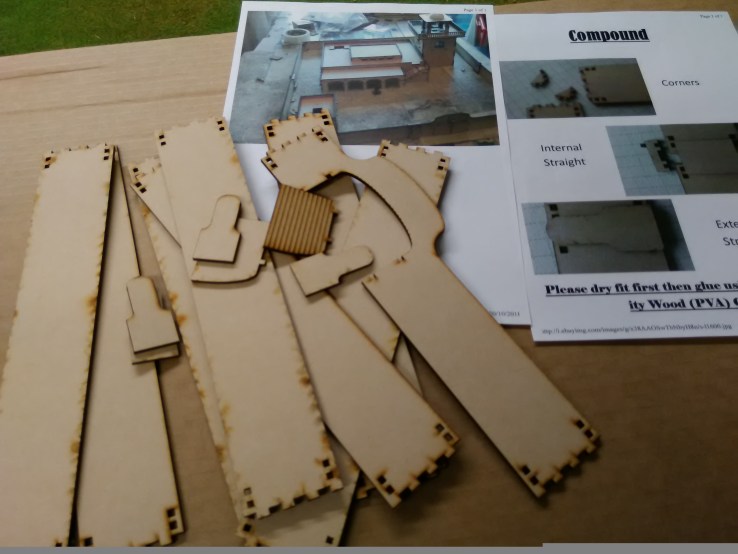
Amongst the many pictures Dave downloaded there were a number that, although not instructions as such, were photos of the bits for each building laid out in plan view so that you could see what went where; a bit like IKEA only better. The buildings were; the mosque tower plus its balcony roof section with dome (two supplied), the outbuilding/store, the main building, the inside rooms for the main building, the ventilation roof for the main building, a set of stairs, a veranda and of course the walls (22″ each side).
Most of the pieces were already punched off their sprues, those that weren’t varied from easy to eject to bloody hard resulting in some damage; on a couple of the inner walls the laser just hadn’t penetrated far enough so it was a Stanley knife job. The doors (etched panels on one face) came separate, well in the sense that you had to eject them from the doorway sections they were part of where they were attached to a pair of hinge cut outs, more on doors later. The window aperture pieces struck me as well worth keeping to use as block windows on other already done middle east buildings that lacked windows. None of the buildings come with a base which at first I thought would be a problem but in fact not.
First up was the outbuilding.


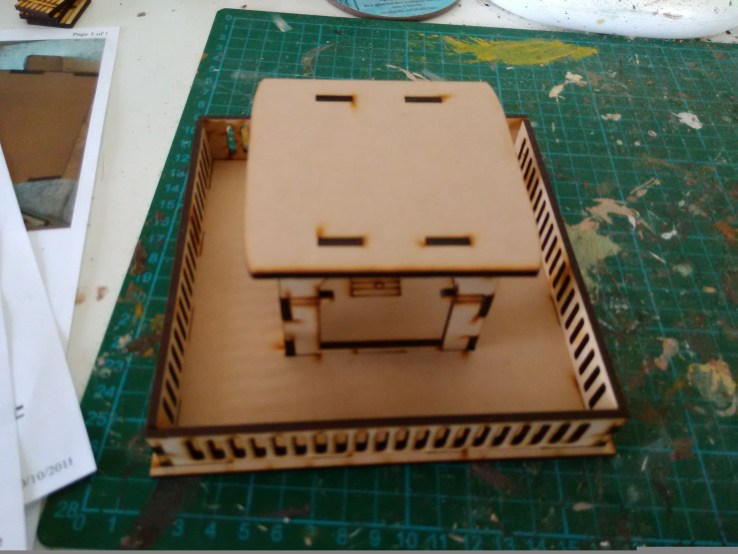
Dead simple. Four walls, two with doorways (put the doors to one side) with cut outs to joint them, an open hatch roof and two right angled jointing pieces to tie the walls together – I liked this idea, they held the walls in place thus negating the need for the floor and acted as the timbers poking through the walls (see photo). PVA applied, clicked into place, rubber band to hold, done.
Next was the tower. A two part build really, first the actual tower itself then the balcony roof.

The base tower was a bit like the outbuilding only bigger. Four walls, two with doorways (illustrated as opposite each other but I’m pretty sure you could ignore this if it suited your planned use of the building) and a flat section with etched floorboards on one face which at first I thought was a base floor but then realised was a mid floor which tied the four sides together. Again simple stuff although I realised that once built there is no way up to the floor as there is no hatch in the floor, etched or cut away; school boy error JB. I later fixed this by gluing on a hatch from Blotz which I had left over from another build. Looks fine I reckon.

The floor hatch also highlighted one other drawback with this building, although it has two doorways to the ground floor they are largely redundant as you can’t reach inside to place figures as the floor is fixed in place. Probably not the end of the world but worth noting.
The balcony had more bits but was still pretty simple. There is a base with slots for the four outer balcony sections and slots for the four walls making up the centre cupola, a roof and of course the polystyrene dome. The illustration shows an open hatch giving access to the floor below but in fact this is an etched hatchway, doesn’t make any difference other than emphasise the problem of not having a hatch in the middle floor. I found it easiest to to assemble the walls to the roof upside down (the roof, not me) then slot the assembly into the balcony base, after that the railings slotted into place easy. I didn’t fix the dome until much, much later.
Next, the stairs to the main building. At last 28mm stairs that actually look like stairs!


Two side pieces, one back and seven steps to go in the slots. Done in a minute, nice and sturdy and they look like a 28mm figure can walk up them, other manufacturers please note.
The main building was next. Four outer walls, two big right angle jointing pieces and clip in window sills to give the windows a bit of depth.


I sub assembled the window sill pieces first and let them dry (actually I’d chucked them in the odds and sods box thinking they were push outs from another piece of the assembly). Then it was the outbuilding writ large, glue the jointing pieces in place then bring together the four walls, line up and PVA. Done.
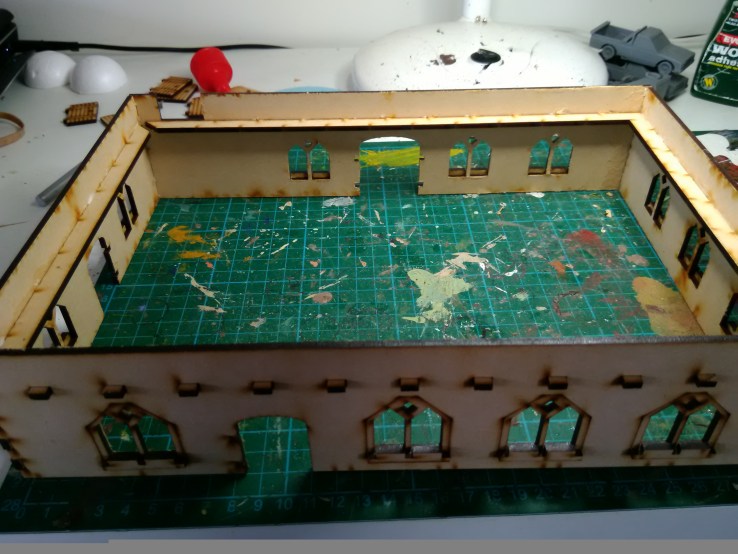
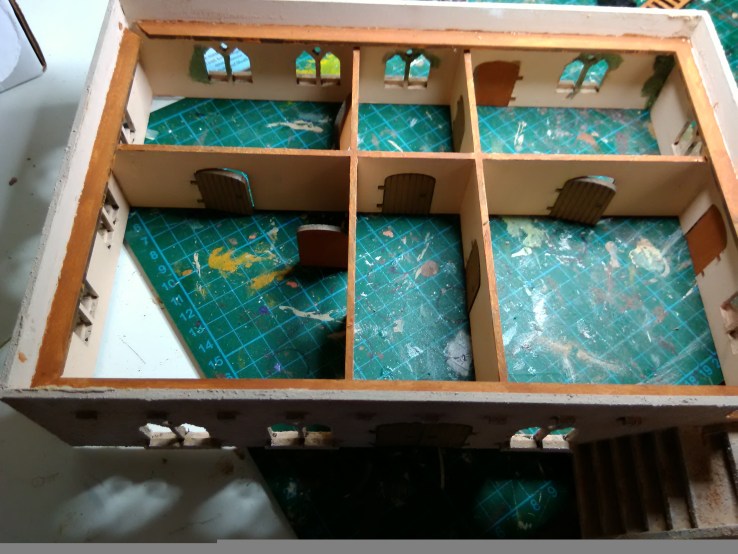
Next, the inner rooms and it was at this point I thought I’d seriously screwed up. The inner walls are made up of one length-ways section and two width-ways sections which slot over it thus dividing up the building.

But how do you get it in? Those dammed jointing pieces are in the way! Shit!

Now it became clear why there were no floors. Flip the building and insert from underneath, apply the PVA and plenty of rooms to chase opponents to and from.


The roof, one big piece of mdf with a roof hatch cut out around which you glue the hatch doors just drops on top. The ventilation roof was just four shallow arched straight sections that clicked into place which in theory you glue to the main roof; I opted not to, so as to allow greater flexibility with the building.


With that complete I glued the stairs to the front of the building to line up with the roof access cutaway.

The veranda was next that sits onto the front of the building. One arched front section, two arched ends and a roof. The roof slots into the three upright pieces, glued and done.


Next the compound walls. I was quite worried over these, seeing problems in alignment and warping but in fact they really were quite ingenious and once done looked very effective.
Basically each side is made up of two pieces with slots at each end and cutaways. Two pieces are butted up to each other via the cutaways and then joined using peg pieces into the slots on the inside face of the wall; the join is then obscured on the inside by gluing a squared mdf section over it and on the outside by a more elegant shaped piece again glued over the join (Morecambe & Wise jokes here for those old enough to remember).


Repeat four time and four outer walls complete but how to hold them together? Another peg piece (well two per corner) formed as a right angled triangle to fit into the slots at the corner and yes it worked.

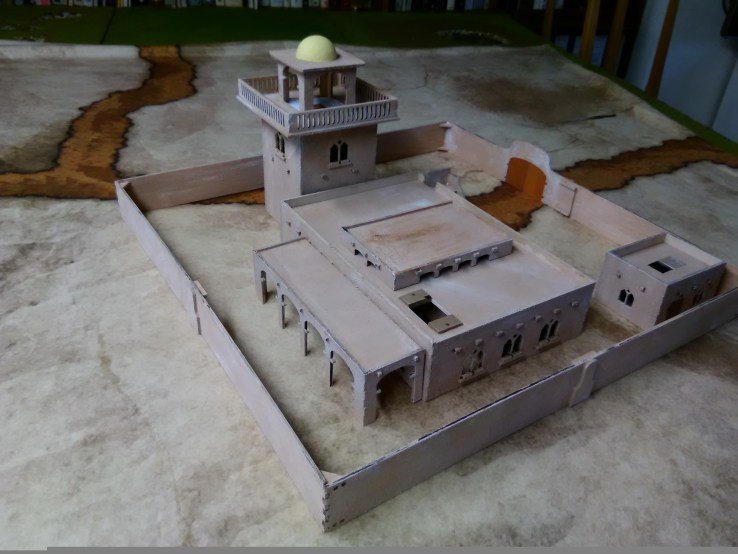
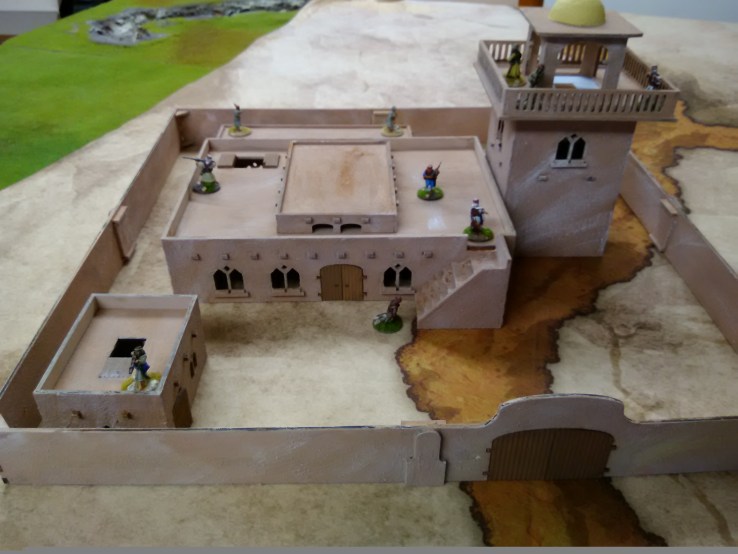
All done, time for the undercoat and tetrion. Erh no. It was at this point I realised the stairs were in the wrong place! Or rather in the place that looks right but is in fact wrong. If you look at the earlier photo the stairs line up with the gap don’t they? Yes. But I realised by looking at the downloaded photo’s that the stairs should line up with the corner edge of the walls even though this means the roof access is obscured. Why? Well so that the veranda can fit across the front of the building, with the stairs where I put them it doesn’t. Well it was too late to prise off the stairs, PVA is pretty damn good once it’s set and besides it looked right, the design way wouldn’t. Solution? Put the veranda on the back! Looks great and actually makes the building look more balanced, but I would say that would’t I?
So tetrion in the house desert colours followed by a dry brush while painting the inside walls – you don’t have to I just do.


Again I was concerned about the outer walls warping so just to make sure I connected them up while they dried – and then had a pig of a job to take apart but at least they didn’t warp! Much Tweeting was done about whether to store as a built up open square or store each length separately, the overwhelming view was separate and having now finished and stored it away, separates was definitely right – thank you all.
 A splash of colour for the dome now glued on and a wood effect colour for the hatch ways and floor boards in the tower and of course all the doors. Ah yes the doors.
 I didn’t really notice this until all were painted but they are all left hand hinged. So what? Well when you’ve got opposite doors, like in the tower or along the corridors of the main building, you can’t help but end up with plain side facing out (remember only one side is etched). Again so what? Well it looks shit is what and there is no way round that. From a design point of view etching the doors both sides would be an easy fix, you certainly don’t want to be having right & left hand hinged doors, total recipe for disaster. From a here and now point of view I’m going to live with it, if I’d realised earlier I could have scored the mdf and black lined it but I was literally gluing the doors in when I noticed.
Which does bring us neatly to the subject of doors in buildings, to be or not to be? This build was a real luxury, actual doors to fit into actual doorways; some have open doorway cutouts both externally and internally (Tabula Rasa), others (Blotz) have fixed external doors and internal cutouts, some have hinged doors (4Ground) and they all work in there own way. The problem is the gamers, have no door and they’ll say they can walk right in, have a door and you can’t show someone shooting through the doorway; in this build I think the luxury was wasted on me, I glued shut all the outer doors and then did variants on open for the internals knowing full well there will have to be the before game explanation when we play with the assembly.
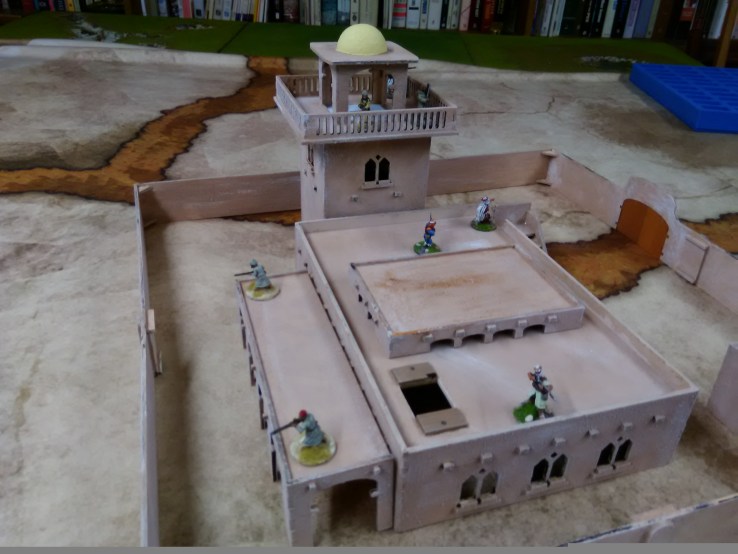
As to usage, well a whole series of possibilities have opened up; we can use it as designed – tower to the side of the main building (or for that matter on the roof I guess) as a fortified position for our Sikh Wars games.

Or as a base for the local tribes in our Foreign Legion games.
 Use the buildings separately in any number of games with a middle eastern/Asian sub continent theme
Or, the very reason Dave bought the kit in the first place, as the compound for the Benghazi game.


Now I really have run out of excuses.

Looks good Ian.
Nicely finished.
LikeLiked by 1 person
Well thank you kind sir.
LikeLike