I’m sure everyone knows what 3D printing is but for the uninitiated; you create a 3D CAD model of whatever it is you want to make, you then make a tool path of the model for the molten plastic to follow, then you send the tool path program to a specialised printer add some molten plastic and hey presto! If it was that simple of course we’d all be doing it but that isn’t the point of this post.
A little while back Dave saw an advert by Butlers Printed Models (BMP) and sent off for a WWII German armoured car and back came a simple, no frills no fuss 1/56th plastic model which looked very nice thank you. Now I knew a little bit about 3D printing from a previous career as an engineer but back then it was a complicated and expensive process so I was kind of intrigued.
First step log onto the web site. Easy to navigate and what a range of scales! – 6mm, 12mm, 15mm, 20mm & 28mm each of which is divided up into WWI, WWII & post WWII and with prices significantly lower than what has become the norm. Now for quite some time we have been moaning at each other about the lack of vehicles in our Afghan Soviet games but haven’t wanted to splash out too much for things that 1) wont get used as much as we think they will and 2) will essentially be background or the target of ambushes etc. However the BMP range seemed to offer us a relatively cost effective way in so I placed an order for a BMP1, a BRDM2 and a BTR-60PB, total price just over £50.
Before we go any further, if you’re a keen modeller and or model vehicle aficionado you might want to look away.


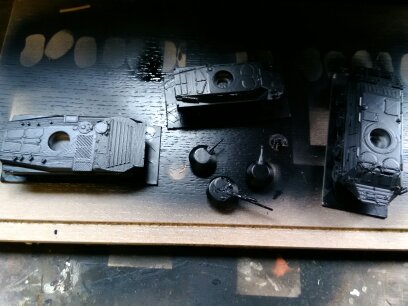
Looks like something out of a sci fi movie doesn’t it? I’ll confess I didn’t quite know what to do next but the very handy slip of paper that came with the models directed me to a very useful YouTube video that told me how to get rid of the ‘print support’ or flash to you and me which is essentially all the plastic that’s been injected in layers as it follows the tool path. I started gingerly at first but as you get in to it the stuff just peels of layer by layer. Some stuff however just wont come off so the wheels & tracks end up with a hard piece of plastic at road level that even the sharpest of knives wont budge, not a problem for us as we base our vehicles on card but others might see this as an issue.


The only separate piece is the turret so essentially its a two part model which for the likes of me is happy days. Don’t get me wrong I love the fine detail of kits like Rubicon in particular but I’m a gamer not a modeller so being able to get on with the painting quickly was a bonus
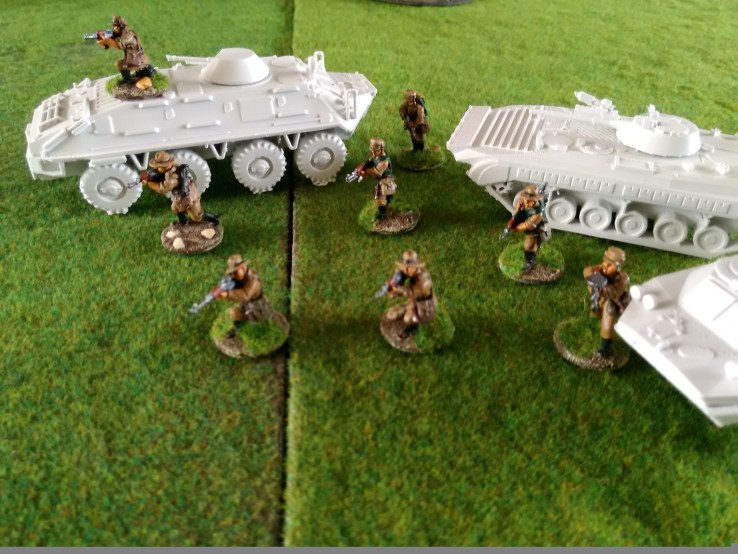
Once the black undercoat was done it was on to the painting which is the boring bit as far as this post is concerned. The important bit is are they worth going for? Our view is yes. The shapes are right and in proportion (see below), there is enough detail to know where troops can exit from and for the model to look like what it’s meant to be. On the down side if you look very closely under the vehicle and between the wheels you can see the lesser detailed bits and of course what you see is what you get so there is no opportunity to do the mark 7A version or whatever or convert the hard plastic.
Cost wise these are very good value coming in at around £5 cheaper per model than their equivalent Empress, Sloppy Jalopy competitors but are they better models? Well I think it really is down to what you want them for, for us they tick all the boxes, for others maybe not.


Once painted and based they look just the ticket so our next Afghan Soviet game might feature a bit of armour. Please keep your comments about my camouflage painting to a minimum!
Enjoy your gaming.
