January 2024 Report

The first month of a new year, which will probably be much like the last year and that’s fine by me! No New Year Resolutions or anything like that but I have promised myself a revamp of the games room and with that the clearing out of figures, terrain, books, magazines and rule sets which just aren’t being used, I think the Scandinavians call it ‘death cleaning’ ๐Ÿ˜„ Anyway, without further ado, on with this month’s events.

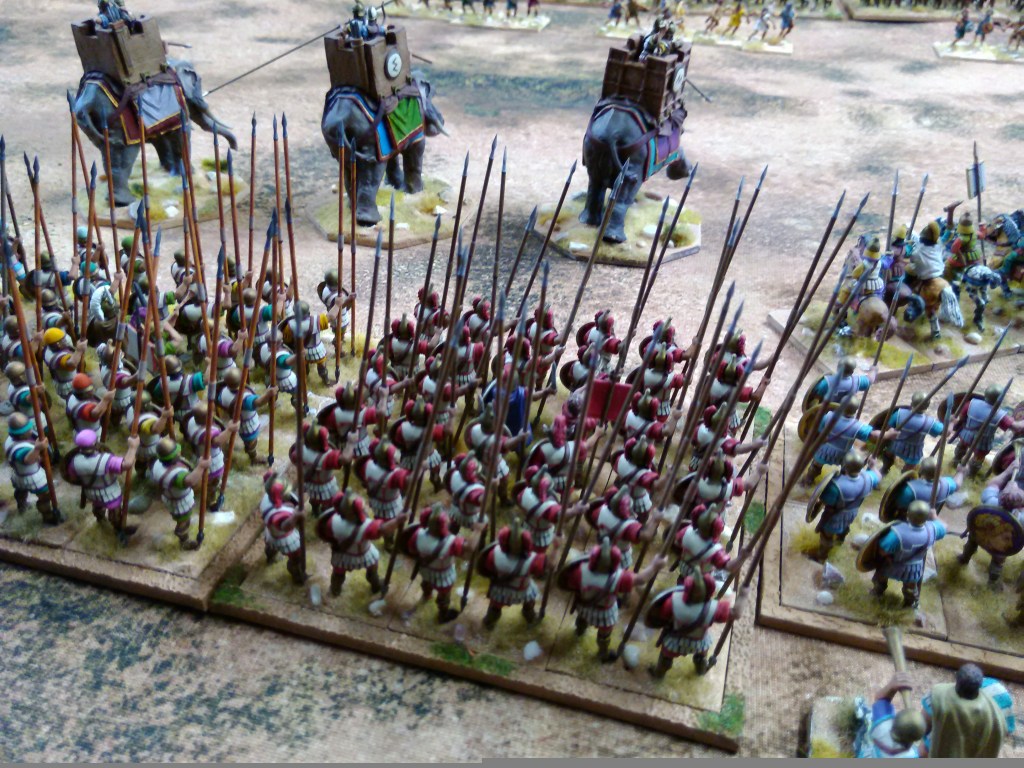
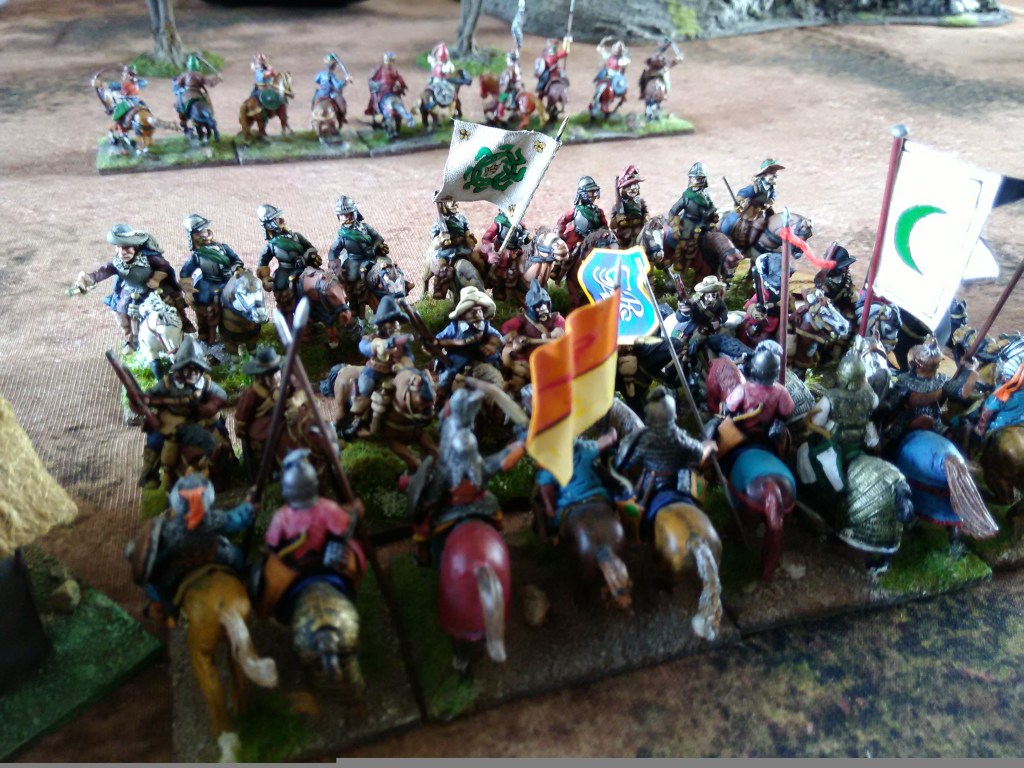
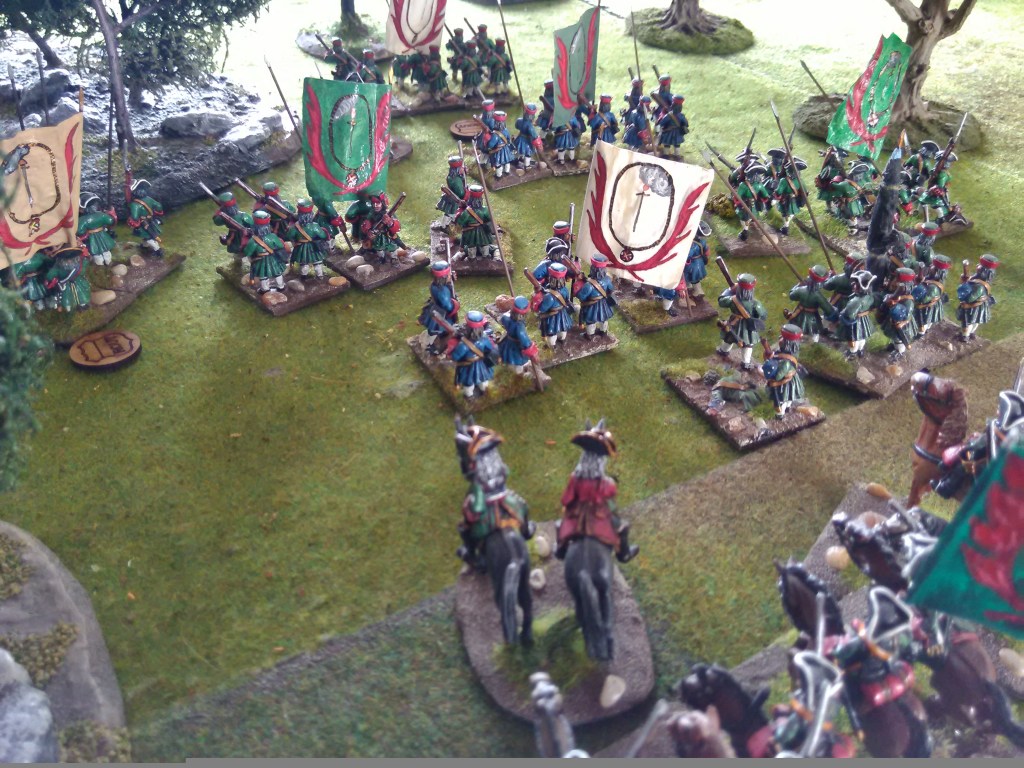
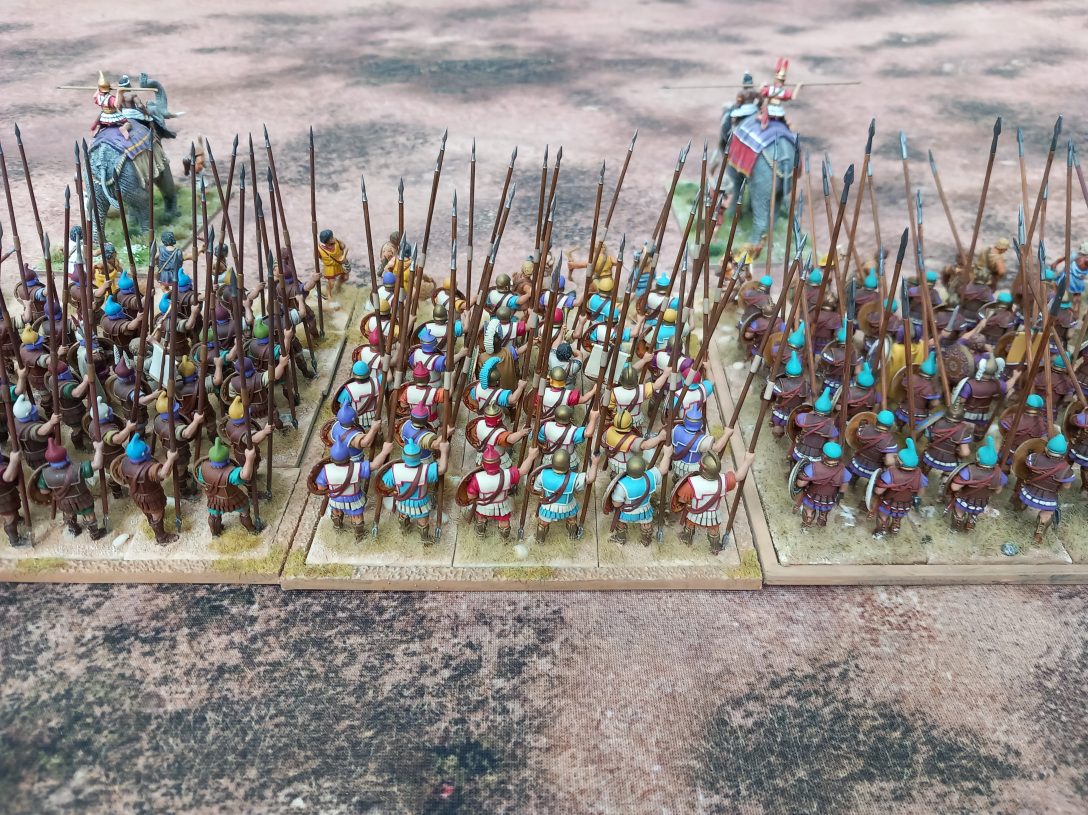
First out of the gate was a group favourite, Successors. This time we staged a Western Satrap army under Asander against the might of the Imperial army under Perdiccas. For a bit of a change we had a crossable stream snaking across part of the battlefield with a temple on one of it’s banks.

The Imperial army had all the good stuff; 3 units of Hetairoi, the Hypaspists, Pezhatairoi, 3 units of phalangites, Cretans, Agrianians, elephants and some lesser skirmishers, they also had a unit of Pantodapoi but the General sensibly relegated them to guarding the camp right out on a flank beyond the stream.

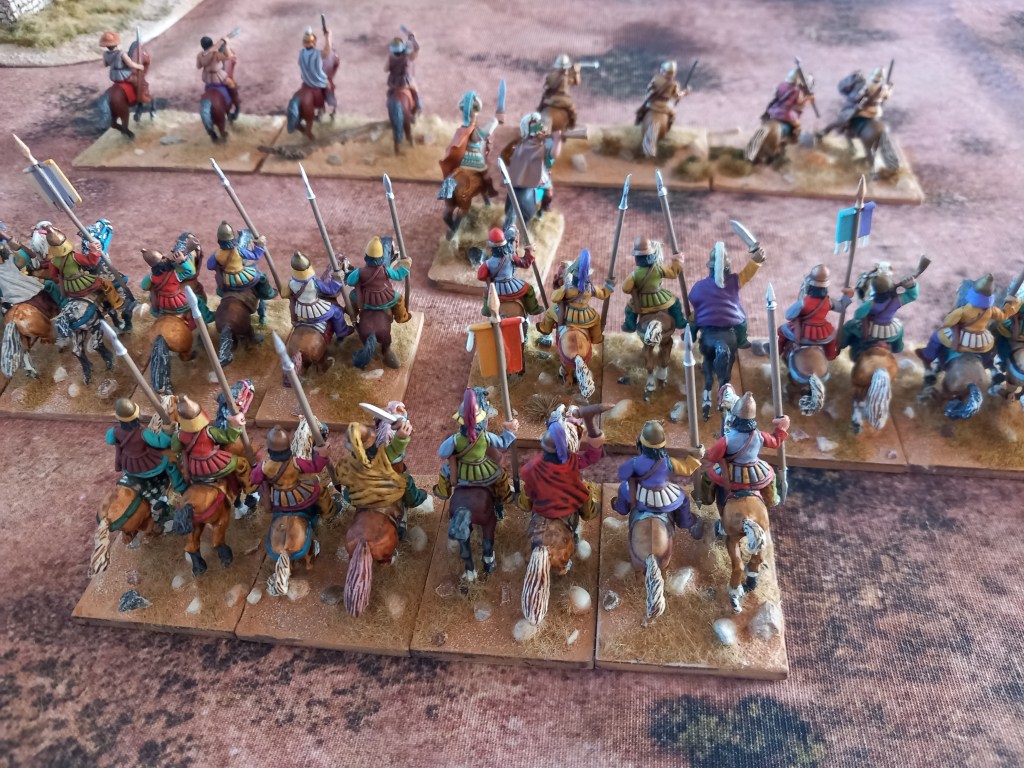
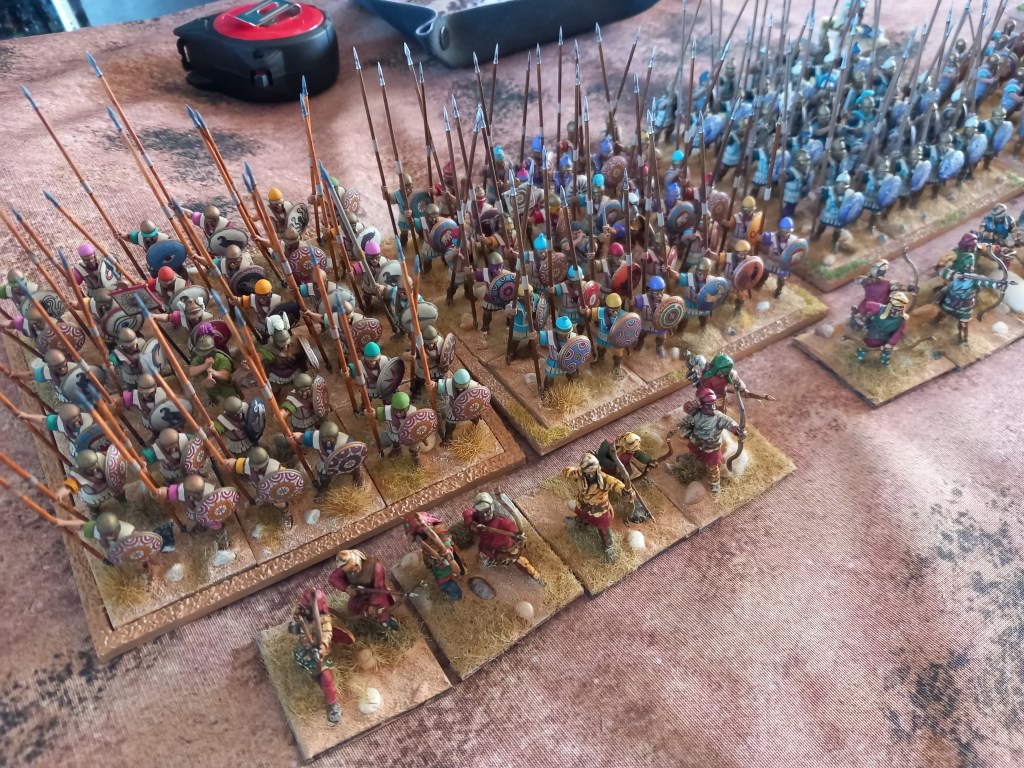
The Satrap army was a more numerous but more varied in quality; the cavalry featured 3 units of Satrap formed cavalry screened by units of light horse and a lone Xystophoroi unit, the foot had two units of phalangites supported by 2 units of Thracians, 2 blocks of Hoplites and 3 units of Pisidian peltasts all screened by variously armed psiloi.

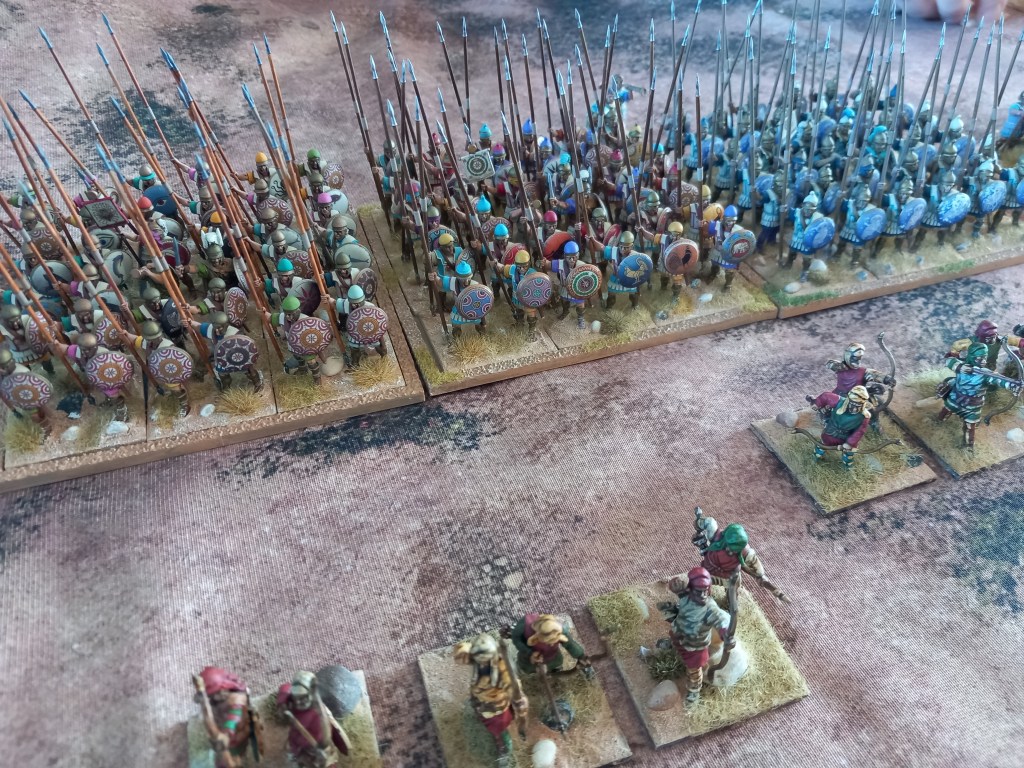
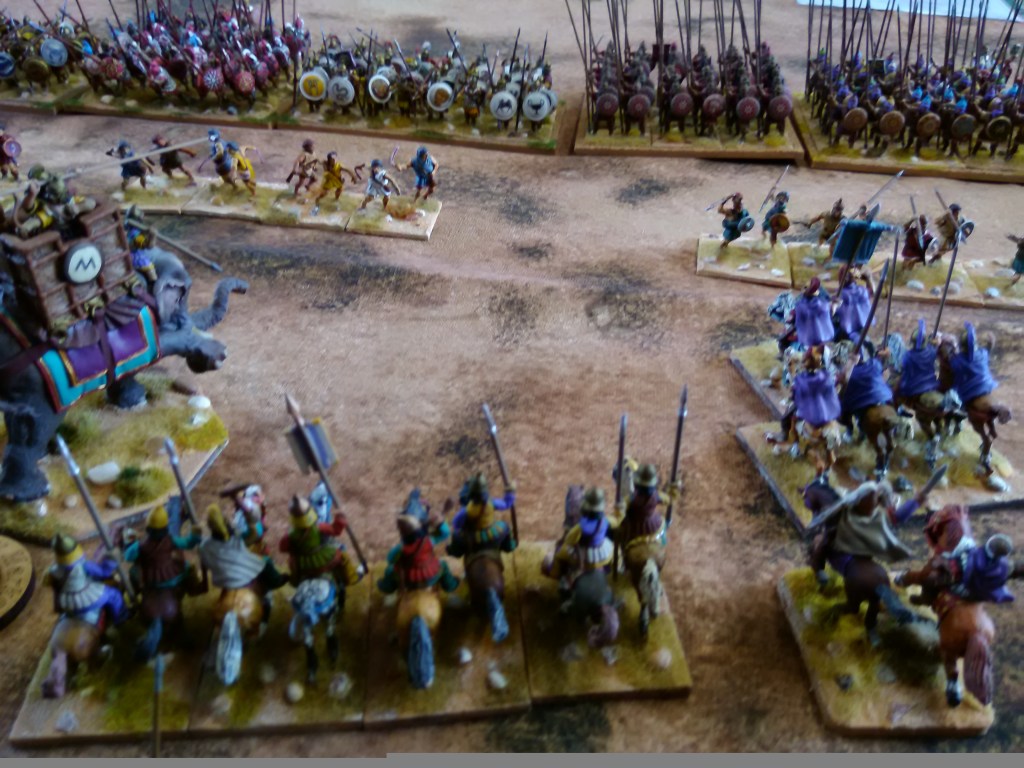
Deployment revealed that Perdiccas had cunningly positioned all his pike on his right flank with it’s left anchored on the stream which meant that the more traditionally deployed Satrap cavalry were staring straight into a mass of pikes ๐Ÿ˜ฎ. The Imperial cavalry, supported by the elephants, were deployed in the centre, more or less lined up facing the opposing peltasts. The Satrap players curiously placed their hoplites off to the right, behind the stream facing the temple, which rather rendered them useless for the course of the game.

The Imperial plan was simple; power across the battlefield with the elite cavalry and sweep away the peltasts and Thracians while the massed pikes trundled forward and crushed anything in its way. The Satrap players had gone for a thin linear deployment which did not help their cause in the long run and kind of boxed themselves in to a purely response tactic.

As the game got under way it was the Imperial centre which saw the first action and it didn’t really go according to plan because the sheer weight of missile fire from the opposition (everyone had a javelin ๐Ÿ˜) saw both the elephants lose their mahouts and panic across the front and then ultimately die while one of the Hetairoi was destroyed and the other two ran off and had to be rallied further back – so much for the soft centre ๐Ÿ˜‚.

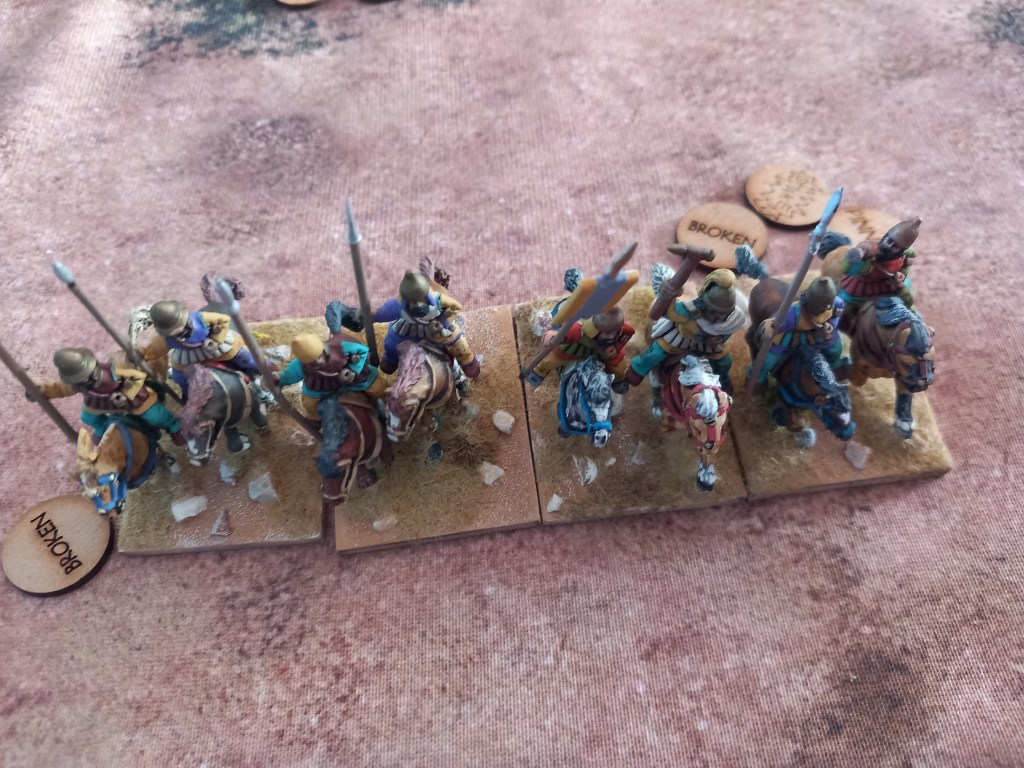
On the Satrap left the cavalry went full on suicide run and got duly duffed up by the pike juggernaut and their tattered remnants fled, never to be rallied.

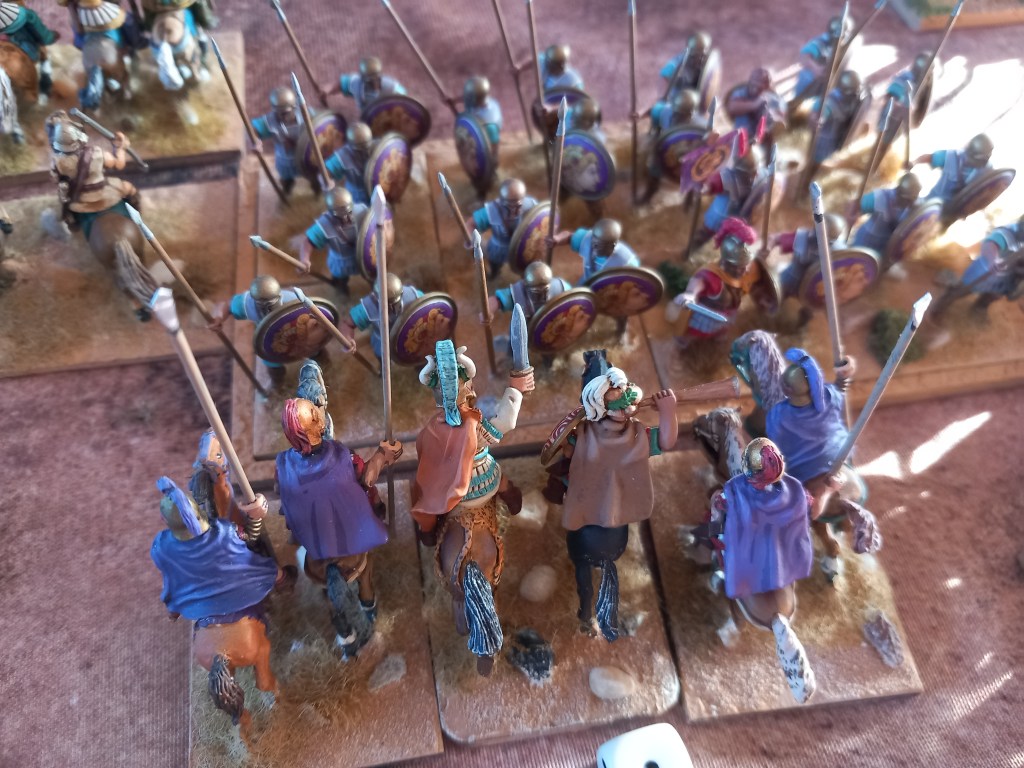
The Xystophoroi tried to rescue the Satrap left but the Hypaspists ate them for breakfast. The Satrapal left no longer existed and the pikes headed for the Thracians.

As can be seen the Thracians didn’t last long either and then one of the Satrap commanders inconveniently dropped dead and his division was paralysed.

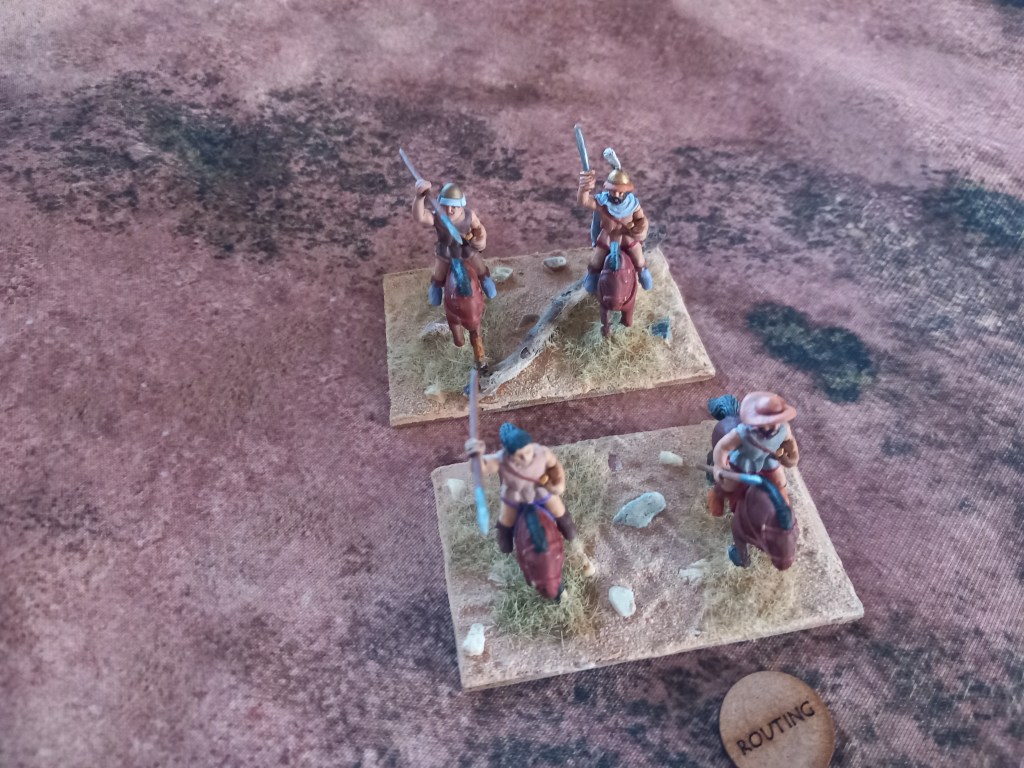
It was all bad news now for the Satrap army, routs are contagious and the big bad pikes were now swinging in, time to call it a day and leave Perdicass in charge ๐Ÿ˜€.

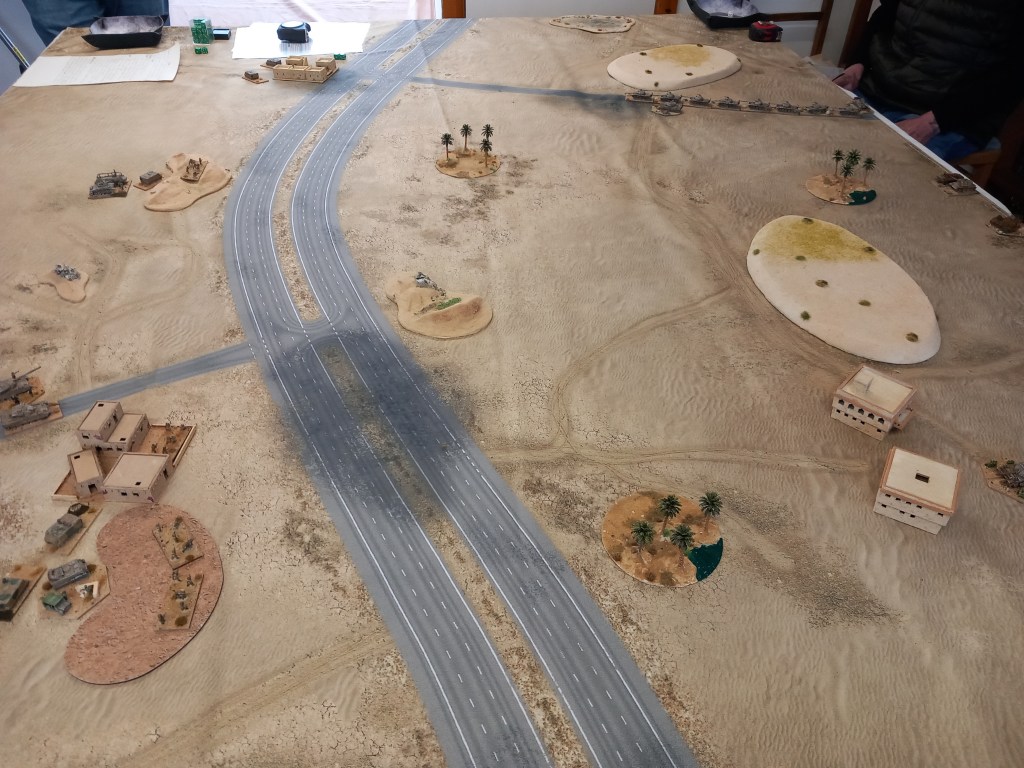
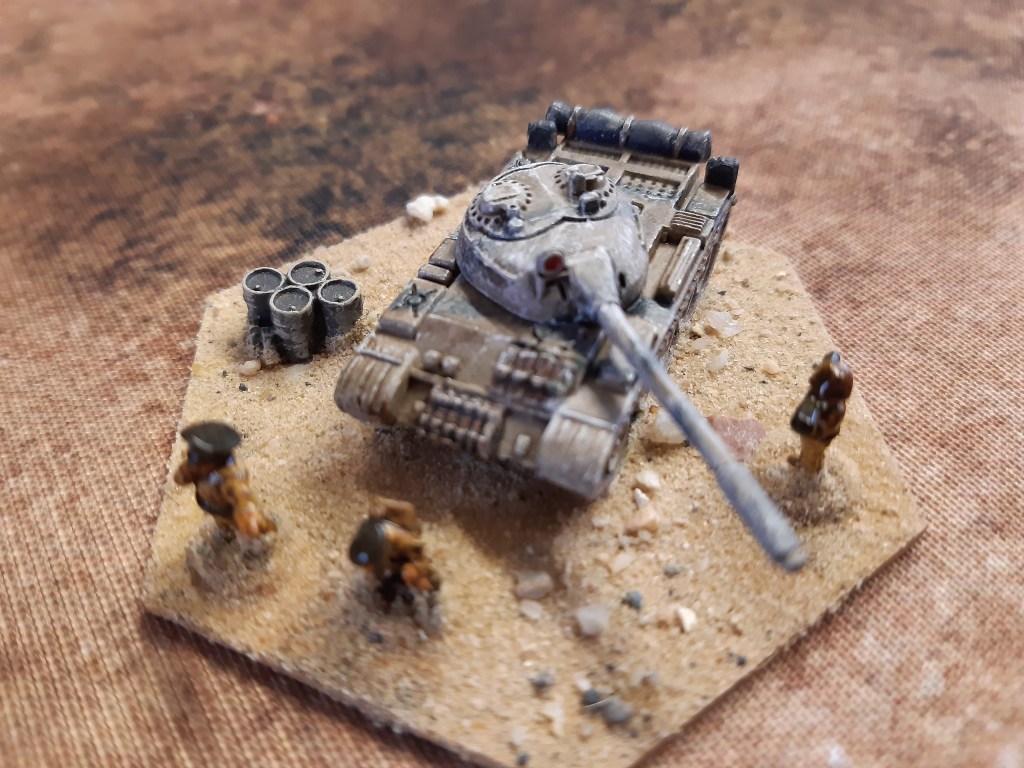
Our next foray was the new kid on the block, and my personal favourite currently, the 10mm Iran Iraq project; this time on our brand new Tiny Wargames desert mat.

Trying to have a bit of a narrative rather than just going bang bang we had elements of the Iranian 165th Mechanised Infantry scattered along a thinly held front trying to protect the M6 highway from advancing Iraqi armour while awaiting the arrival of the 232nd tank battalion to bolster their lines. The Iraqi 26th armoured battalion and the 7th armoured battalion could enter the battle area from anywhere along their tactical edge and had only one objective, secure the highway. Both sides had off table artillery, the Iranians had the slight advantage that their FAO was already on elevated ground overlooking the highway.

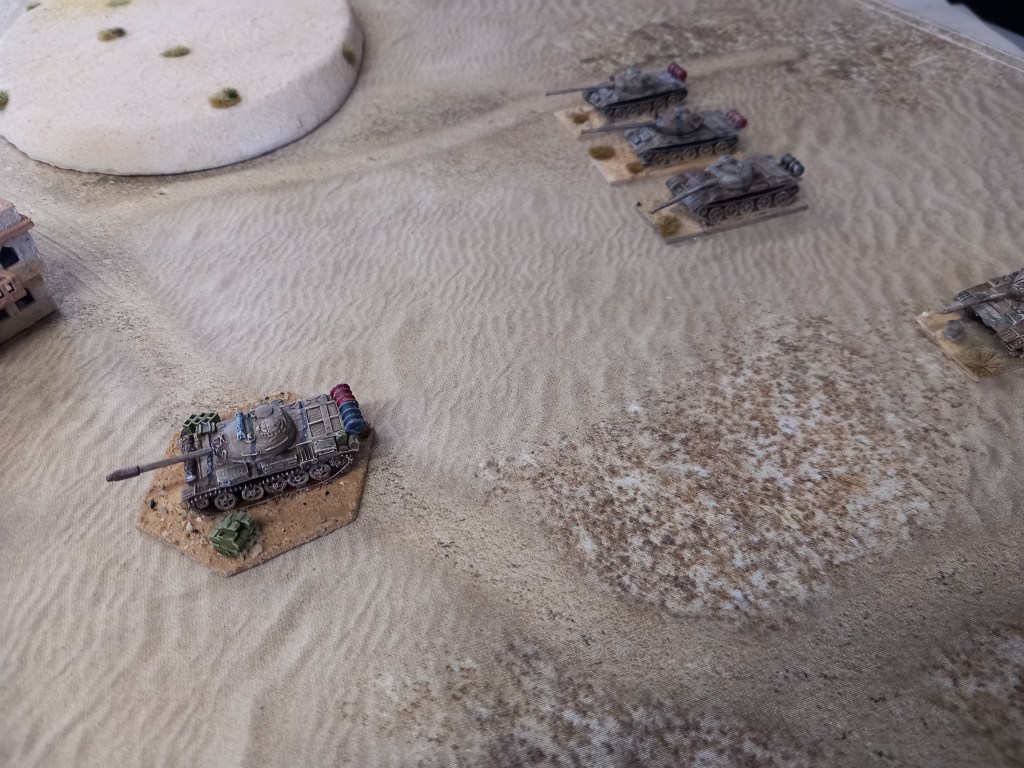
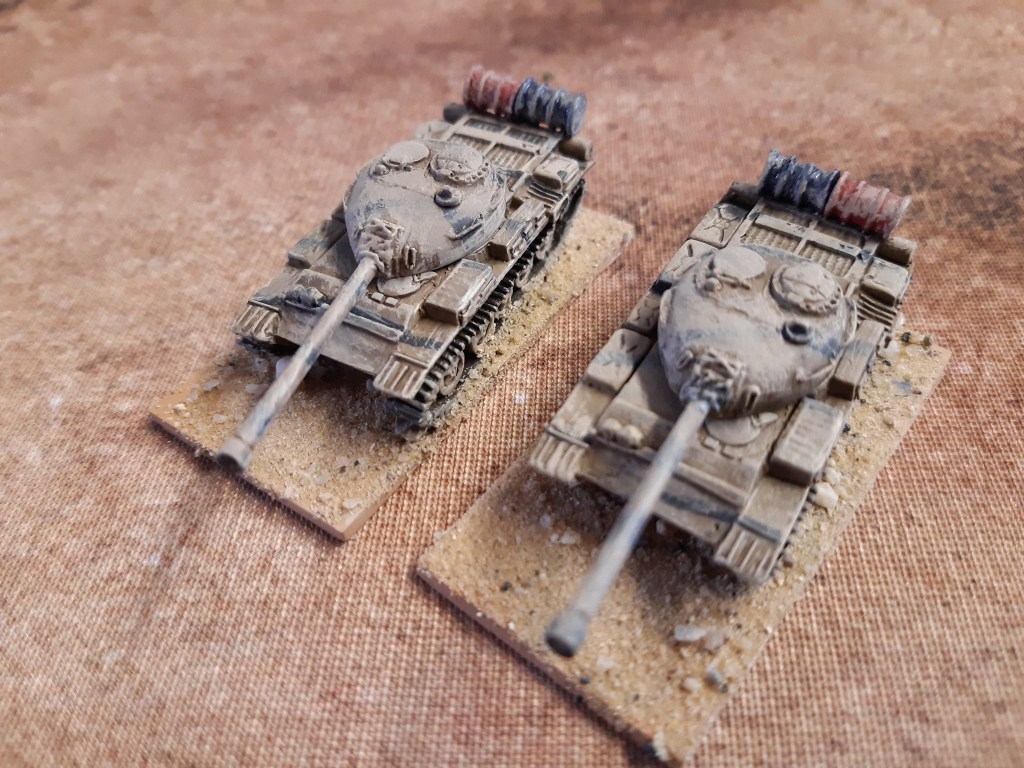
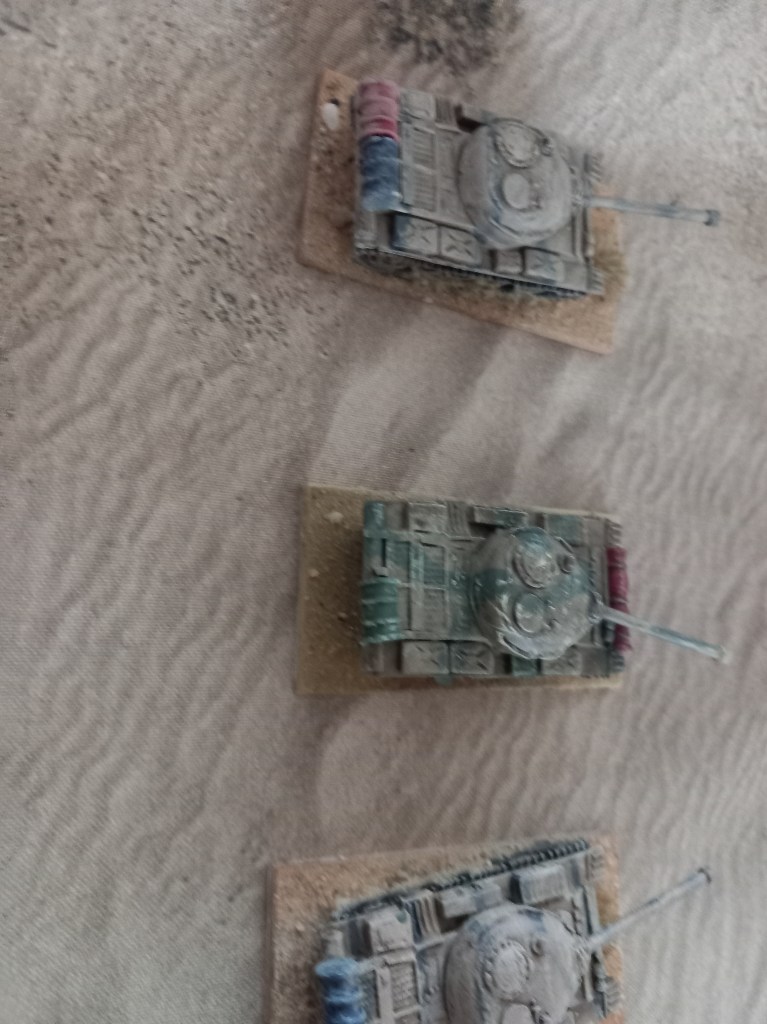
Well aware of the weakness of their T54/T55’s the Iraqis fanned out and tried to get up close before the dreaded Iranian Chieftains could arrive. PS. this failed ๐Ÿ˜‚.

The T62’s of the 7th armoured opted to roar up the metalled road that joined the highway, maybe this would work?

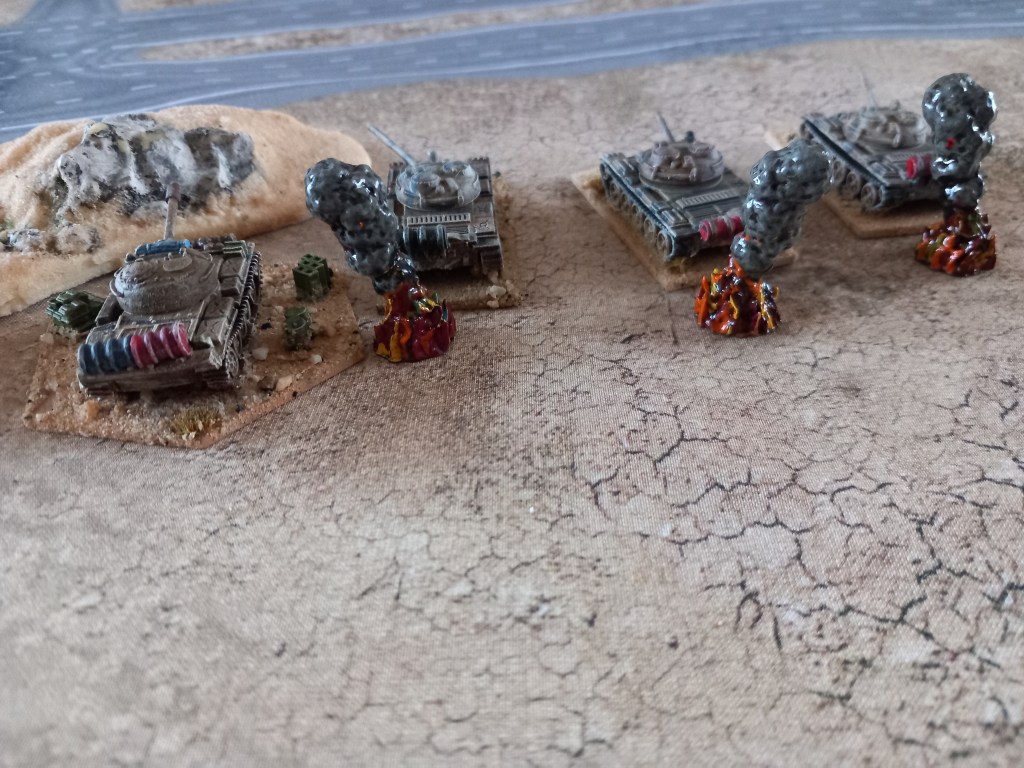
Well in the time honoured tradition the Chieftains shot the T55’s to pieces with no loss to themselves although this was made slightly easier by the Iraqi player inexplicably leaving one company of tanks lingering at the back – “well at least it didn’t get destroyed” was the response when asked why.

Not surprisingly the Iranians prevented the highway from falling into enemy hands but this was rather helped by the holding back of one tank company and the T62 column just roaring up the road and then just stopping to shell a village with the lead tank. What was noteworthy was the utter uselessness of both sides artillery targeting, they literally couldn’t hit a barn door between them ๐Ÿคฃ๐Ÿ˜‚.

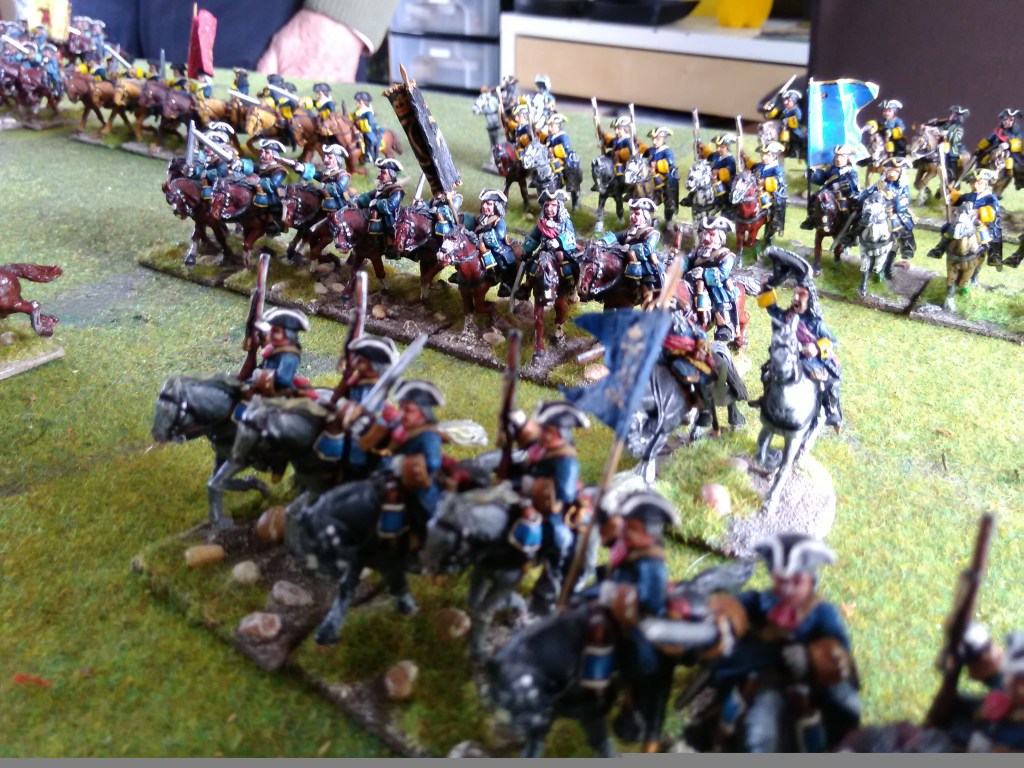
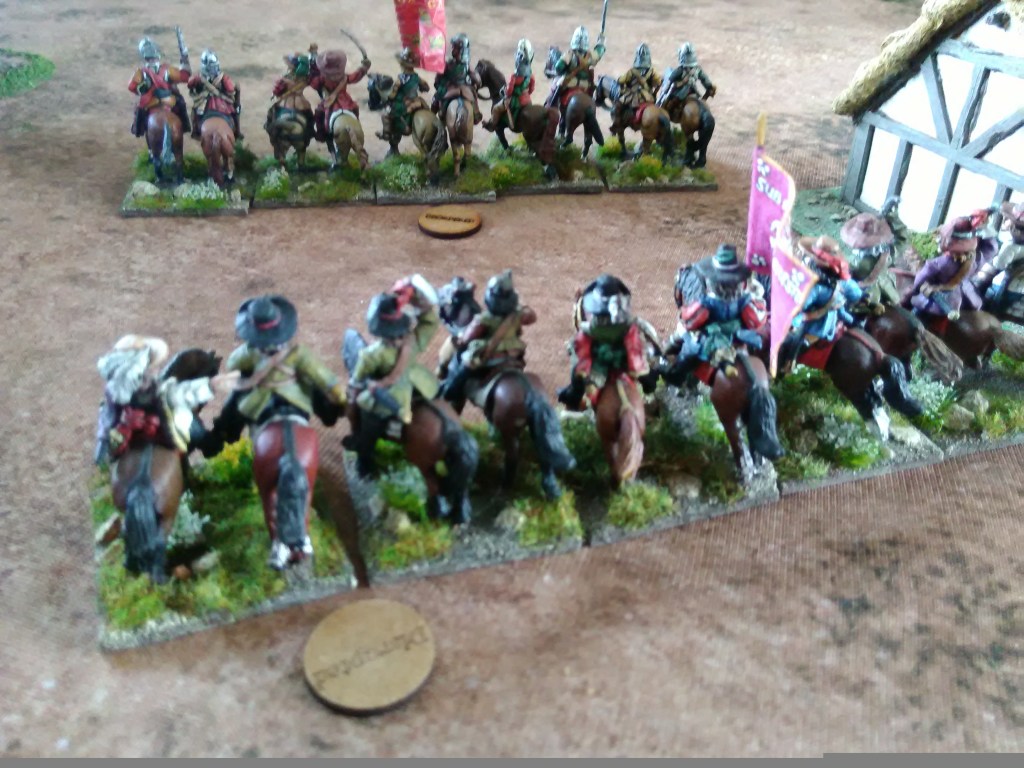
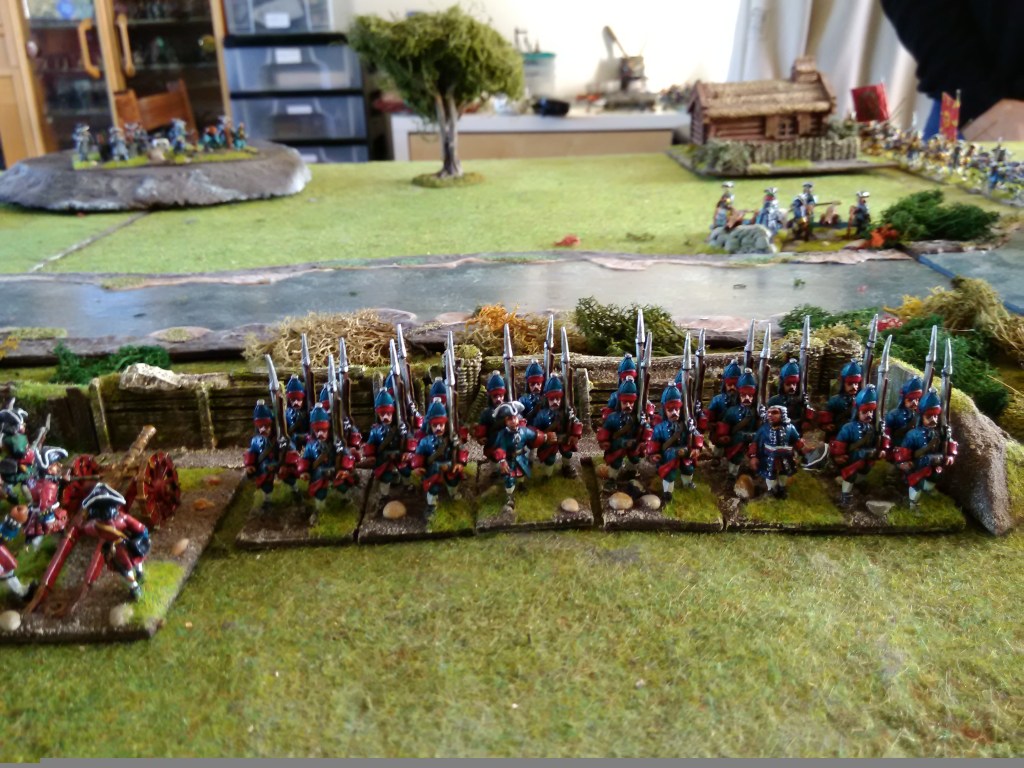
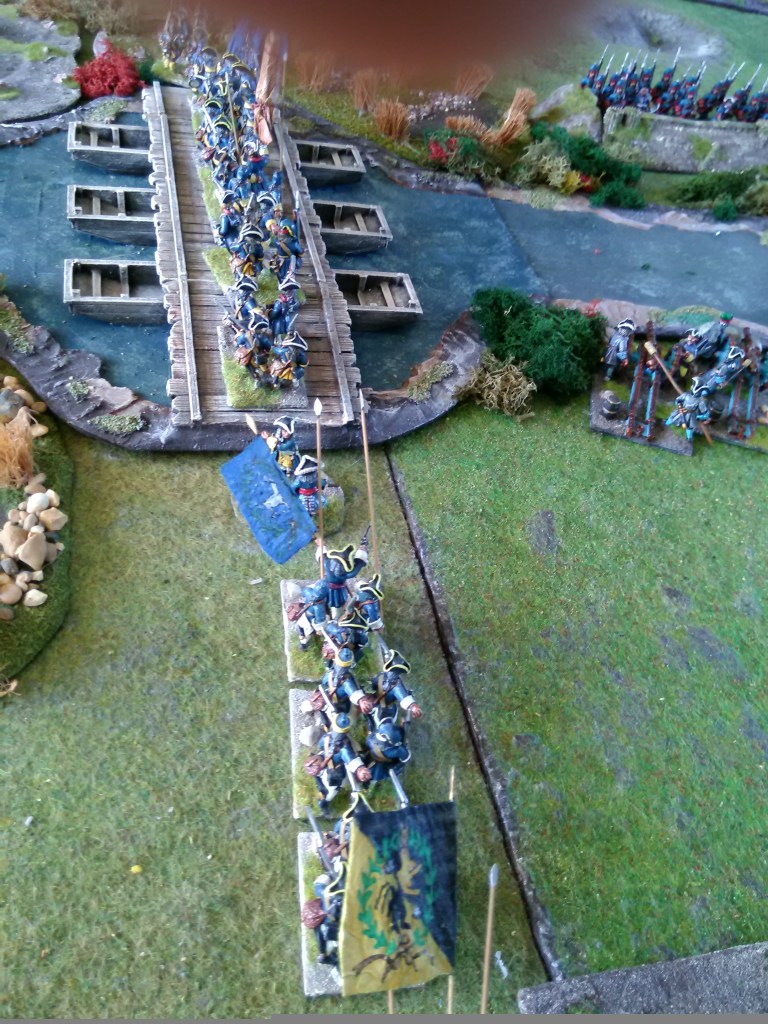
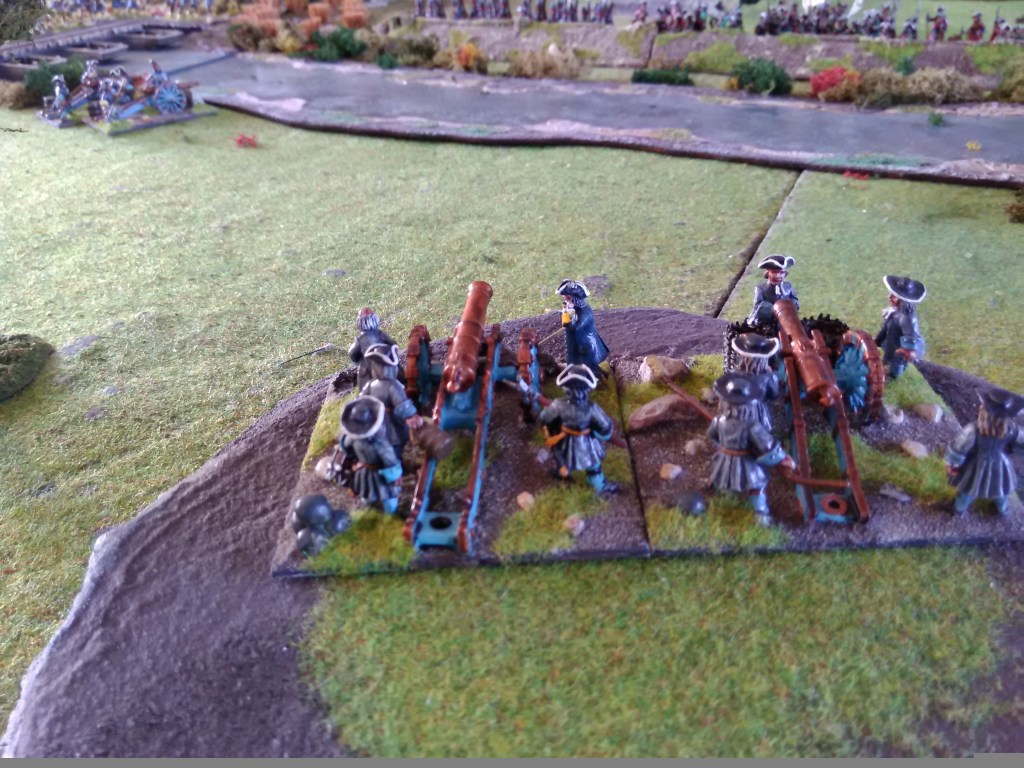
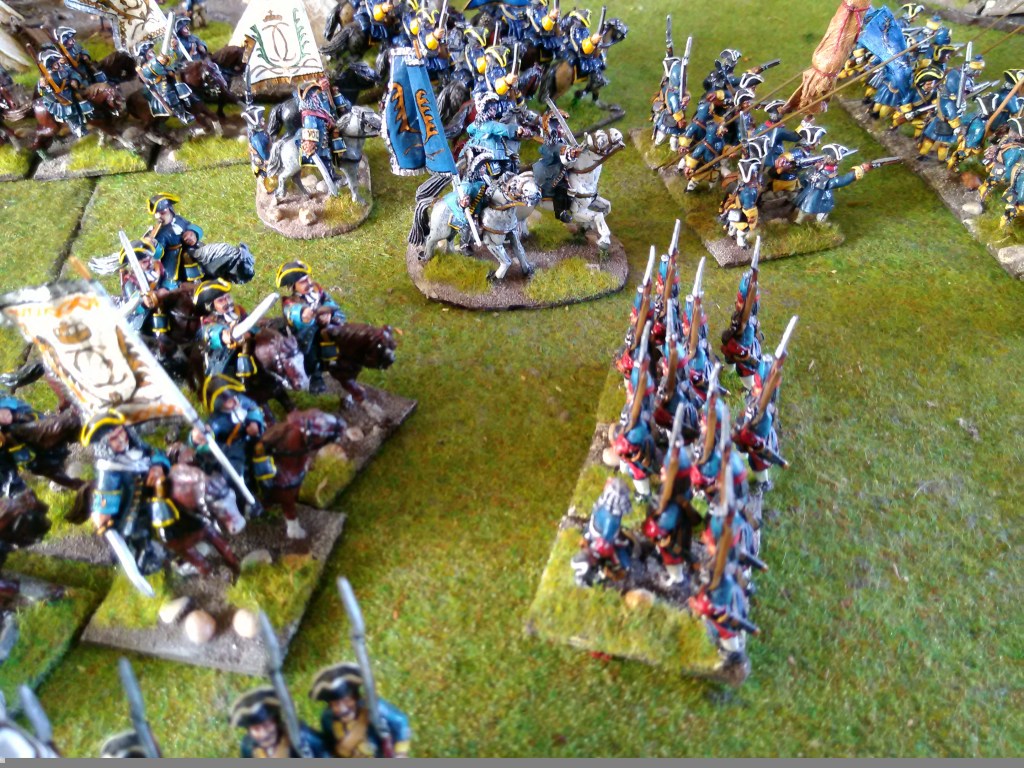
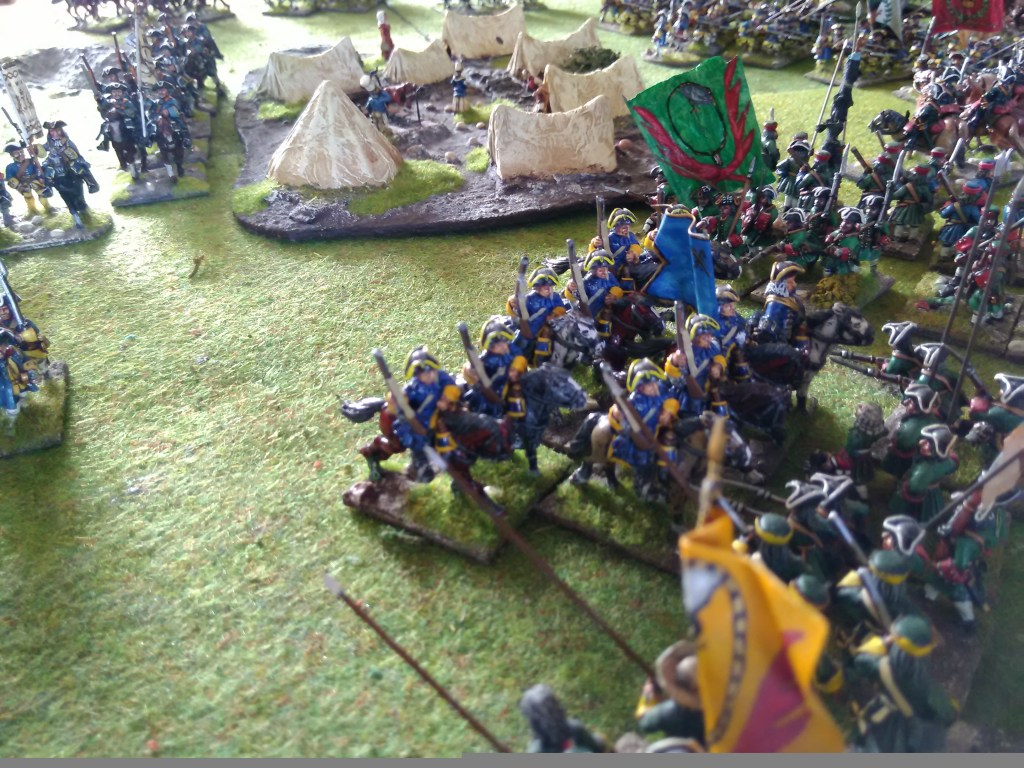
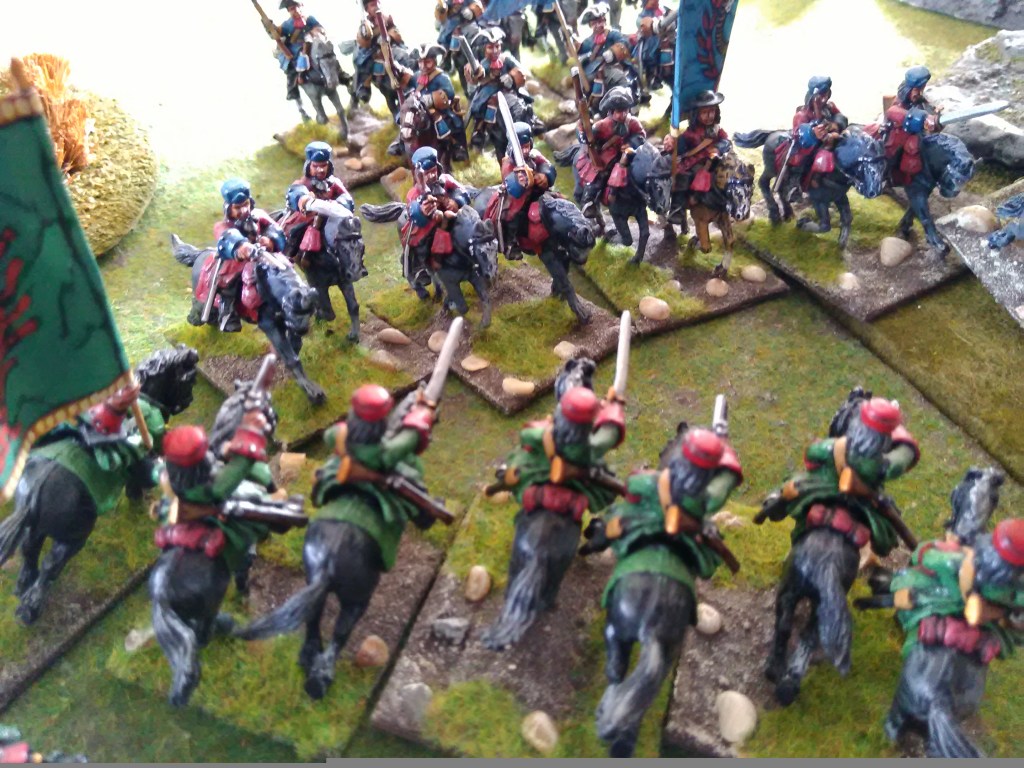
Our next game was from our GNW collection, this time a Swedish attack on a Danish force.

This was a pretty bloody affair – mainly Danish blood I’m afraid.

Both sides deployed fairly traditionally, two cavalry wing and an infantry centre each, the Danes had the slight advantage of a farm enclosure they could defend.

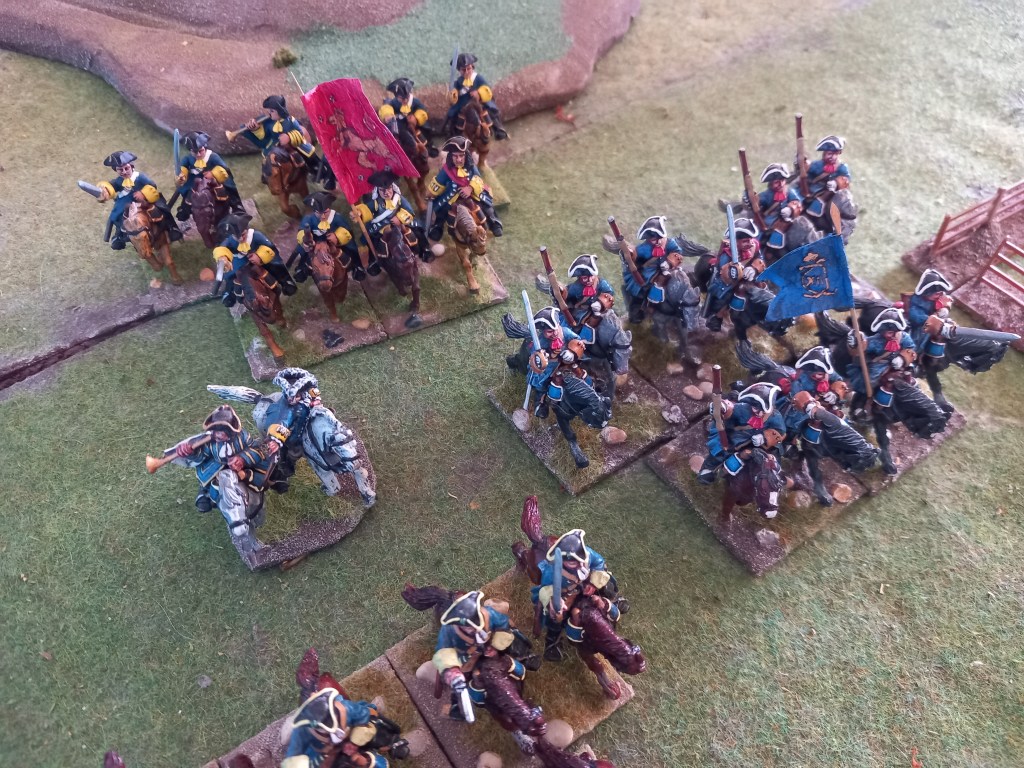
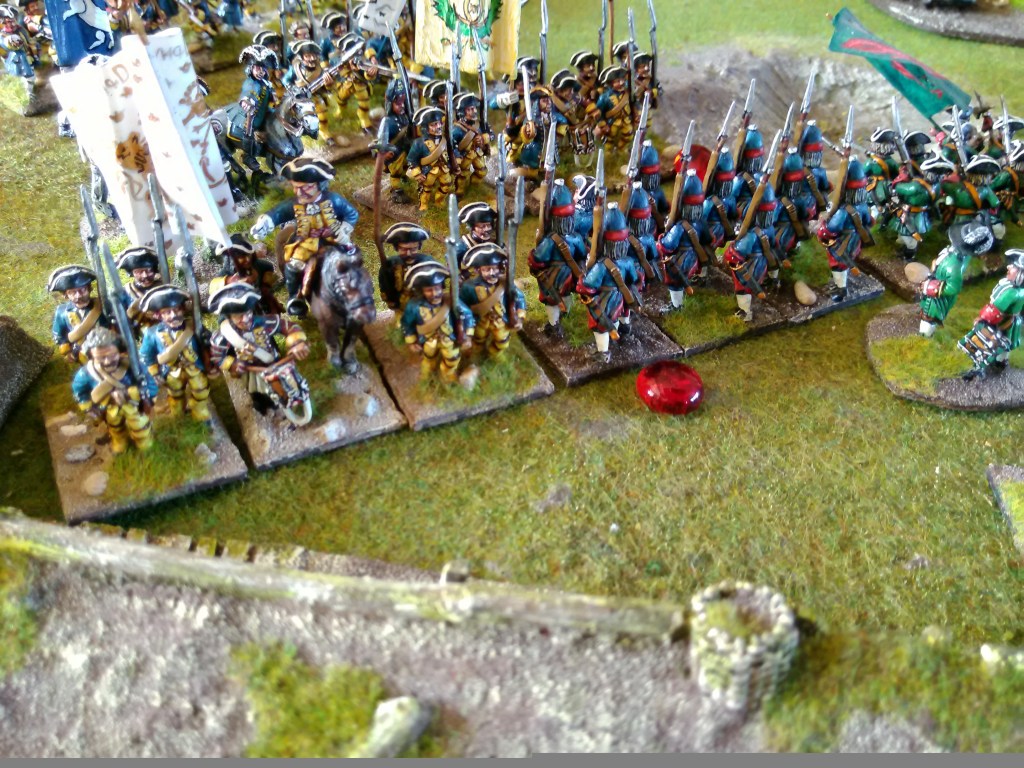
The early moves were all about the cavalry and featured the Swedes charging into the Danes with their traditional gusto and the Danes repulsing the first wave but the Swedes could better absorb casualties and so when the second wave went in the Danish wings collapsed.

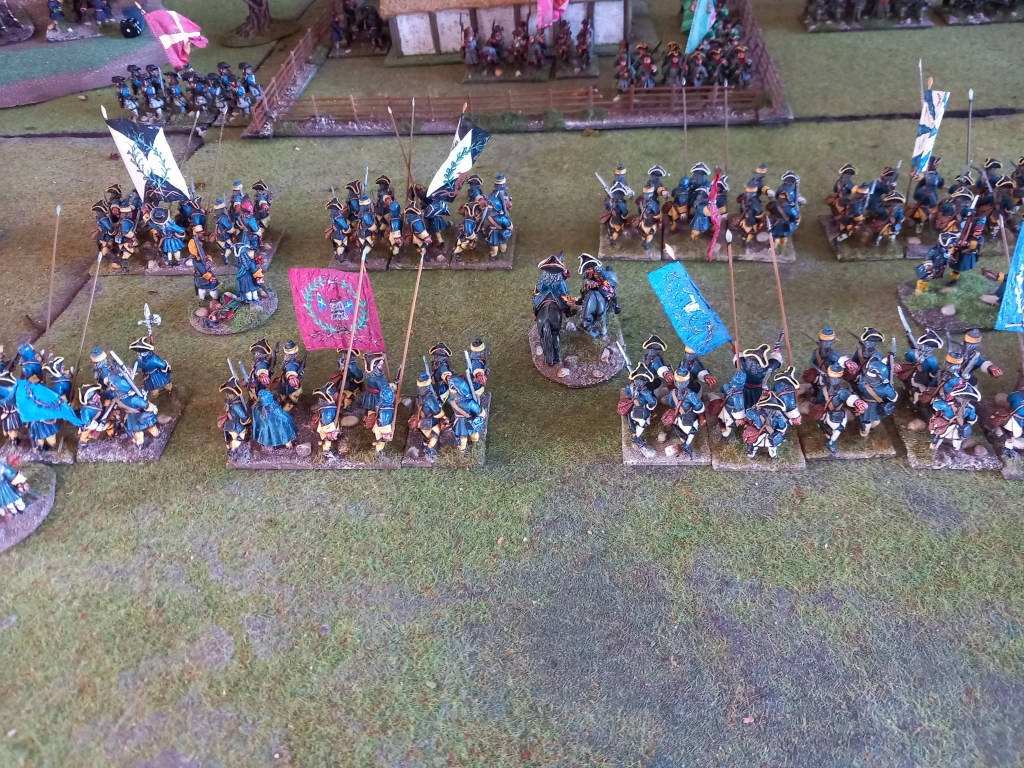
The Swedish infantry attack on the farm was held and settled into a long running musketry duel which the Swedes would ultimately win but it would be a long time coming.

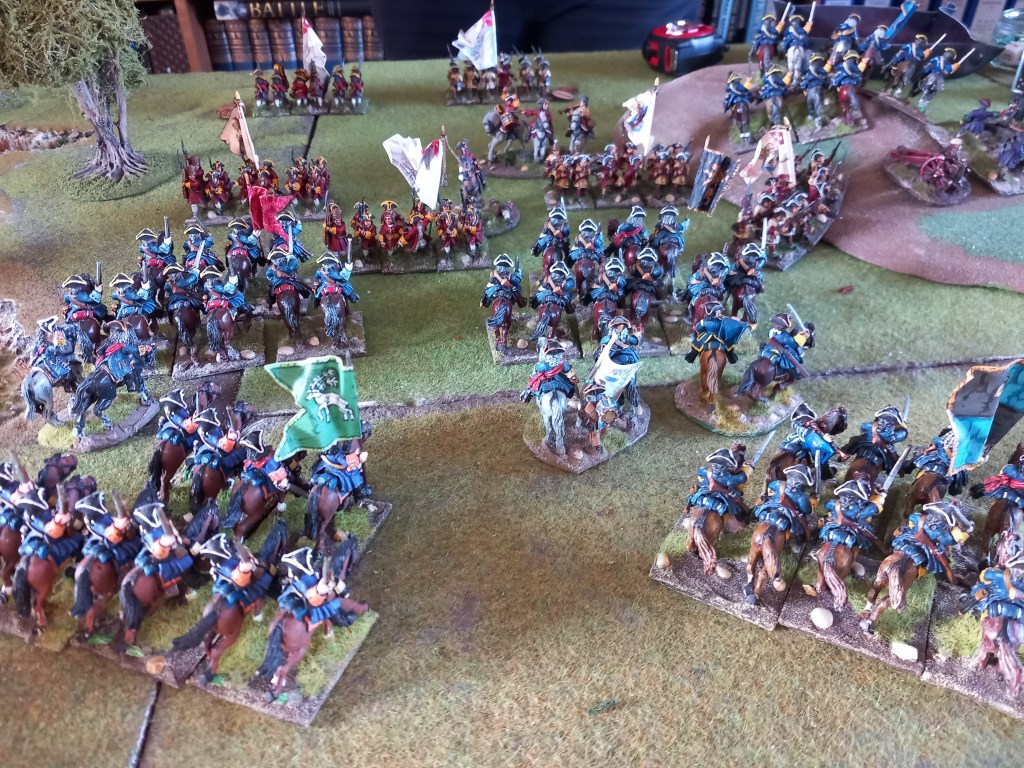
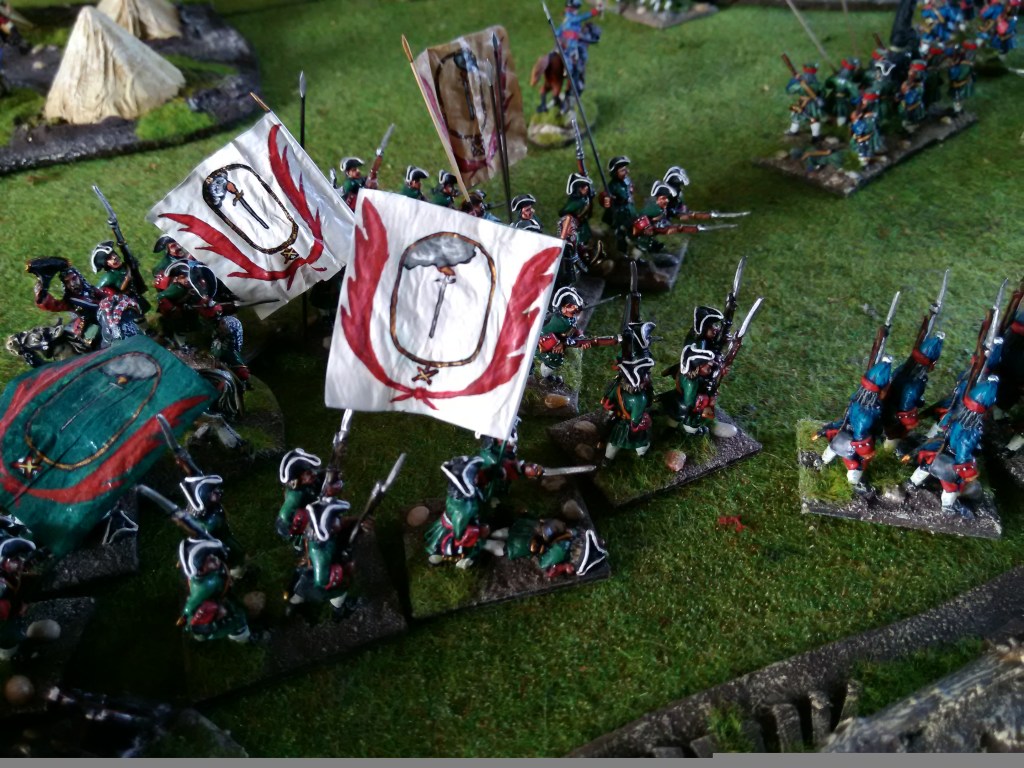
The shocking event and the one that sealed the game was the charge of two brigades of Swedish cavalry on the large Danish Guards brigade. The Guards barely put up and fight and collapsed almost immediately, it really shouldn’t have happened but a couple of minor tactical errors and some appalling dice throwing ended the game in shocked silence.

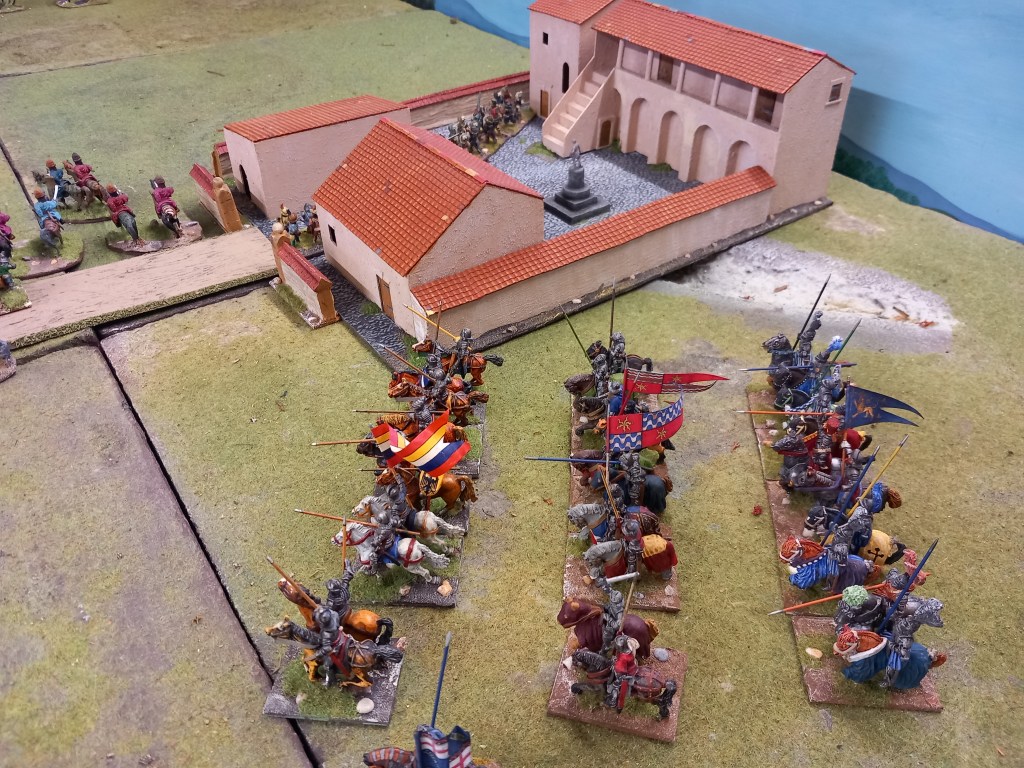
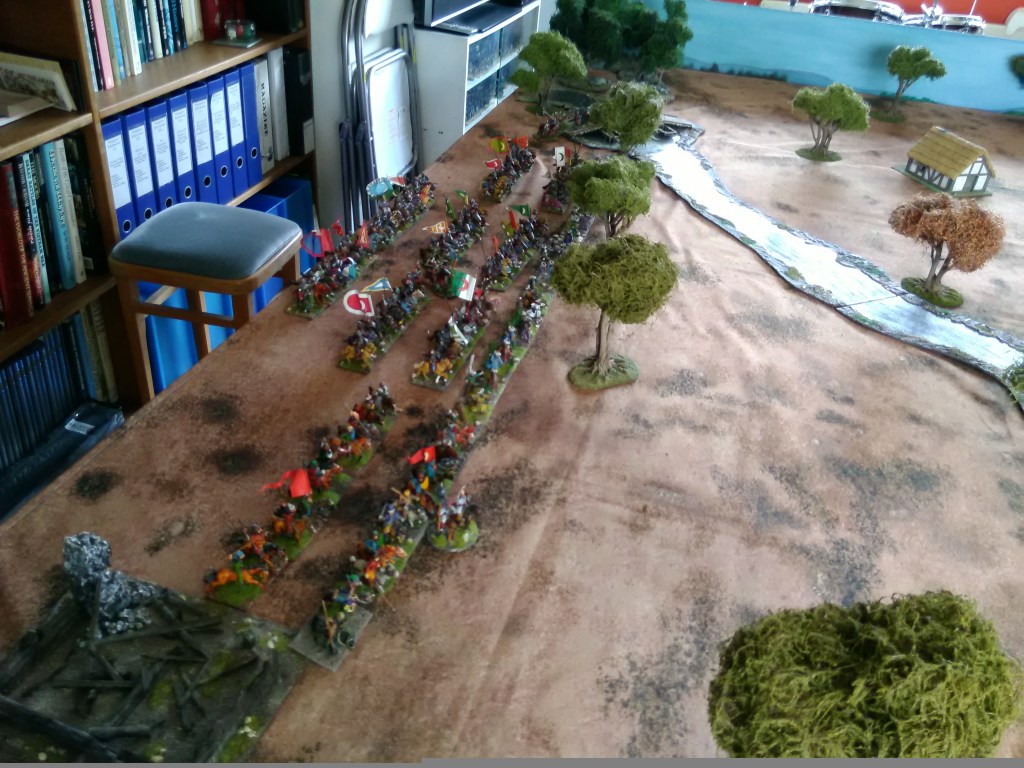
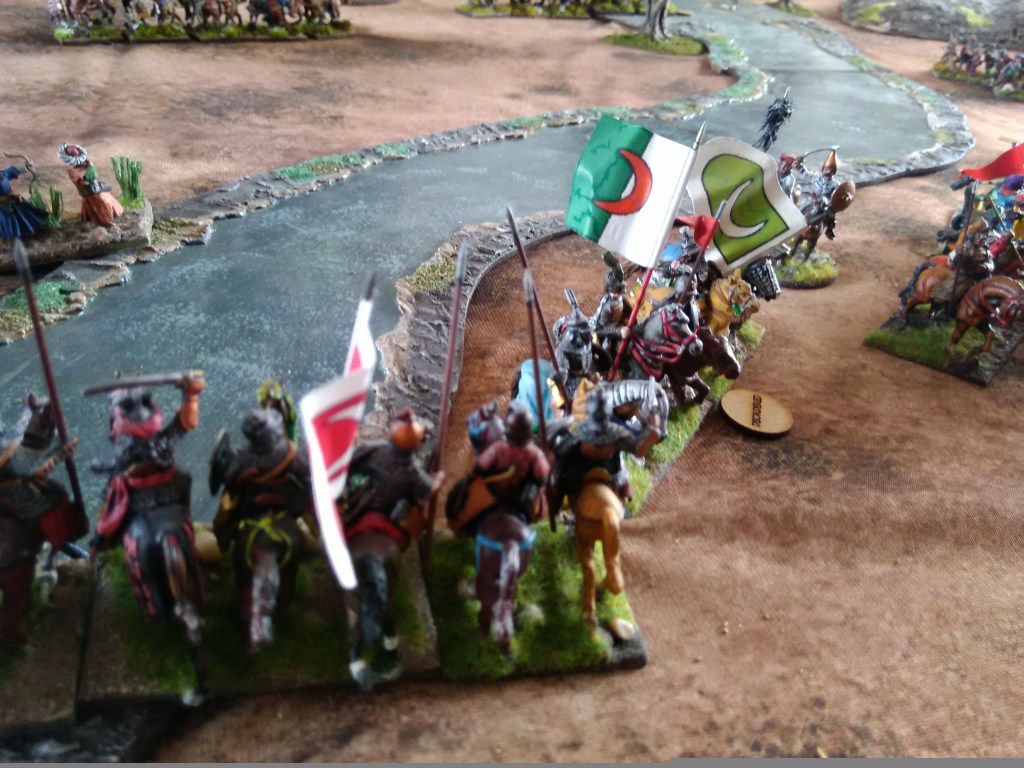
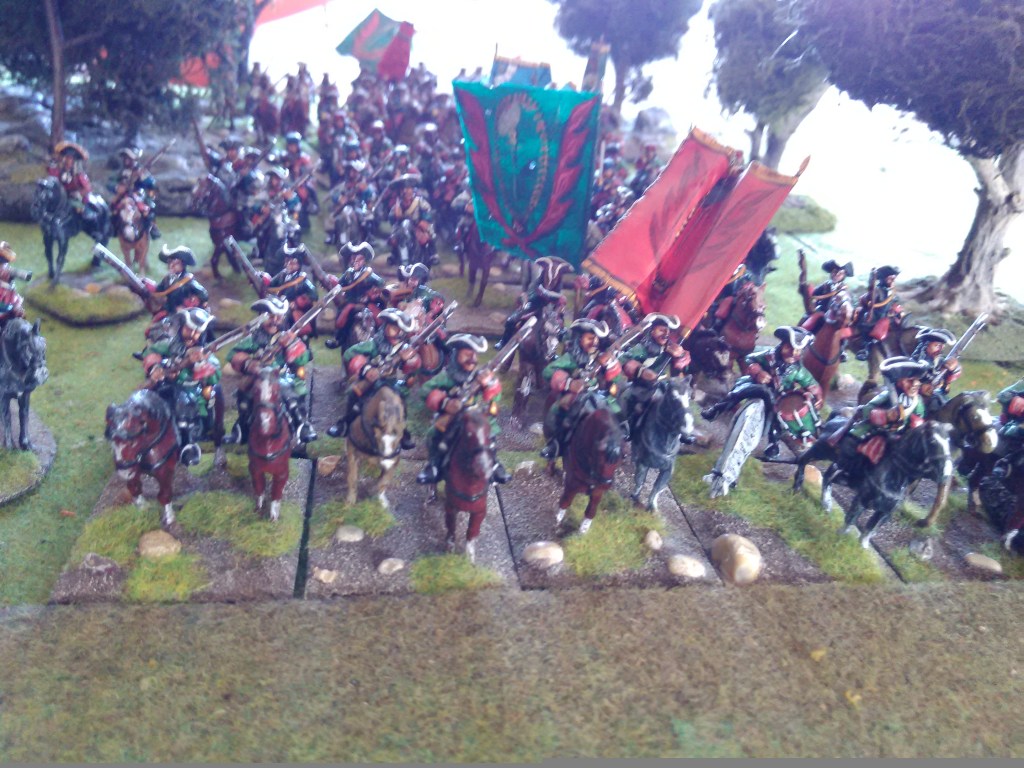
Next was good old Italian Wars, a period we have gamed for some 30 years now ๐Ÿ˜ฎ.

For this one we had a Spanish Imperial army attacking a road between two walled towns which is defended by a Venetian force,

Despite the presence of cavalry on both sides this was much more of an infantry fight and so it took longer for the armies to close which rather favoured the Venetians who could slowly wear down the Spanish with long range crossbow fire.

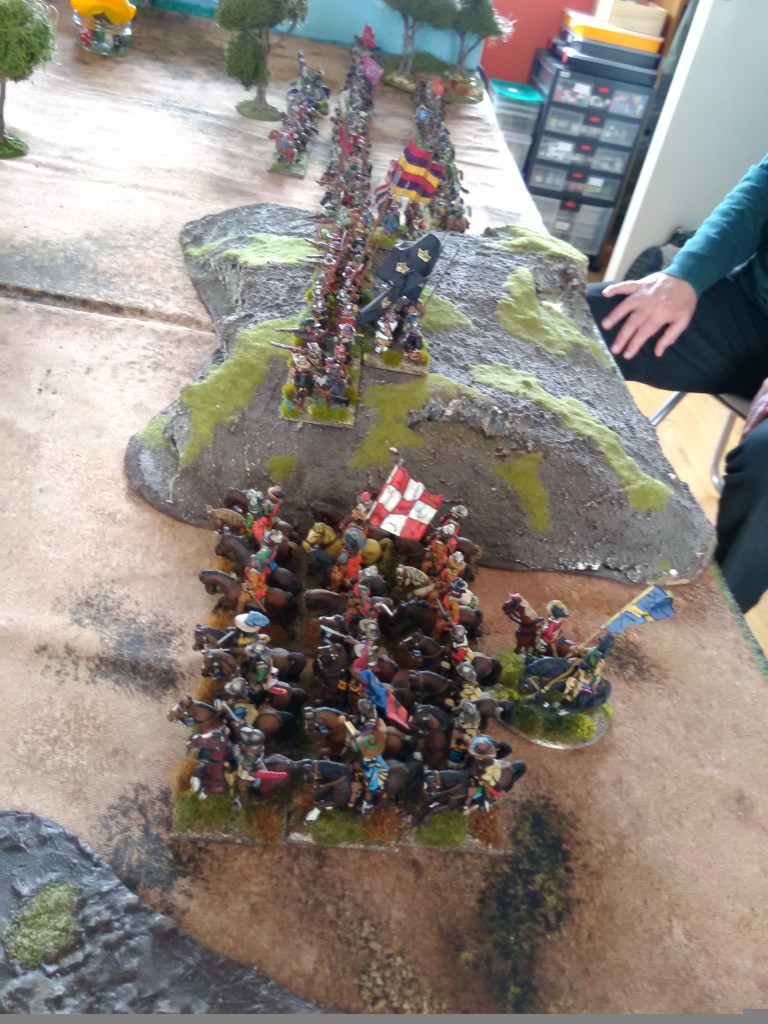
The one bit of cavalry action that there was saw the Burgundian men at arms in the Spanish army drive some Mantuan mercenaries from a breached wall and then mix it up with the largely supine Venetian cavalry beyond the wall.

Unfortunately for the Burgundians the pathetic Venetian cavalry response did hold them up long enough for the Romagnol pike to redeploy and attack the cavalry in the flank and eventually cut them down.

The real action however was the attack of the Spanish pike colunella who swept the opposition from one part of the wall and broke through but further down the wall the colunella there stopped after its captain was slain and would proceed no further.

The attack of the colunella was the keystone of the Spanish attack plan and the faltering of the one meant that despite the success elsewhere it was not enough and the Venetians rightly claimed victory.

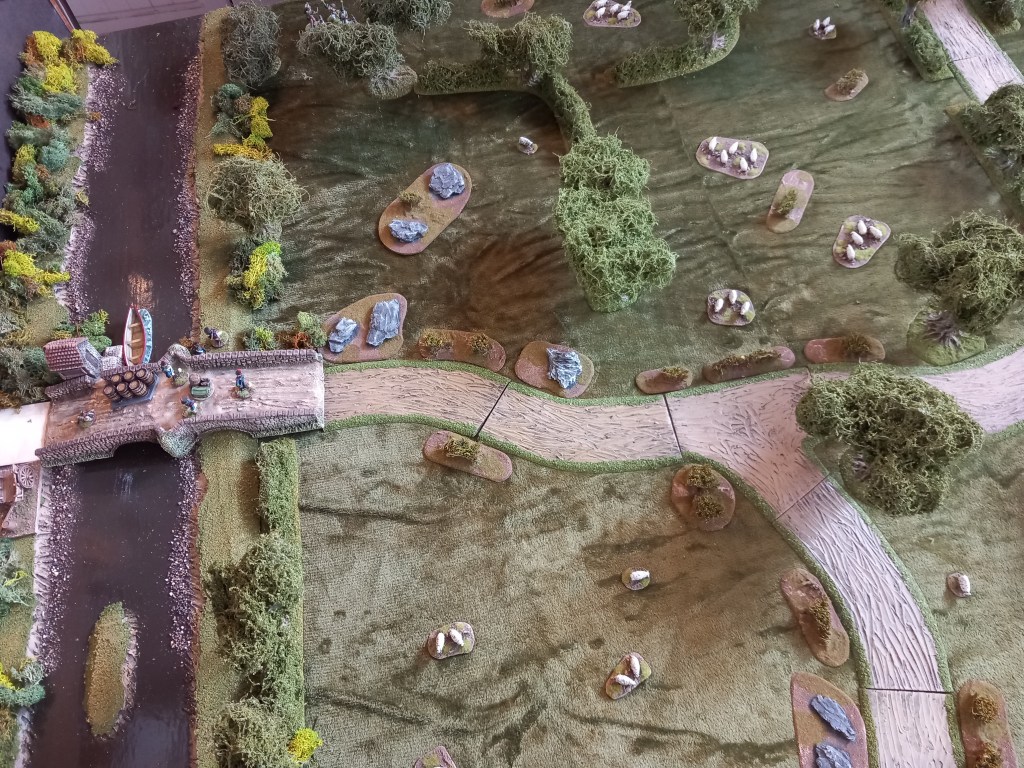
Our next game was a Napoleonic skirmish away game with one English and one Scottish company attempting to get to a bridge before it was blown by the French, the only thing in their way was a thin force of Irish in French service.

Quite frankly there was no way the British were going to get to the bridge in time (the French increased their percentage chance of blowing the bridge by 10% per turn played and the British were more than 10 turns away.

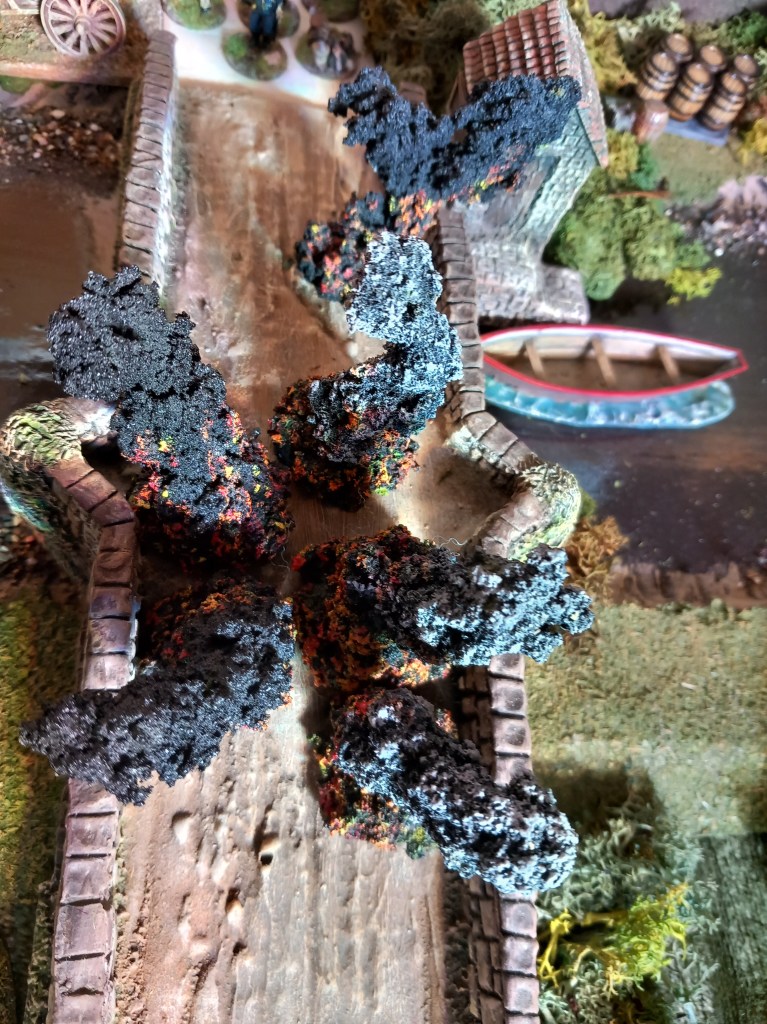
The bridge duly blew but plenty of fun was had ๐Ÿ˜€.

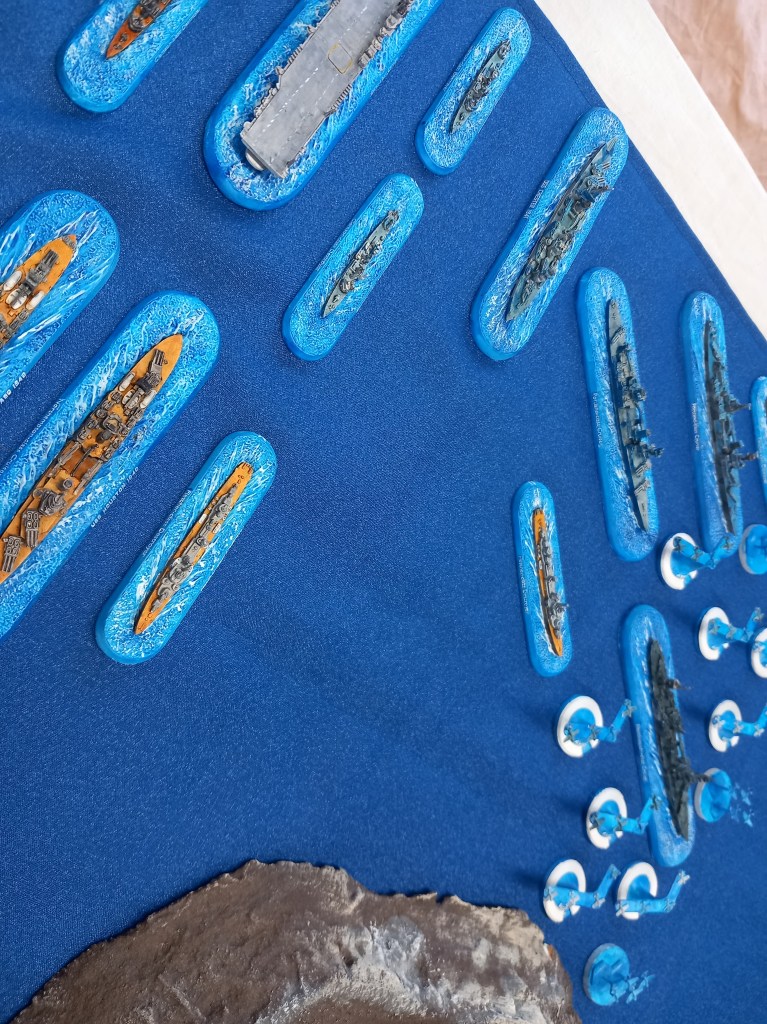
Our final game of the month was another Victory at Sea encounter set once again in the Pacific. This time we had a pair of enlarged fleets (Gerard was busy painting over the Christmas break) both featuring an aircraft carrier and the name of the game was don’t let your carrier get sunk.

For the first time we used the aircraft rules, which are simple but effective, and they certainly added a different tactical nuance to the game.

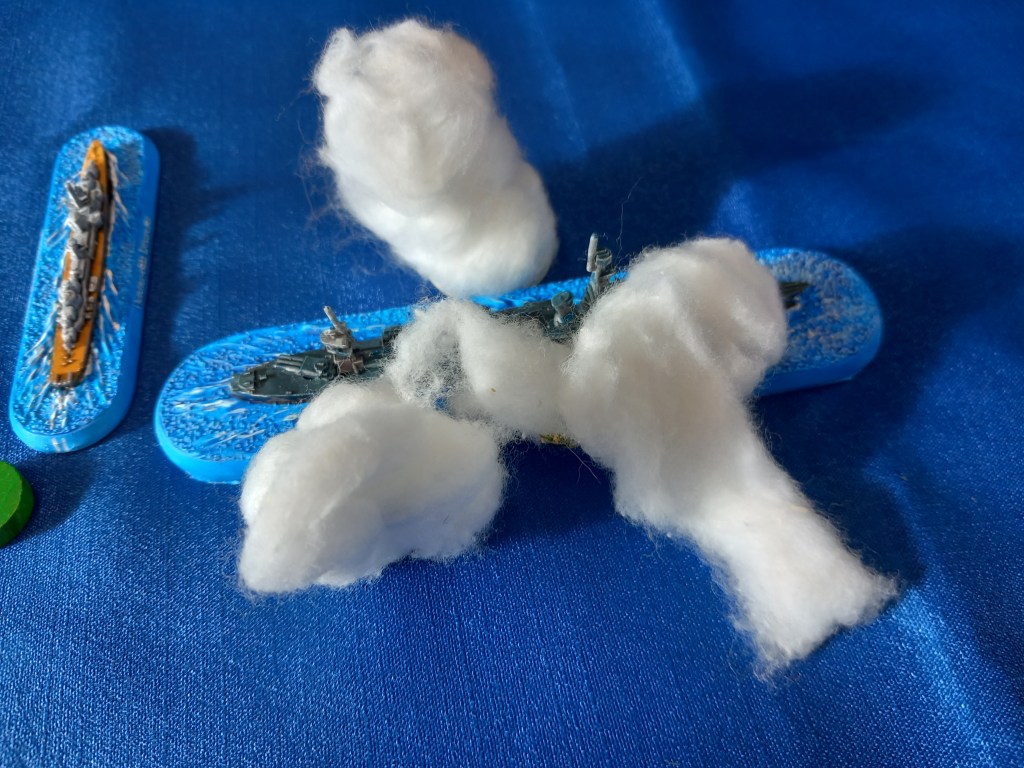
Ships on both sides were sunk with all hands but both players managed to protect the ‘mother ship’ – more by luck than judgement, with only the US player getting any hits in at all.

A points tally at the end gave a marginal victory to the US player but the practical reality was a draw.

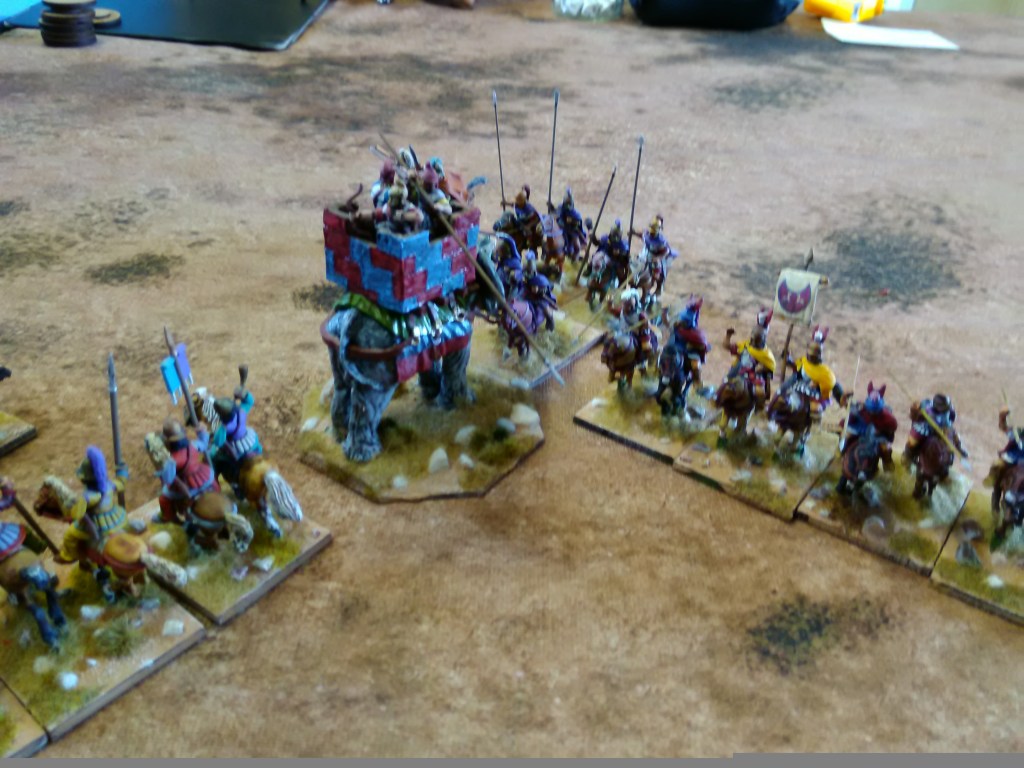
In other news we had the incredibly exploding elephant! As you can see, uncured resin forced its way out and split the model catastrophically ๐Ÿ˜ญ which was bloody annoying.

On the down side, we bought 6 of these models from the manufacturer before he realised the problem (no vent hole) and 2 have gone so far which means replacing them and re-painting – Dave cried. On the plus side, said manufacturer acknowledged responsibility and has replaced the 2 dead elephants and will replace the others when they burst (if they do I guess?).

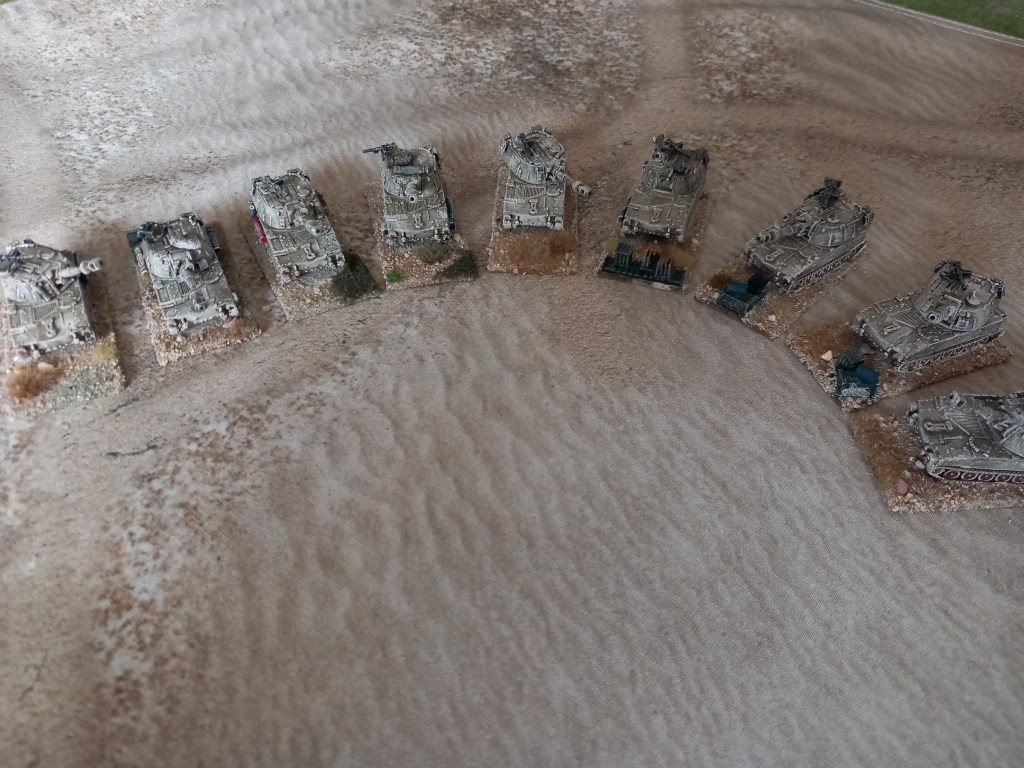
Painted some more 10mm for the collection, this time M109’s for Iran. Pretty sure I’ve done more than is needed but I’m having such fun doing them.

Nothing much else to report, the last few days have been spent starting the games room clear-out and the first week of February will probably be a bust in terms of gaming but hopefully back on track after that. In the meantime, play nice and I’ll see you in February.

April 2023 Report

Back from holiday we were into a multi command GNW game which saw two fairly evenly matched sides slug it out over a convivial afternoon of gaming.

The Russians deployed with half of their cavalry behind a stream on their right supported by a foot brigade and the rest in the centre hoping to use a patch of wooded scrub as an area where they could deploy their other cavalry dismounted to slow the Swedes. The Swedes themselves deployed all their horse on the left with the aim of smashing their way across the stream and thinly held the centre and right with their foot.

As always the Russians had the toughest job given the poor morale of their troops but the cautious advance of the Swedes rather played into their hands in the early moves.

On the Swedish left the massed cavalry attack was funnelled by the stream and marsh behind which the Russians were hiding and in the early moves they took losses from musketry fire but once they got going it was difficult for the Russians to hold on. The Swedish first wave were indeed repulsed but when the second wave crashed in the already weakened Russians collapsed and fled the scene which forced a morale test on the supporting infantry who decided that home suddenly sounded very appealing!

Across the Russian centre and left the plan of dismounting the dragoons worked and the Swedish advance in the wood slowed to a crawl but on the left where the village was located the Russian foot didn’t fare so well and after a stiff fight they gave up and fled.

All told, a strong Swedish victory. For those that are interested the bulk of the figures are Foundry with Old Glory in support.

Next up was another Successors game with the predominately Victrix collection, this time Eumenids v Antipatrid.

In this encounter Eumenes was significantly outflanked on his right so had to get on with it before the jaws closed.

Being superior in cavalry and elephants, as well as having the better quality infantry, Eumenes got a bit cocky and galloped his right wing cavalry across the face of his infantry in order to overwhelm the Antipatrid sole cavalry force on their right. Not surprisingly this was a fail, the cavalry got tangled up with the enemy foot resulting in the loss of the Xystophoroi and the slowing of the Eumenid infantry advance.

The Eumenid left wing cavalry did the job they were meant to do which was slow up the Antipatrid shock cavalry and in fact such was the accuracy of their volleys that they saw off the opposing Thessalians, although the nearby elephant might have been a bit of help ๐Ÿคจ

In the end, of course, it was the infantry centre that settled it and the better quality Eumenids burst through their opponents before the jaw could close about them although in reality this was more to do with over timid play by the commander of the Antipatrid left – problem of a Napoleonic player being more concerned about nice neat lines and not getting stuck in ๐Ÿ˜‚๐Ÿคฃ

After the intensity of a couple of big battles we changed the pace with a Franco Prussian skirmish game around two scouting parties coming to loot a monastery.

The rules were a set of amendments to an existing Napoleonic set held together by a rough narrative and making up stuff along the way that we hadn’t catered for – surprisingly it worked and both sides managed to get off with something although the French lost their officer and several troopers.

Although this was a bit of fun we reluctantly came to the conclusion that we just don’t get enough out of gaming this so the collection is going to have to be sold on. If you are interested then drop us a line on the site and we’ll get back to you with details and photos.

Another skirmish was next with a medieval away game which was a tourney to select those who would be sailing away on a campaign using the old Lamming rules. Nothing else to say really.

Final game of the month was an Ottoman v Swedes game circa early C17th.

The terrain was split by a stream which flowed between two large hills (on the Swedish deployment baseline) and had two formal crossing points (a pontoon bridge and a ford) although the stream could be crossed by anyone albeit at a reduced rate. A burnt out village and a wood anchored both flanks on the Ottoman baseline and a small village sat in the middle of the more open plain beyond the stream.

Both sides opted for the ‘smash through with all your cavalry strategy’ ๐Ÿ˜‚ The Swedes deployed almost all their cavalry to the right of the big hill (where the two landskap regiments spent the whole game) comprising 3 units of Danes, 3 units of Swedes & 1 unit of Finns covered by a skirmish screen of Transylvanians; on the other side of the hill, ready to cross the stream via the ford were 2 units of German cavalry and a Scots brigade on the other hill. The Ottomans deployed their 6 units of Feudal Sipahi and 2 units of Sipahi of the Porte in the centre, just short of the stream, screened by 3 units of Azabs, the pontoon bridge on the left was held by the Voyniks and the right by 2 units of Tartars.

In the initial stages it was all about the skirmishers; the Transylvanians got the worst of the shooting from the Azabs who had waded across the stream and retired hurt, the Tartars got tied up with the Germans in a back and forth which eventually saw the Germans retiring having been unable to get up close enough to fully utilise the caracole.

Out on the Swedish right the Finns avoided what would later become death central further over and in a brief, but too late, affair drove the Voyniks back across the bridge in rout – this was the single success the Swedes enjoyed.

In the centre the Sipahi’s took longer to get over the stream than their general would have liked but the Swedes & Danes were held up by the over enthusiastic Swedes pushing through the Danes and disordering everyone and then realising that being disordered as the arrows started to fly in wasn’t such a good idea!

The early Swedish attacks went well, sending the Azabs scuttling back across the stream but by then the Sipahi’s had dried themselves off from the crossing and, after a volley of arrows, charged in and the rot started ๐Ÿ˜“

The repulse of the initial attack wasn’t the end of the world for the Swedes and the units that retired would soon rally but in order to keep the Sipahis back the cavalry general committed his Danes to the charge rather than shooting (carbine armed). This just didn’t work out well, a couple of the units refused to charge which meant that their opponents were able to get the jump on them next turn and the one that did charge just got mashed up. Suffice to say the Sipahis “got their dander up” and were all over the Danish cavalry who then retired into the the Swedes who off course couldn’t get organised quickly enough to repulse the following on Ottomans.

Realising all was lost the Swedish commander and his downcast cavalry general conceded. A crushing Ottoman victory.

In other news some more figures were added to the future wars project, cheers Mark.

Extras for the GNW collection were recruited, thank you Neil.

Additions to our Mexican bandits for the western gunfight project, thanks Vlad.

Iraqi command stand stand for the Iran Iran Cold War Commanders project.

More for the modern skirmish collection, wonder if they’ll actually get used? This is such a rabbit hole ๐Ÿ˜‚

Well that’s it for the month, not a bad one, next month is Partizan and we’ll be taking the Successors on tour so if you’re going to be there find us and have a chat ๐Ÿ˜€

Holowczyn Refought

Swedish vanguard crosses the river

Many, many, years ago we fought Holowczyn as part of a convention tour, simulating the ‘tour’ of Russia by Charles XII, culminating in the battle of Poltava, so 3 battles, 3 conventions, but we’ve never played it since so we thought we’d roll out the collection and give it a go.

Bieltz’s Grenadiers

For those not in the know, Holowczyn was the opening battle in Charles XII’s campaign against Peter the Great’s Russia which kicked off in the summer of 1707. By the summer of 1708 the Swedes were well into Russia struggling to come to grips with an enemy that kept retreating and burning everything – that sounds familiar ๐Ÿ˜’ but on June 30th Charles and the Swedes found themselves facing a dug in Russian army over the river Vabitich.

The long line of the column

In what would become his signature approach to battle, Charles opted for the mad idea ๐Ÿ˜, so in the early hours of the morning of July 3rd 1708 he and his men waded across the river at an unguarded point, advanced through a marsh, deployed on the flank of the enemy and attacked. The Russians were slow to respond, not being sure whether it was a full attack or a diversion, and ended up conducting a fighting retreat in a confused and haphazard firefight. Further infantry reinforcements merely added to the confusion and when the Russians committed their cavalry the outclassed dragoons were swept away and the field was clearly in Swedish hands. It was however somewhat of a phyrric victory, Russian dead were 4x that of the Swedes but most of the Swedish wounded (around a thousand) would succumb to their wounds and the losses were mainly among the guard infantry, losses that would be felt at Poltava.

It took a while!

The reality of the battle was that Charles was attacking one division (Repnin’s – the biggest, comprising 2 brigades) of the three positioned along the Vabitch and was inserting himself between Repnin on the left and Sheremetiev in the centre while Hallart was out on the right; to the left of Repnin was Goltz’s substantial cavalry division of 3 brigades. The only other troops to get themselves involved was a brigade detached late in the day from Sheremetiev’s division. The Swedes comprised the vanguard foot brigade, commanded by Charles himself, featuring the 4 battalions of the Guard plus 2 other battalions, then a 2nd brigade of 6 battalions and finally a cavalry brigade featuring the Guard Cavalry & Guard Dragoons and 3 other cavalry regiments.

Charles XII

Looking at our collection we easily had the numbers (and we’d sold a third of it back in 2020!) and even had most of the named regiments/battalions, unfortunately only 3 Guard battalions but we reckoned it wouldn’t make much difference (it didn’t ๐Ÿ˜Š). Measuring up the space that would be occupied by the battalions representing the actual number of Russian battalions behind the earthworks we reckoned they would need about 5 foot, give or take, so the 8 foot x 6 foot standard table would allow us to deploy them, allow space for the marsh and give space on the table end for the later Russian reinforcements. Our trusty river section we positioned 2 foot in and used the section with a pontoon bridge on to represent the crossing point (the Swedes did have pontoons but abandoned them – why do it the easy way?) and at that crossing point we constructed a substantial marsh. Along the rear of the Russian table edge we put on plenty of trees and down part of the left flank; into these we placed Goltz’s cavalry division (on the left) and Renne’s reinforcing infantry from Sheremetiev (on the right) while in the centre behind Repnin’s division we put on the army camp.

Swedish field artillery

Our thinking with the Russians was that Repnin’s 2 big brigades would be positioned facing out across the river and wouldn’t start responding until the Swedes emerged from the marsh and then only the brigade that could see them (Schweden). The reinforcing cavalry and infantry could only be activated by Repnin finding out from Schweden that they were under attack and sending a message off to Goltz who would then roll a D6 for the number of turns after receipt for when he could start to emerge, said messenger would then carry on to Renne to release his infantry using the same process. The process was made deliberately slow (wargamers are very good at responding to things they can’t see unless you stop them ๐Ÿ˜‰) which is just as well because both reinforcement commands rolled a 1! Deploying the Swedes was more straight forward as they only had one route so we strung out the infantry battalions, led by the Guard, all the way from the table edge, across the pontoons and into the marsh with the 1st Guards on the edge of the marsh, somewhat disorganised, ready to go; this signalled the start of turn 1. As a side note, the Swedes, for once, out gunned the Russians so we placed some regimental guns next to the crossing point to fire in support and some big field guns on a low hill to pound the entrenched Russians, the Russians only had regimental guns strung out along the line.

Guards face off to the Grenadiers

Rather than go balls out, the Swedish commander decided to remain stationary with the 1st Guards to shake the accumulated disorder and wait for the 2nd Guards form up alongside and do the same, this gave the Russian grenadiers time to about face and wheel out of their entrenchments to face off and allow the Russian high command to panic and send for help.

Repnin and Schweden

With the grenadiers and Guards in range both opened up on each other at effective range, losses were even, so no morale failures and the rest of Schweden’s command started to turn about as more Swedes emerged from the marsh. Another volley and Charles decided it was time to force the issue so the 1st & 2nd Guards moved into close range and fired again forcing one of the grenadiers to rout and punching a hole in the the shaky Russian line.

1st Guards

First brigade morale test of the day (due to the grenadiers rout) and Schweden’s brigade failed spectacularly, hotfooting along the entrenchments and into the camp. Fortunately Repnin and Schweden were able to rally some of the units further back and start to restore order but they would now count as a failed brigade for any further tests which for Russian morale was always going to be a worry. The collapse enabled Dalcarian (2 battalions) and the 3rd Guards to get out of the marsh and form up with the 1st & 2nd into a fairly coherent line while Sparre and the other brigade marched on through the marsh to eventually emerge at the top end and march south on the other side of the camp.

Rallying the troops

As Repnin and Schweden tried to stem the flight Goltz received the request for help and rolled his 1 so Illfland’s brigade was first out of the woods and headed along the top edge of the camp in what would become a collision with Sparre. Back with the Guards, Charles went all out now and threw the 1st & 2nd into close combat with the rallied Russian foot, who of course had almost no losses at this point and managed to repulse the Guards, shouts of “huzzah”. Testing for losses the 1st Guards failed and routed but the subsequent brigade test was passed with ease (it helps having Charles XII as your brigade commander ๐Ÿ˜‚) and the 1st were rallied by him pronto but sat out the hard action for a while as they called in stragglers and tended to the wounded.

That’s a lot of cavalry!

While the infantry slogged it out on one side of the camp Illflands dragoons advanced on Sparre’s infantry, who due to the terrain could only deploy two battalions abreast, but non the less Vasterboten forced Narvski back and slowly ground forward – the dragoons were never going to charge the Swedish infantry so it became a shooting match which for a while the dragoons did ok in but eventually legged it for the woods.

Vasterboten v Narvski

Seeing how ‘well’ Illfland was doing Goltz realised that his other two brigades were going to be no use in the limited space so made the fateful decision to send them both into the woods to outflank Sparre and attack the rear of the Swedes; a bold plan which the Sparre player could realistically not respond to and was a calculated gamble by Goltz that he could be through and out before the Swedish cavalry under Creutz got through the marsh. An alternative plan could have been to dismount in the woods and fire on the flanks of Sparre’s command which might have forced him to stop and deal with the threat – we discussed this after the game and the Goltz player took the view that as the real Goltz didn’t do it neither would he!

If you go down to the woods today…..

Back at the real battle ๐Ÿคฃ Charles and his brigade were definitely in and amongst the entrenchments facing off to a hastily constructed second line by Schweden which Chambers was extending out to the right effectively forming behind Illfland’s withdrawing dragoons – the size of Chambers brigade (9 battalions) made cohesion quite difficult in the space available and we could see why in the real thing they just faded into the woods.

Guard cavalry

To force the issue in the main battle area Charles summoned the Guard Cavalry & Dragoons from Creutz along with Nyland to punch Schweden’s already weakened brigade; this was a risk, it weakened Creutz’s command and if the Guards didn’t do as well as envisaged they wouldn’t have their commander to rally on. Always willing to “roll the hard six” the Swedish cavalry blasted their way in and made some big holes although the Dragoon Guards did pay for a reckless pursuit and got themselves shot up ๐Ÿ˜’

Nyland

Unfortunately for the Russians the holes punched by the Swedes was in Chambers brigade and in the ensuing test for routing units and having Schweden’s failed brigade on their flank the big brigade failed and ran for the woods. Not surprisingly, Schweden’s already shaky brigade didn’t survive their test and they too duly headed for the woods.

“you’re going the wrong way!”

While all this was happening Heinsk’s dragoons emerged from the woods, somewhat disorganised, but all they needed was a bit of a breather and they could catch Sparre by surprise. Even better was the emergence of the lead battalions of Renne’s infantry from their wood. It could all be saved!

Oh dear

Unfortunately for Goltz and Heinsk, regiment Hielm of Creutz’s reduced command had other ideas and charged home smashing the lead dragoons off the table who routed through their brethren behind who were caught in the pursuit and equally smashed resulting in a brigade morale failure (surprise๐Ÿ˜) and the end of the flank move.

Goodbyeee

That was really it, both infantry brigades were on the run, Illfland’s & Heinsk’s cavalry were shattered and running, while Hesse Darmstadt cowered in the woods; the fact of Renne’s arrival was insignificant, yes it was a substantial brigade (6 battalions) but what was it going to do? Clearly a substantial Swedish victory.

It’s all ours

When we analysed the game the Russians initially did better than their historical counterparts – well they stood and fought! but low morale and poor command levels meant they were never going to last that long once things went wrong. I think it’s interesting that wargamers will stand and slug it out even when the odds are stacked against them unlike the historical prototypes who couldn’t get off the field quick enough – mind you it wouldn’t have been much of a game if the Russians had just turned round and retreated! For the Swedes bold play paid off, so very historical but the casualty tables also equated to history with the Guards showing the kind of casualty figures that would make a general think about amalgamating regiments, everyone else was pretty much insignificant.

Guards

It was nice to give the GNW collection a run out, good job we didn’t sell the whole lot! The rules were our own ‘Ga Pa’ – oh how original, we hope you enjoyed the write up, feel free to fire in any questions.

Ian & Dave.