Our Indo China jungle has grown to quite a reasonable size over the past year mainly using aquatic foliage and different shaped mdf bases from the likes of Warbases but no bamboo, until now.
This was started by Dave who saw a bag of plastic bamboo on an e bay browse for next to nothing from China so bought it on a whim. The big idea was to base the bamboo on 20mm round bases the same as our figures and place in the mdf skirmish movement trays again available from the likes of Warbases, then as troops moved through you would remove a bamboo base and replace with a figure base thus getting rid of the awkward balancing act you get when figures move through difficult terrain. We’d tried the idea with our ACW stuff a few years back when we based up corn stalks on 40mm wide square bases to match our unit bases so that we could get the effect of troops moving through the corn.
However that’s as far as it got until one day Dave came over and said “Here, you do it”


First job, drill a couple of holes in each of the round bases using a pin drill to suit the bamboo stalks; I can’t tell you the drill bit size but if you’ve got a pin drill then you’ve got small drill bits, it ain’t rocket science. Why two holes? Well one stalk on it’s own looks a bit naff, not much of a thicket really, but if you want to eek out your supply then go for one; I did try three stalks but it is a bit overcrowded, uses your supply up pretty darn fast and makes it difficult to get on the skirmish bases without tangling up with other shoots.
Once that’s done then apply a slap of PVA to a stalk and push through the hole until a bit of the stalk appears on the other side, repeat ad finitum. You could use contact adhesive or superglue, I just found it easier to squirt out a glob of PVA onto the work bench and then just dip the stalks in as I went.
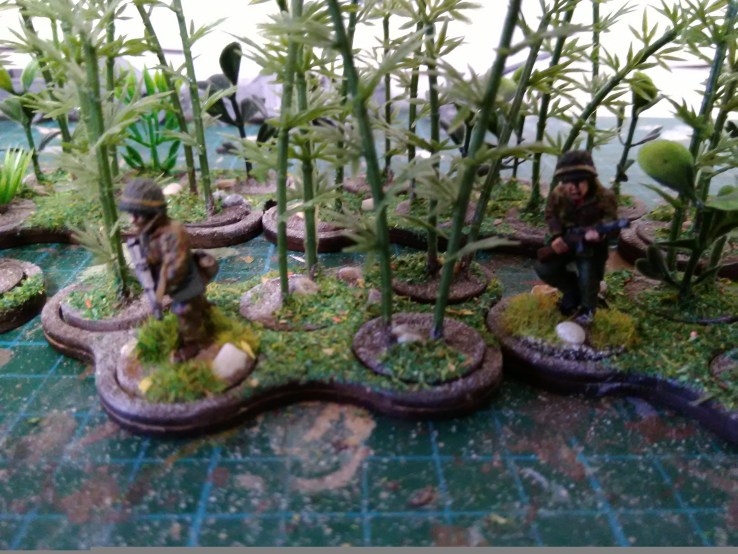
 Once they were all done I left them to dry (overnight) then came back to them and shaved off the excess stalk protruding underneath with a sharp knife, lined them up in the skirmish trays and swapped out with figures to see if the idea worked. It did!


Next I painted the bases and the movement trays a dark brown (you probably don’t need to do this but…) and then applied our in house coloured tetrion (dark chocolate masonry paint), the odd stone here and there a dusting of fine sand and left to dry. I was fairly slap dash with the tetrion which is fine up to a point but, as I found later, once it dries around the outside of the round bases and on the inside of the skirmish bases it is a challenge to fit them in and an even bigger challenge to get them out again! Simple lesson, 20mm bases and 20mm holes don’t have an engineering tolerance they are a straight interference fit.


Next, a dry brush of white and once that was dry some more (diluted) PVA to use for applying random green scatter to both. Quick spray of varnish and job done. Final result looks pretty good I think and made a bit of a break from constructing buildings.


Enjoy your gaming. See you next time.
