September 2025 Report

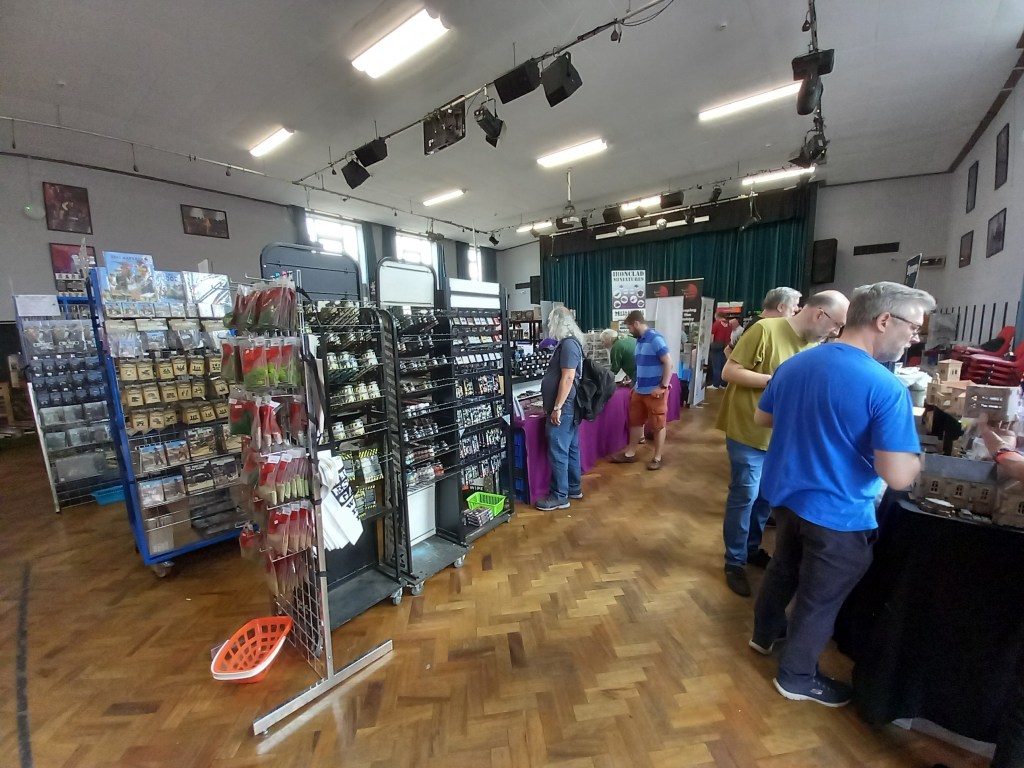
The Autumn is here but it’s been a good one.

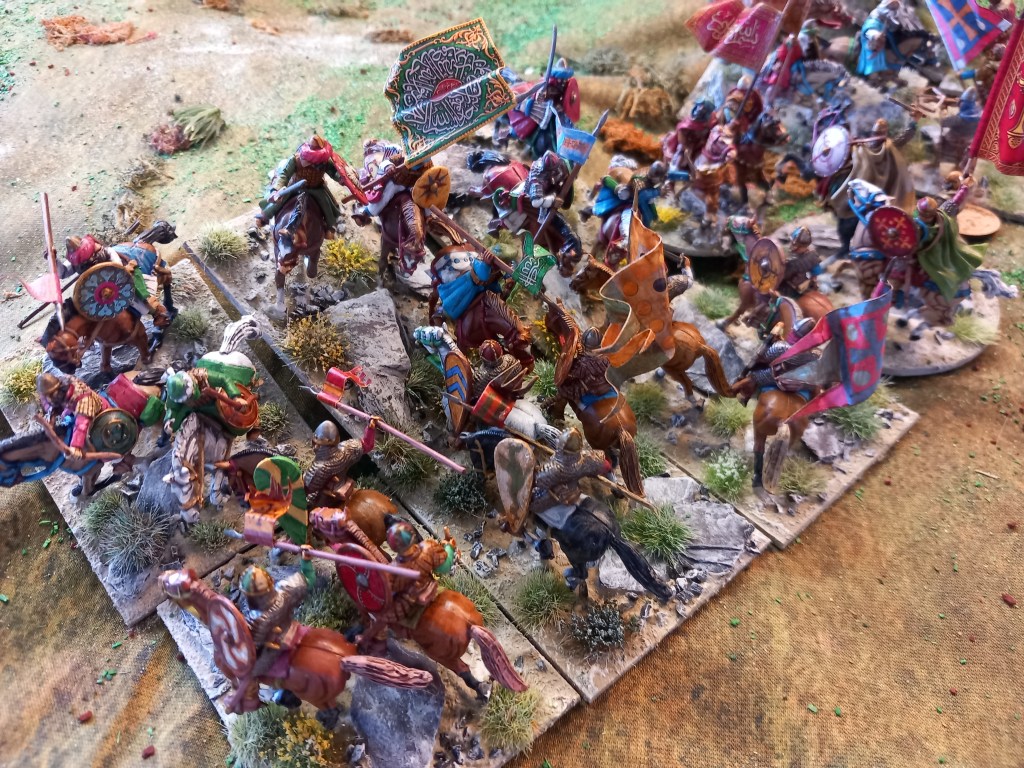
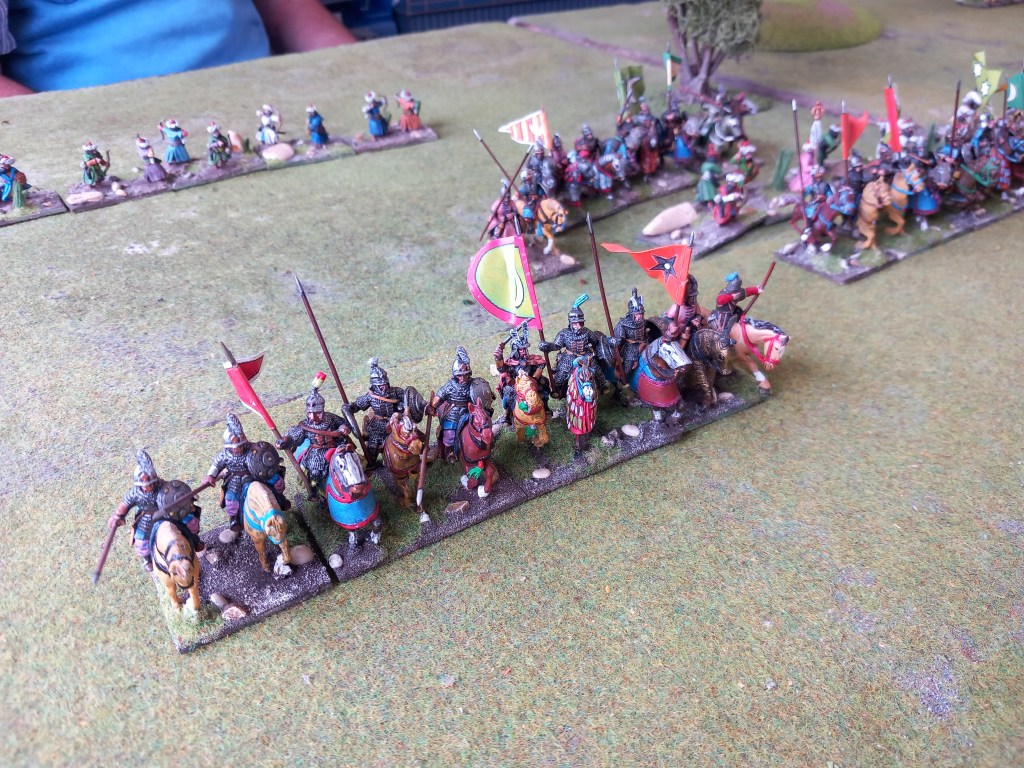
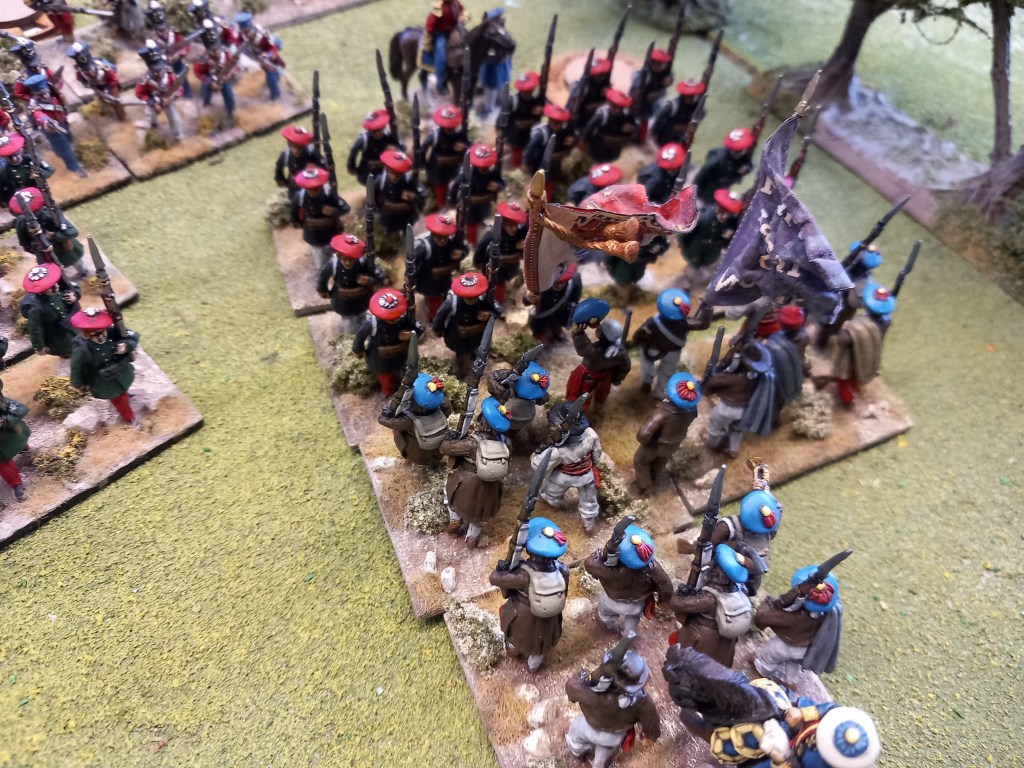
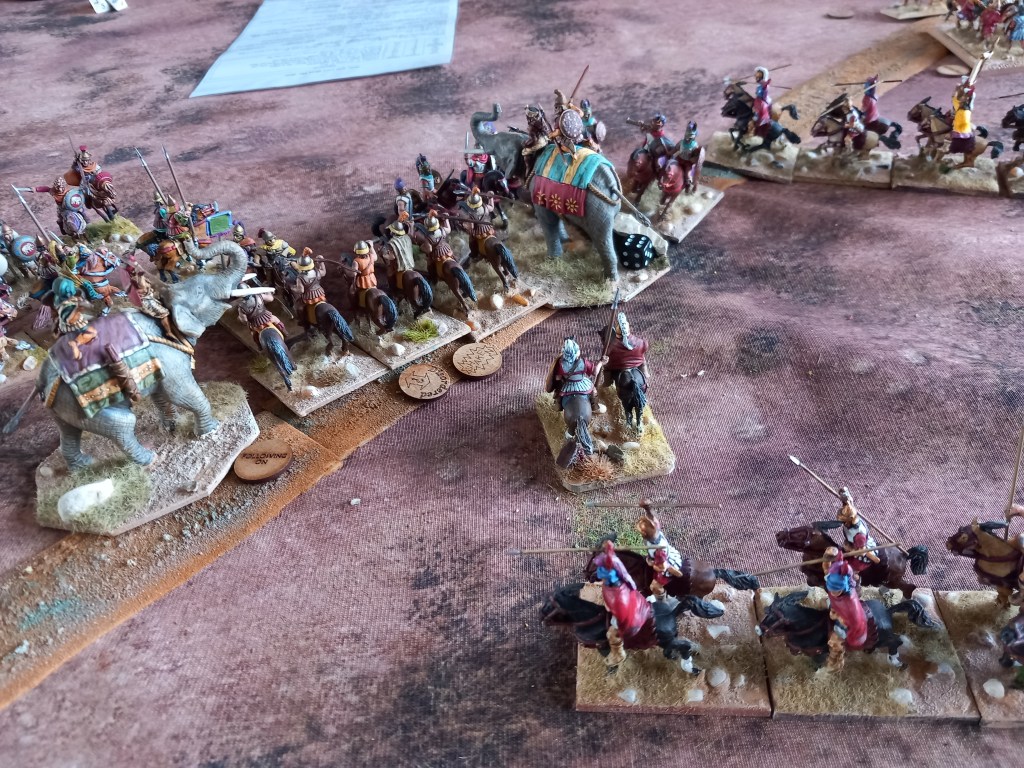
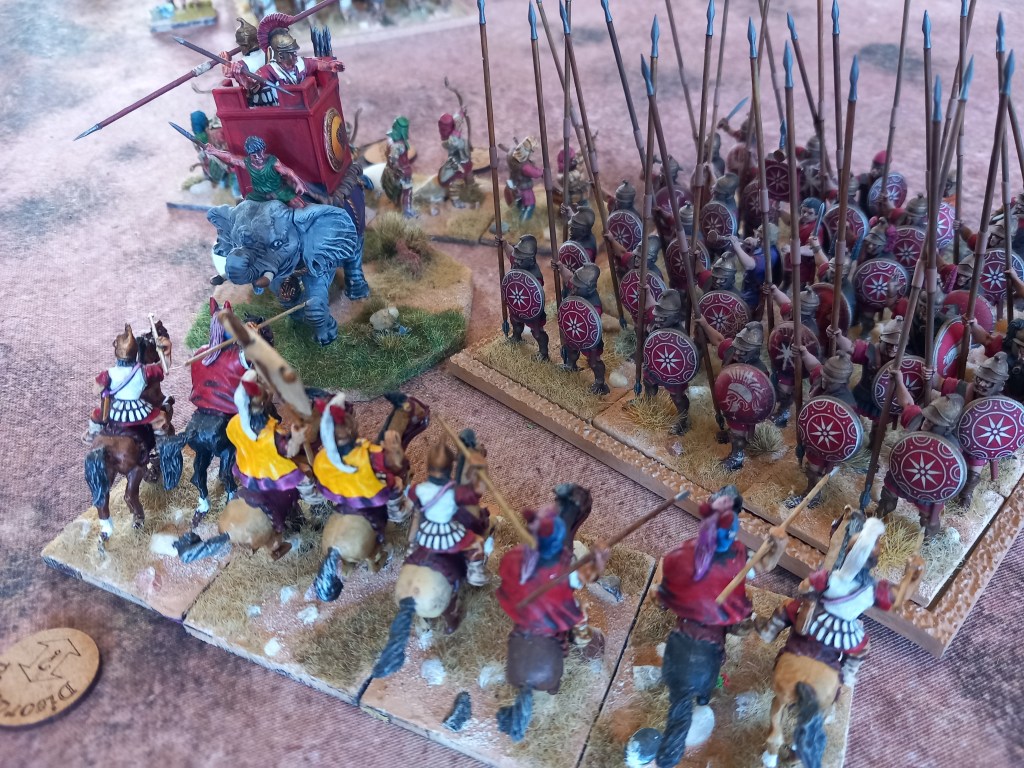
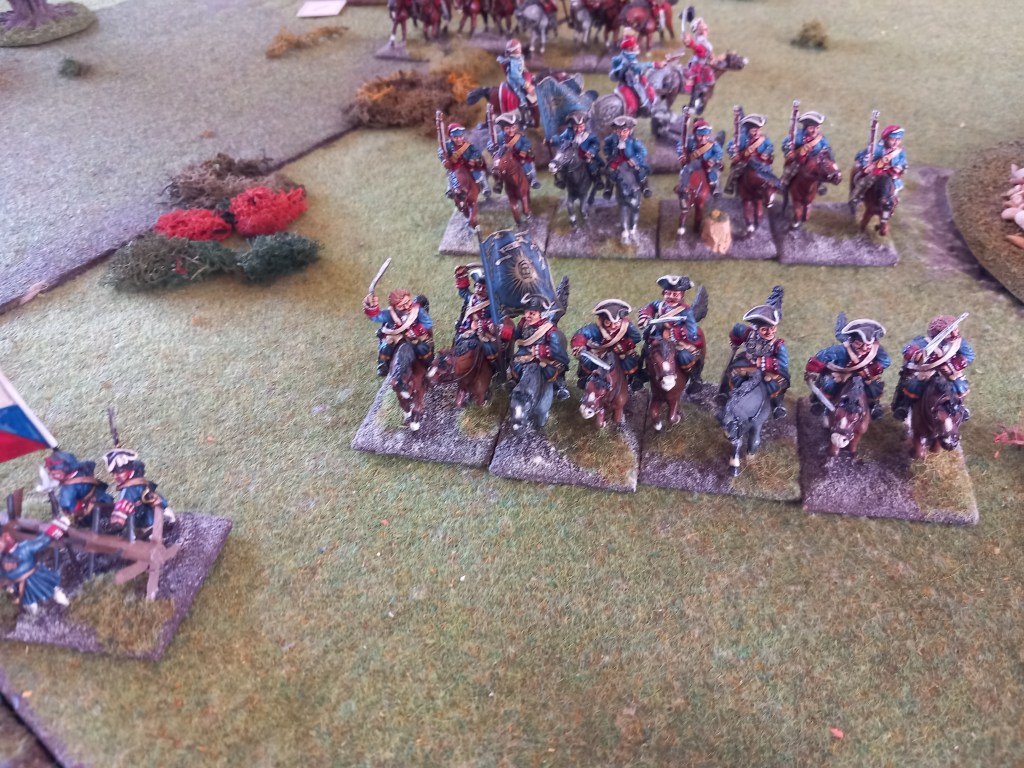
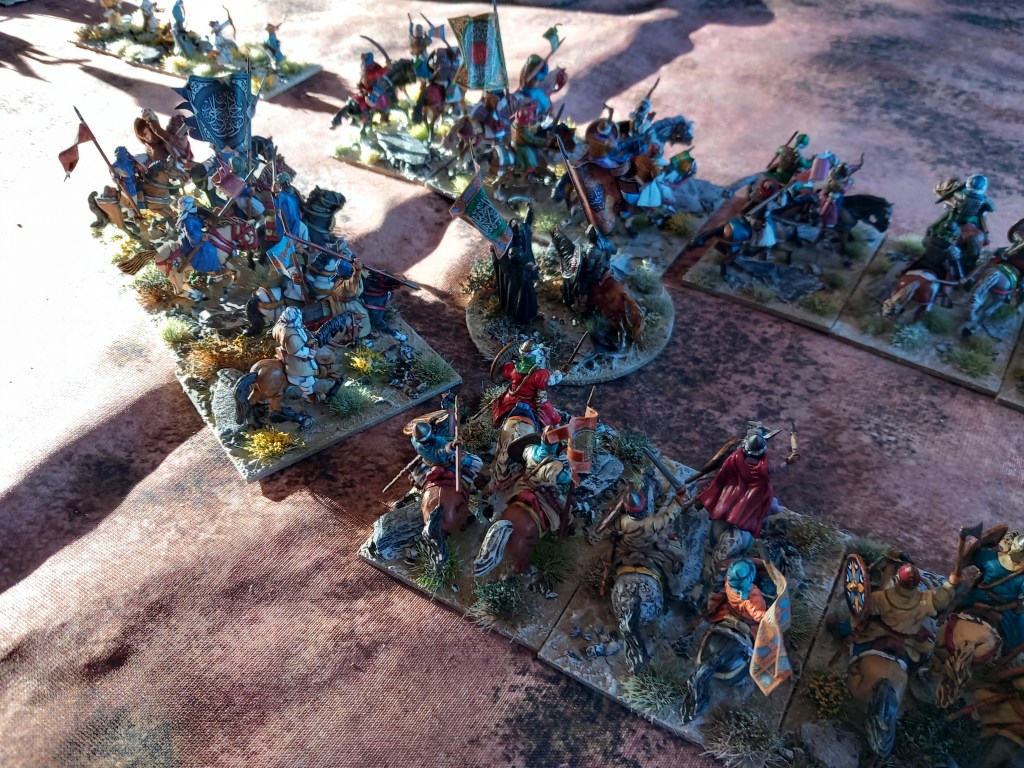
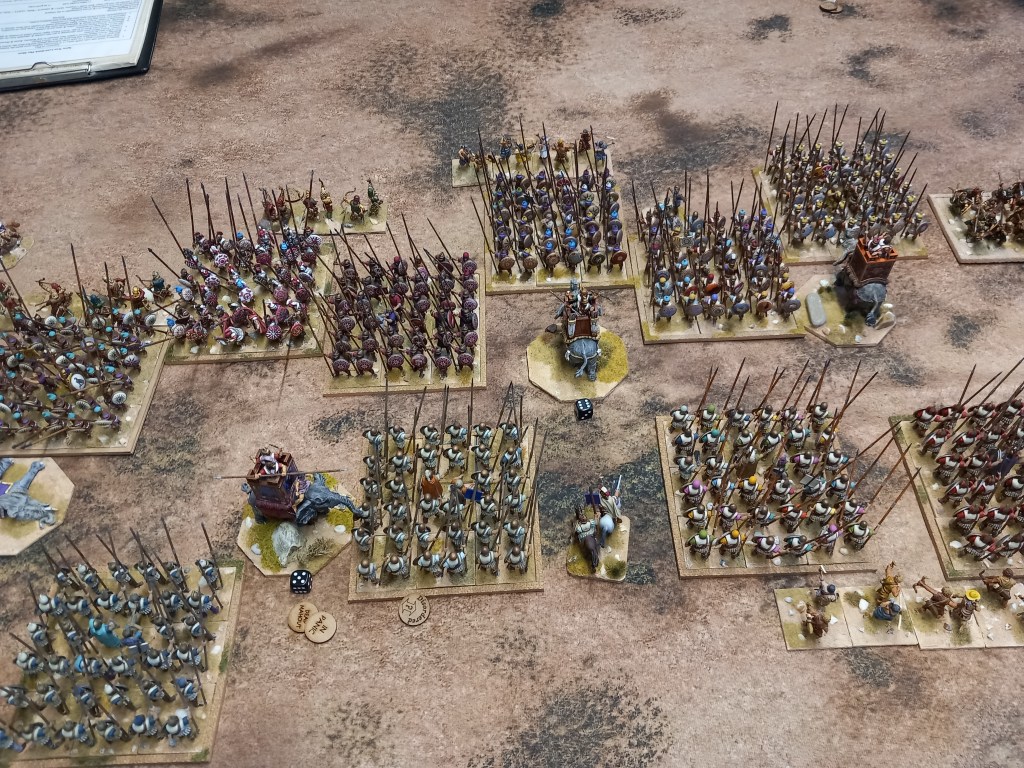
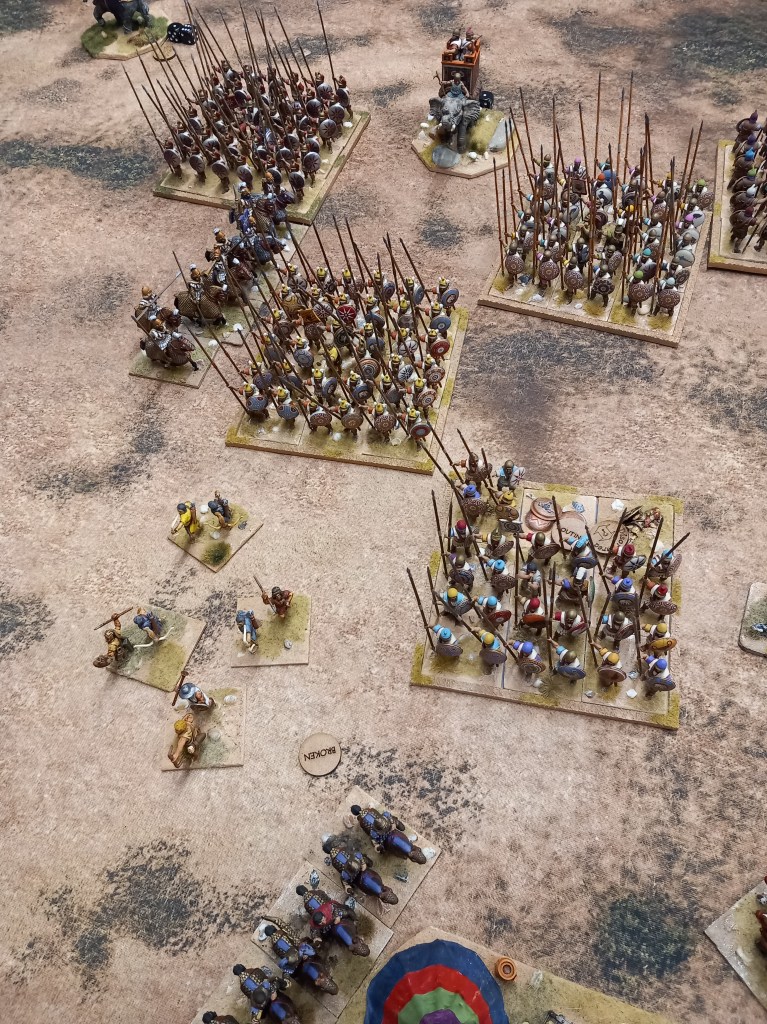
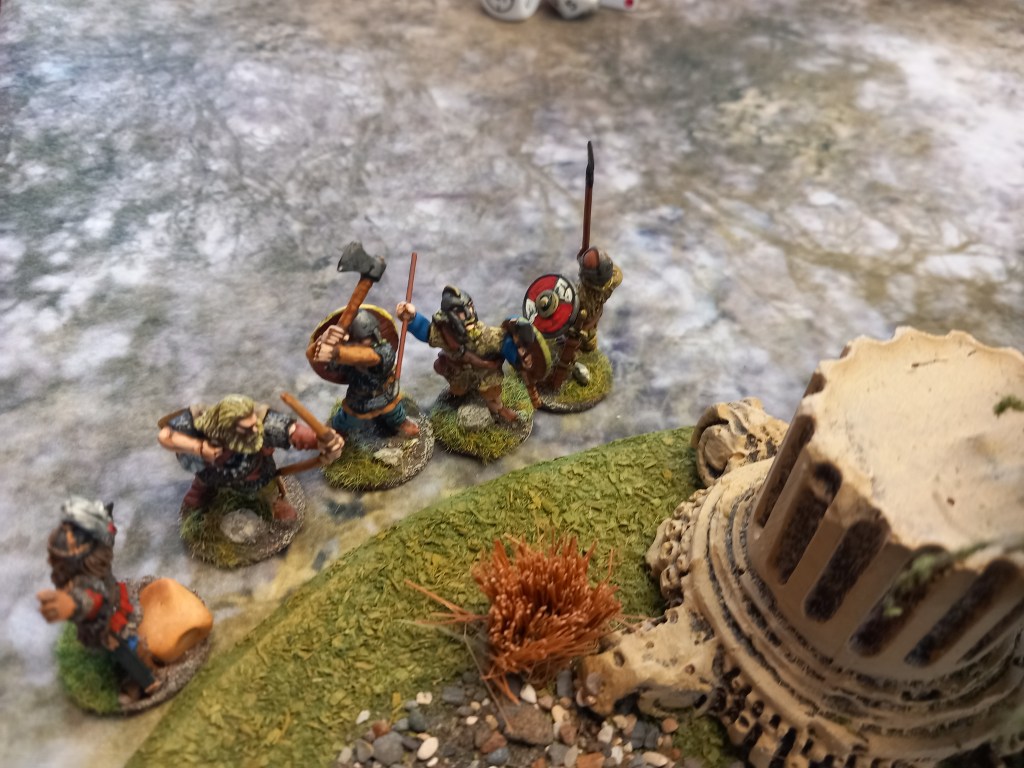
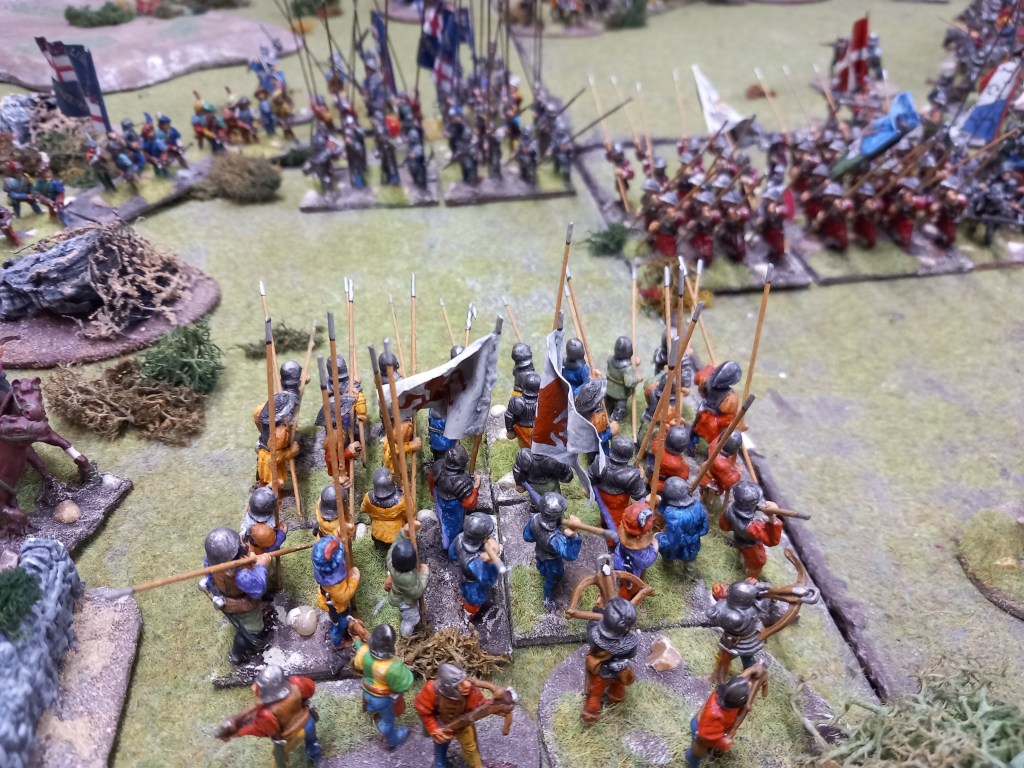
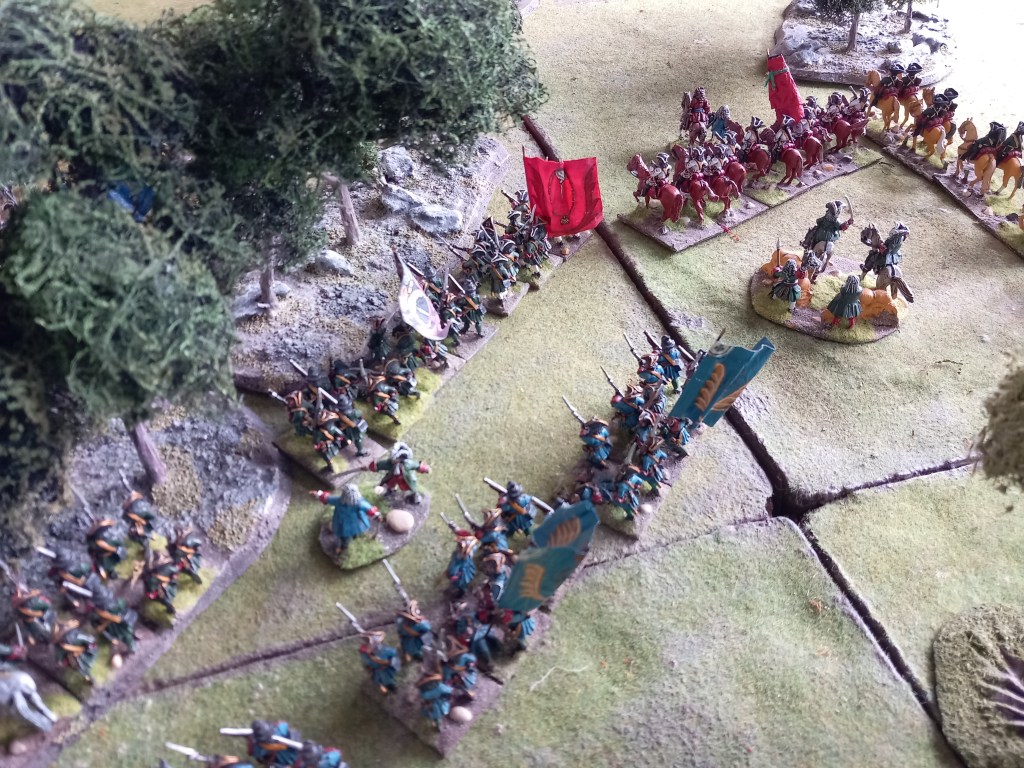
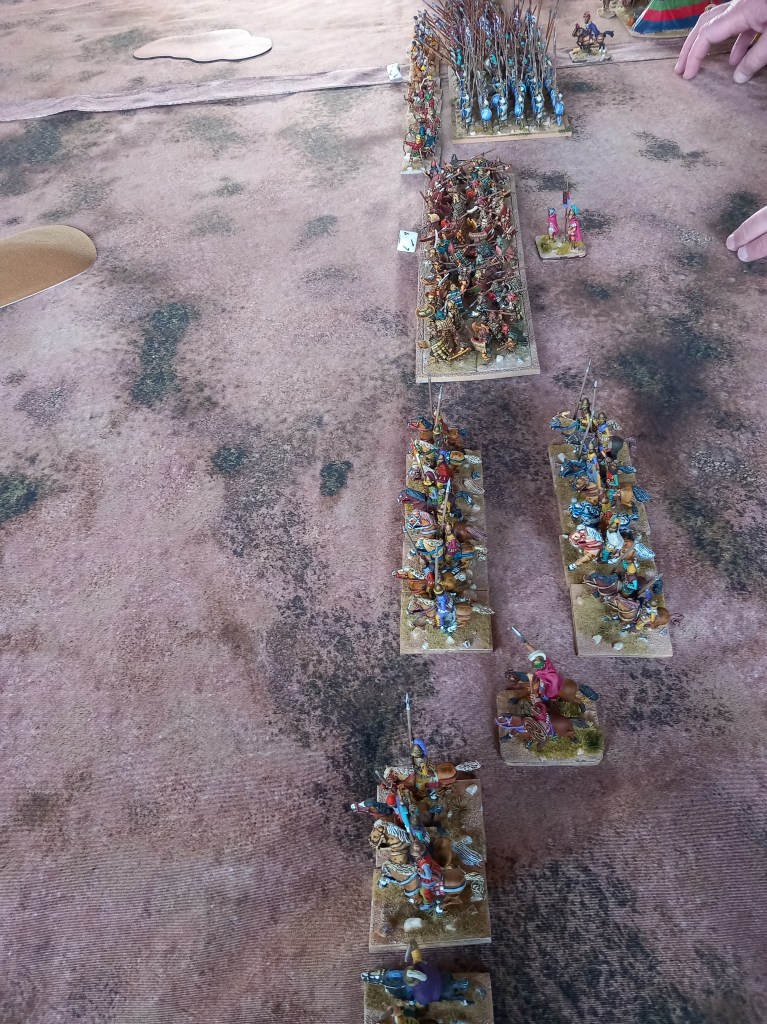
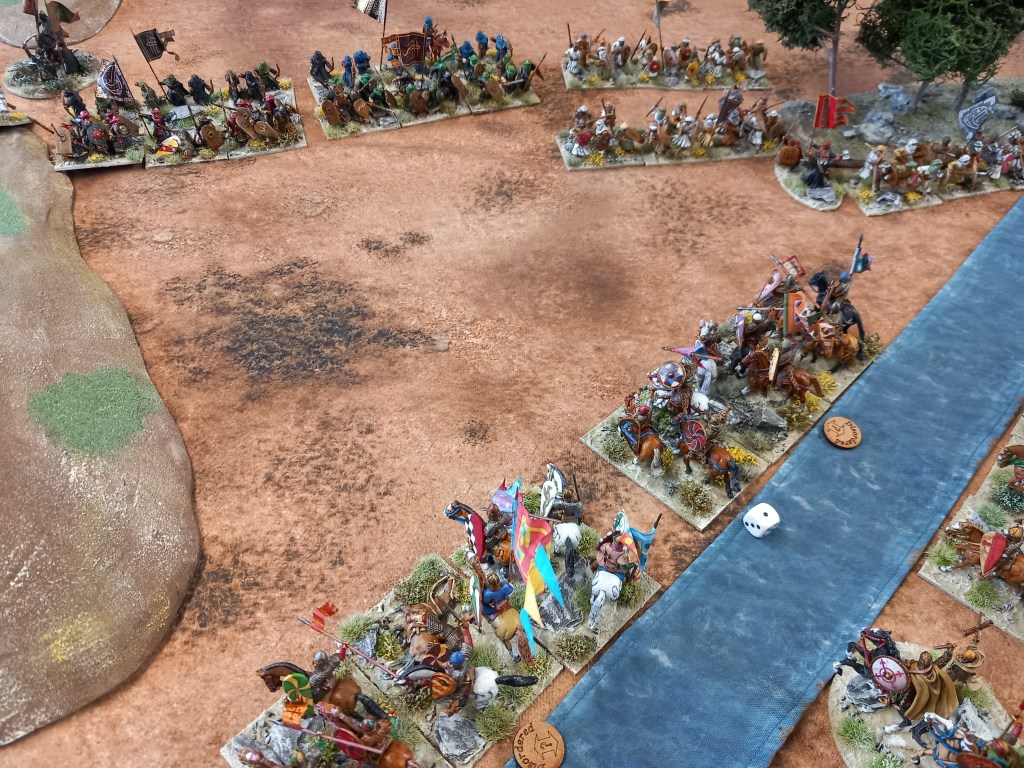
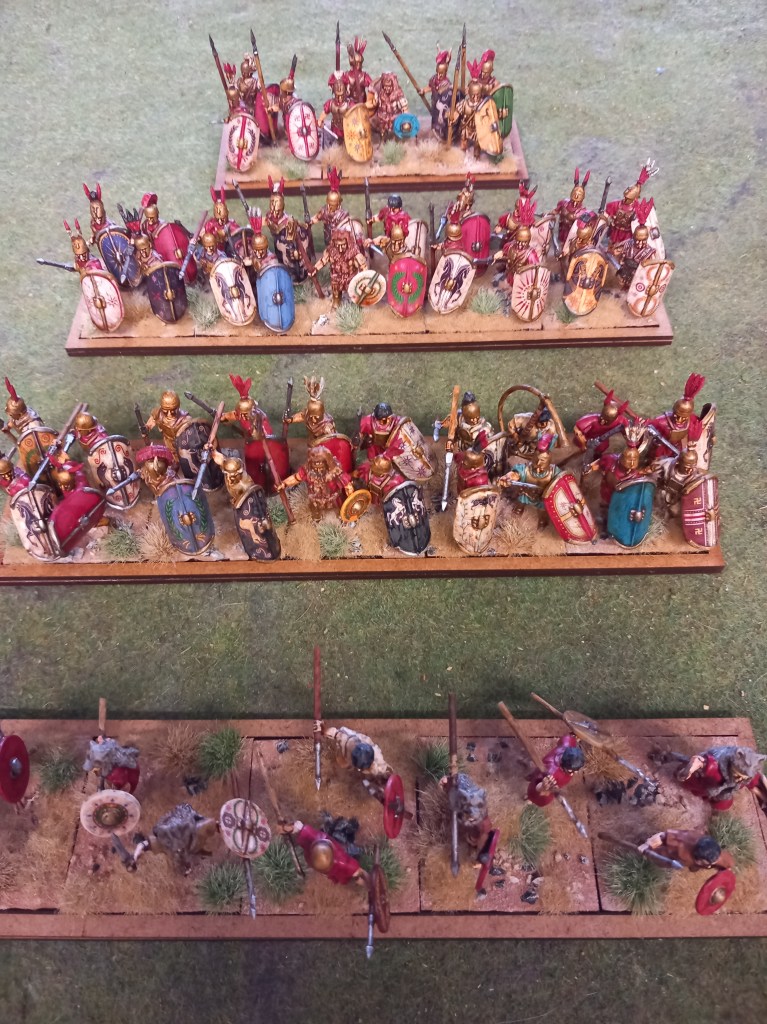
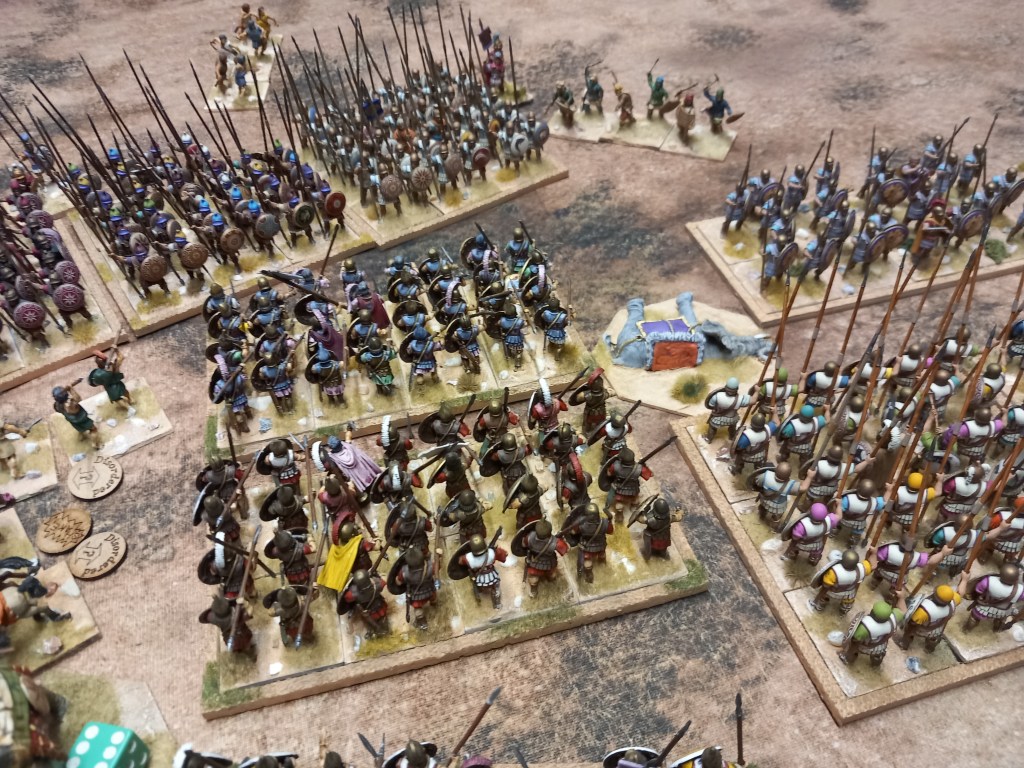
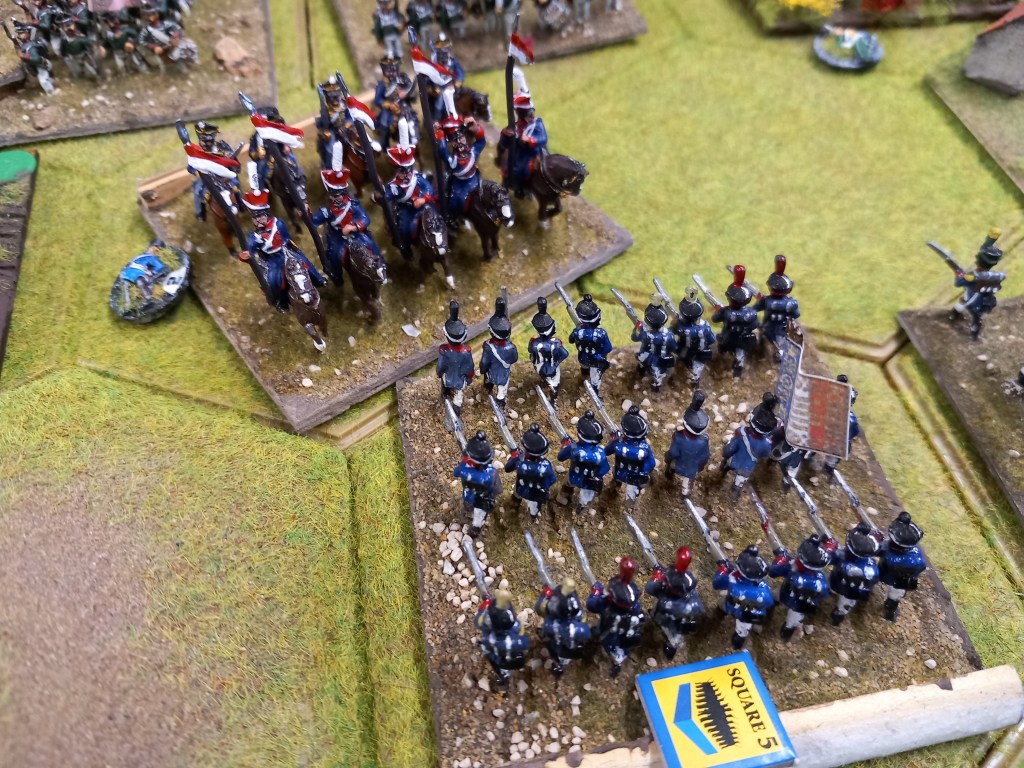
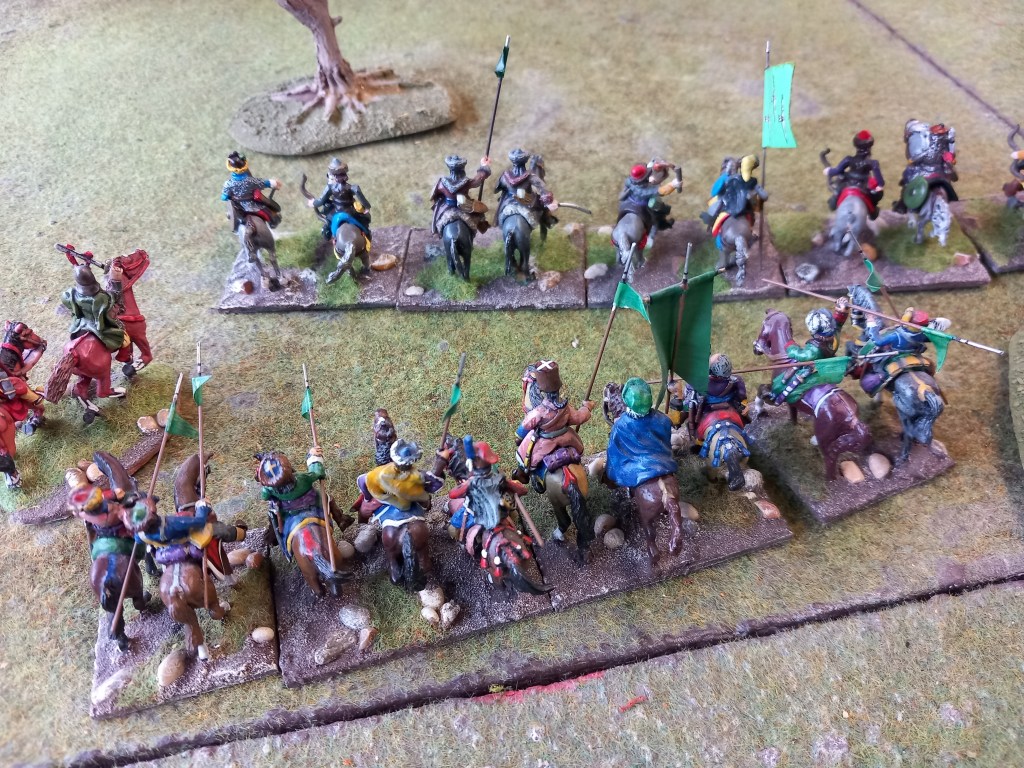
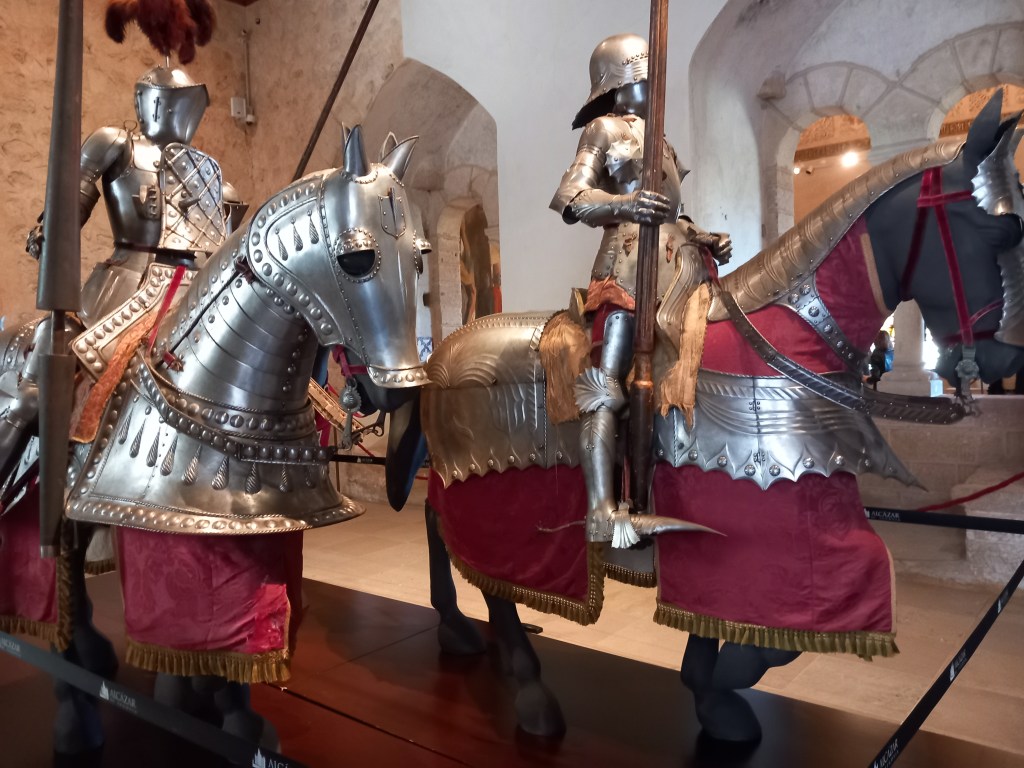
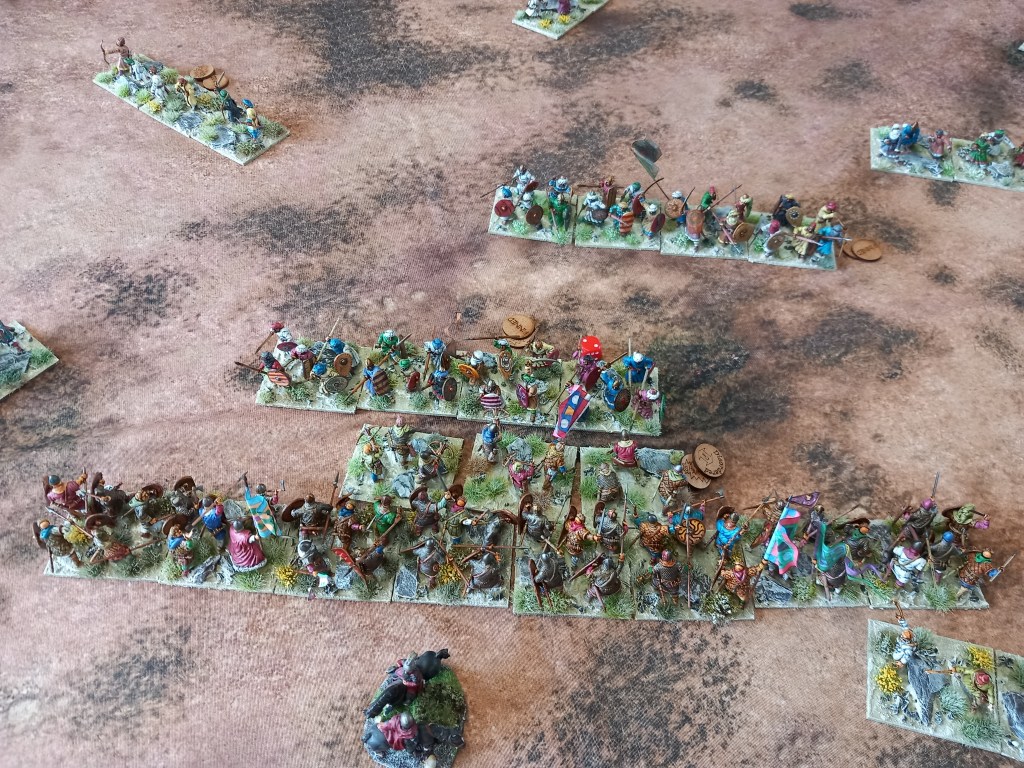
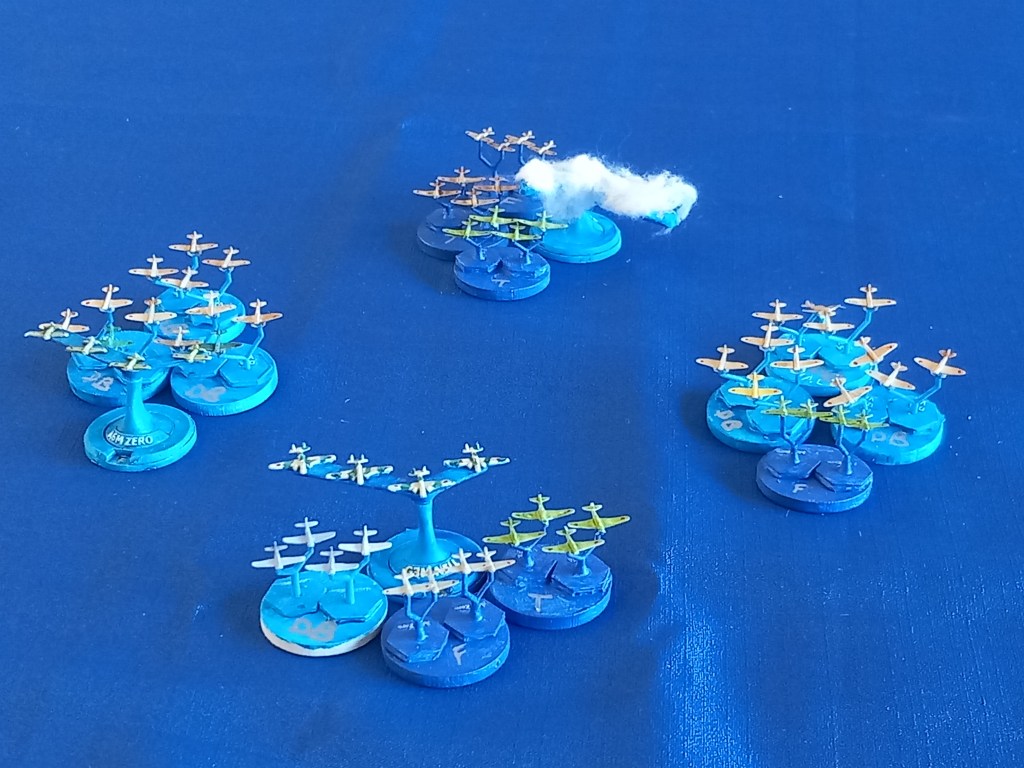
Our first game of the month was Samurai using Battles in the Age of War (BAW) set in the Sengoku period (1467 – 1650) with some local amendments to suit our take on the period.

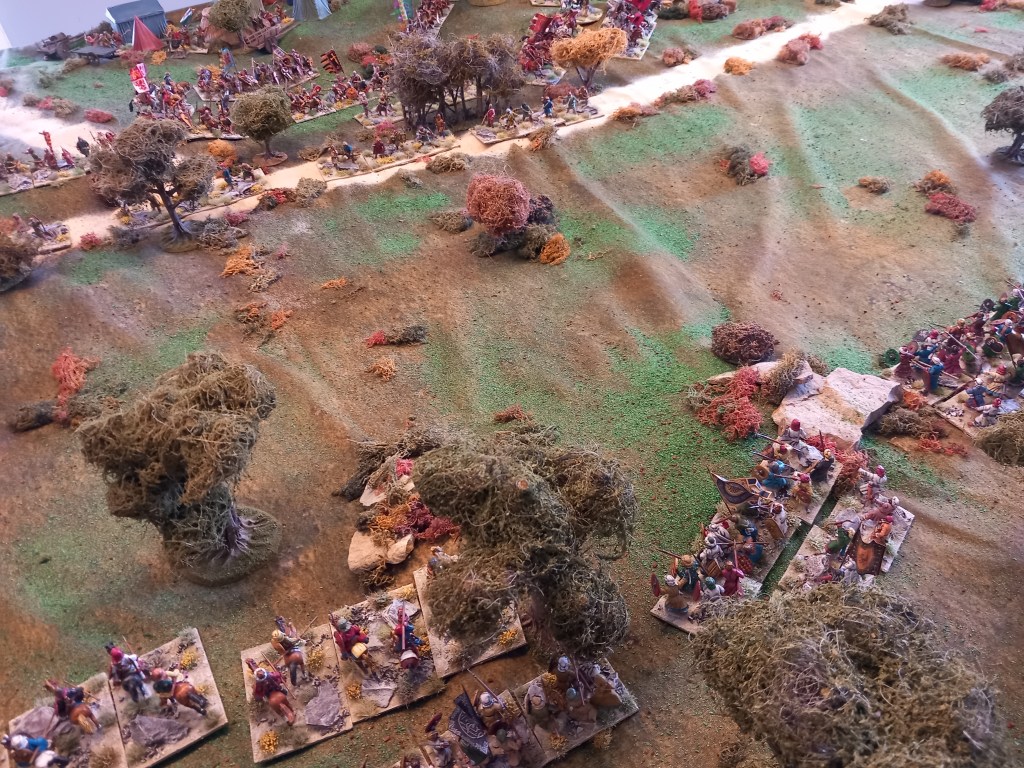
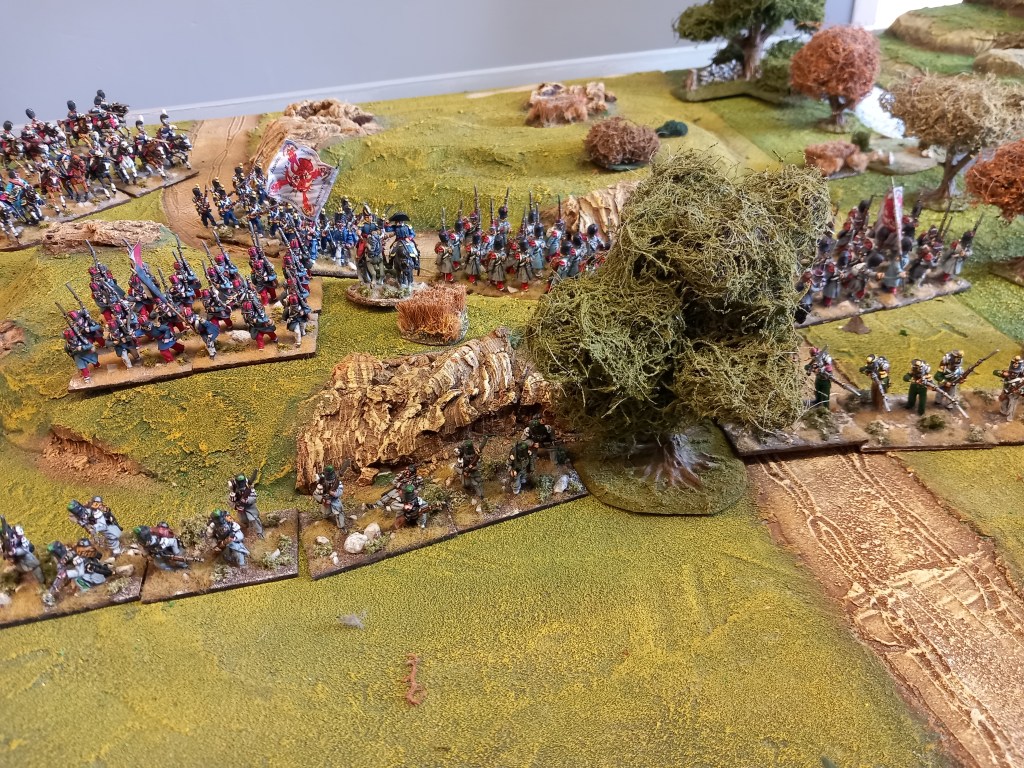
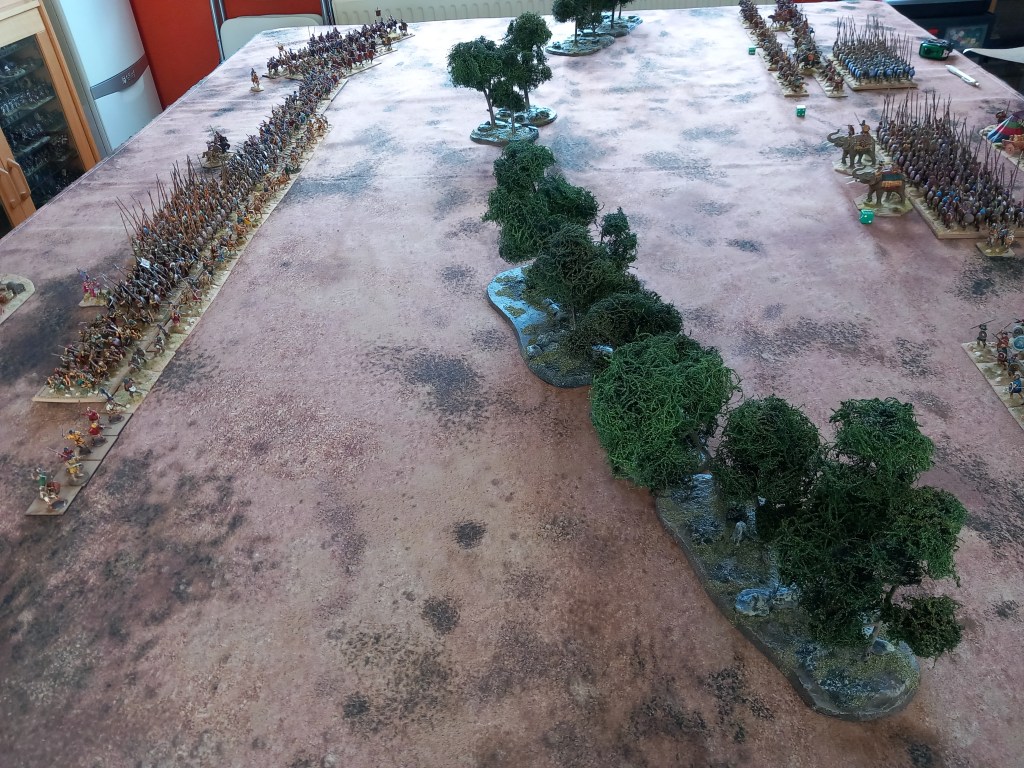
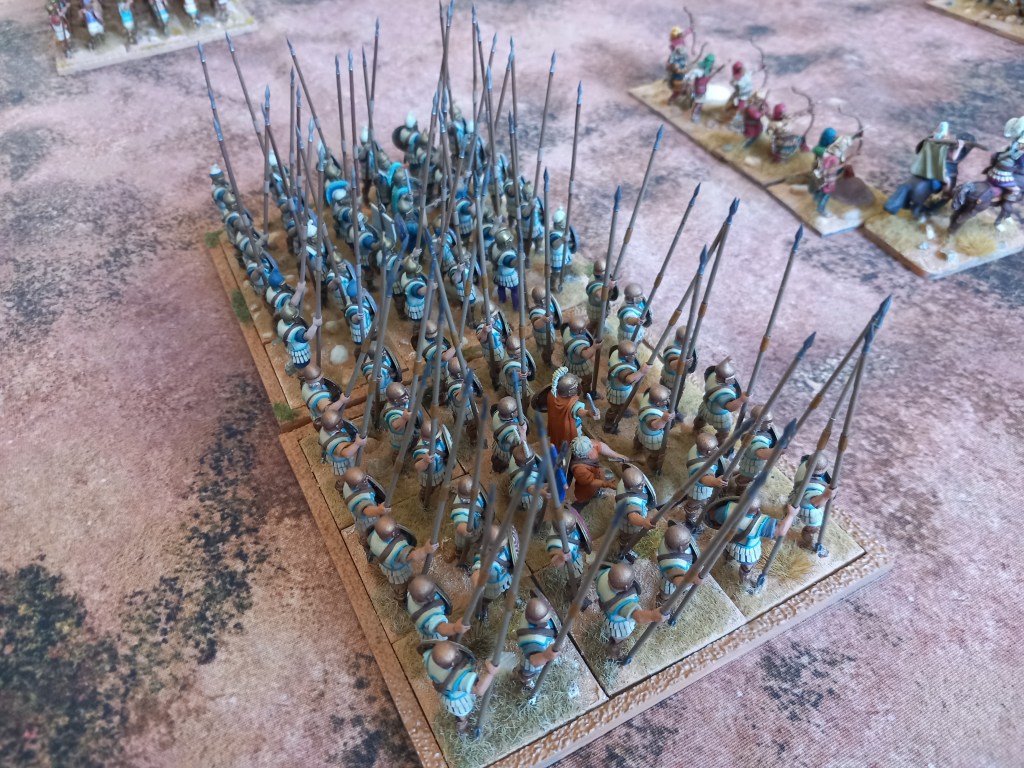
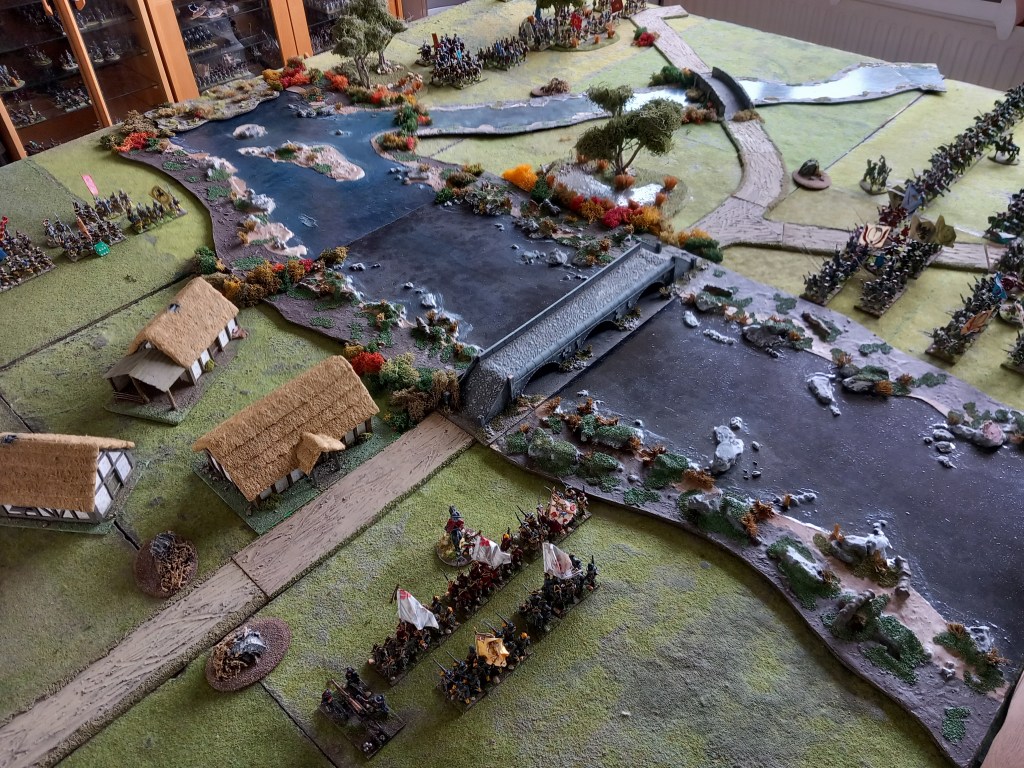
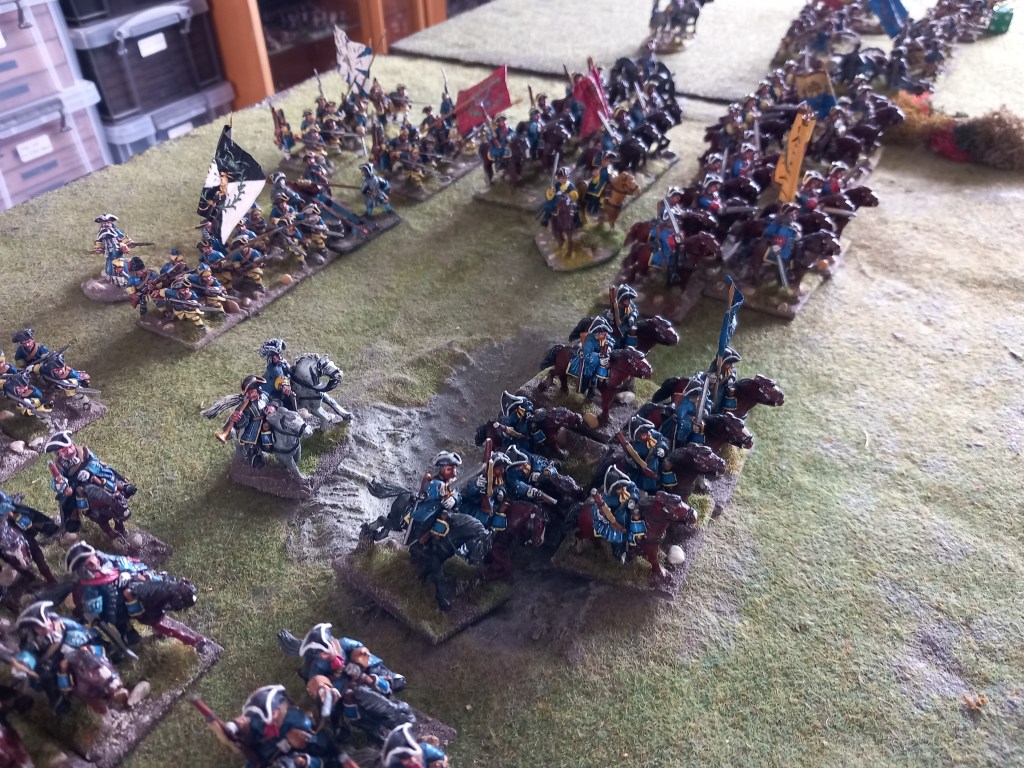
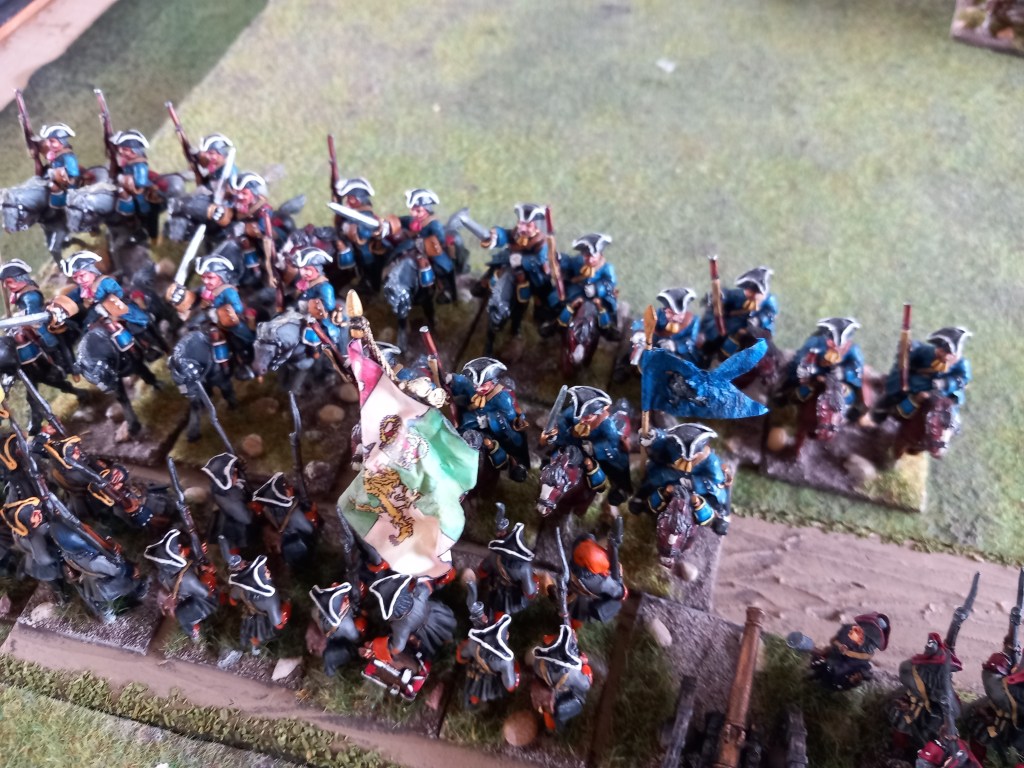
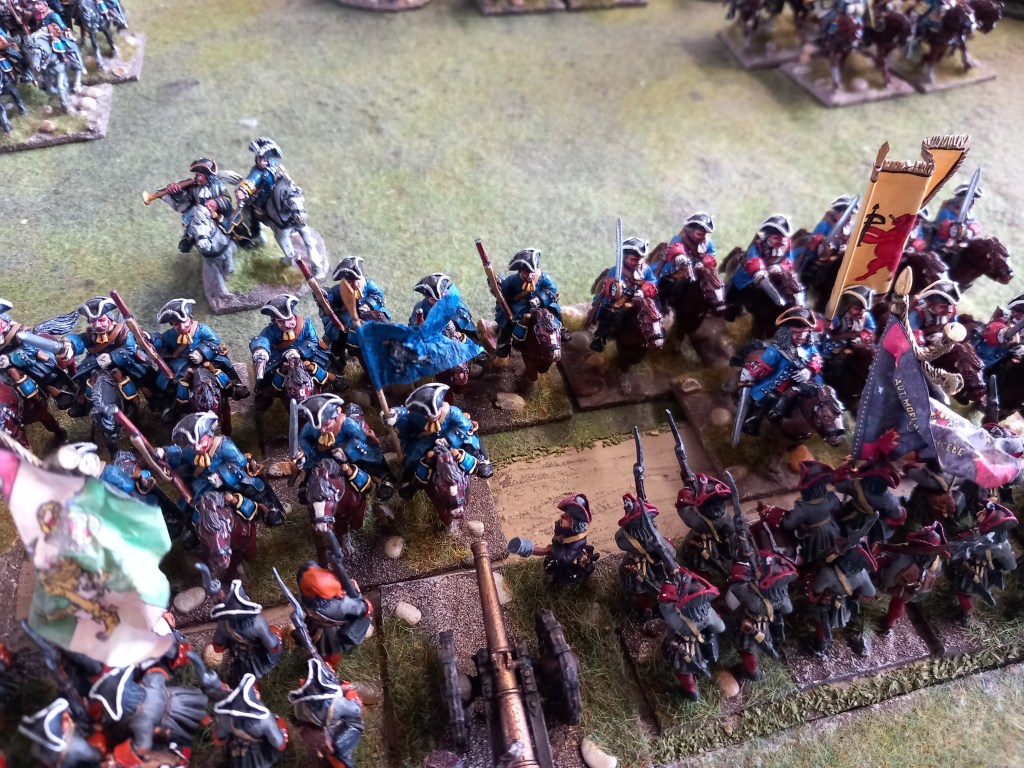
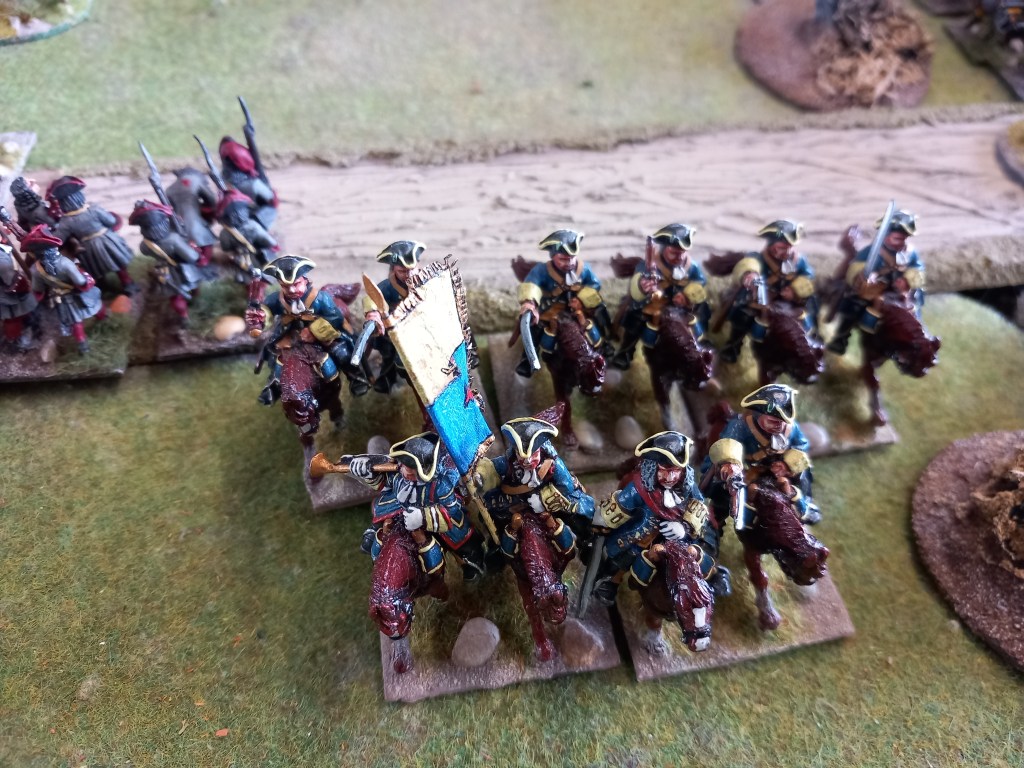
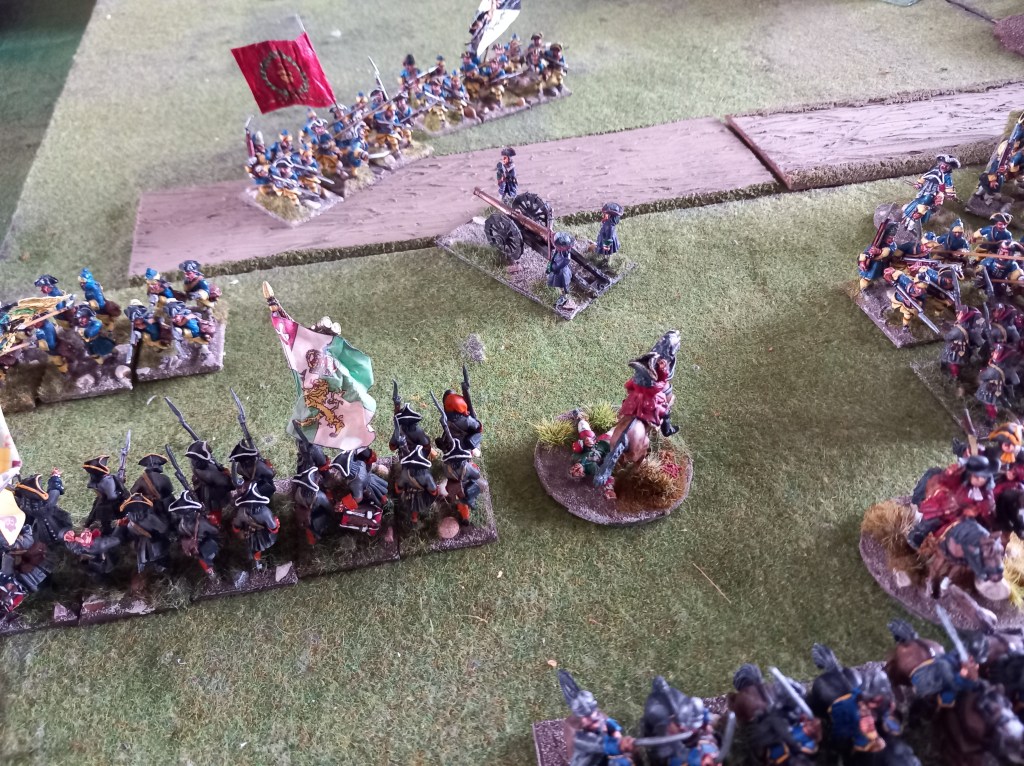
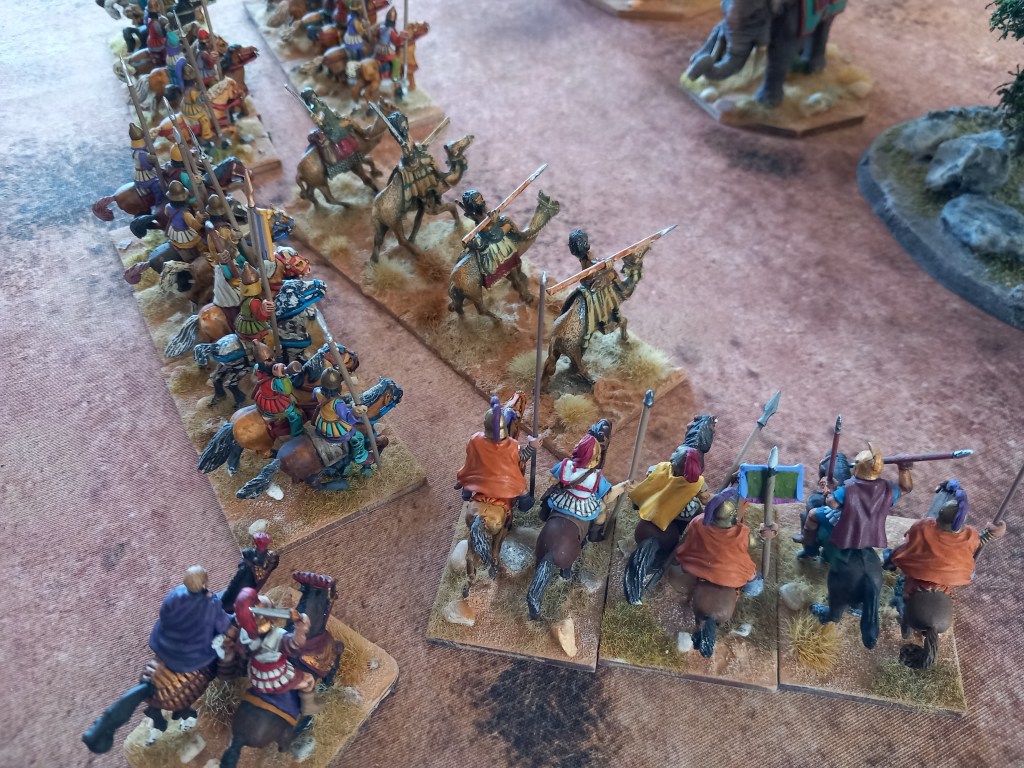
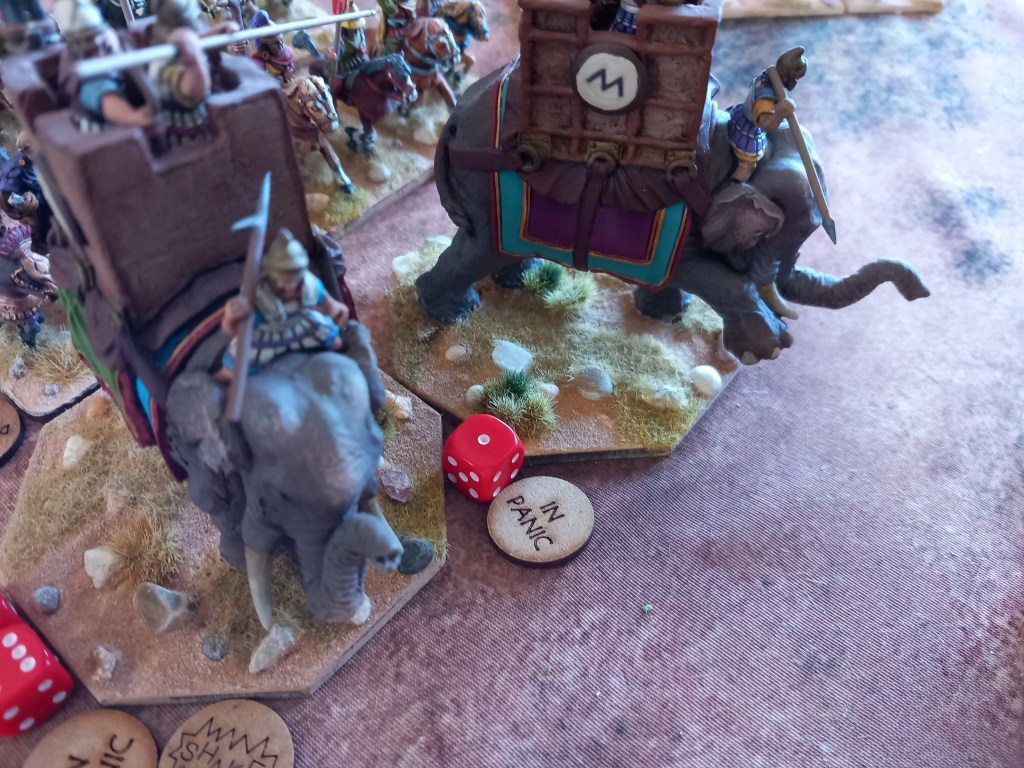
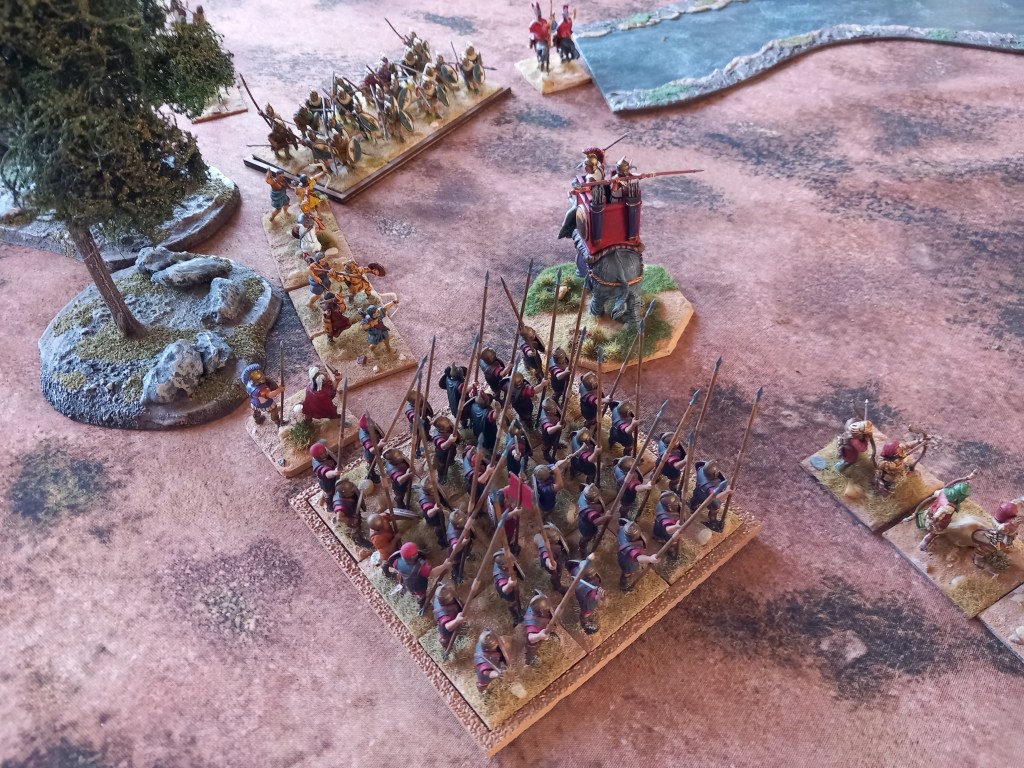
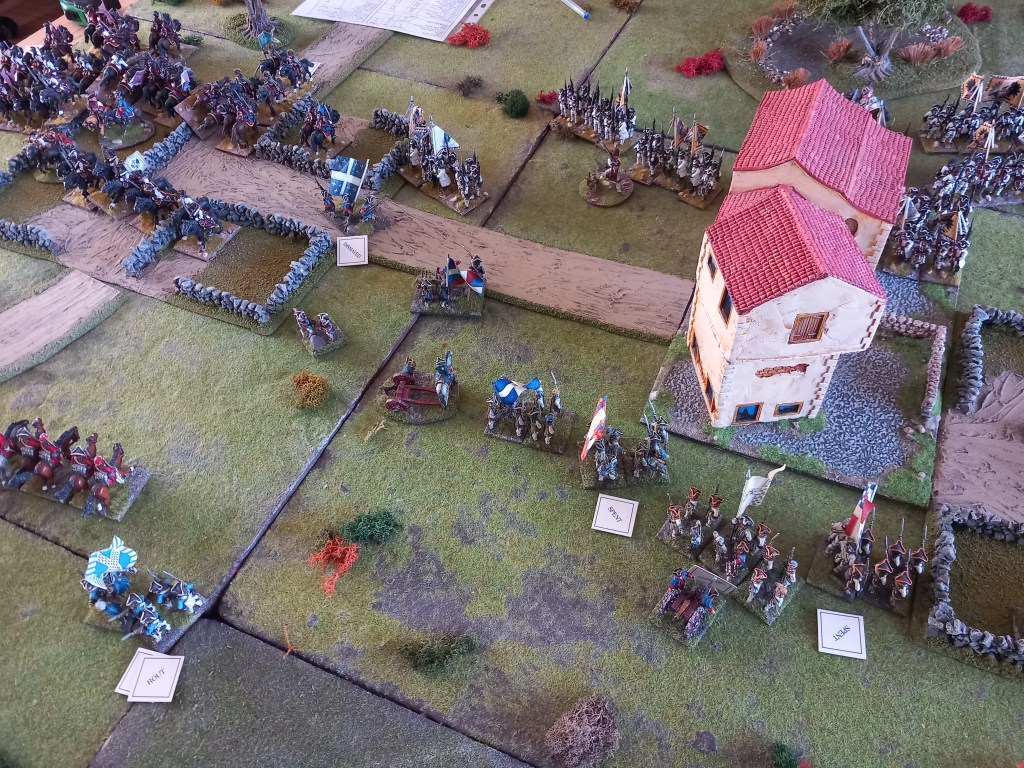
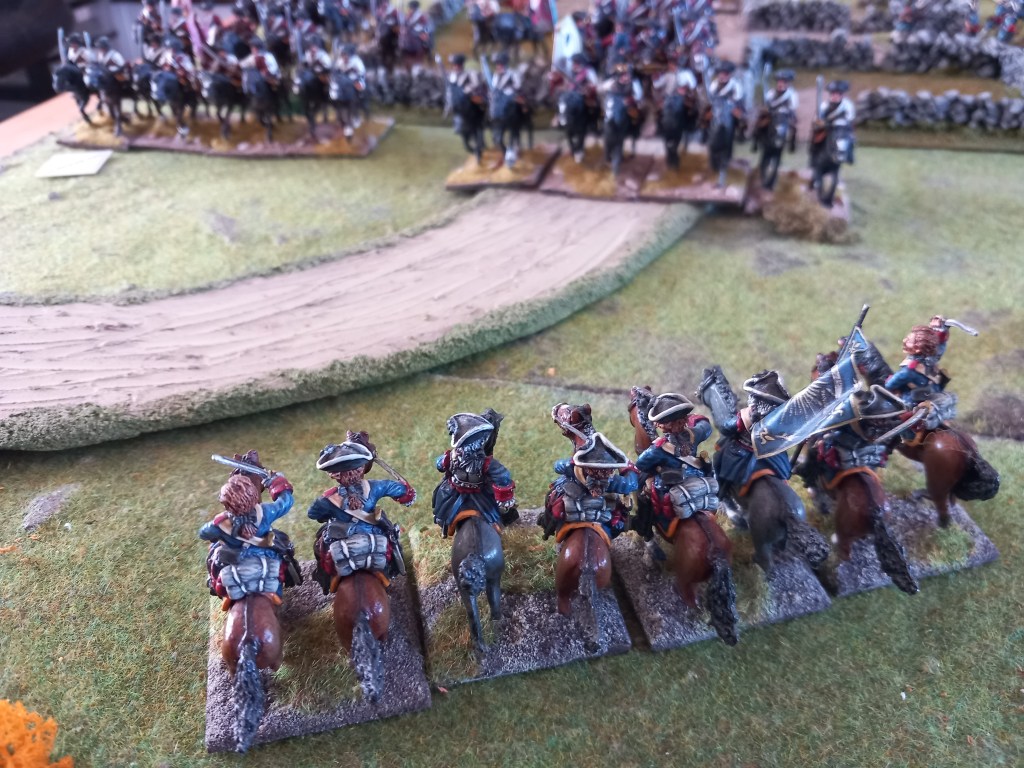
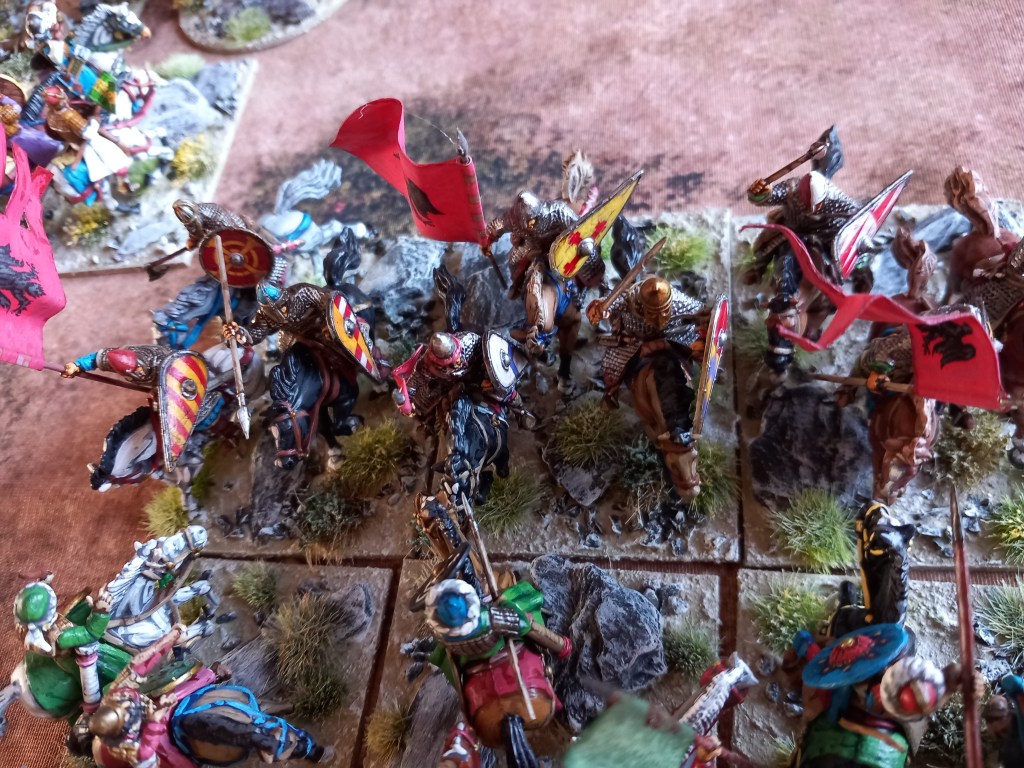
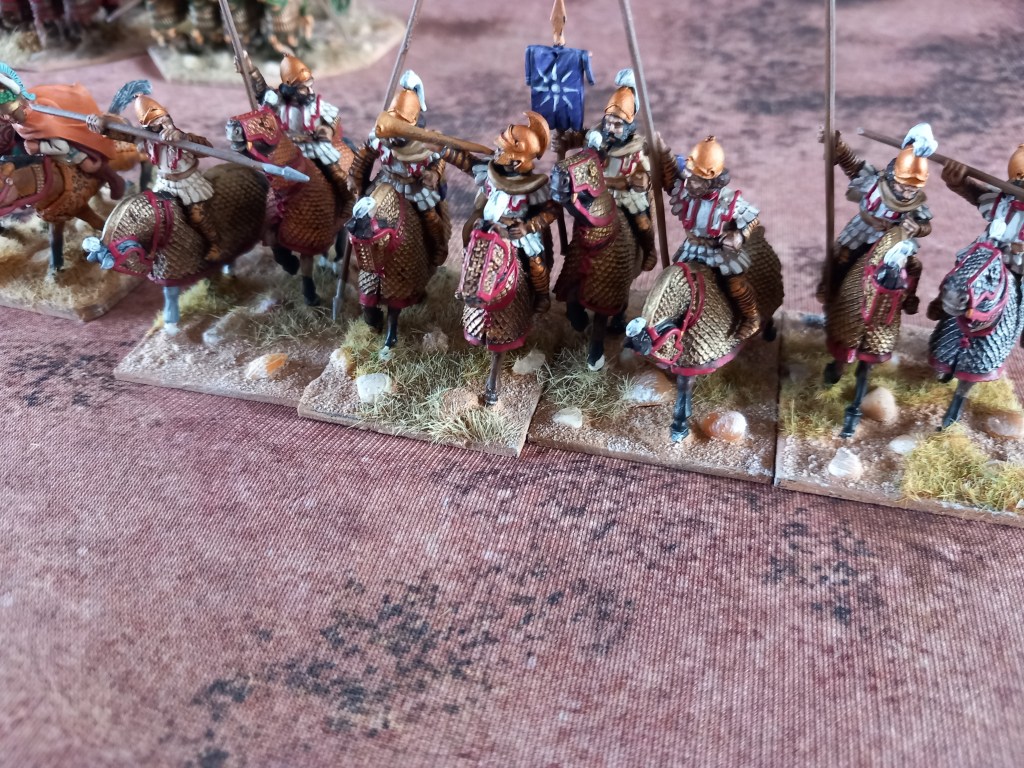
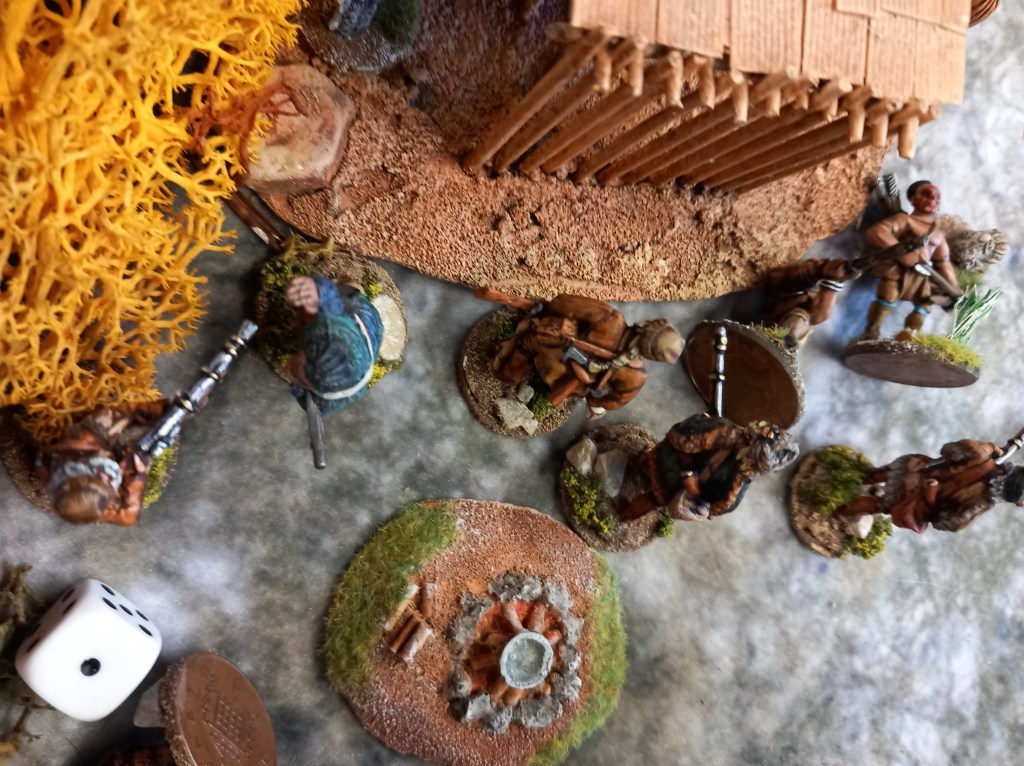
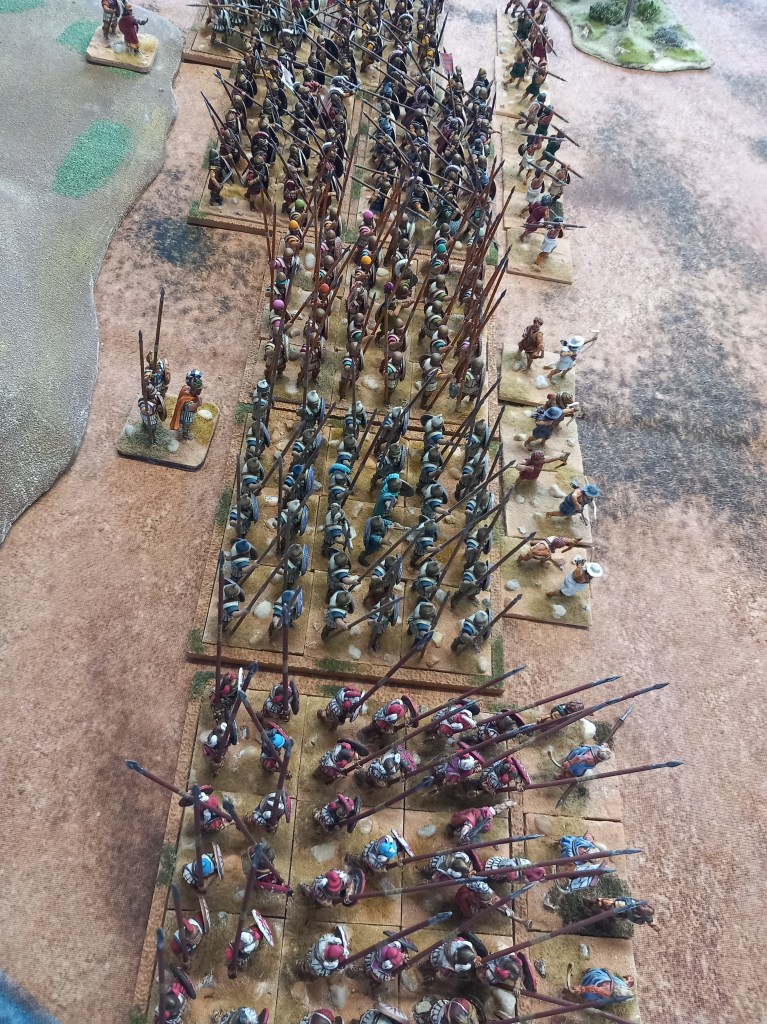
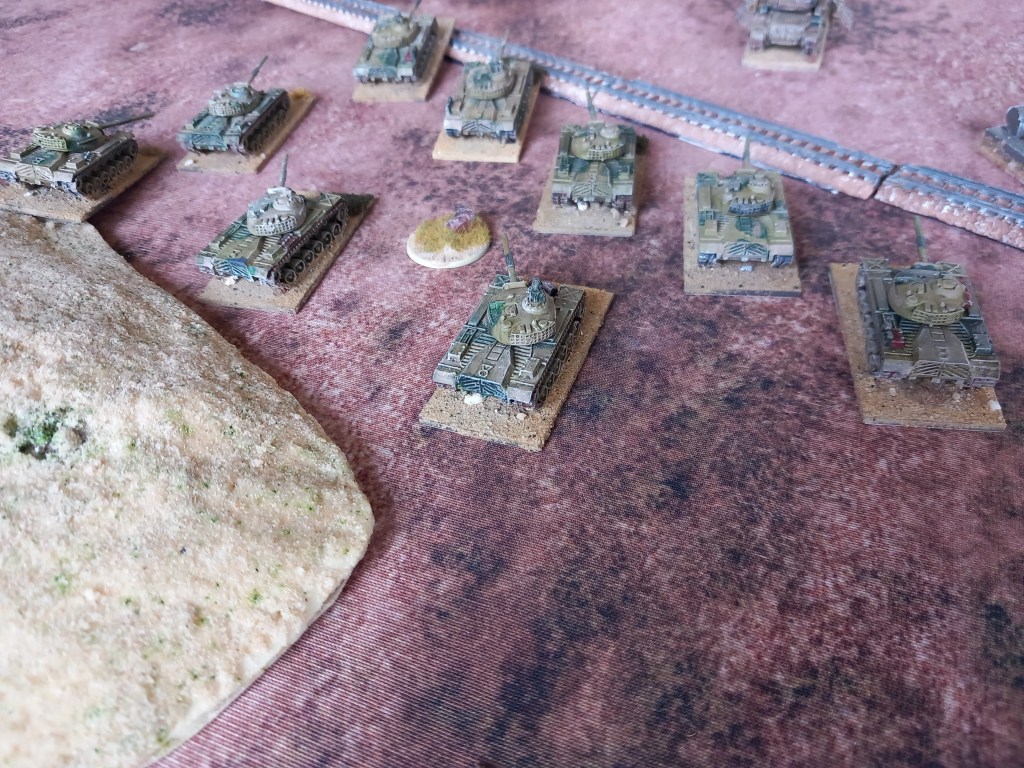
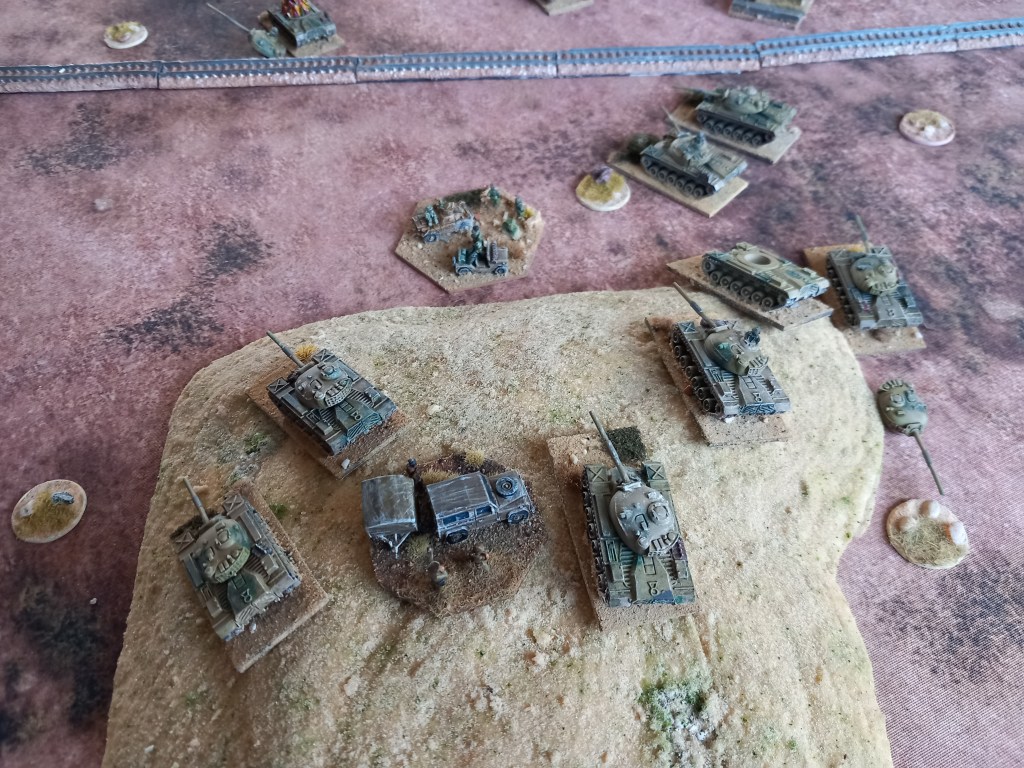
Our commanding generals (or Daimyo) were Tokugawa Ieyasu and Ishida Mitsunari, each commanding 3 divisions of 3 sonei each (well one had 4 but who’s counting). Under Tokugawa we had the Date, Maeda & II clans and under Ishida the Shingen, Kenshin and Uesugi clans.

After we had done the pre-game stuff (treachery, scouting, weather, etc), which does take a while but is fun and gets you into the period feel, Ishida was declared the defender and Tokugawa the attacker with a couple of objectives (a wood and temple area) and the ultimate objective of killing the other guy – points are awarded for objectives but the big points are in killing the other side. Ishida did really badly in the pre battle manoeuvre and ended up with his largest division off table and so having to dice for each sonei to get on the table each turn; accordingly he spread his forces thinly across the range of hills to his front and prayed he could hold on.

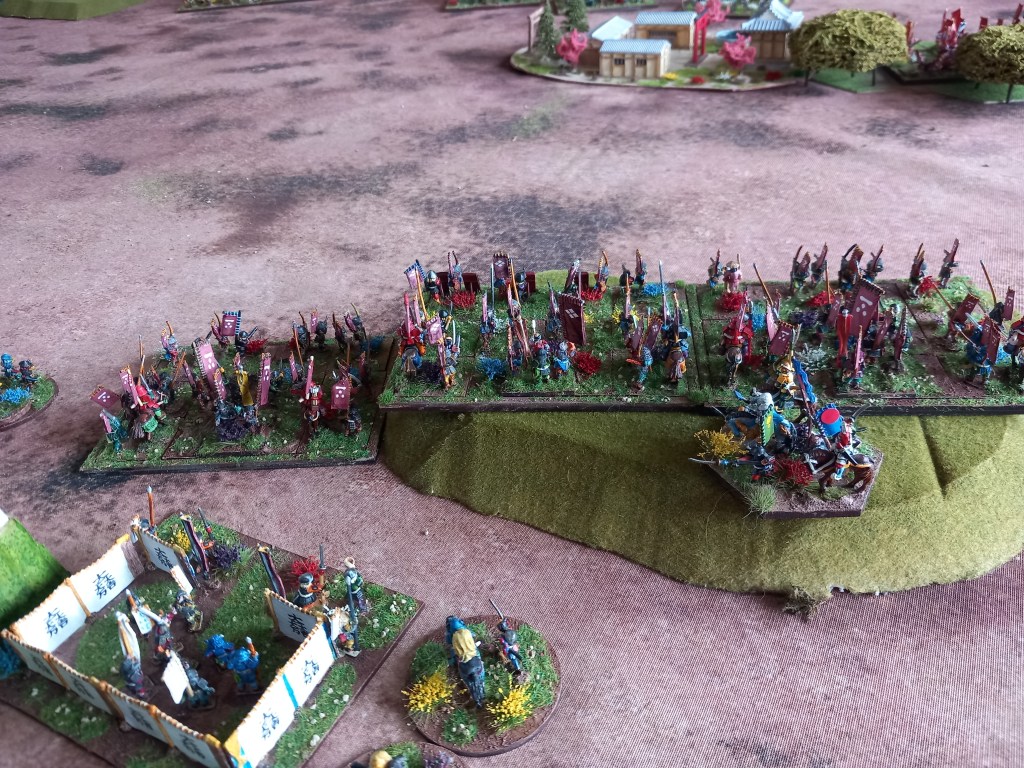
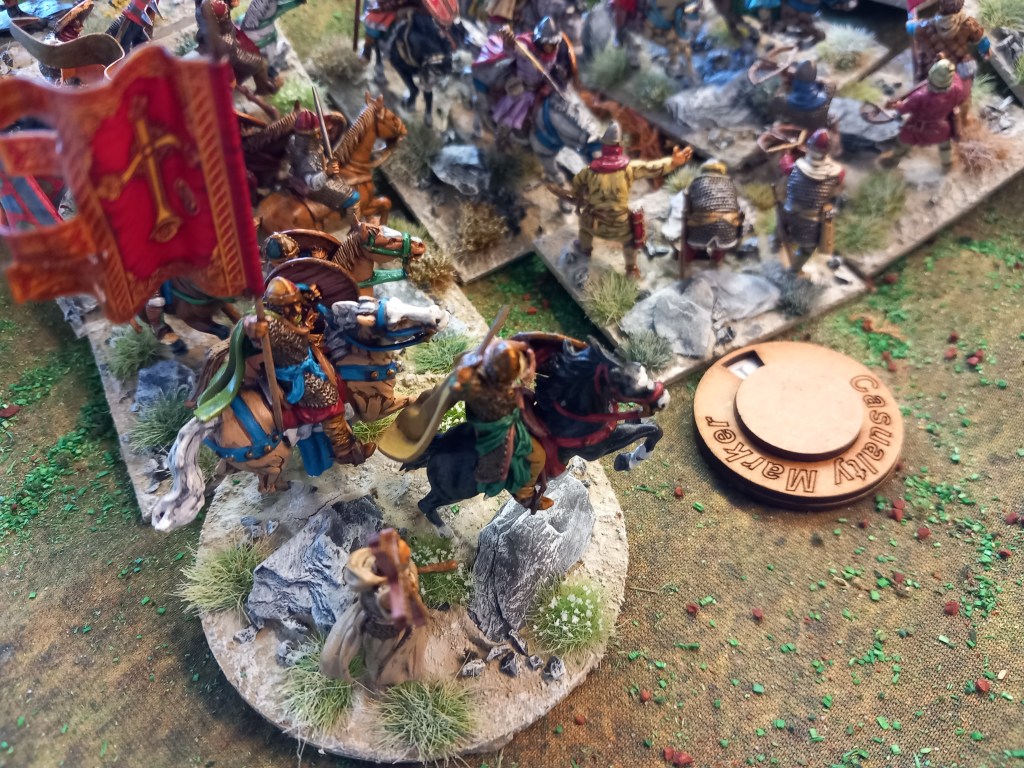
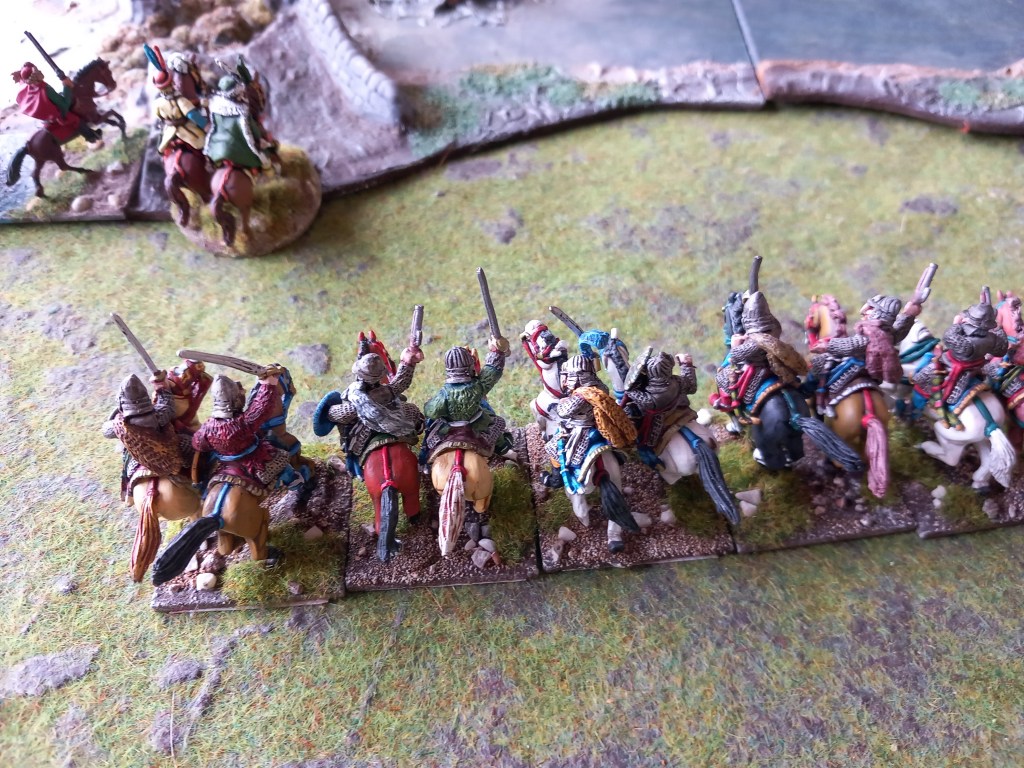
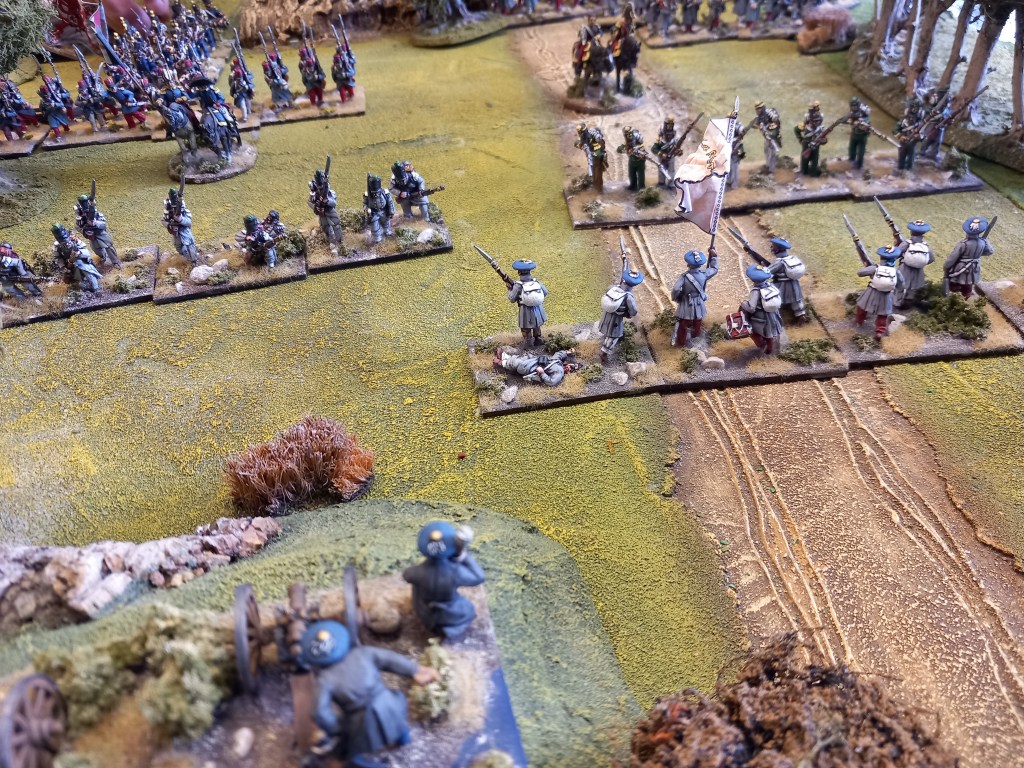
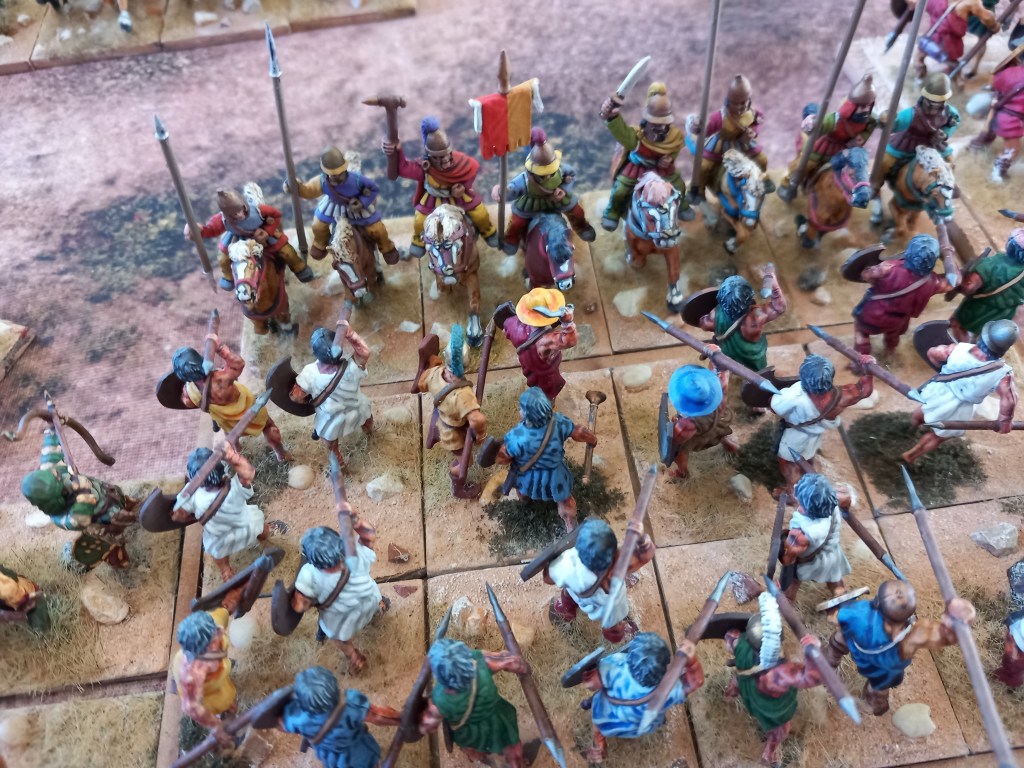
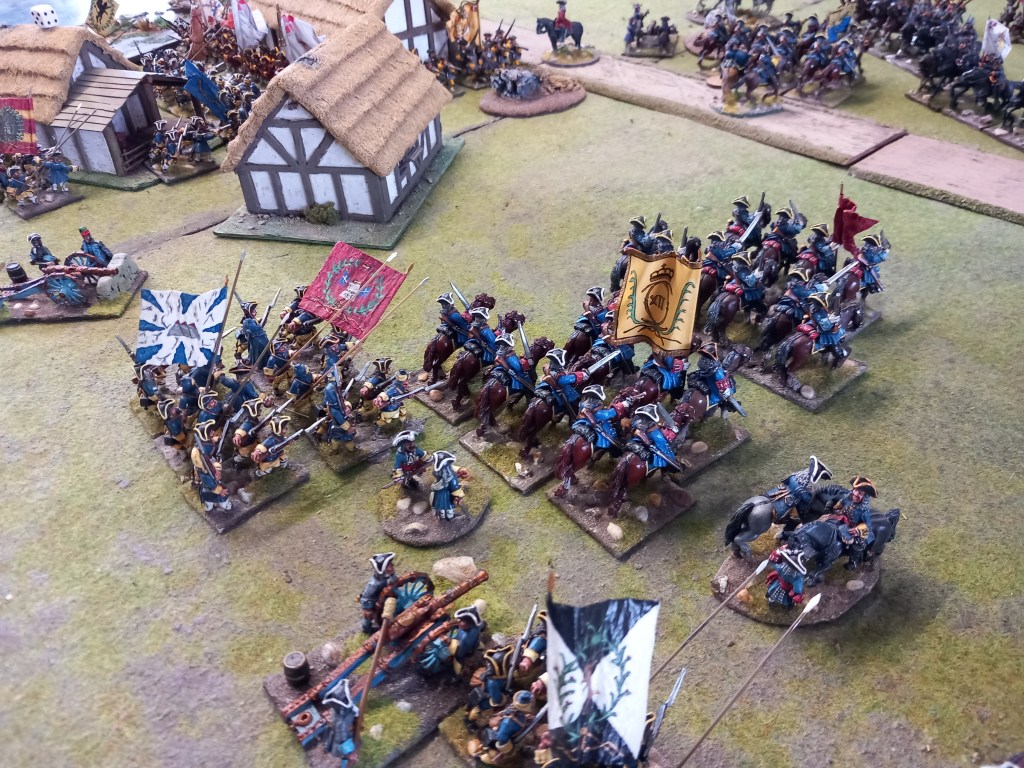
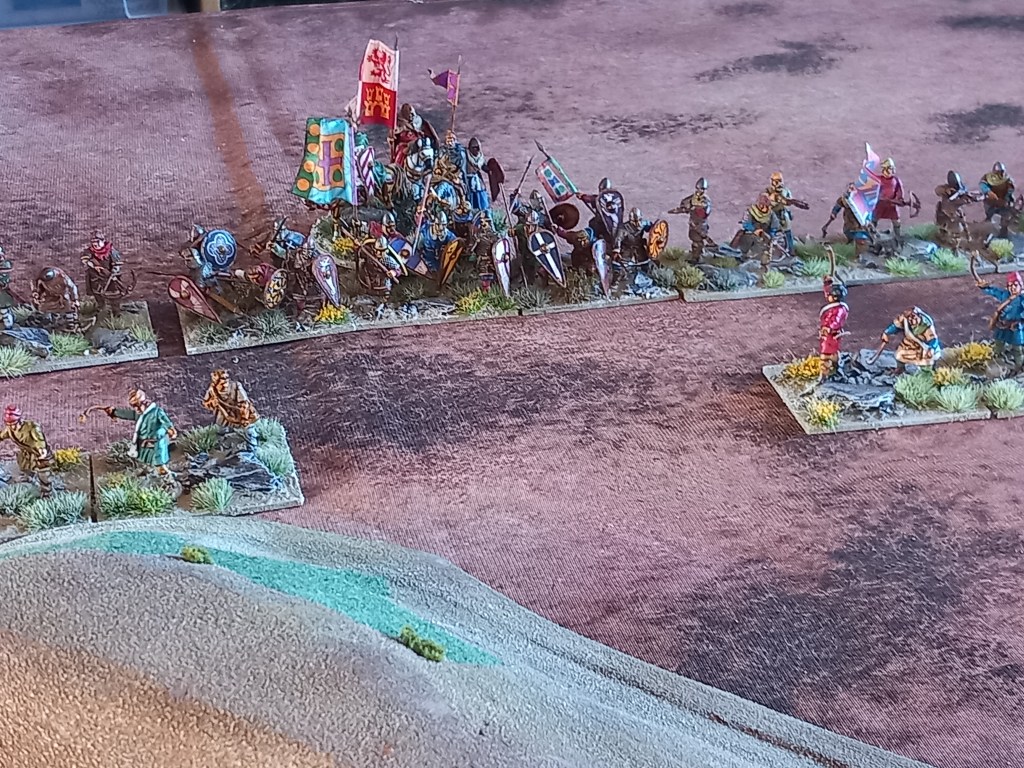
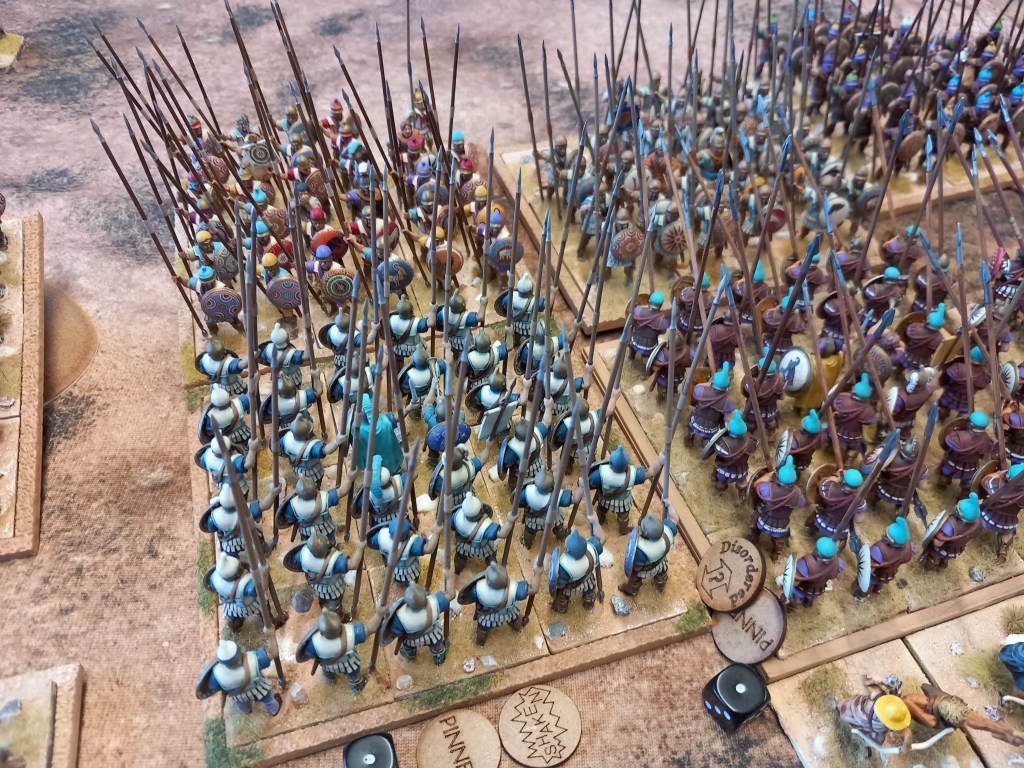
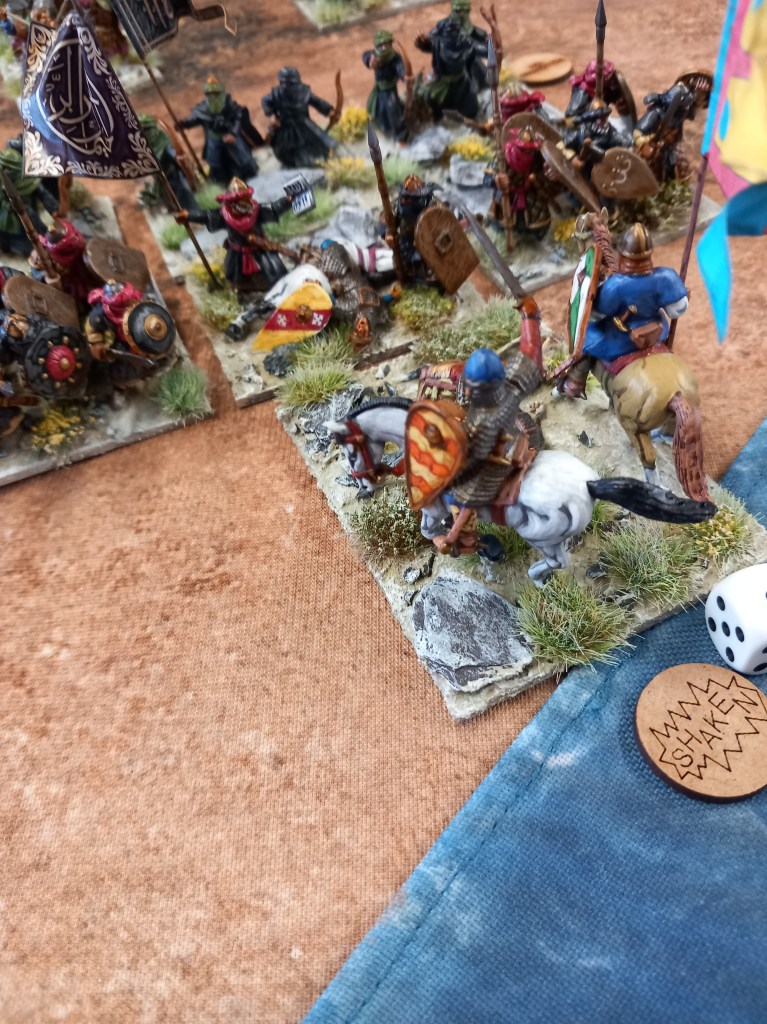
Tokugawa advanced slowly with little co-ordination between the clans. Maeda got into the temple area with ease but the slow going through it (and the wood) meant that they were effectively out of the fight – good news for Ishida 😀 The most aggressive of the Tokugawa divisions was the II clan on the left, who had the best general but failed to form a cohesive line of battle and as they closed the Shingen clan pounced, ultimately routing 2 sonei (lots of points!) and by game end had surrounded the remaining one.

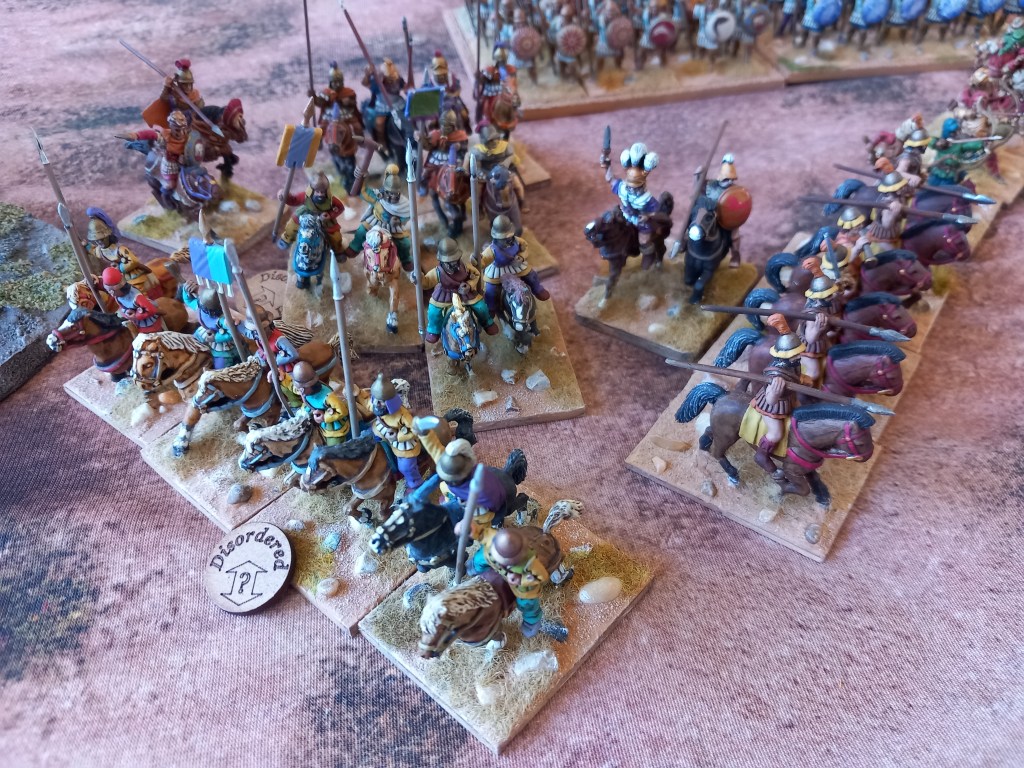
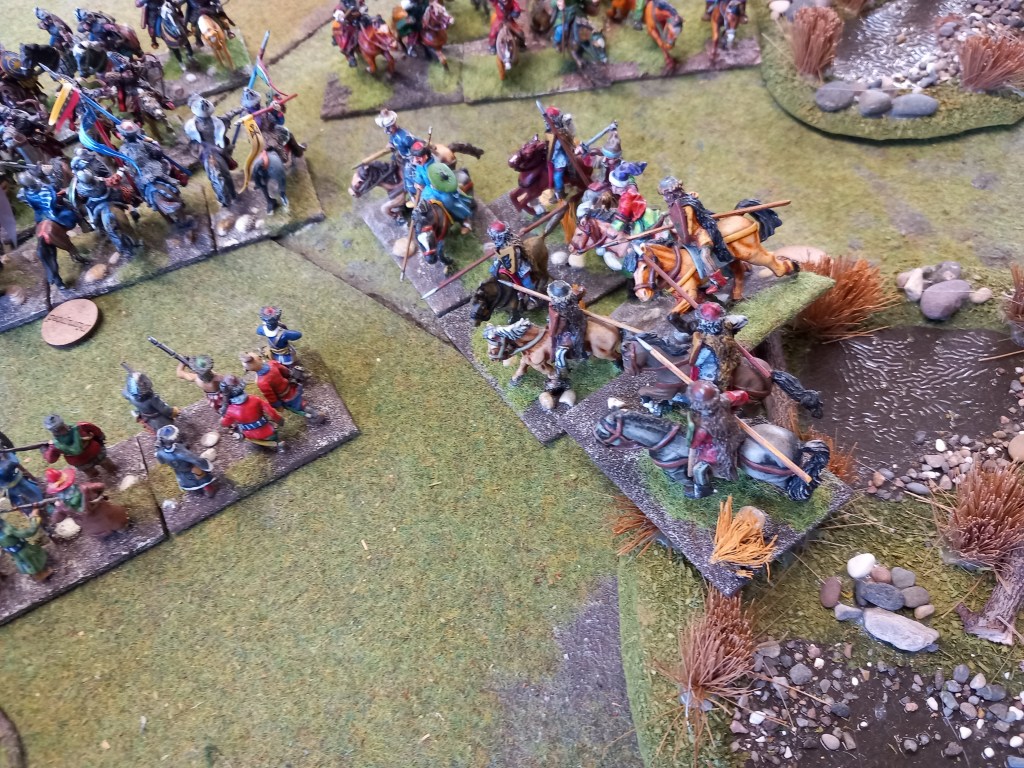
On the Tokugawa right the large Date division spread out across the table and dilly dallied allowing time for Uesugi to get his off table sonei onto the battlefield and link up with the left of Kenshin. Thus by the time Date and Maeda launched attacks by single sonei they were easy meat for the now superior numbers of Kenshin and Uesugi leading to more routs.

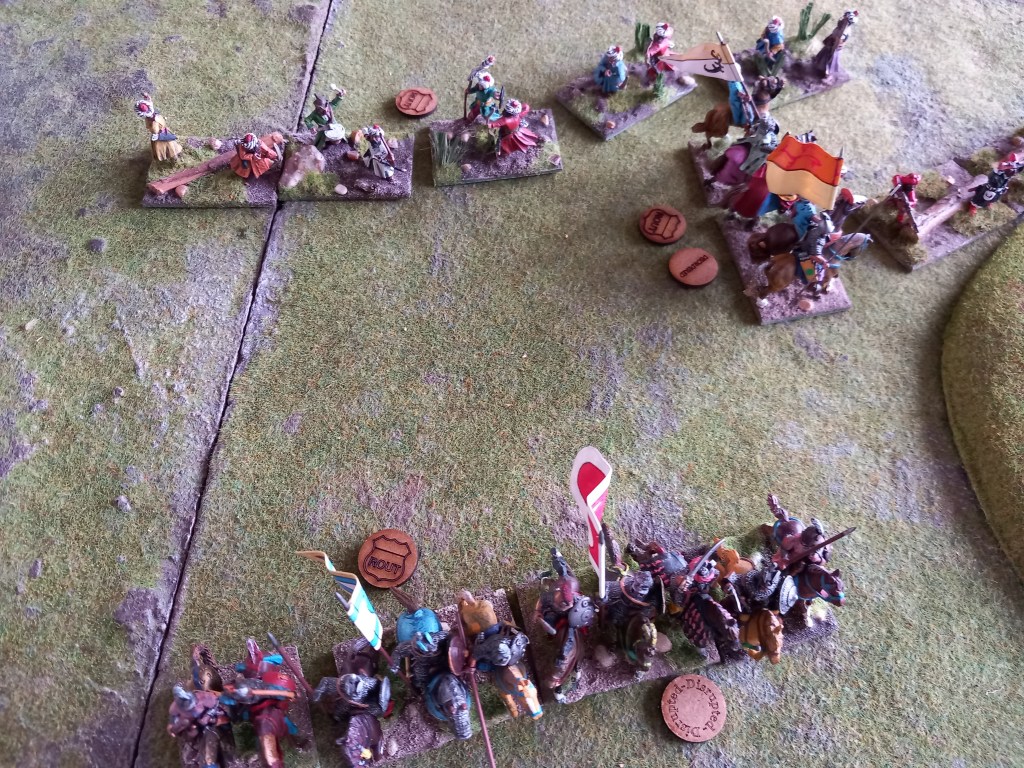
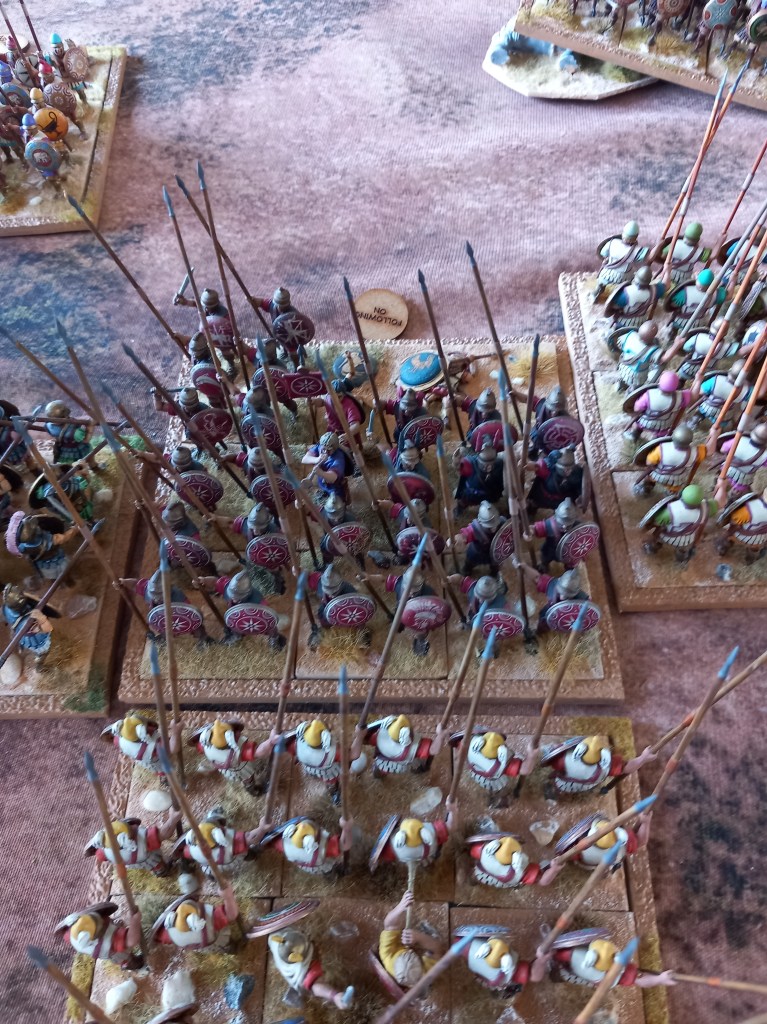
And that was the game. A classic lesson of the fate of over cautious advances and uncoordinated attacks.

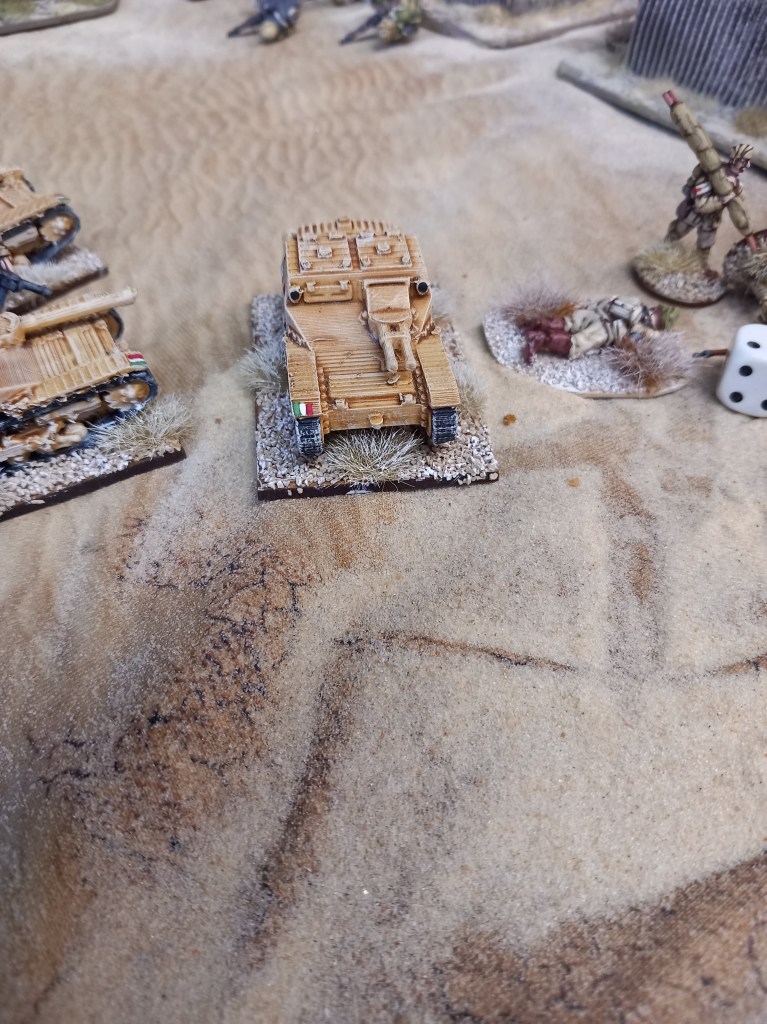
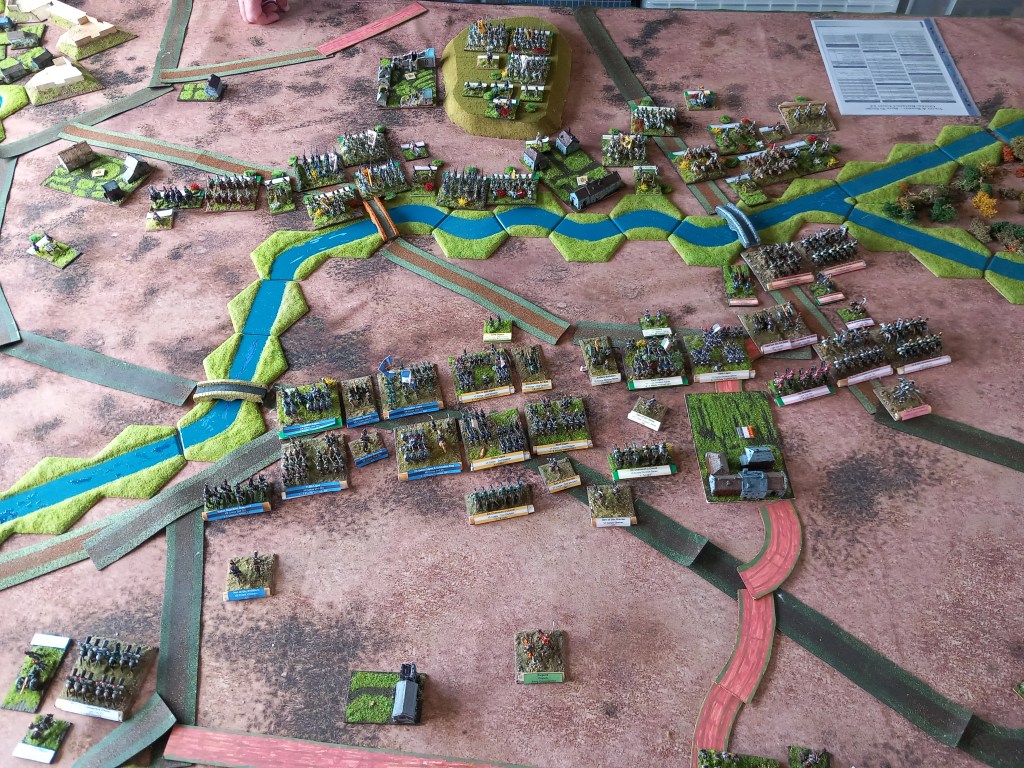
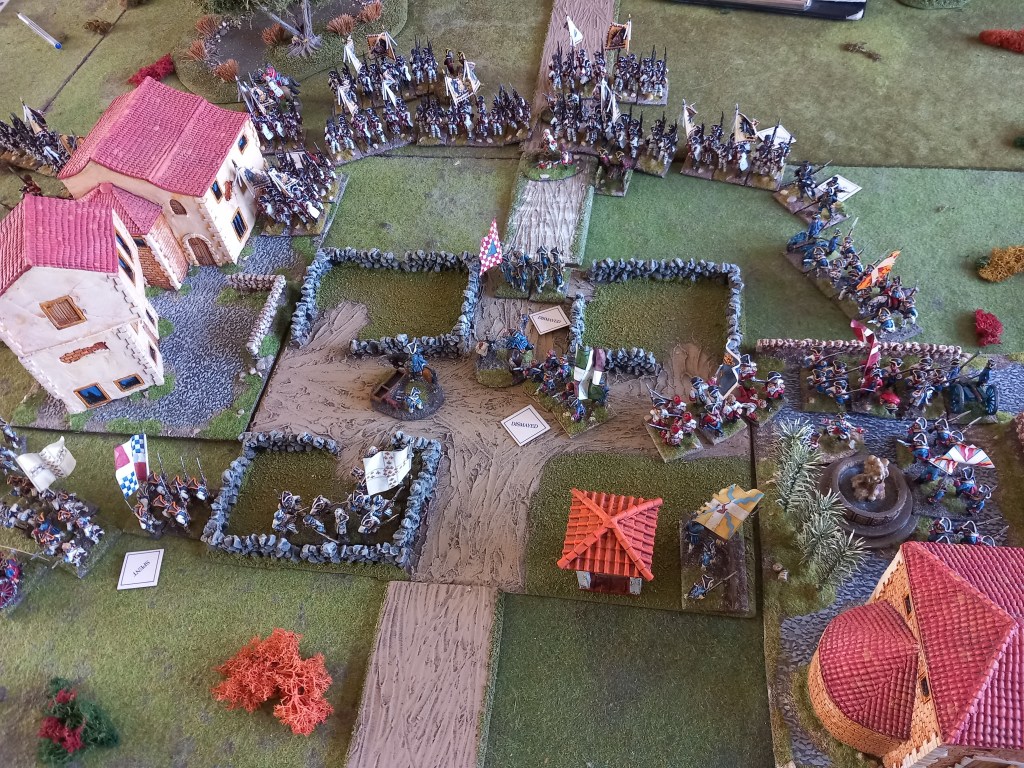
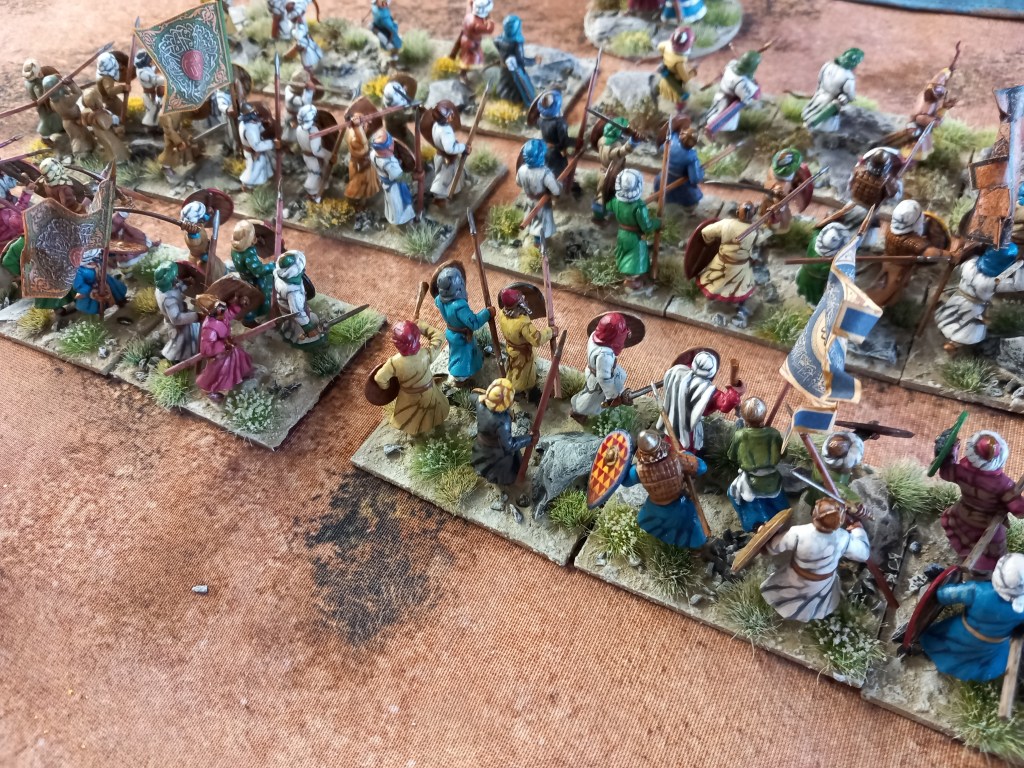
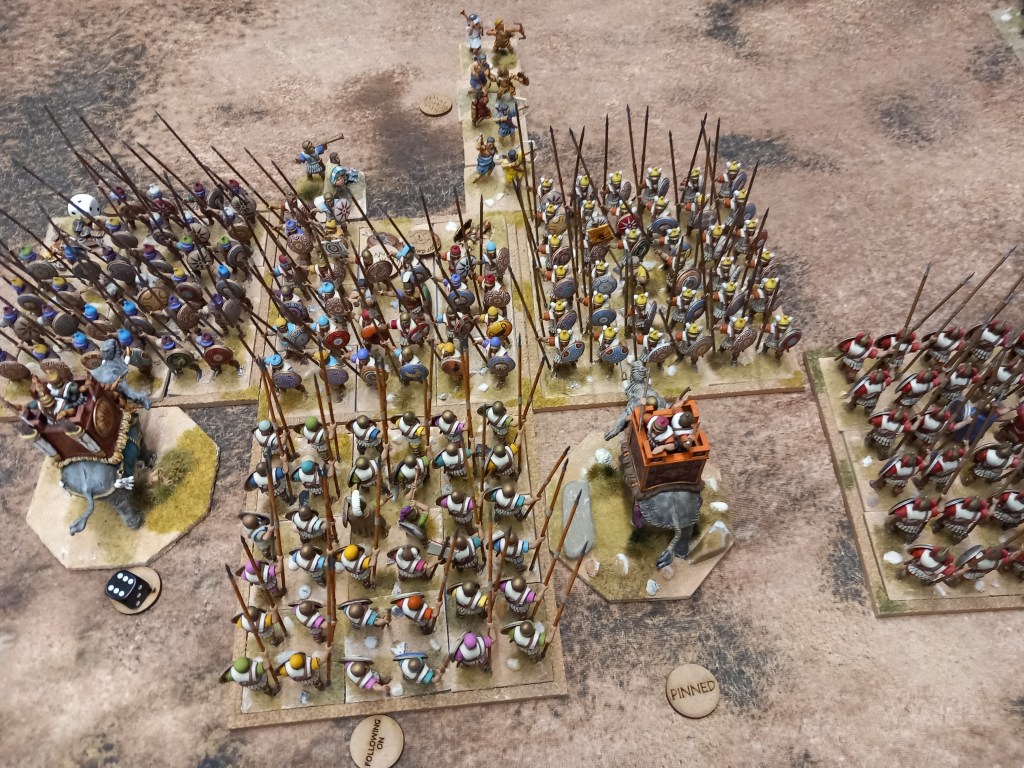
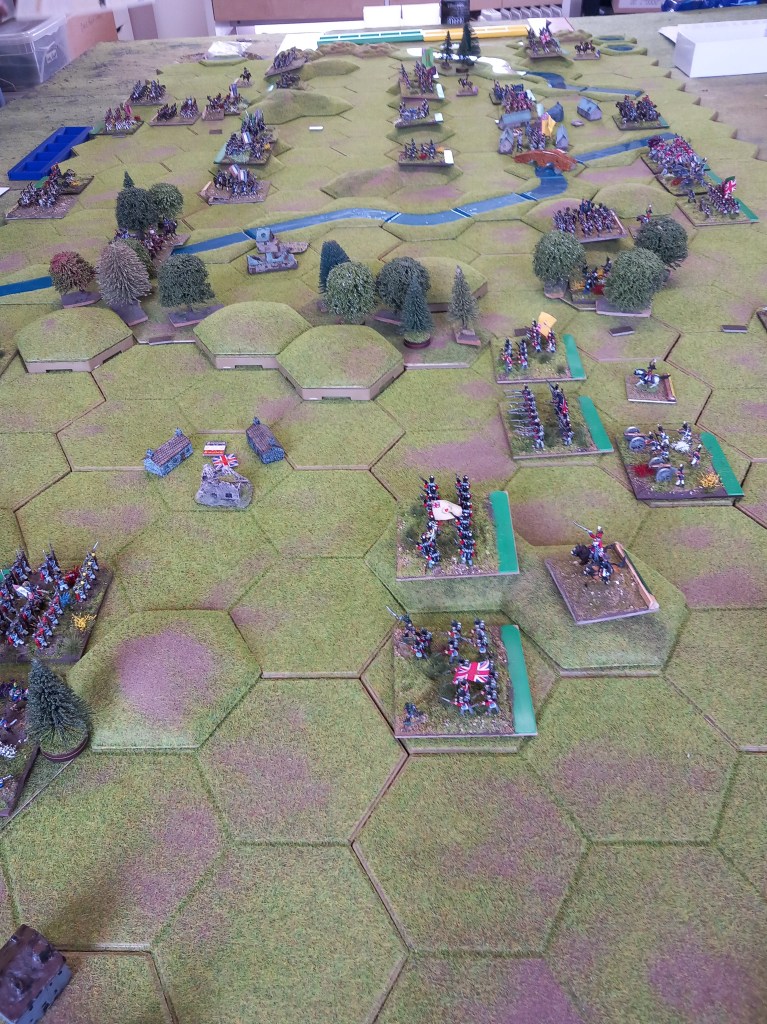
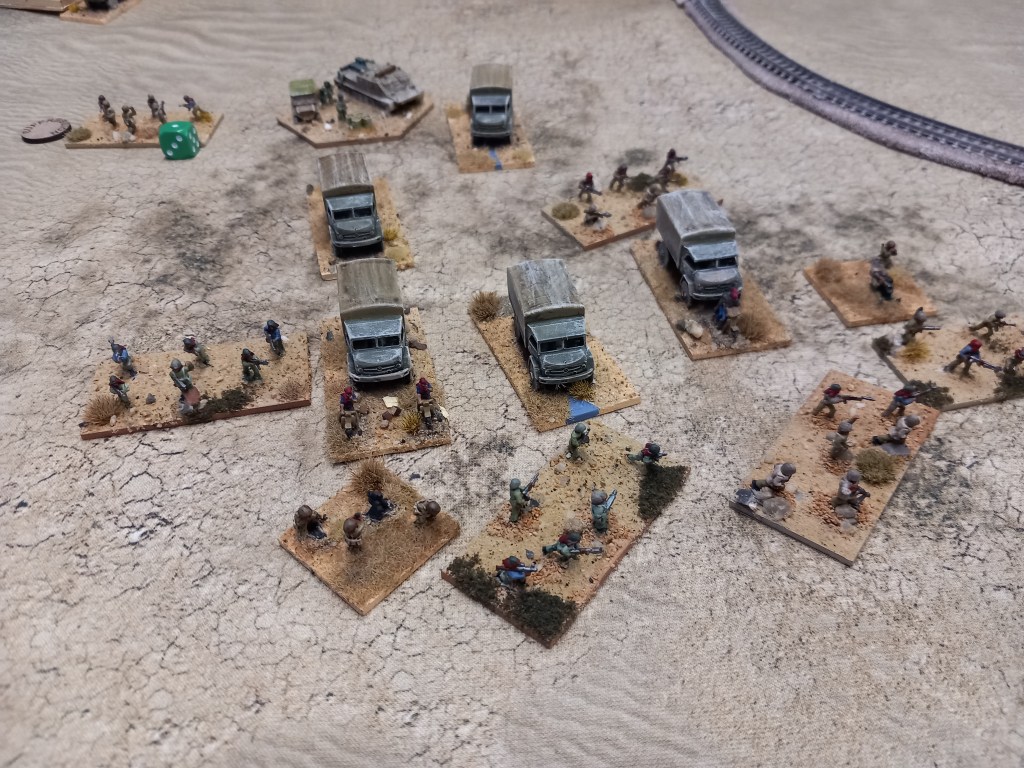
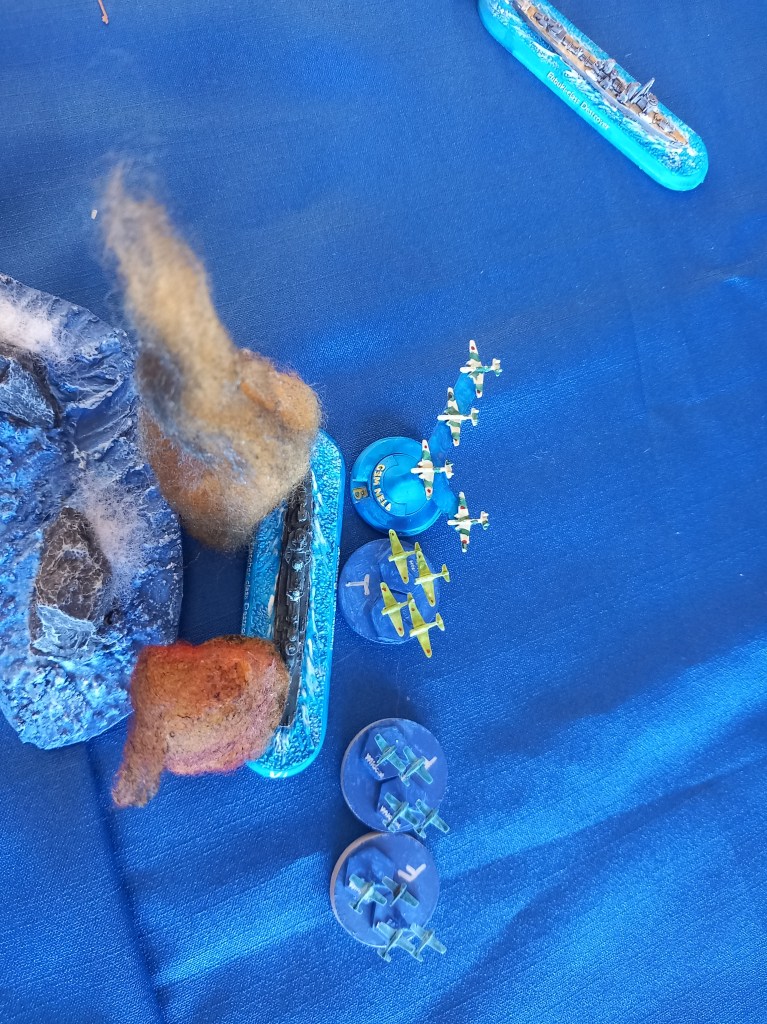
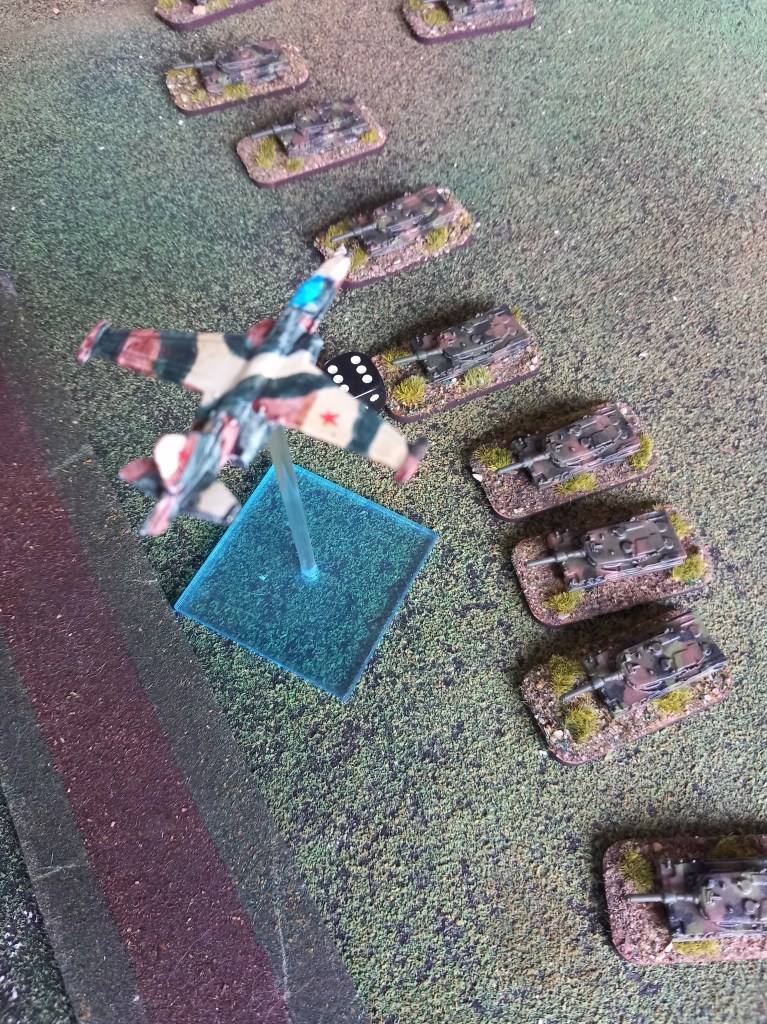
Next up was our old favourite, Iran Iraq. Another narrative driven game based loosely around Operation Badr, March 1985. It was a 12 turn game so stretched over two playing days.

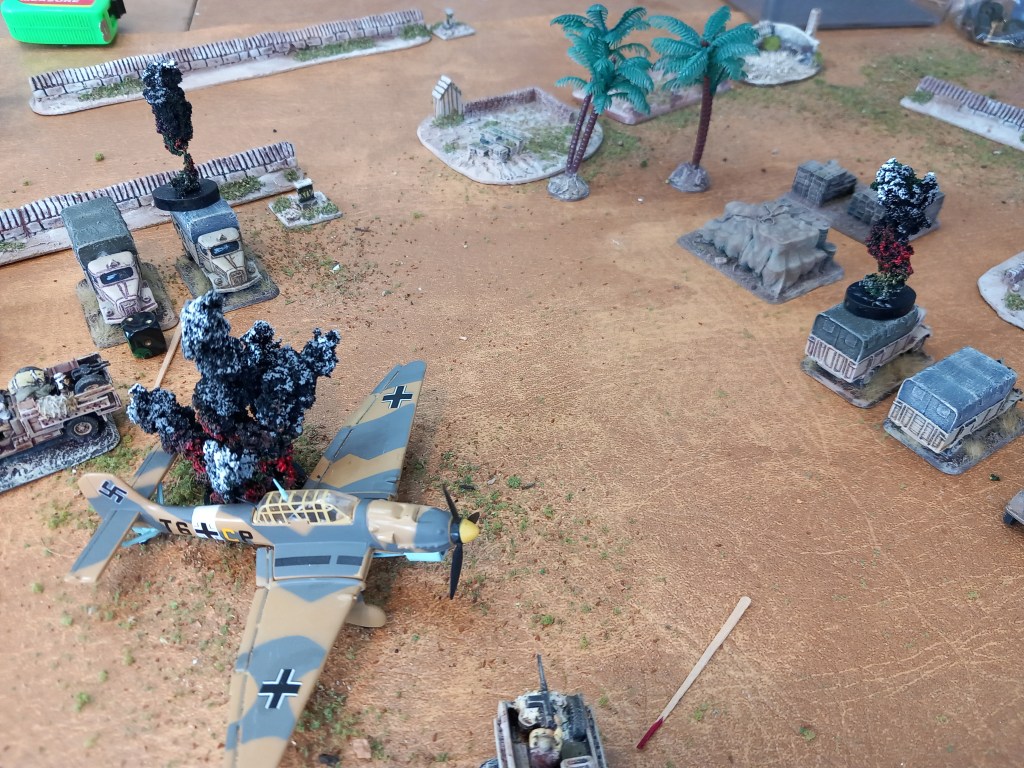
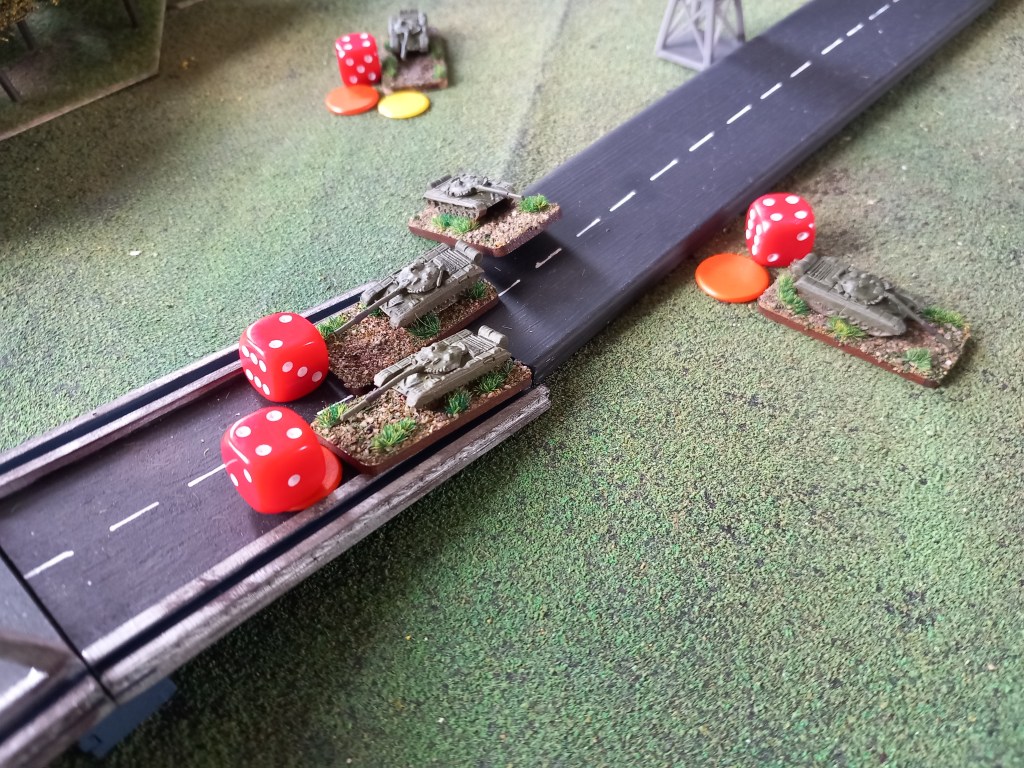
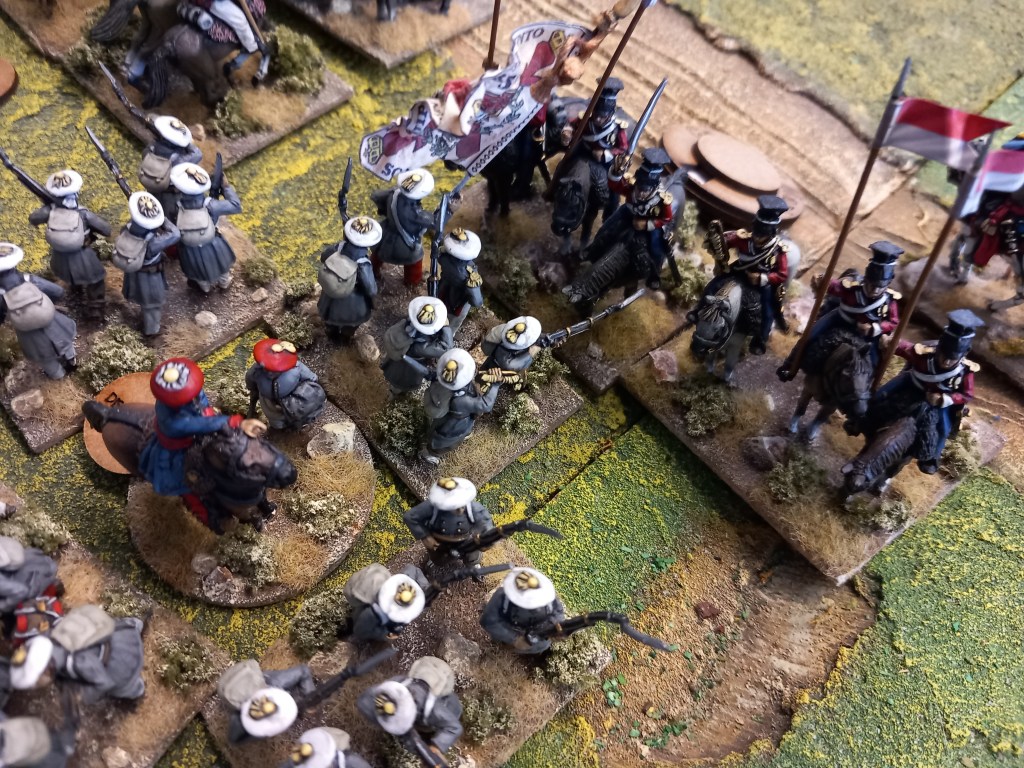
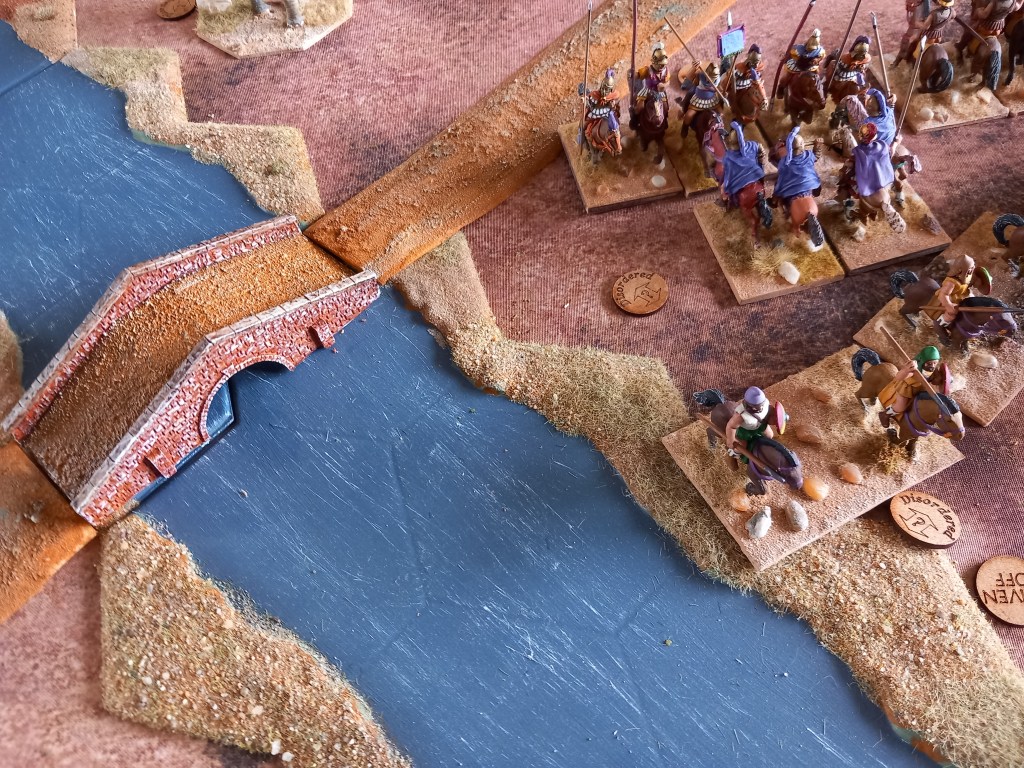
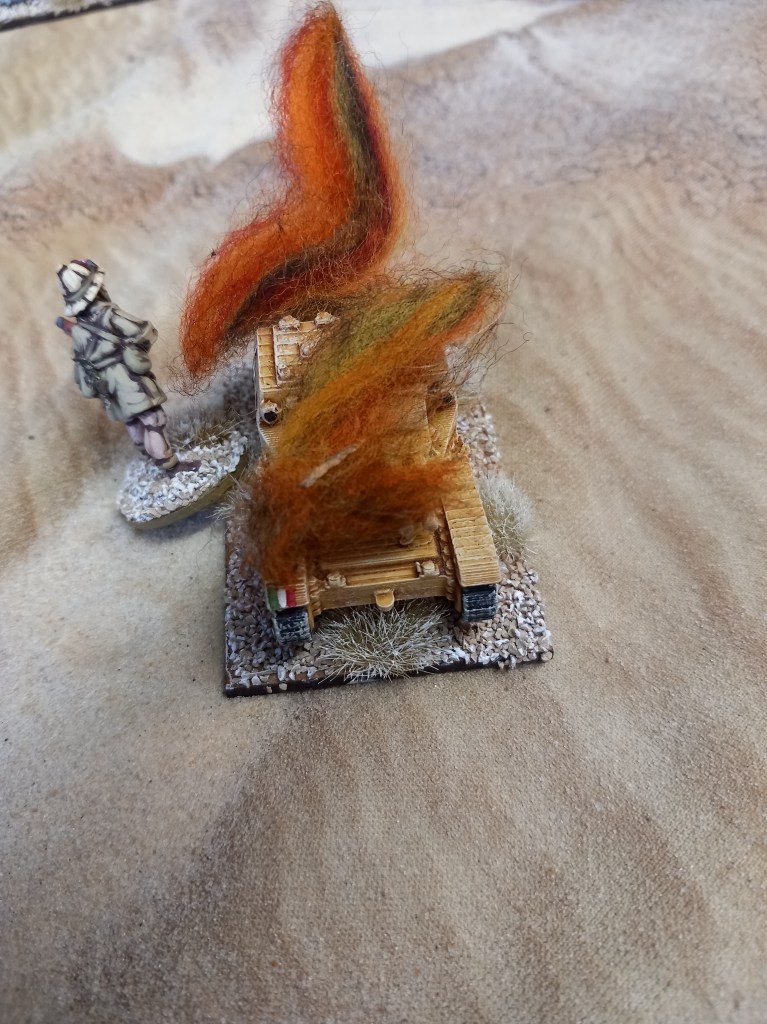
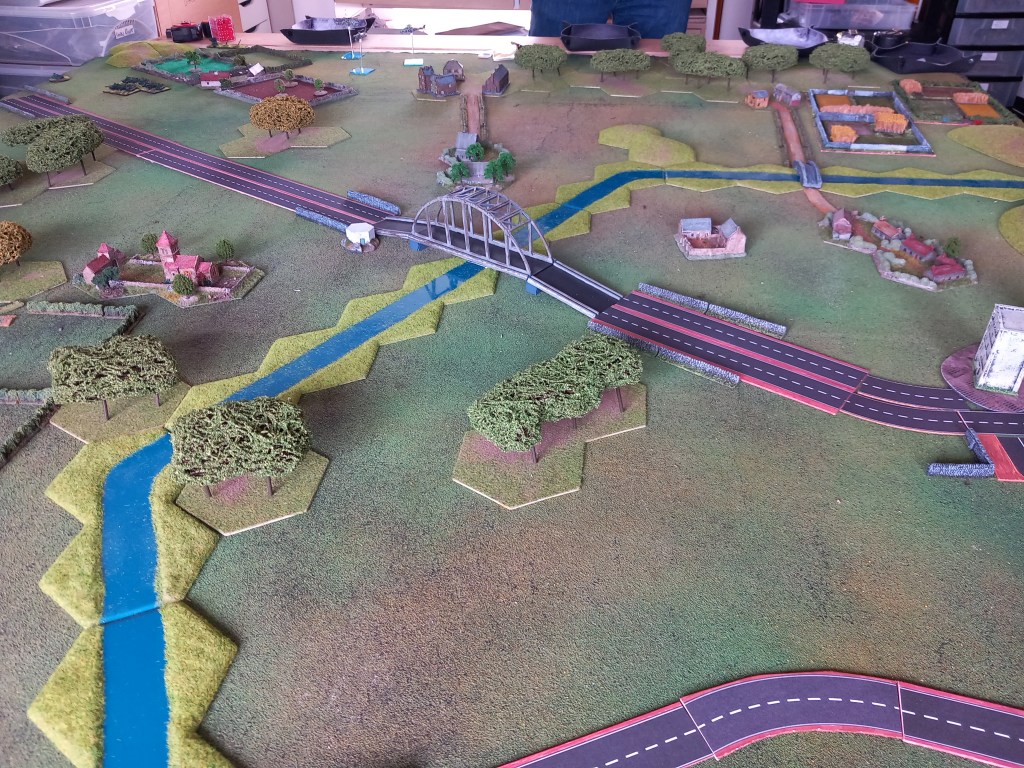
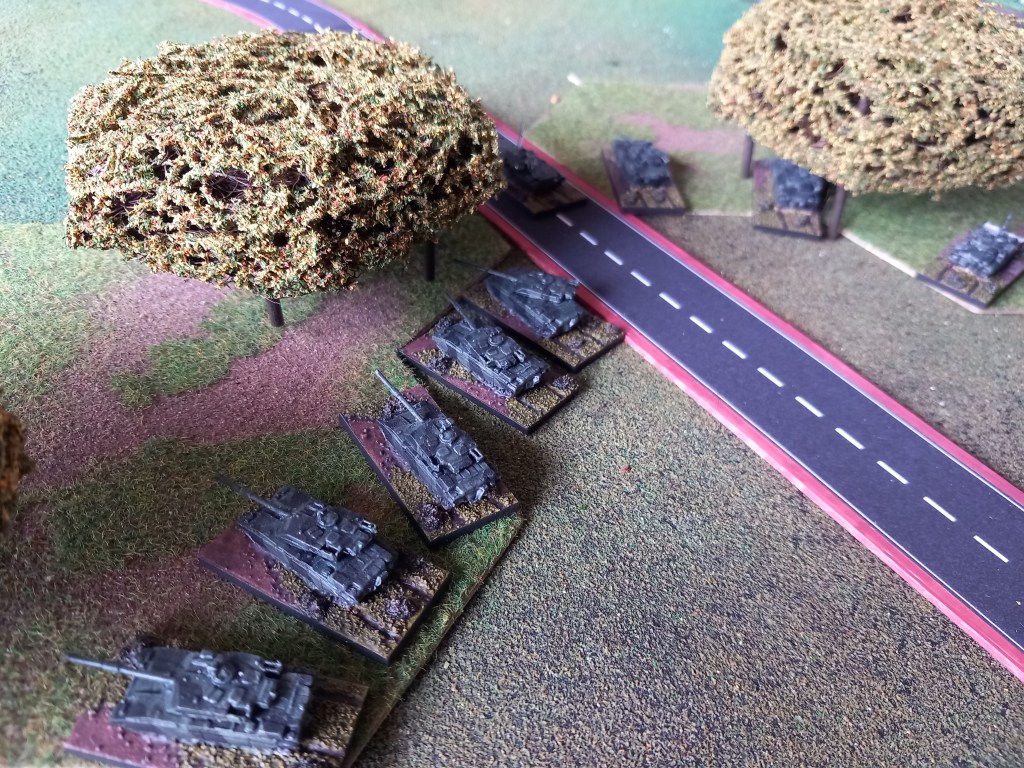
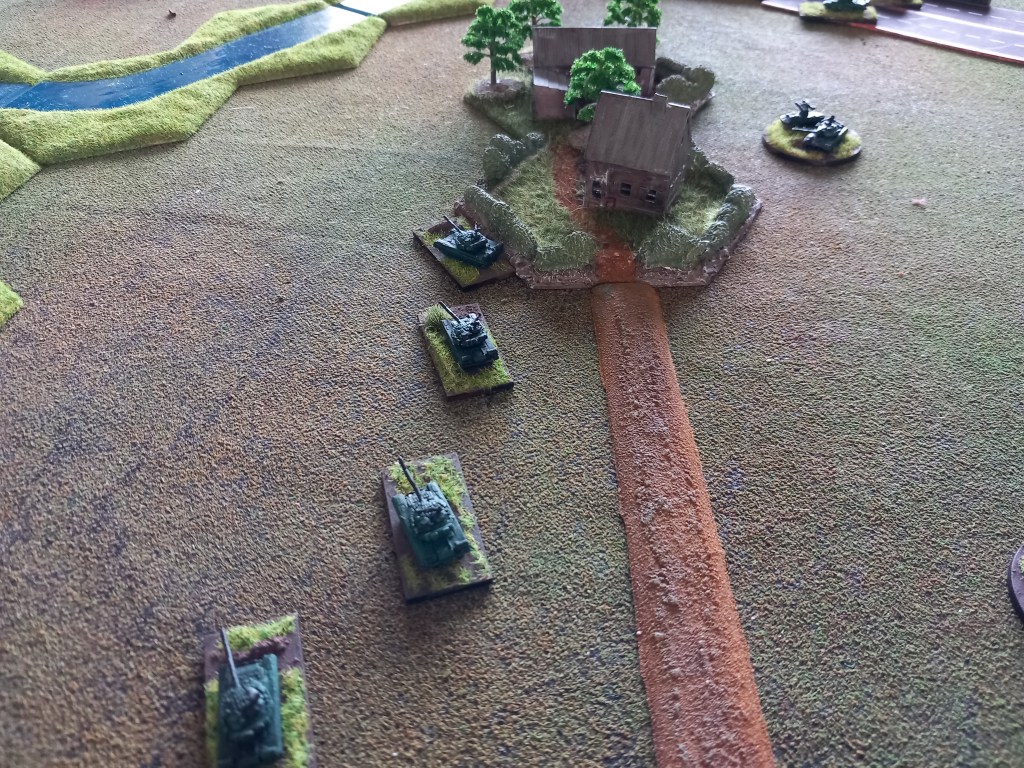
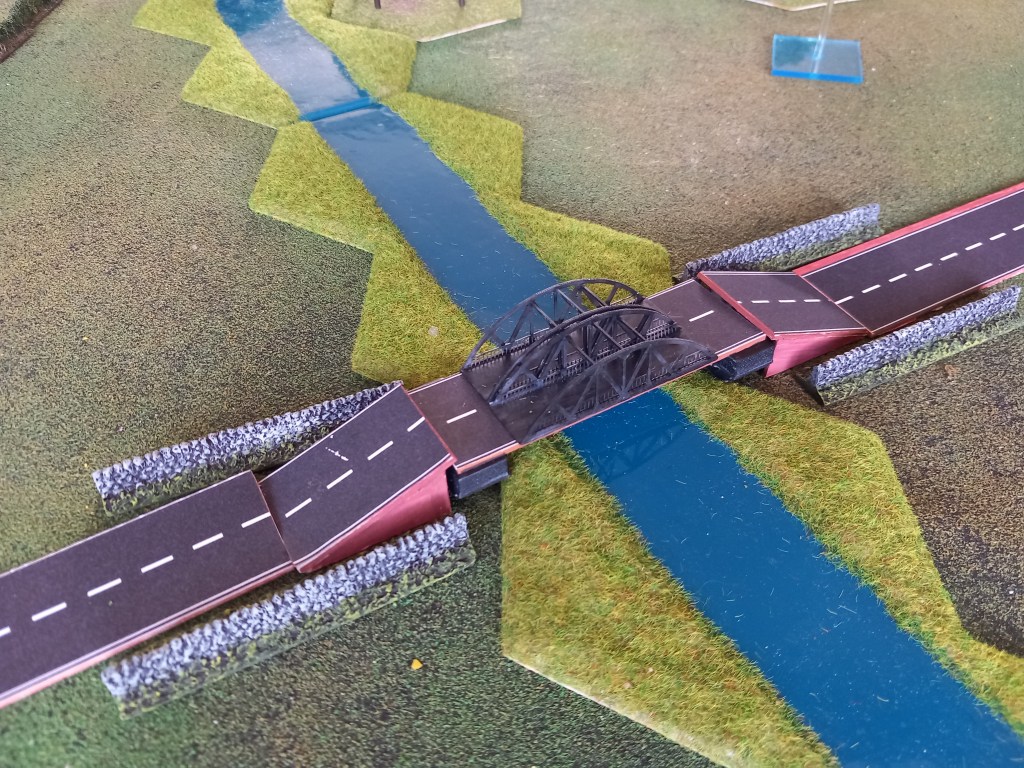
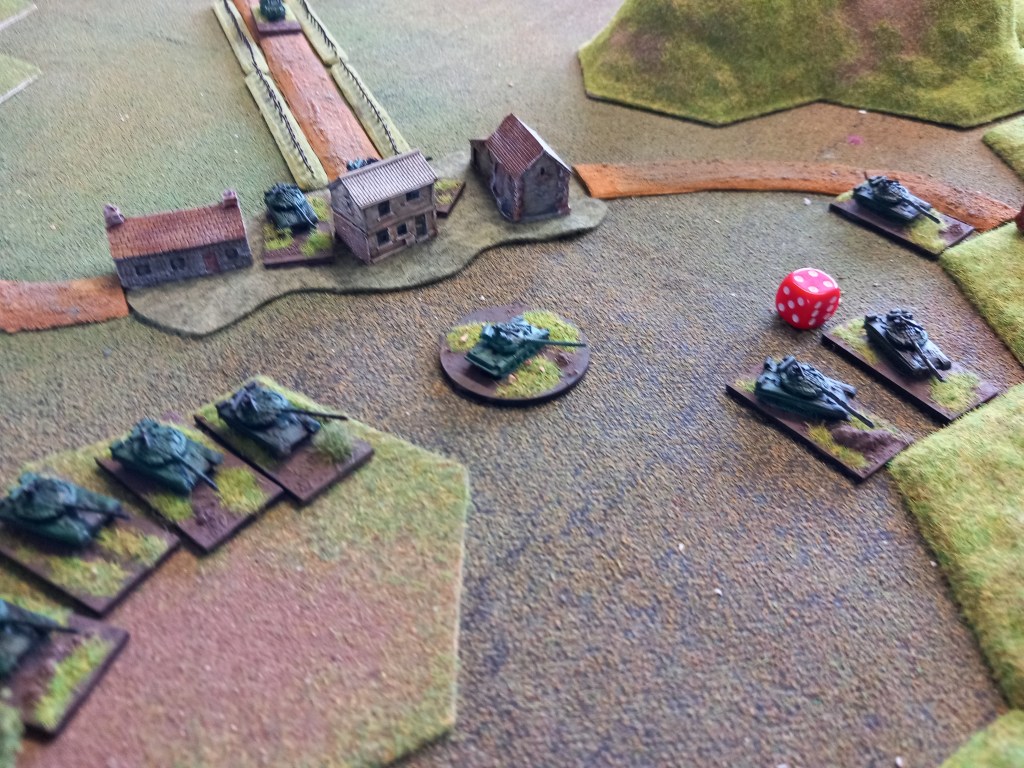
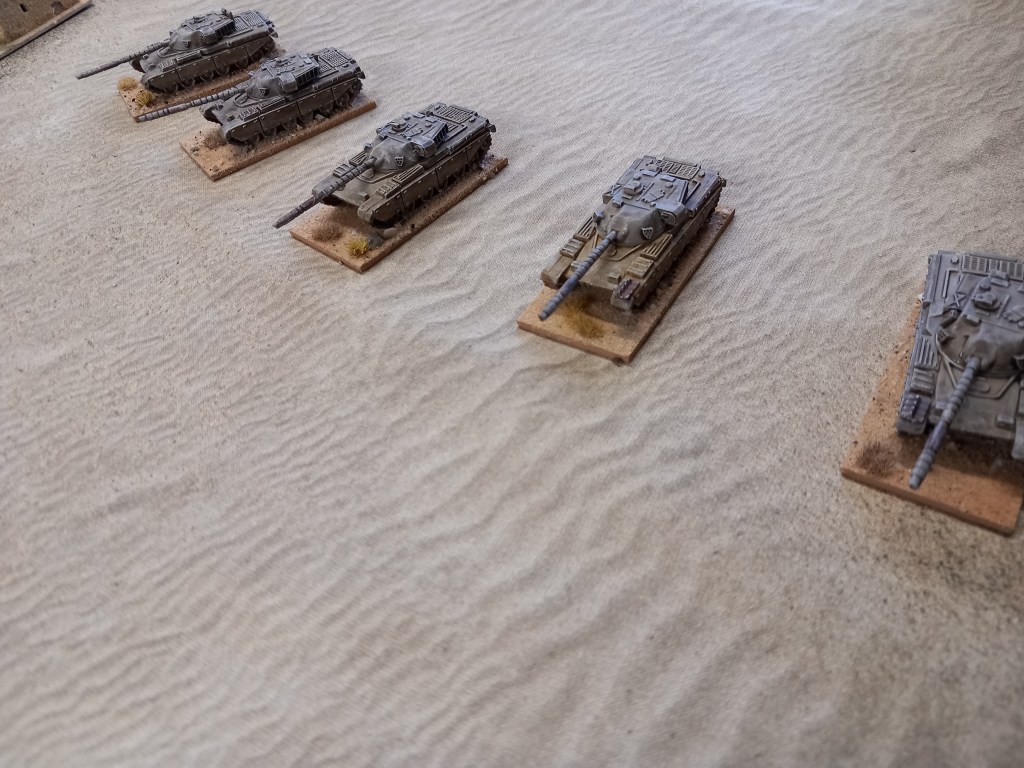
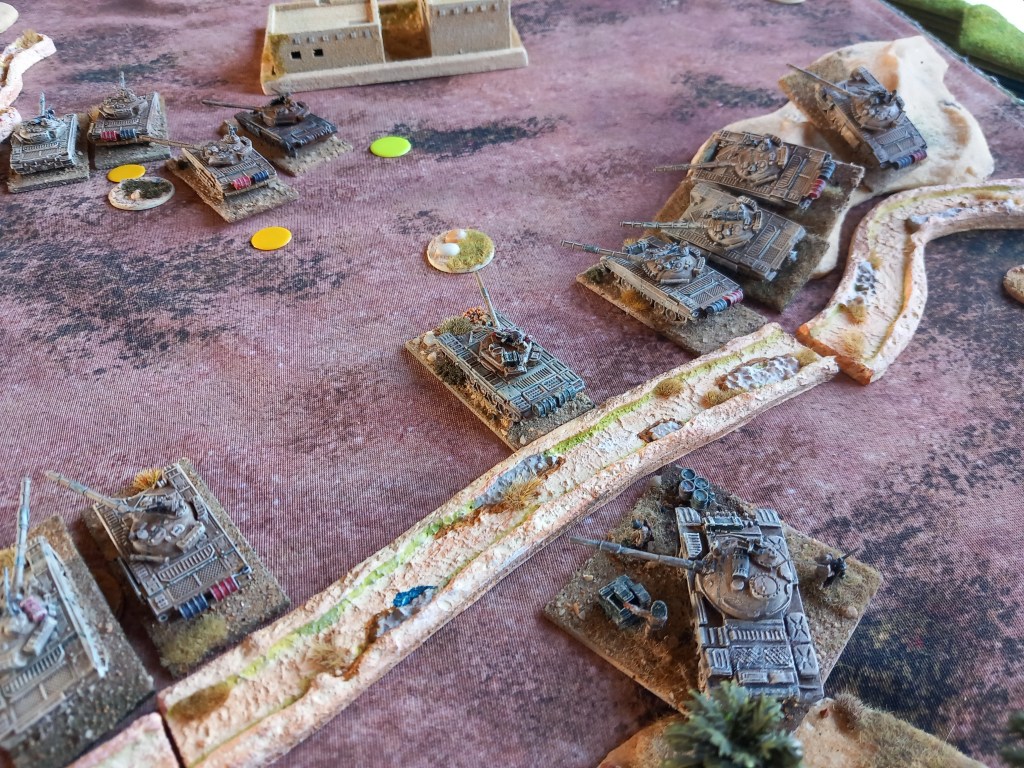
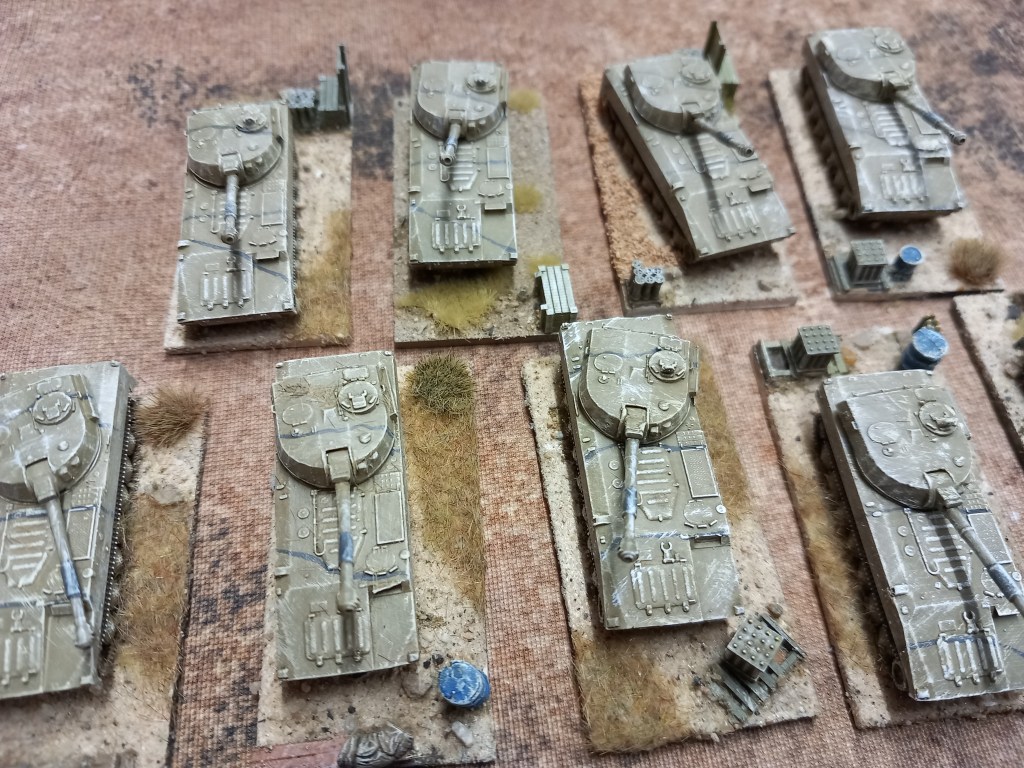
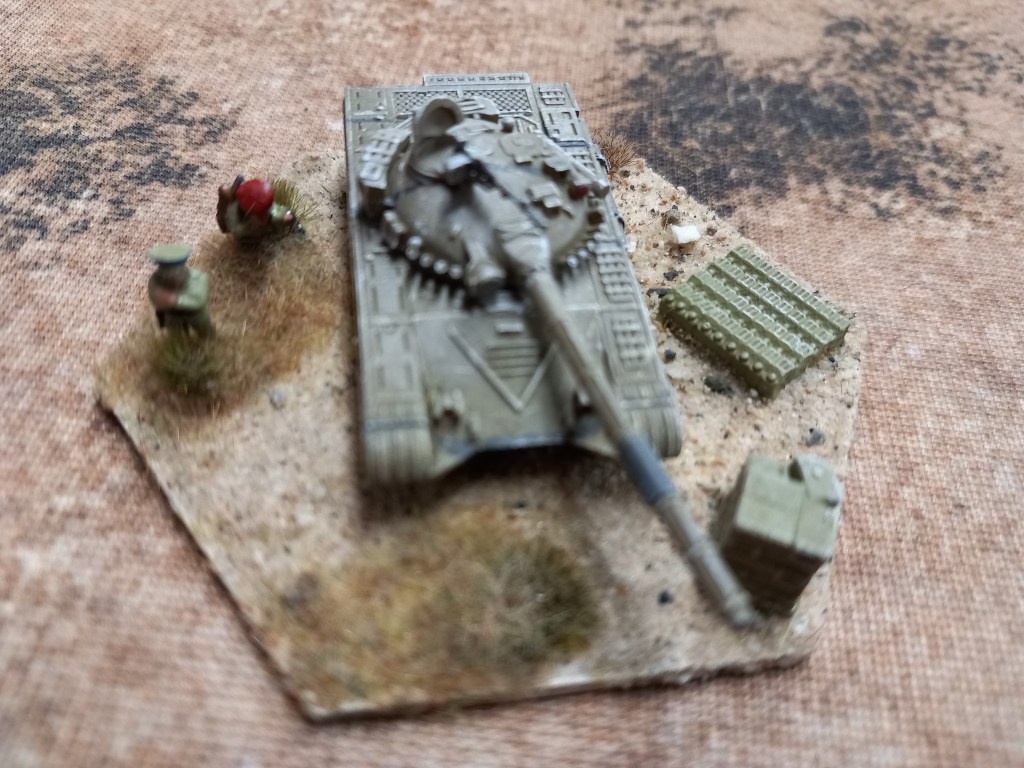
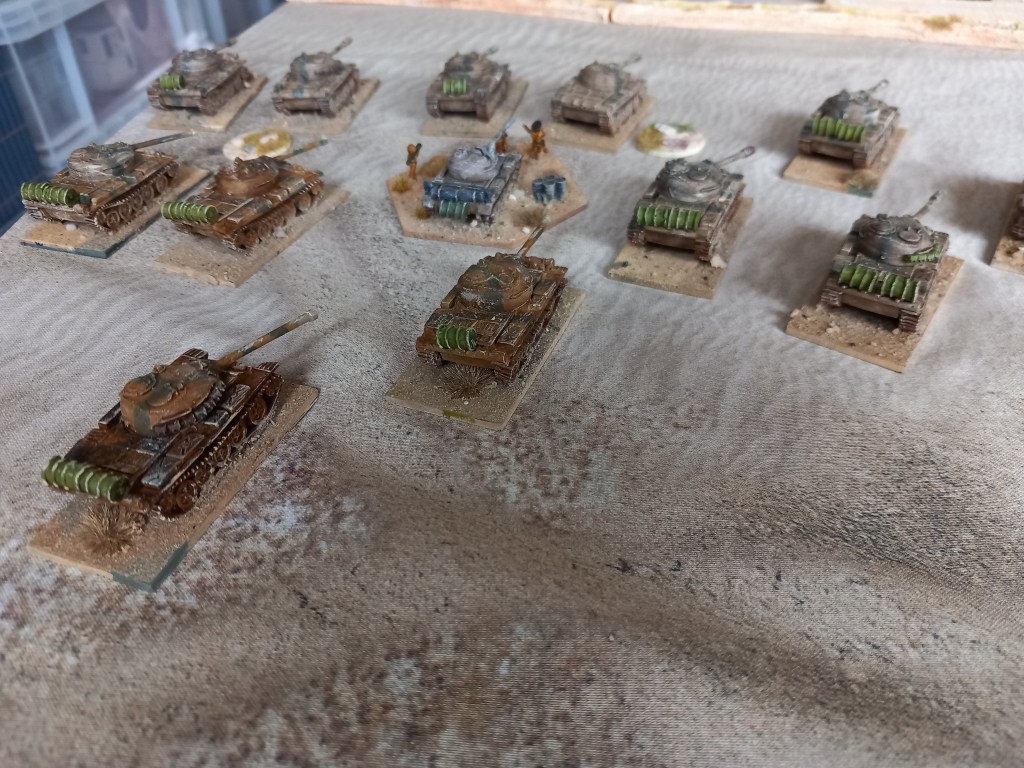
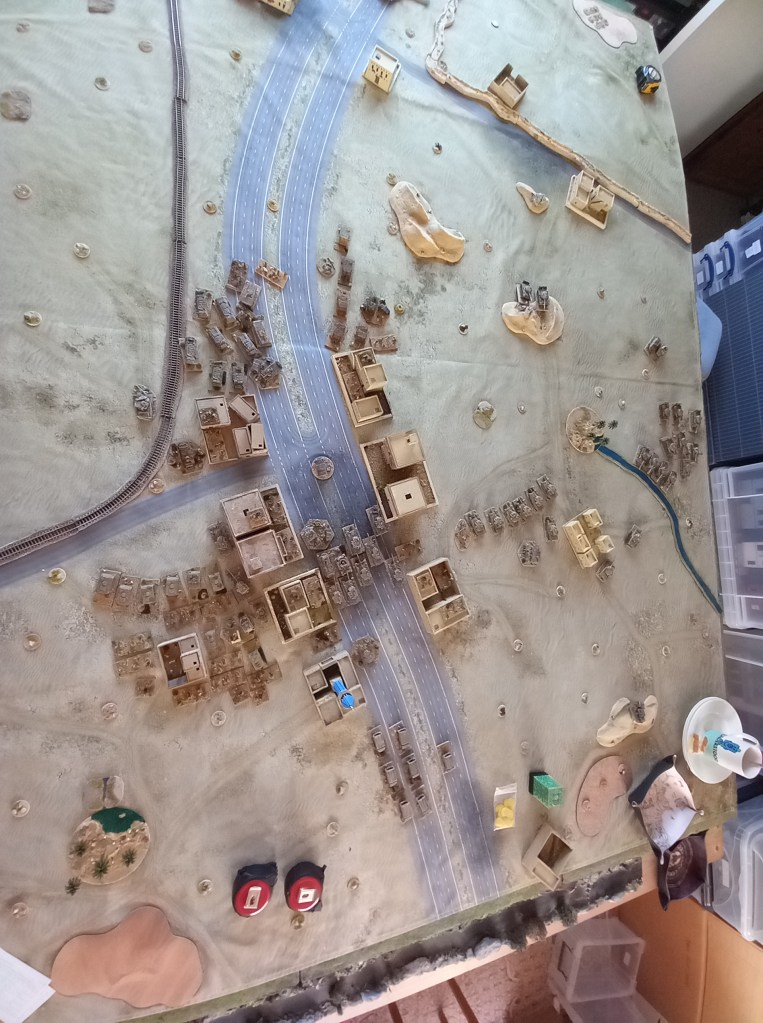
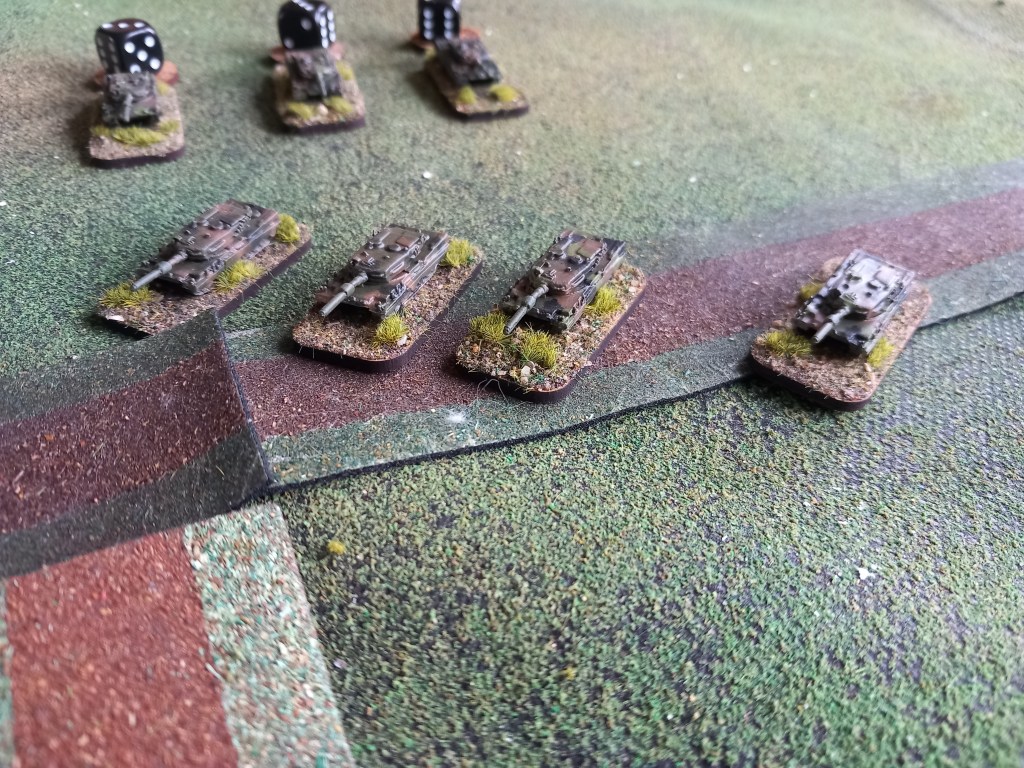
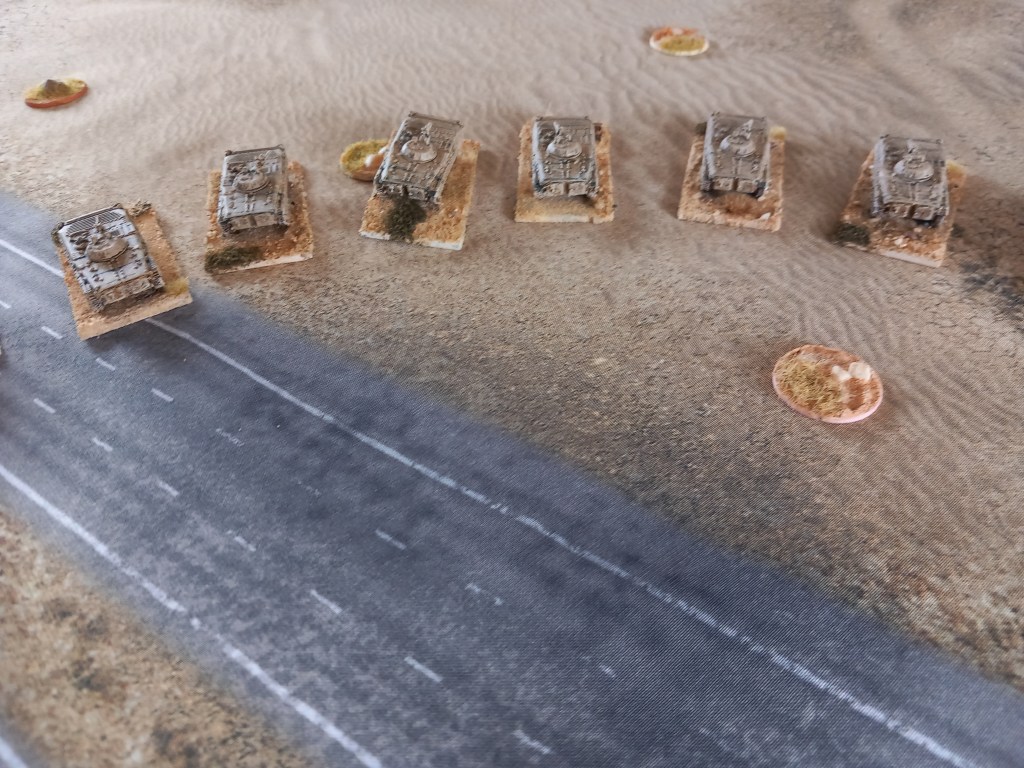
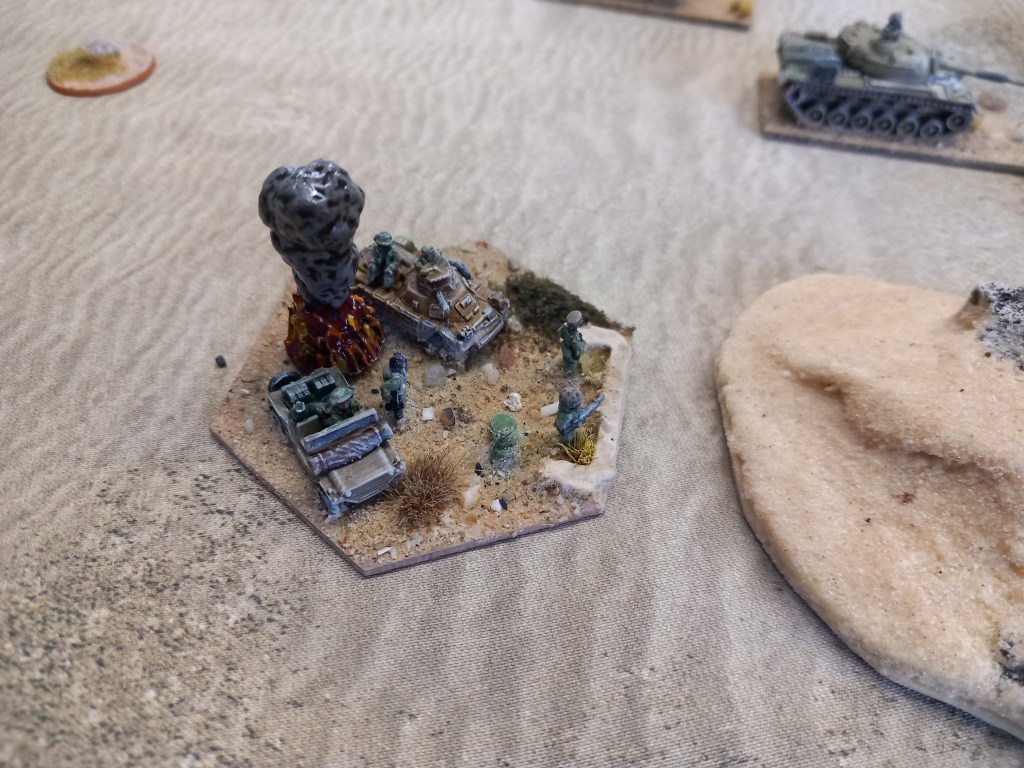
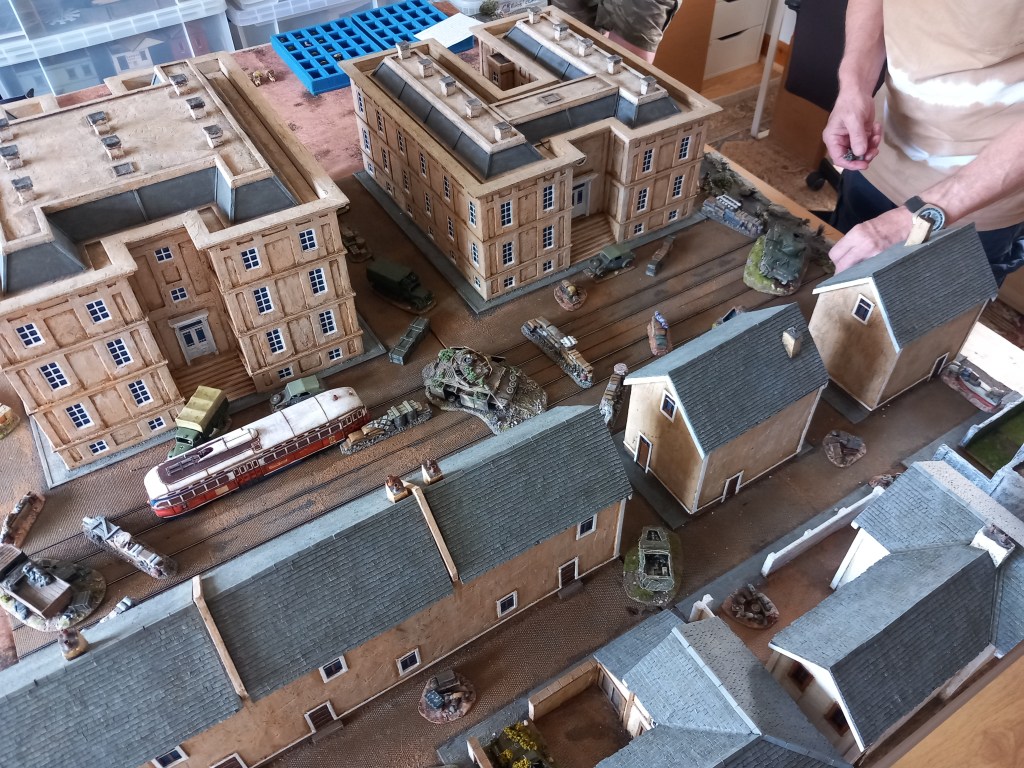
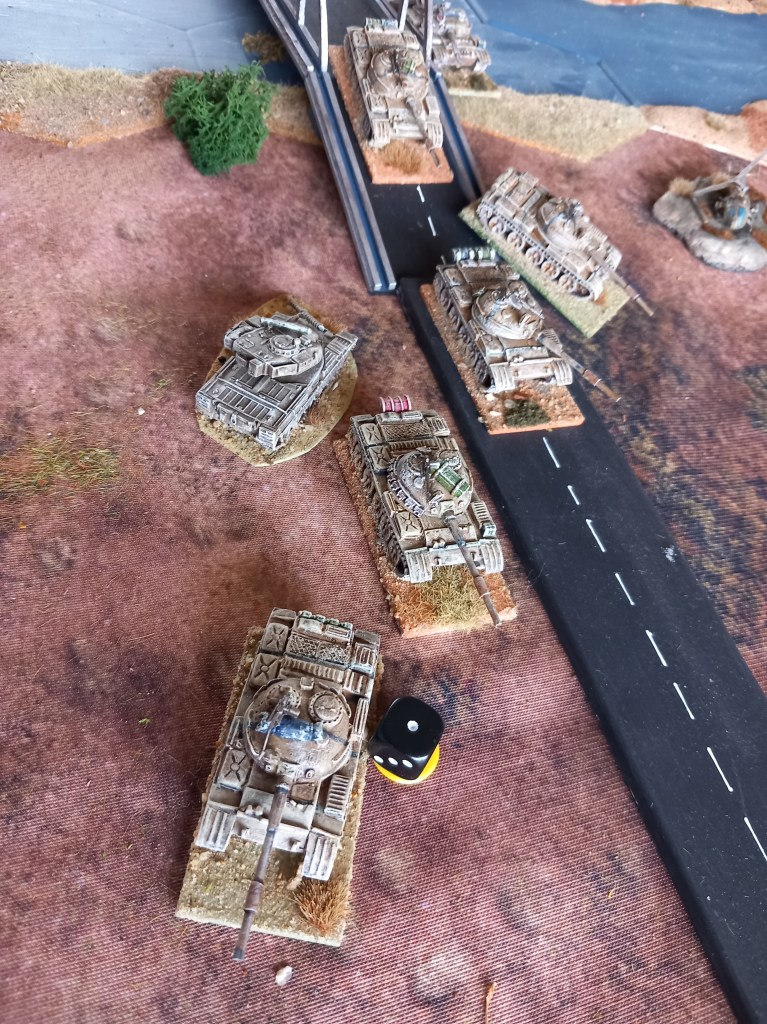
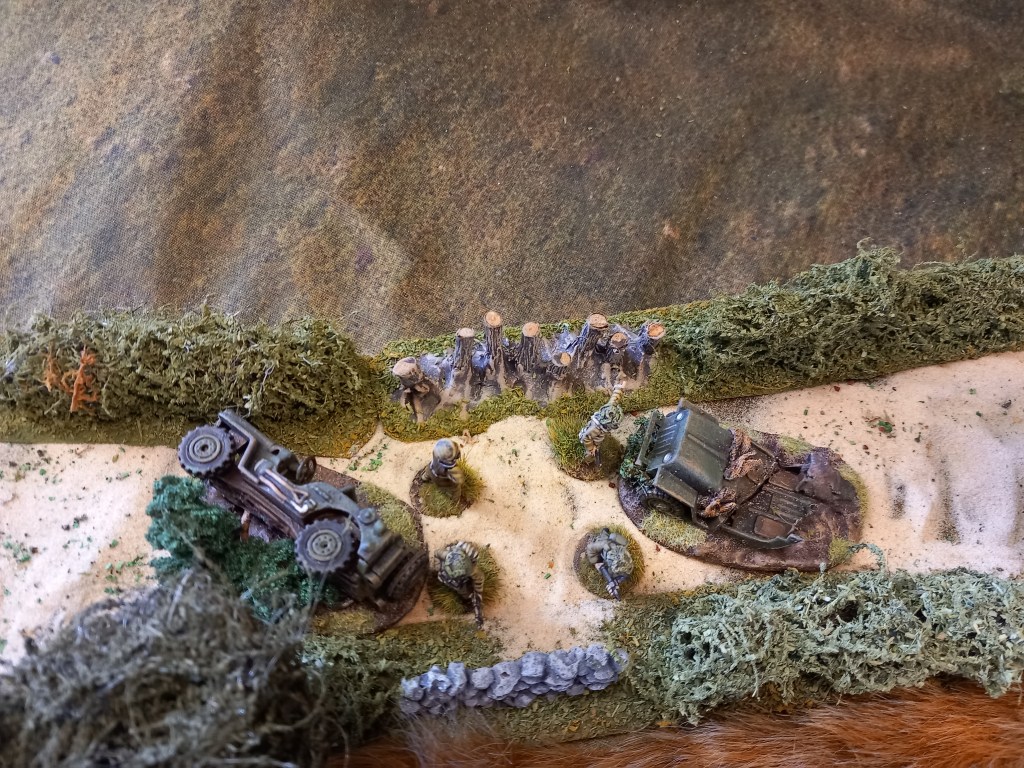
In this scenario the Iranian 37th Armoured were dug in around the town of Ajairda supported by off table SP artillery. Forward of their position was the river Tigris with two possible crossing points; the steel bridge directly to the front over which the main highway ran into the town and the old stone bridge off to the right over which ran the old road alongside a dried up stream bed, a long derelict bridge over to the left was of no use to road traffic. The narrative required the mechanised infantry battalion to be deployed within the town limits with the option to entrench individual platoons (bases). The two armoured battalions (one M60A1 and one M48A5) had the options of deploying on table with optional berms or deploying off table and dicing to arrive once the shooting started. The player spread his infantry amongst the buildings and entrenched a number of platoons on the right of the town along with half of the M60s in berms while the other half were on the left of the town. The splitting of the M48s did give operational problems in the game as the commander couldn’t be in two places at once! The M48s were off table behind the hill on which the FAO took up his position.

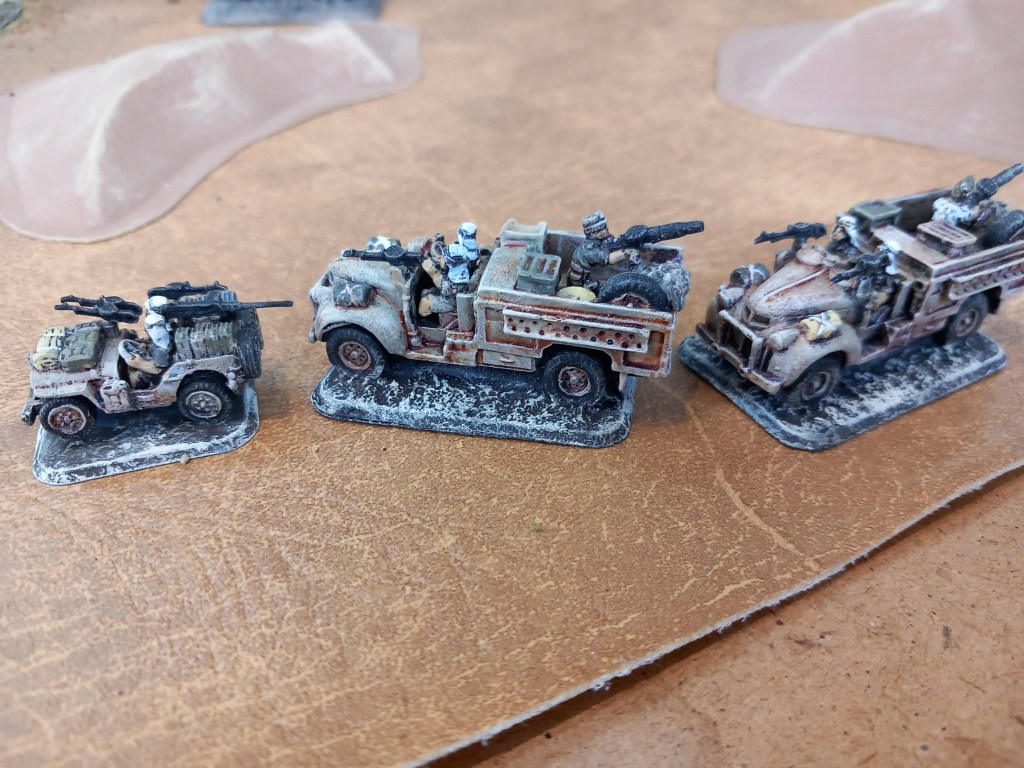
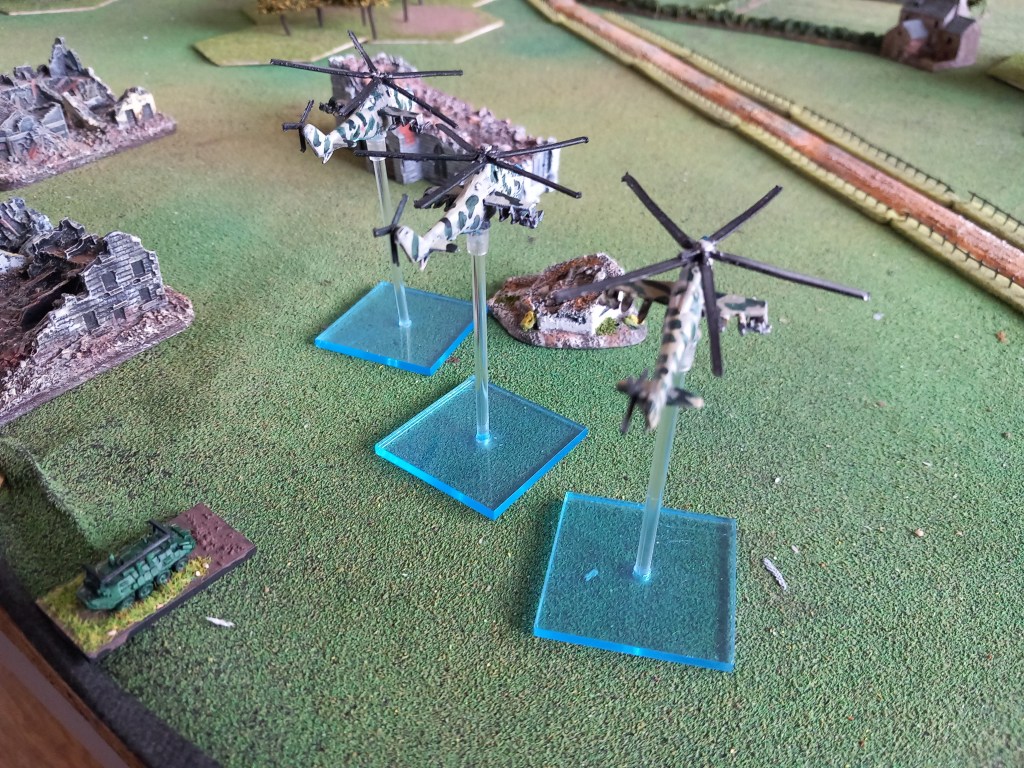
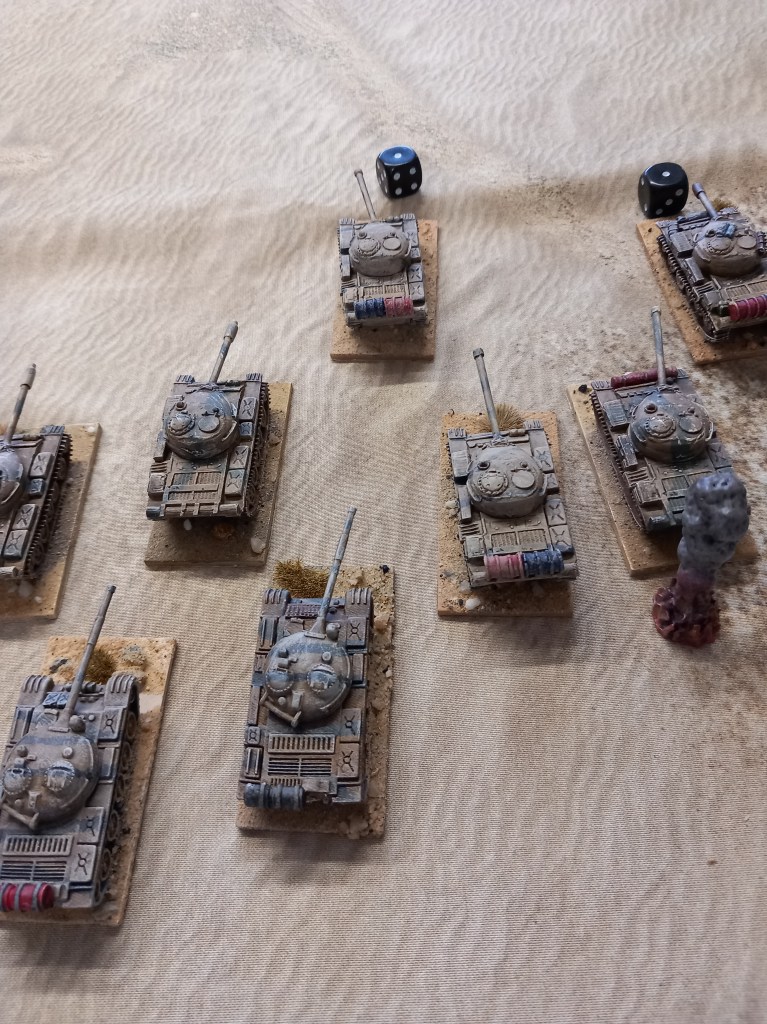
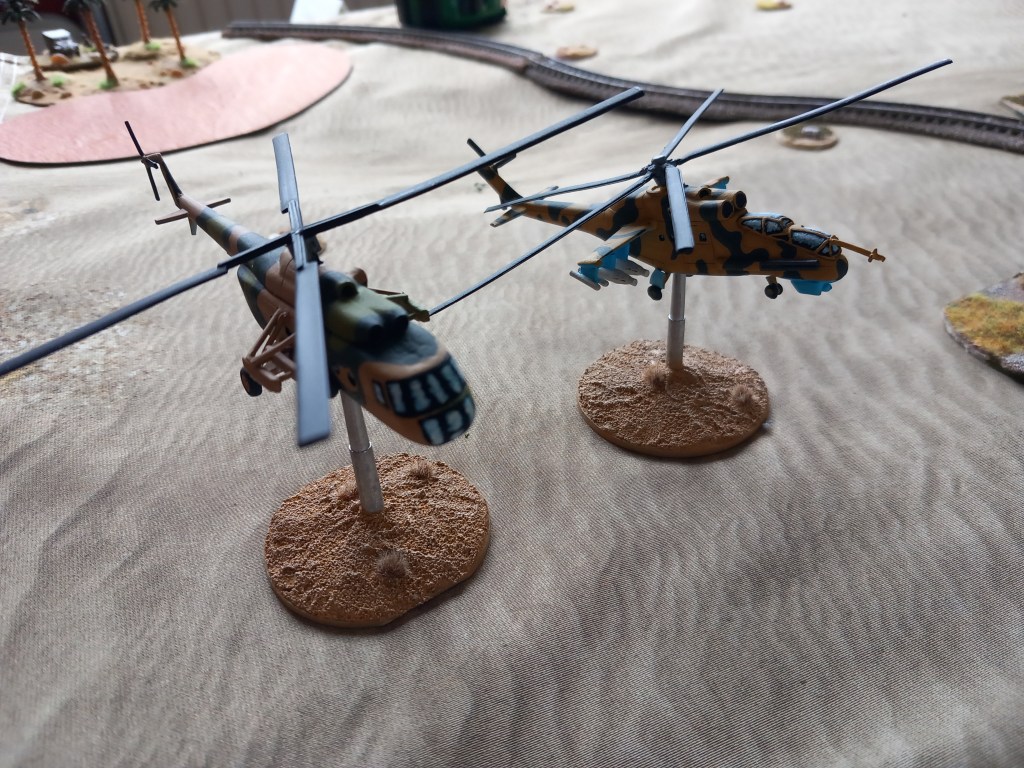
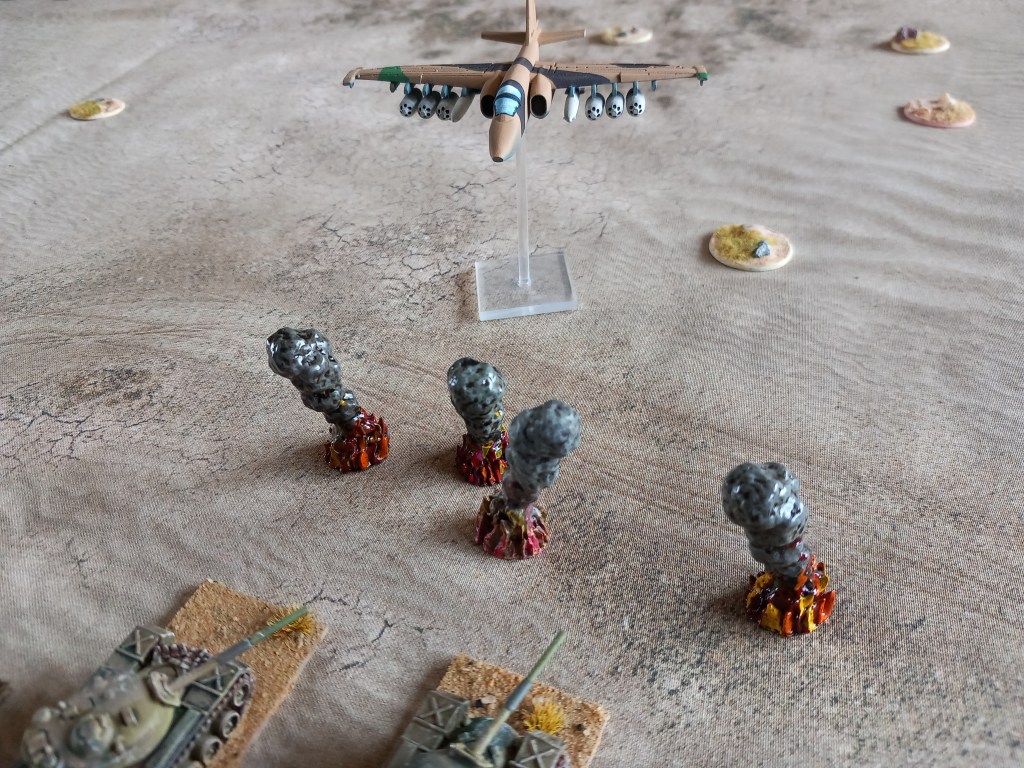
As the attacker the Iraqis had all the tactical problems to solve but also more kit to do it with. They started with the 26th Armoured – two battalions of T62s, one battalion of mixed T54s & T55s, and one battalion of mechanised infantry plus an attached battalion of elite commandos. In support they had off table SP artillery, similar to the Iranians, but in the Iraqi case each armoured battalion controlled its own artillery – this should have proved to be an advantage but…… Also in support was a wing of Mirage ground attack aircraft under the control of an FAC. Several jump off points were available along the Iraqi baseline although their recon elements could be deployed further forward and the commandos could start at the banks of the Tigris.

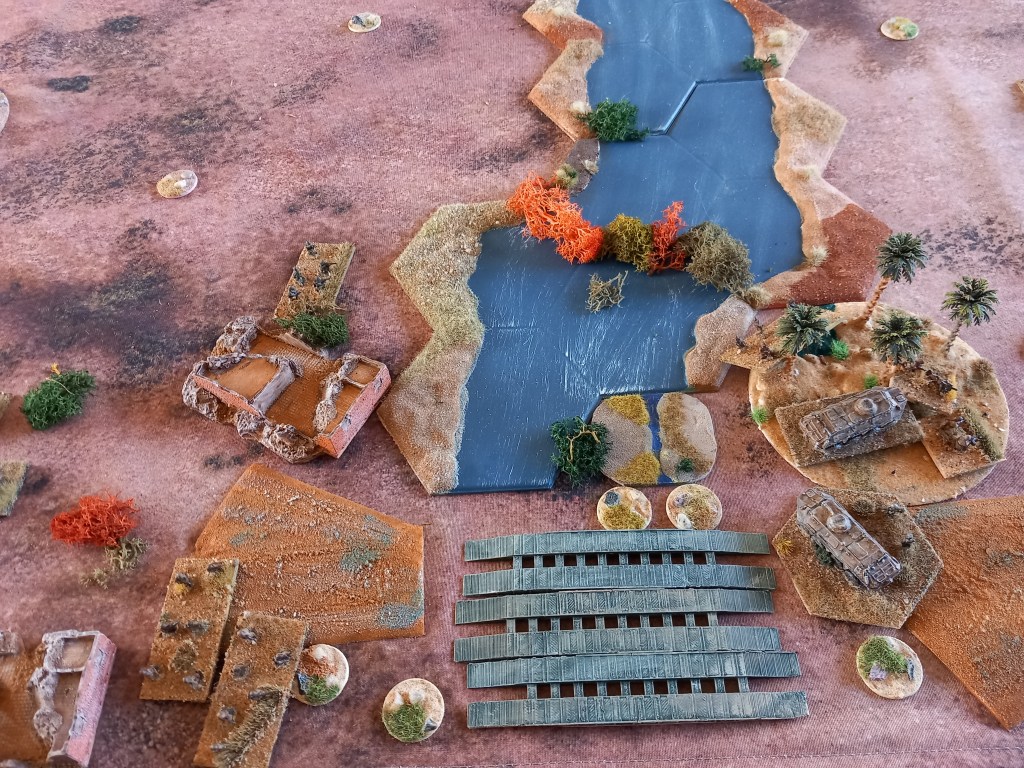
Unbeknown to the Iranians the Iraqis had the option to deploy pontoon bridges over the where the ruined bridge was which they duly did. The commandos were a bit of a surprise too!

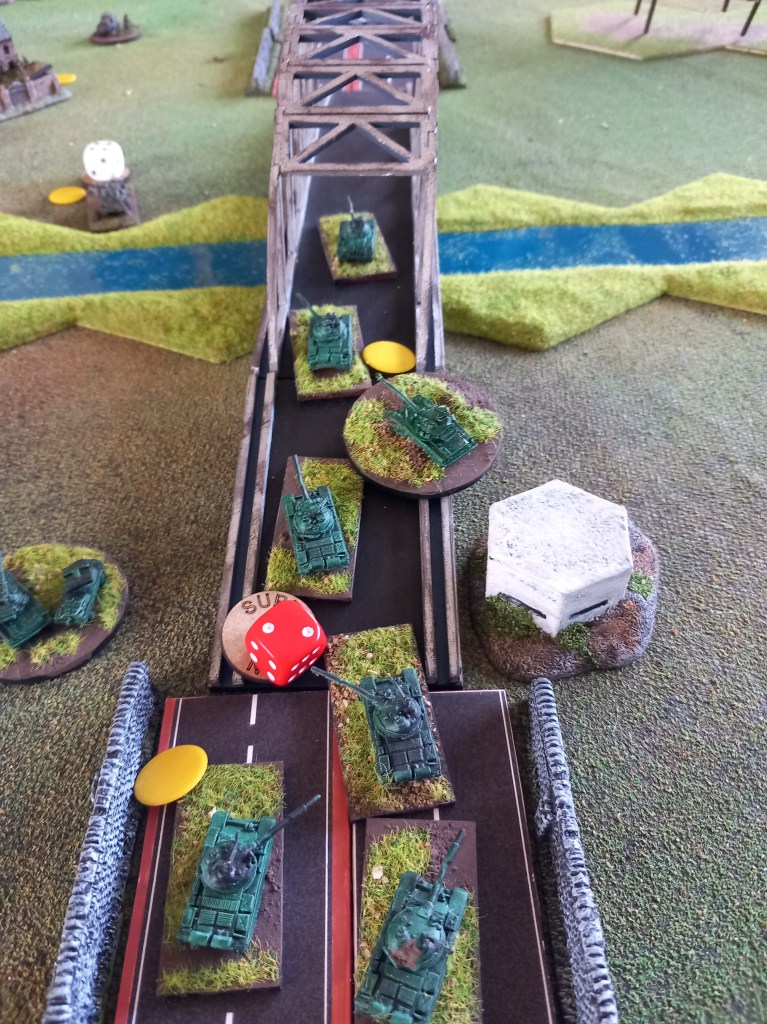
The Iraqis opted for a three pronged attack. The weaker T54/T55 tank battalion supported by the infantry would assault over the pontoon and pin the Iranian left, in the centre one T62 tank battalion would barrel over the bridge and on the left the other T62 battalion would cross via the old bridge and, using the dried stream bed as cover, turn the Iranian right while the commandos assaulted across the river in support. It nearly worked!

The initial Iraqi moves were all about getting into position while the air and artillery pounded away, unfortunately this was largely ineffective.

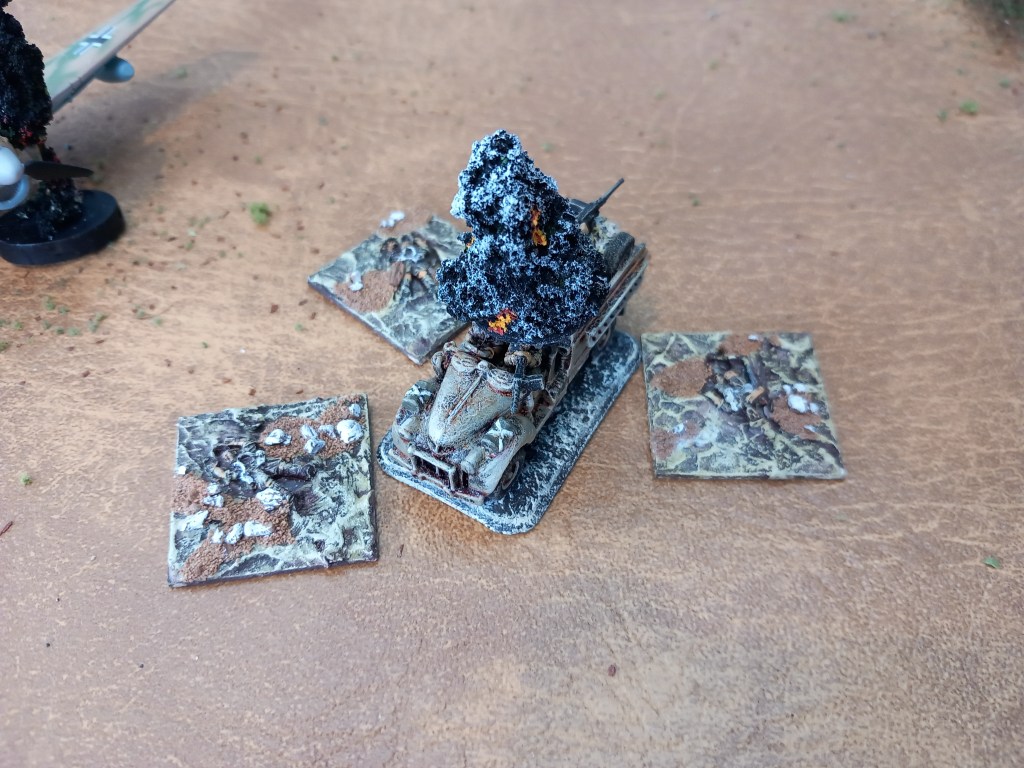
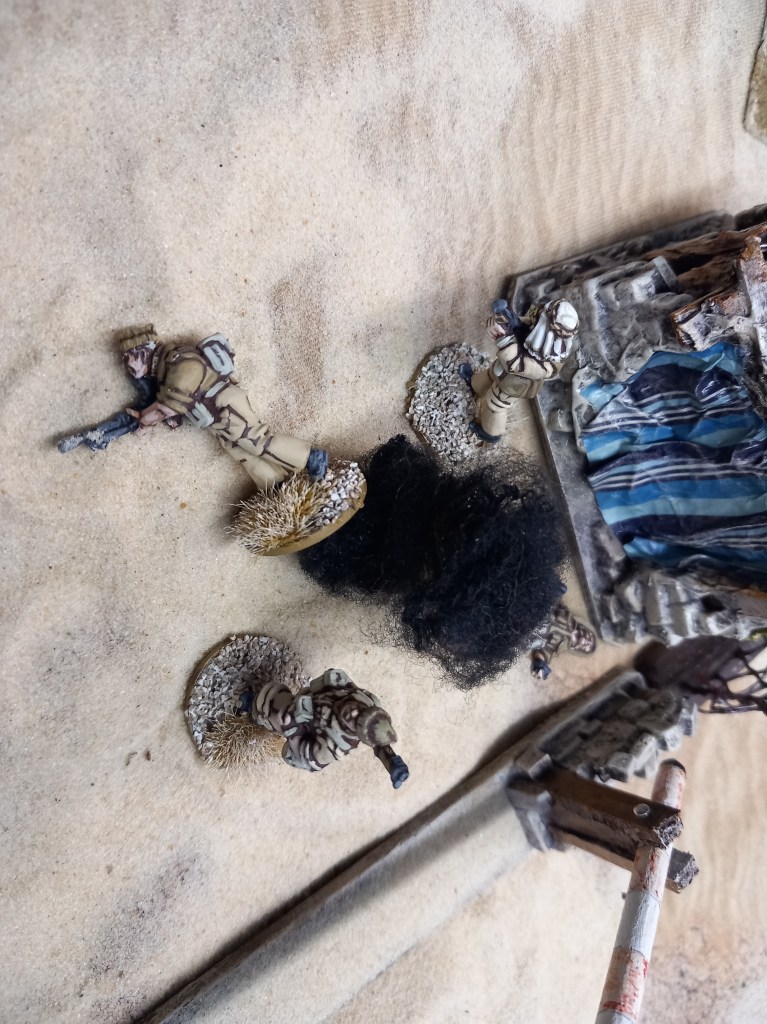
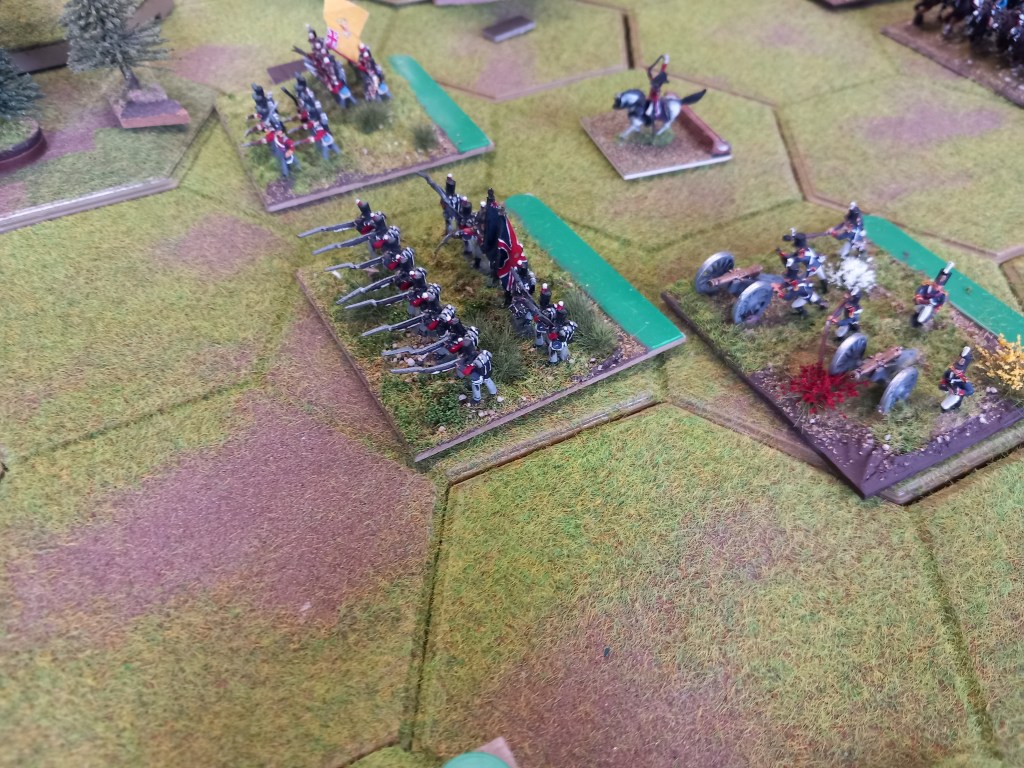
The first sign that things were not going to go according to plan was the commandos, they came under fire from the dug in tanks (somebody didn’t think about the better ranges of US supplied kit 😮) and within a couple of turns were down to half strength which forced a rethink and the remainder of the battalion worked their way along the river bank to cross via the old road in the company of the T62s.

Next it was the turn of the centre T62s, out ranged by the Iranian armour they took early losses and had a moment of ‘do we, don’t we?’ before pressing on over the bridge so as to get into range, after all the Iranians couldn’t shoot everywhere at once, could they?

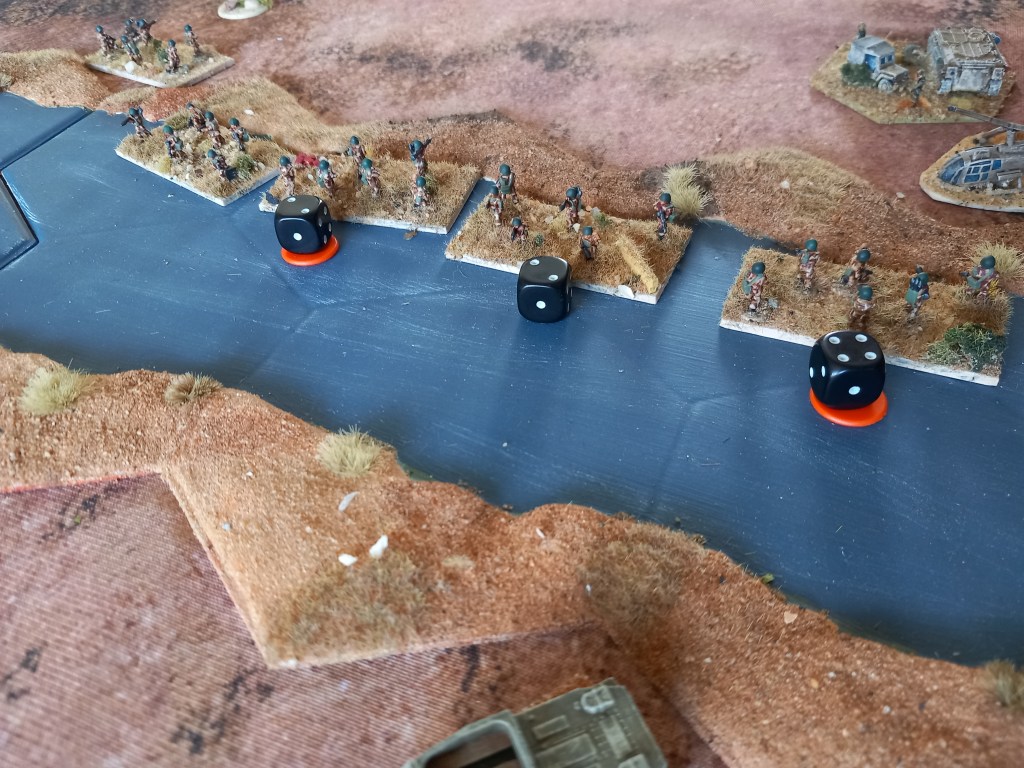
Now the shooting had started the Iranians bought on their M48s to bolster the left.

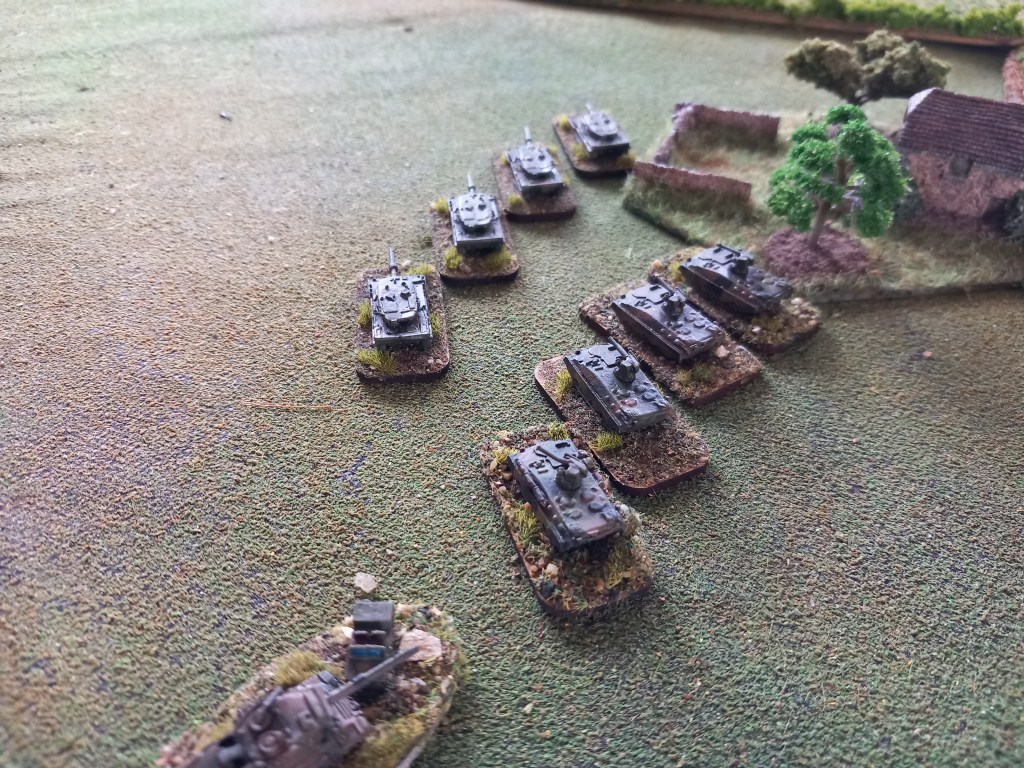
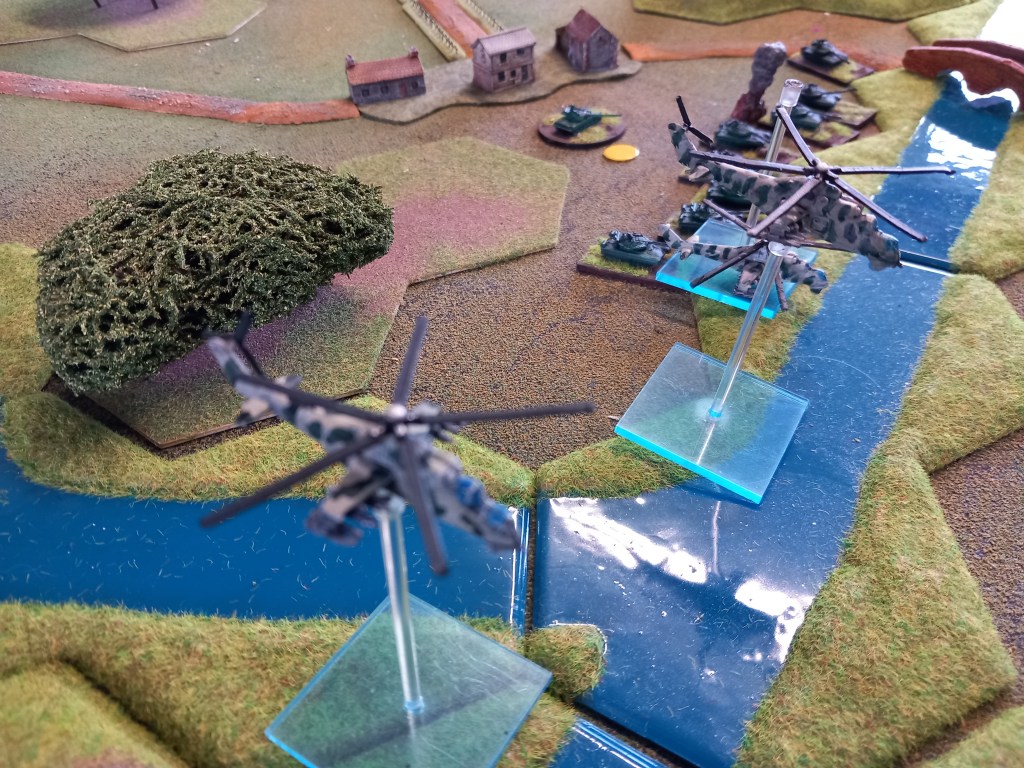
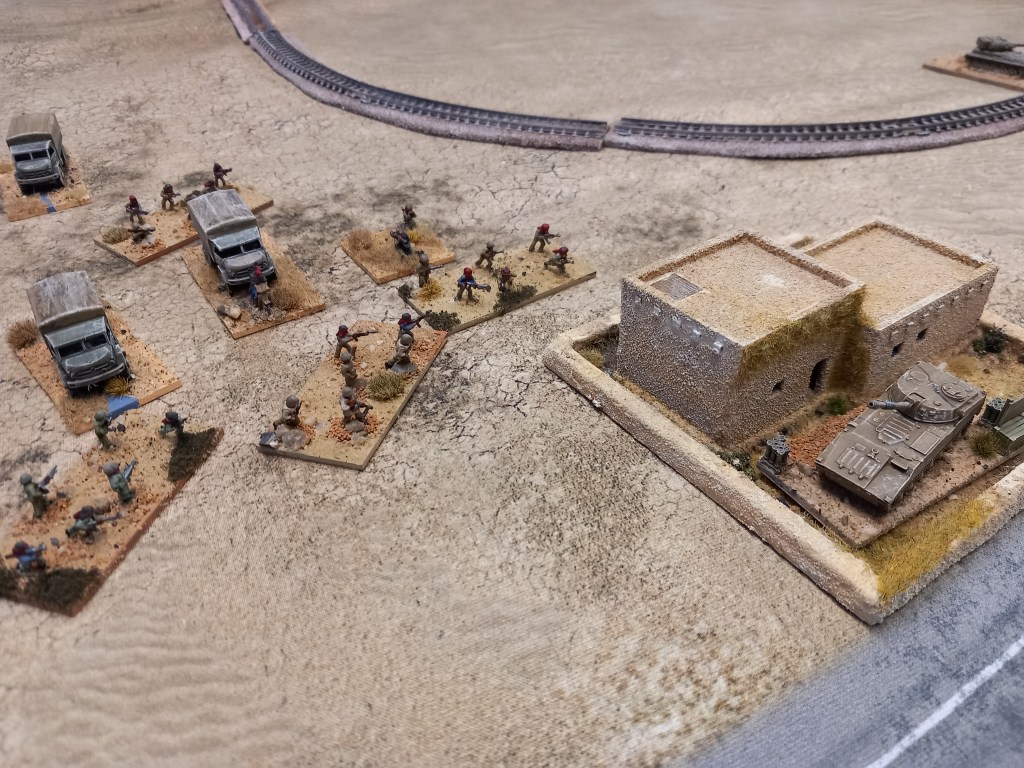
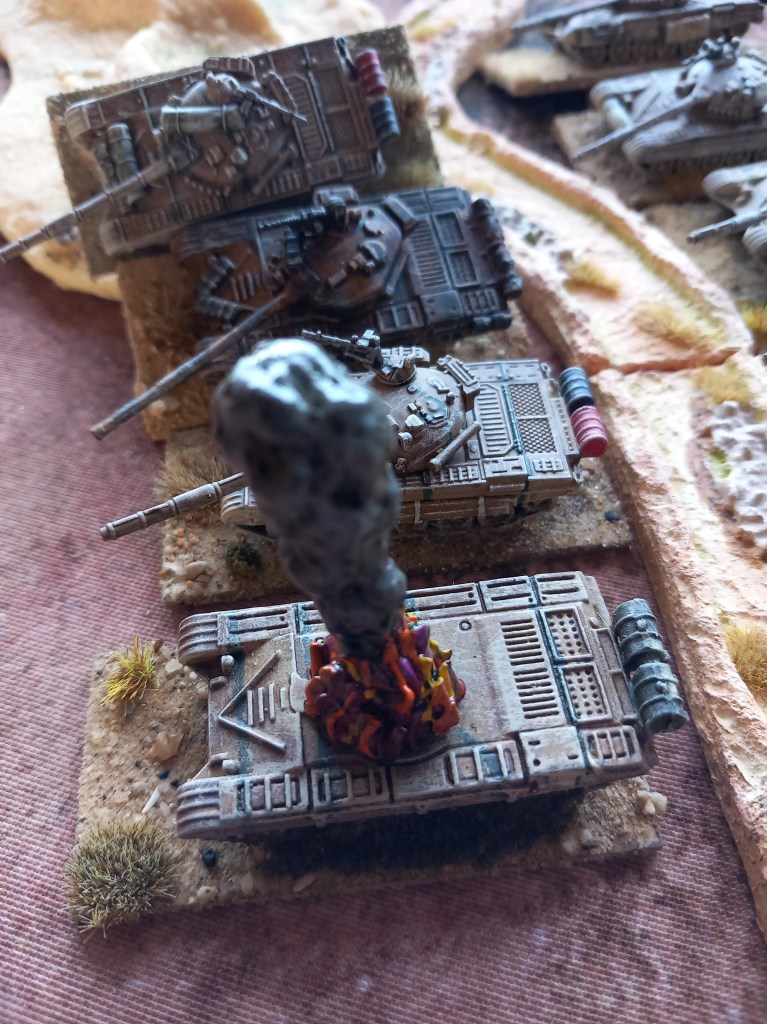
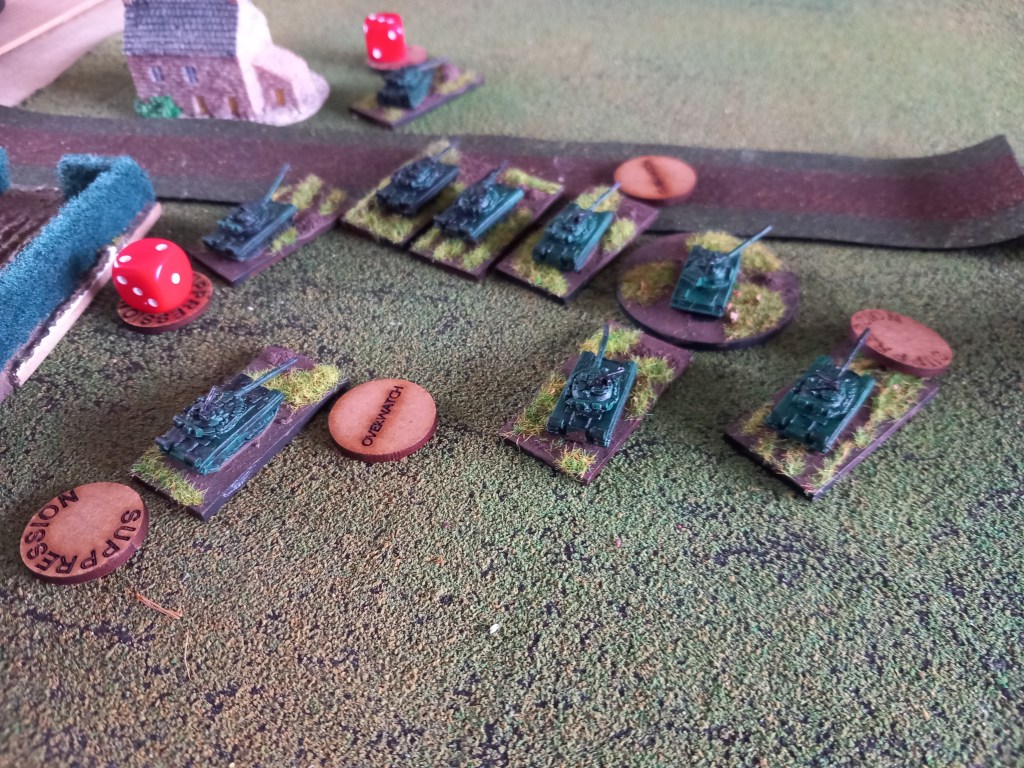
By about the mid point of the game the Iraqis were over the Tigris; the T54/T55s were on the losing end of the tank duel on their flank but were holding out remarkably well once the infantry ATGW moved up in support, the centre T62s were over the bridge and the other T62s & commandos were advancing unseen behind the cover of the stream bed.

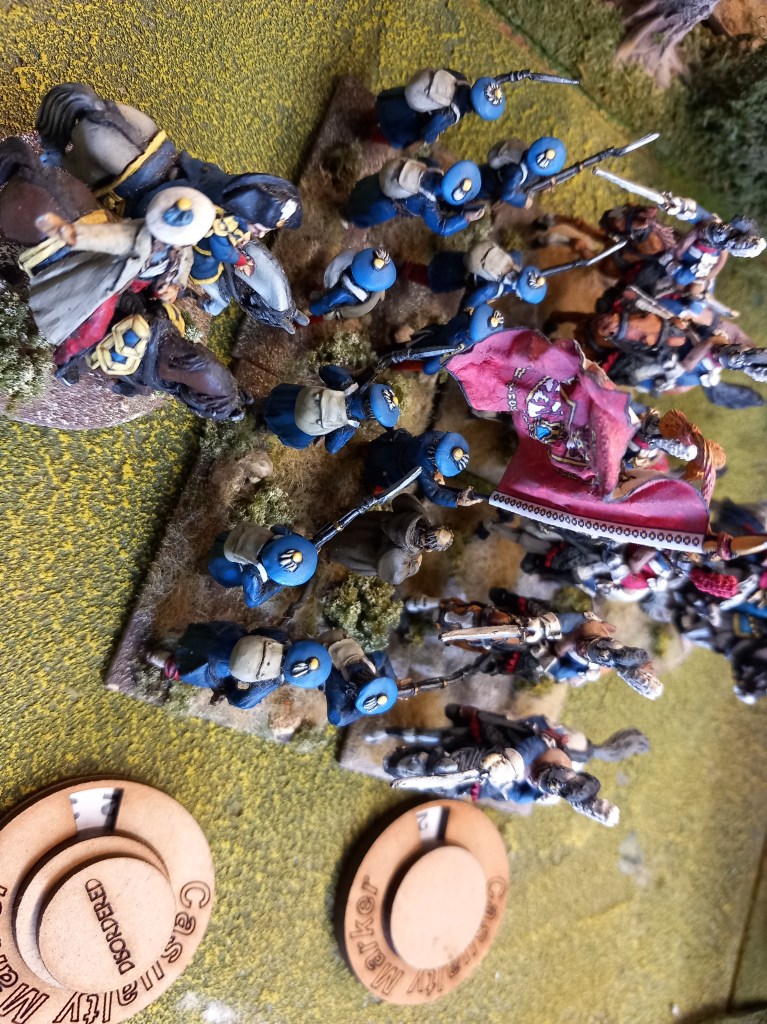
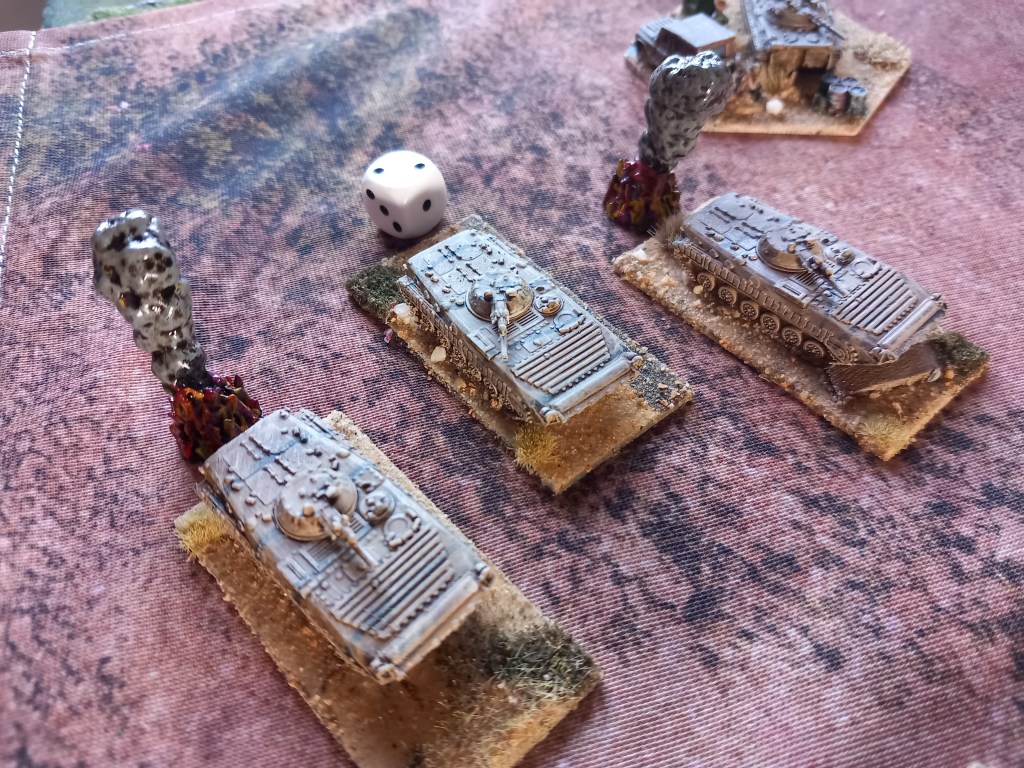
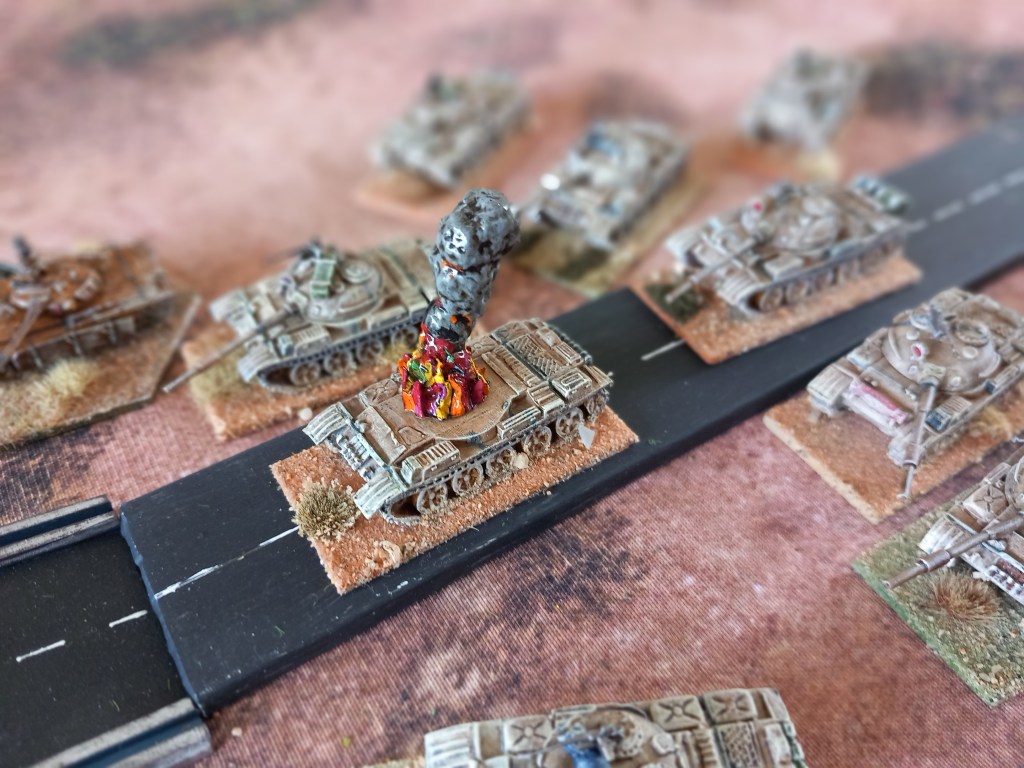
Then the Iranians decided to be stupid. Overconfident, the M60s on the right left their nice comfortable berms and moved out to try and pinch off the T62 salient at the bridge. Unfortunately this coincided with the commandos getting into position at the stream bed and letting loose with their upgraded RPGs, which rather made a mess of several Iranian tanks. This could have been a turning point if the accompanying T62s had gotten into the action but in the second half of the game they failed their command role 5 times in a row!! Yes 5 times out of the 6 turns left to play 😱

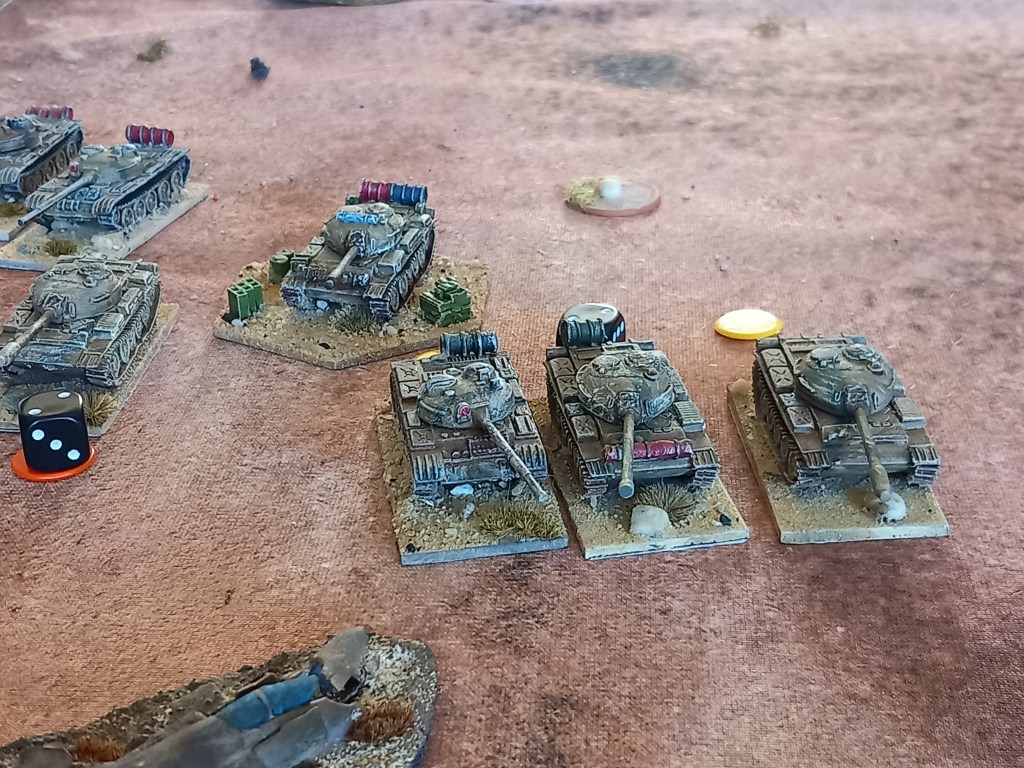
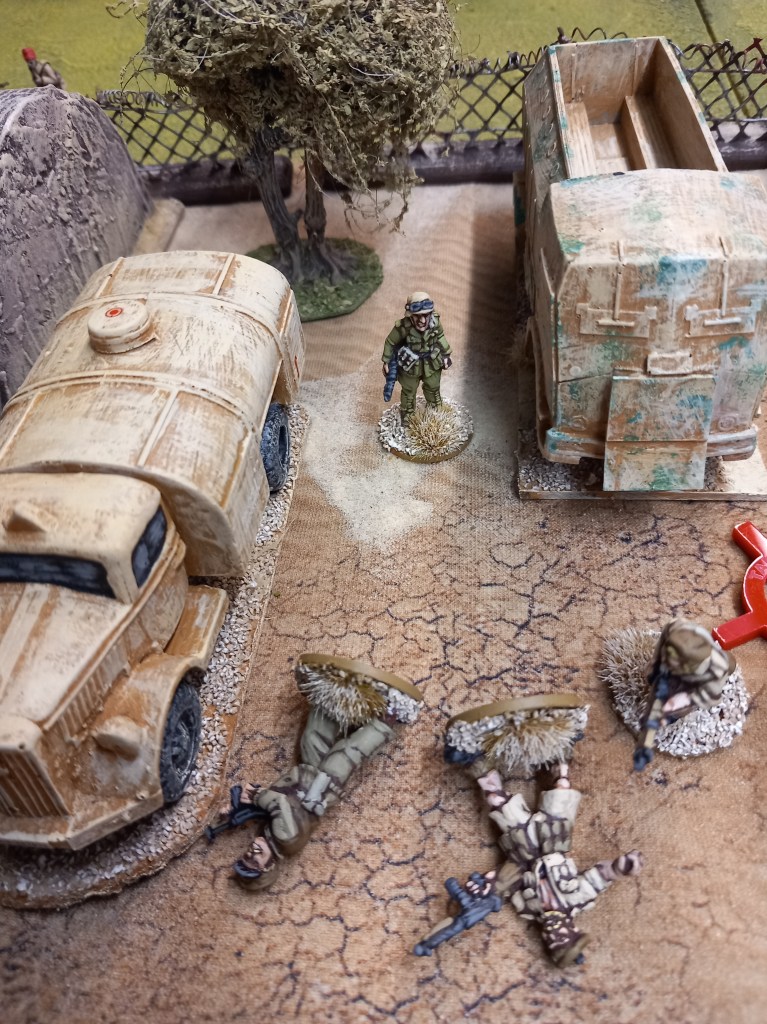
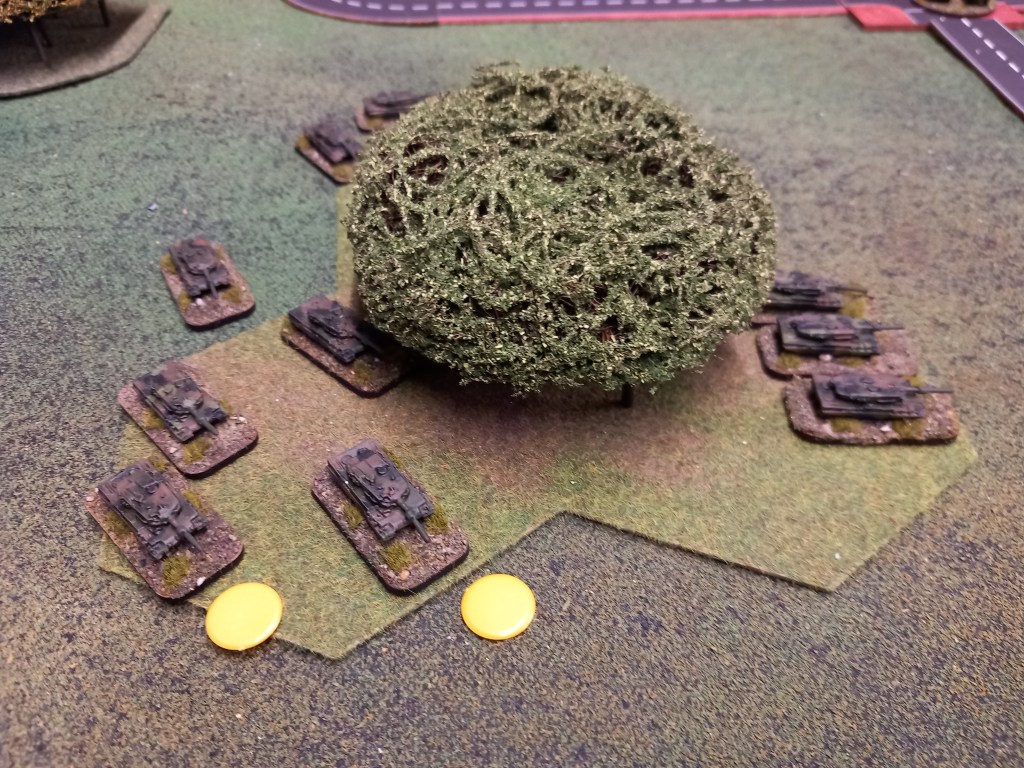
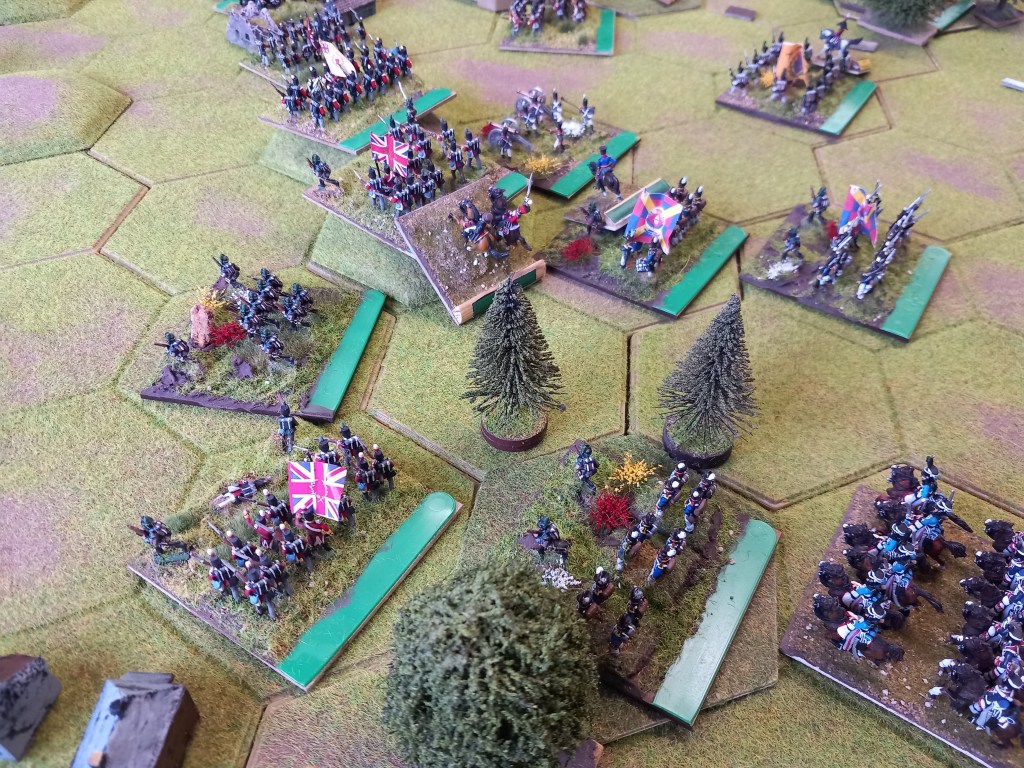
Over on the Iraqi right the old war horses battled on and quite frankly did themselves proud but a combination of the better M48s and some pretty spot on Iranian artillery ground the attack down and soon there wasn’t much left.

As the clock wound down the stuck T62s sorted themselves out and advanced against the Iranian right but it was all a bit late and the dug in Iranian infantry prepared to let loose with their RPGs.

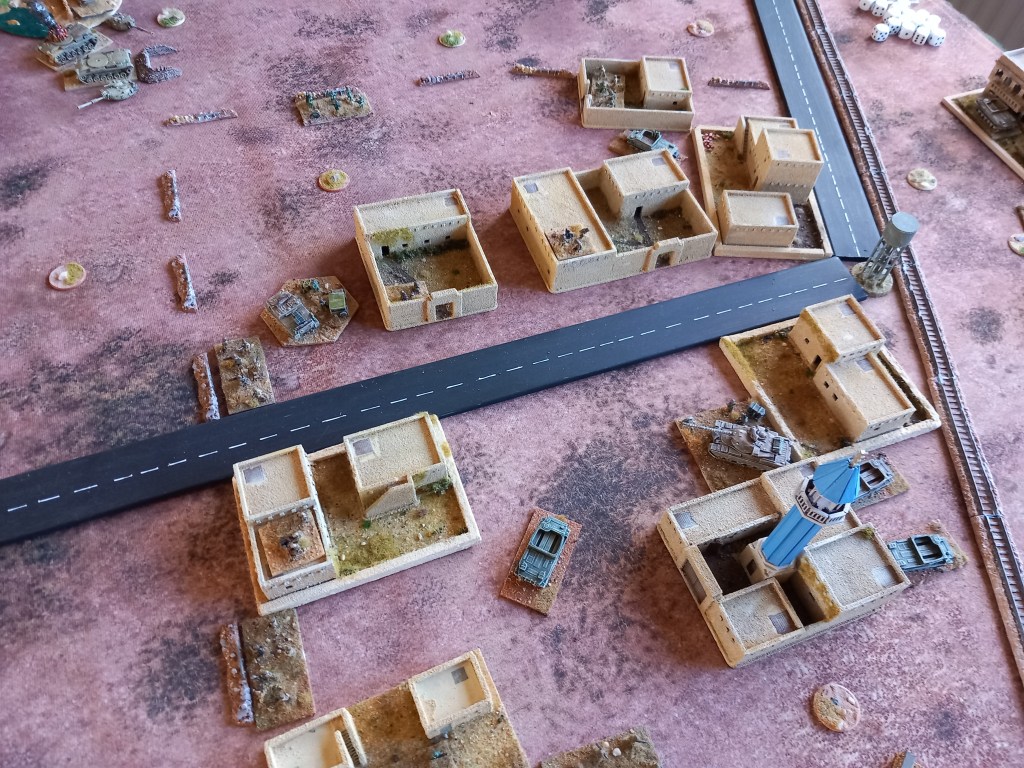
At the end of the final turn the Iranians were still in control of Ajairda and it would take some serious effort to move them out. Yes they had certainly suffered a near disaster with the loss of half of the M60 battalion but on the other side the T54/55s were no more and the accompanying infantry were hunkered down along the banks of the Tigris while the centre T62s were slowly suffering losses as they sat in their salient.

This was a good fight, the scenario worked well and it was down to the last couple of turns. Analysing afterwards this could so have been an Iraqi victory but over caution and bad game management cost them – the famous 5 failures to activate wasn’t just down to bad dice it was fuelled by the player not recognising how he could help himself by managing the factors that influenced the roll, forgetting to fire the attached artillery multiple times didn’t help either 😂🤣

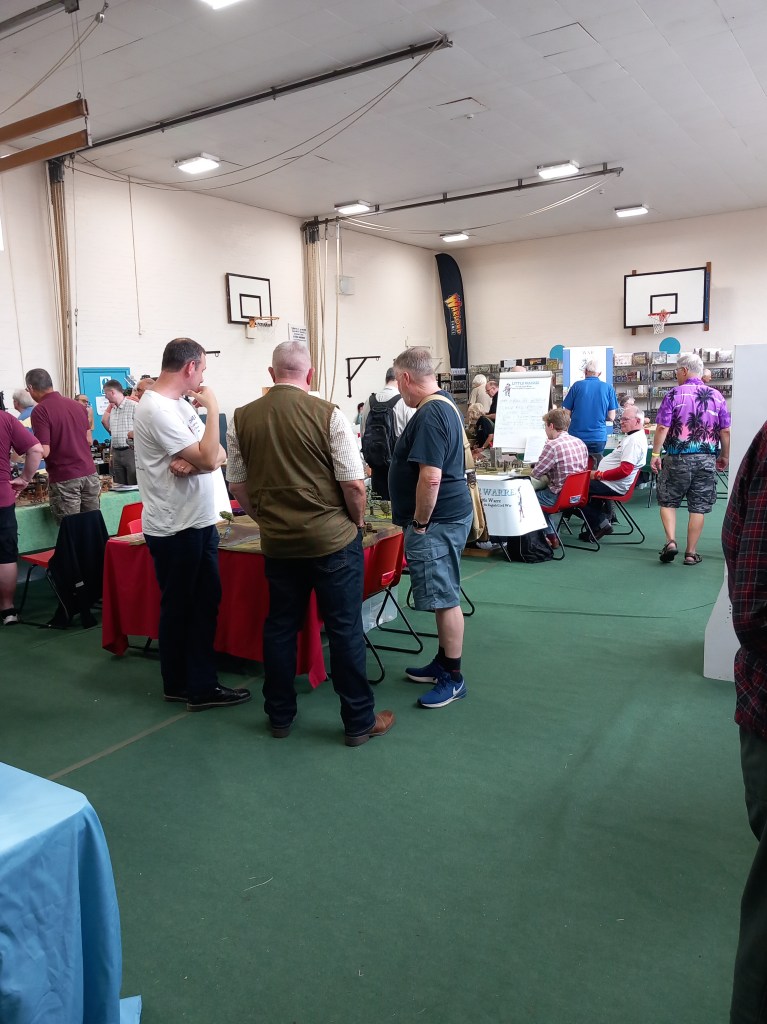
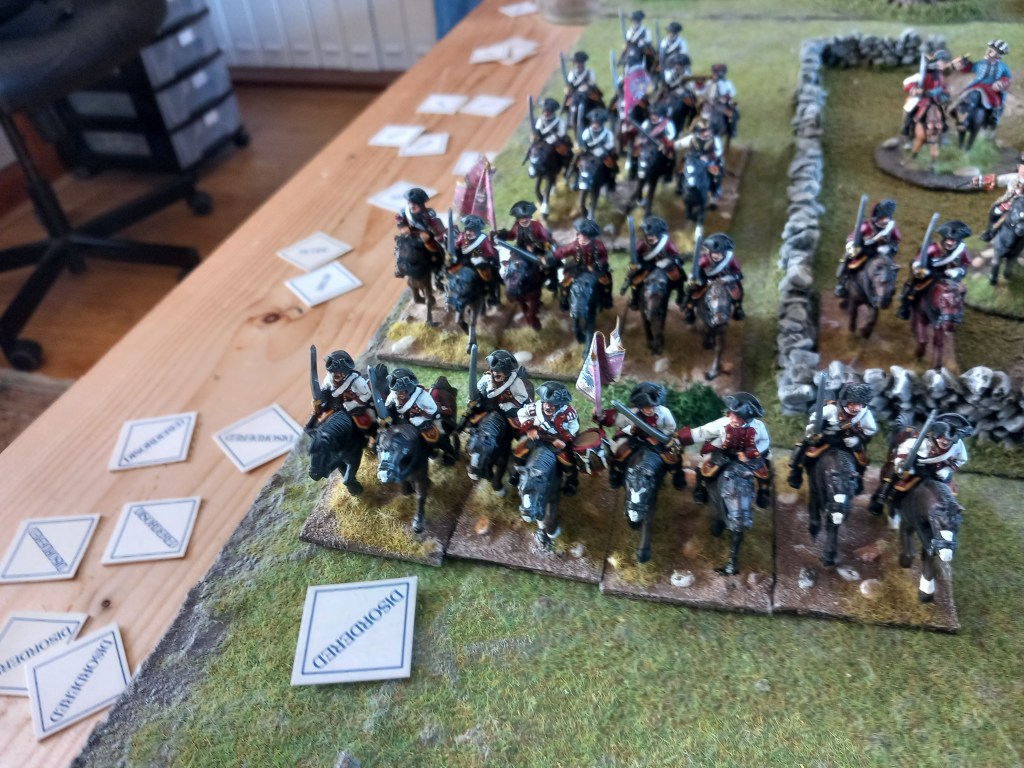
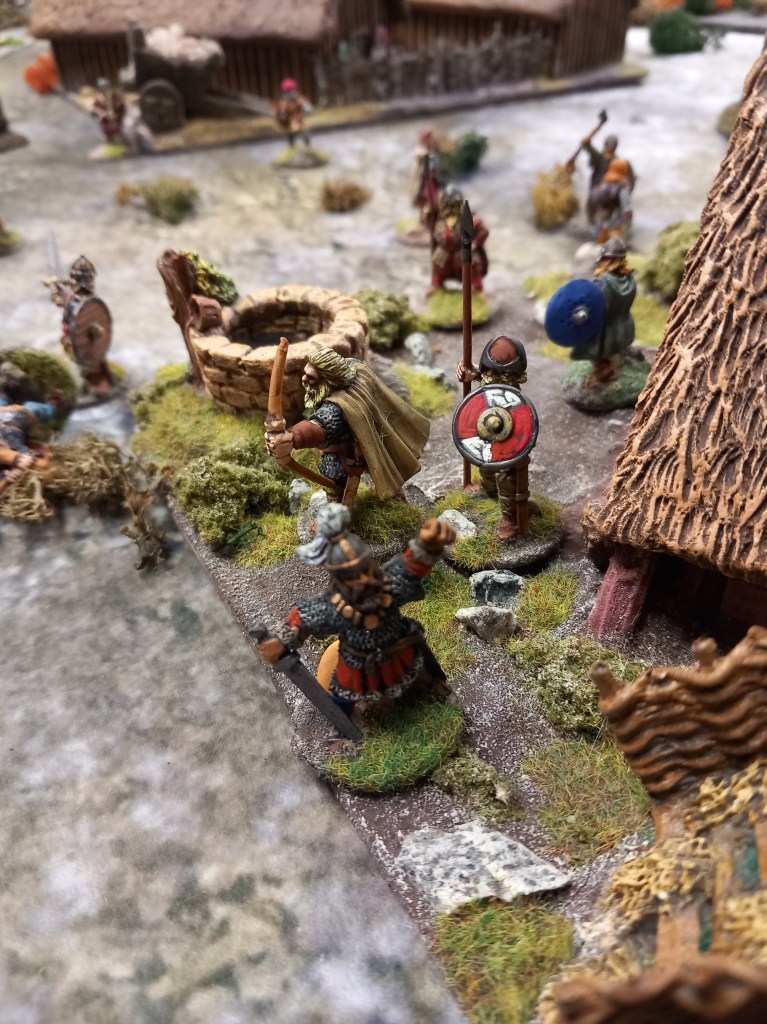
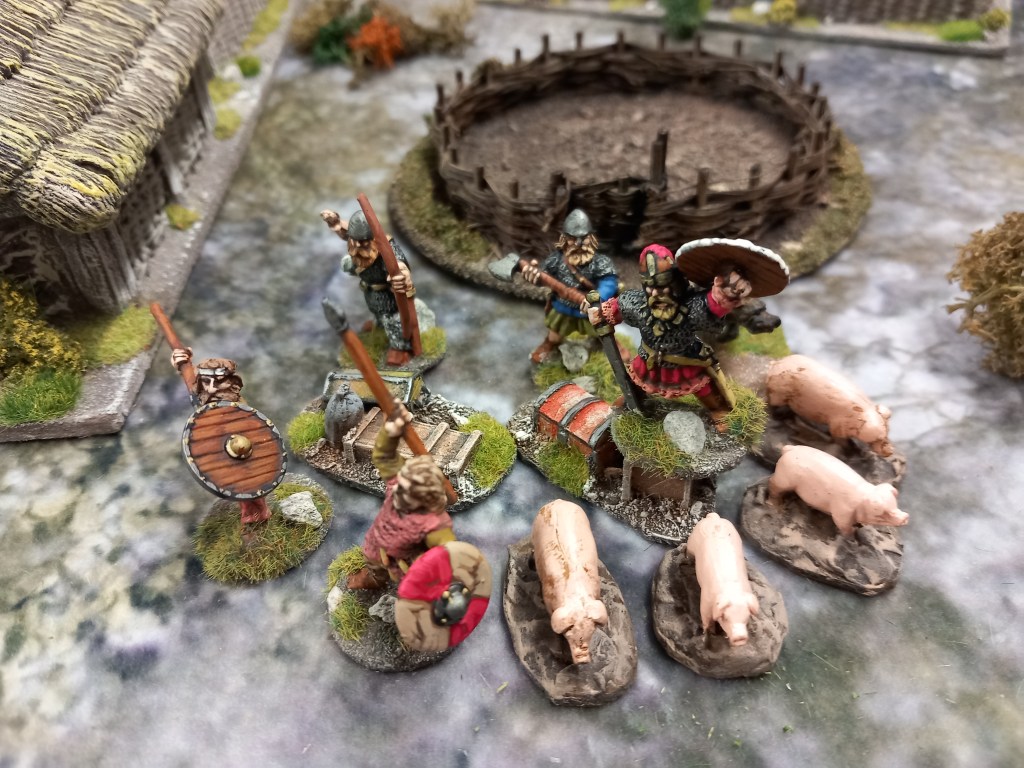
To round off the month we had a couple of skirmish games, a bit of a rarity these days.

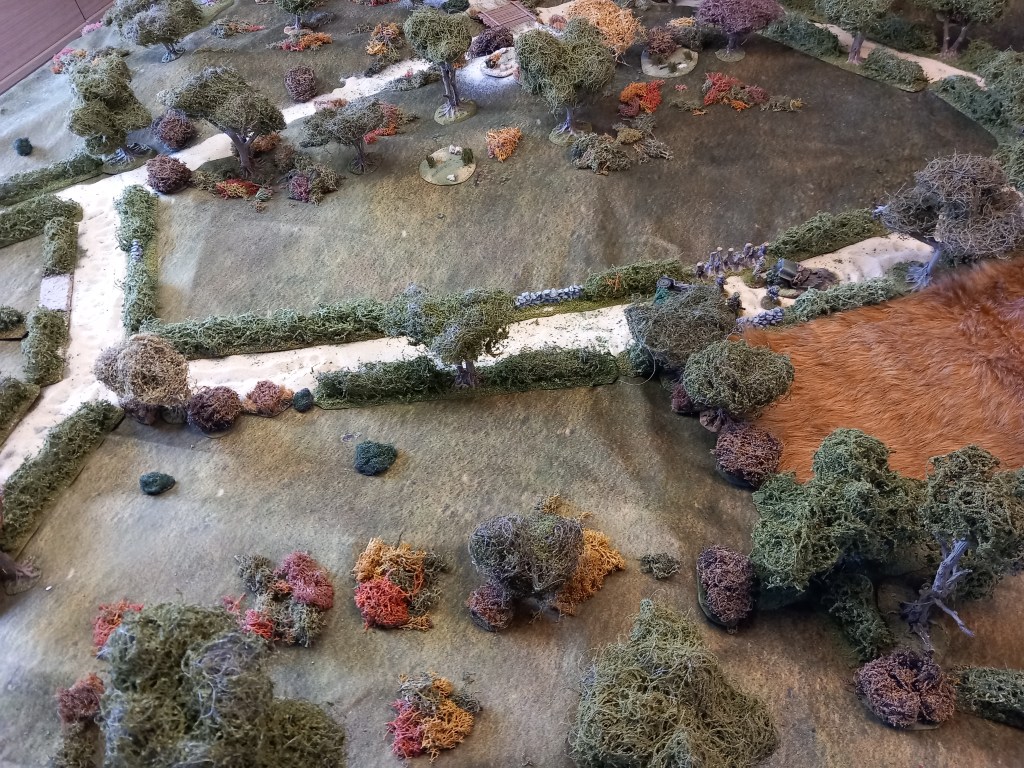
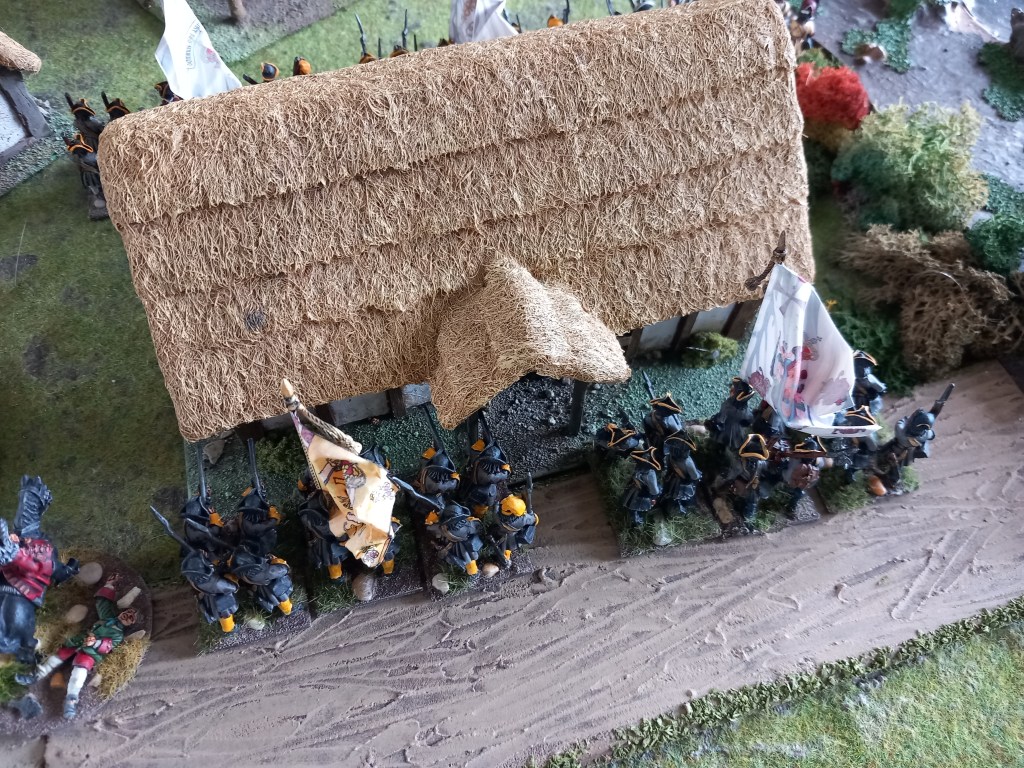
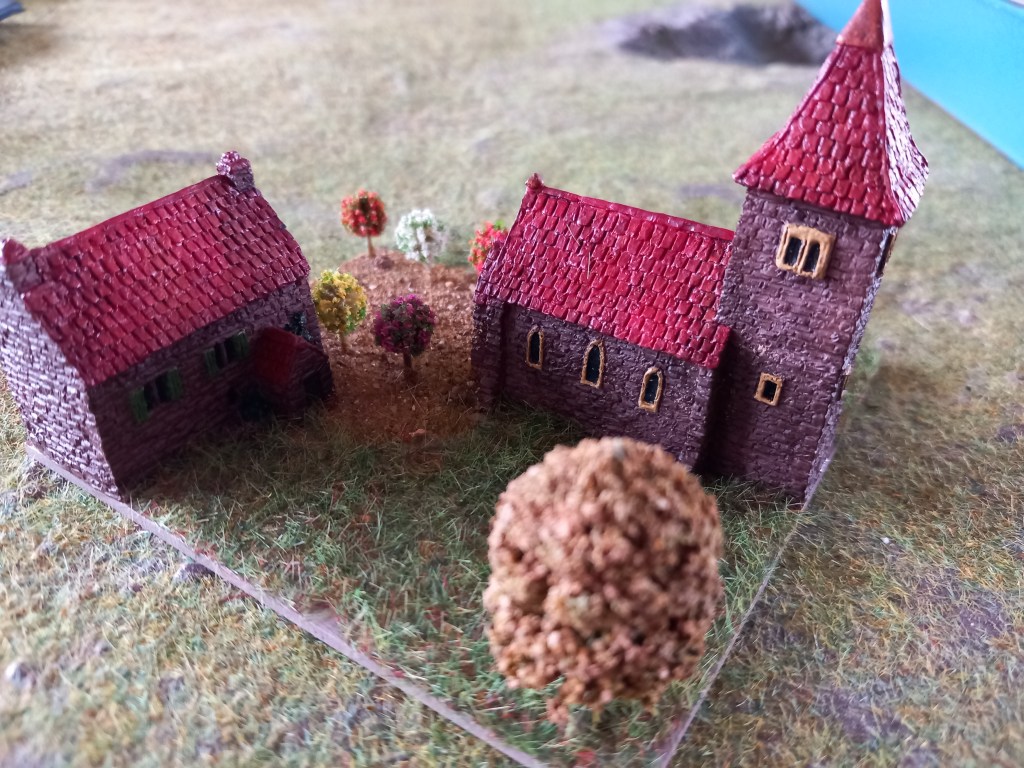
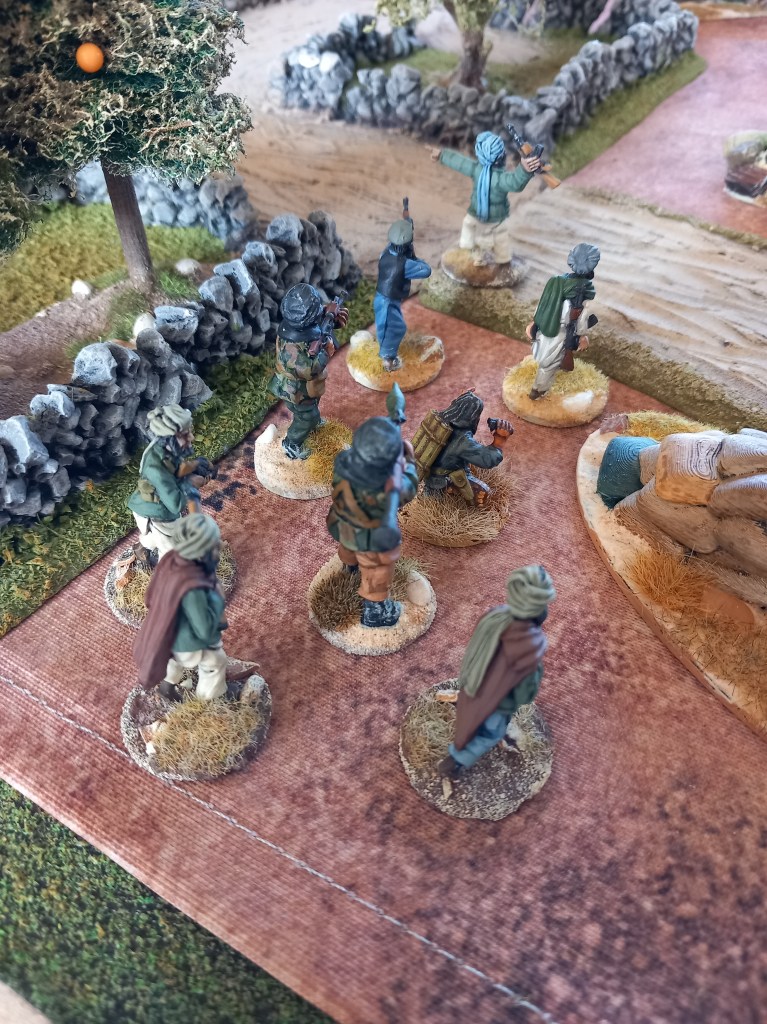
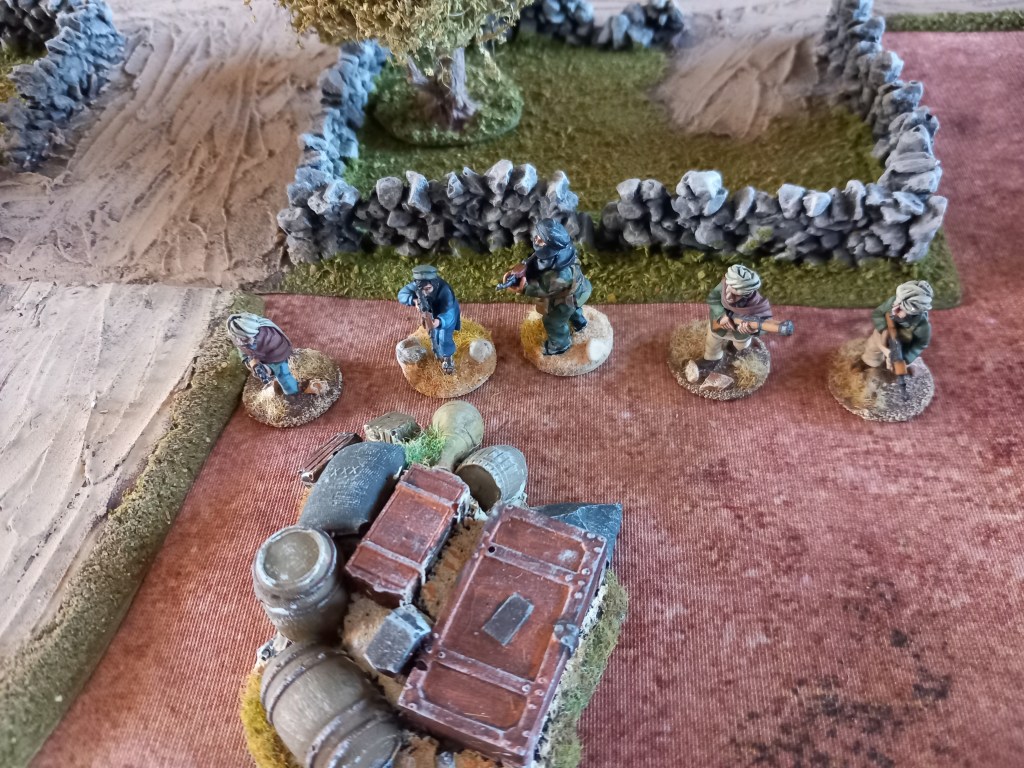
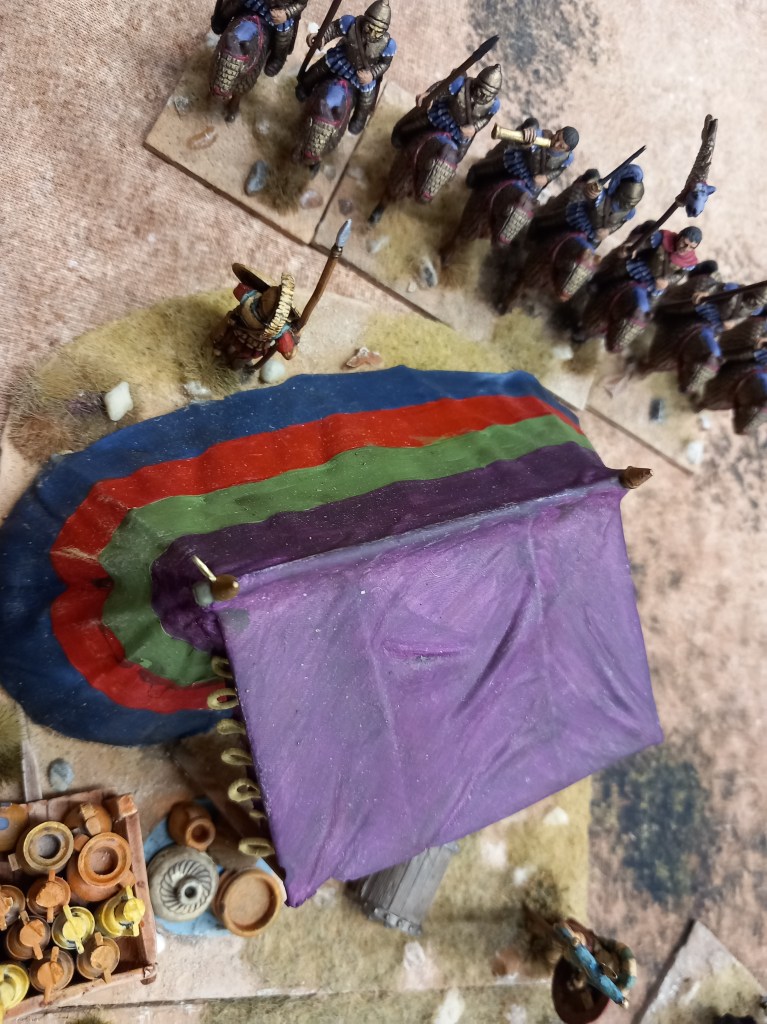
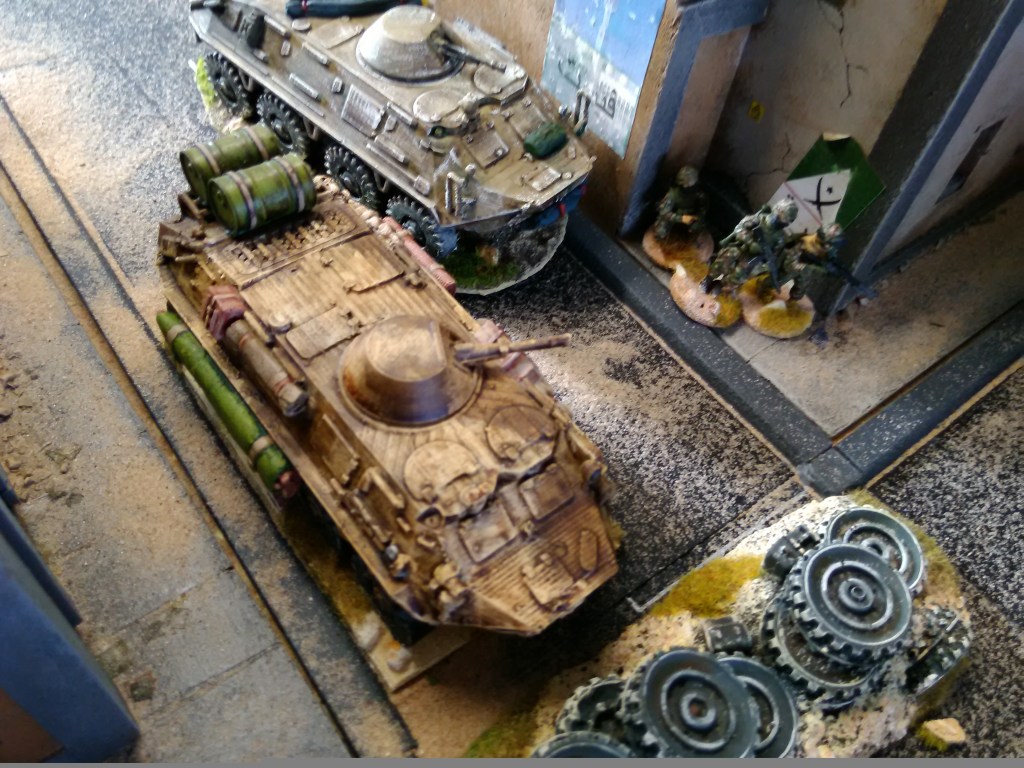
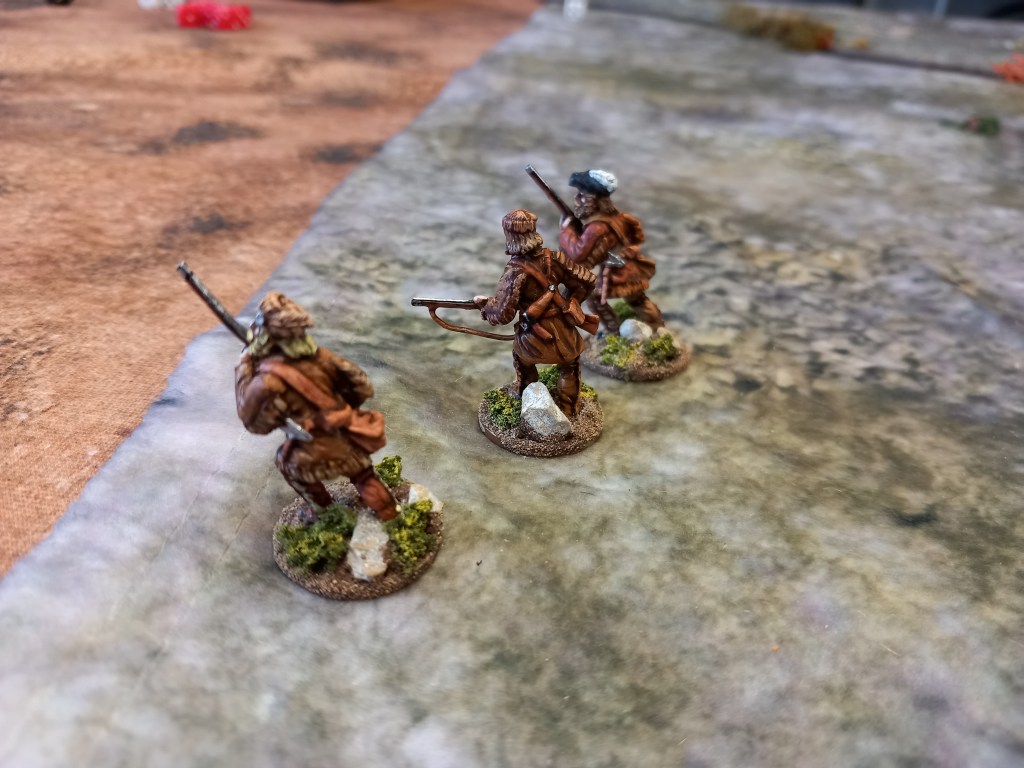
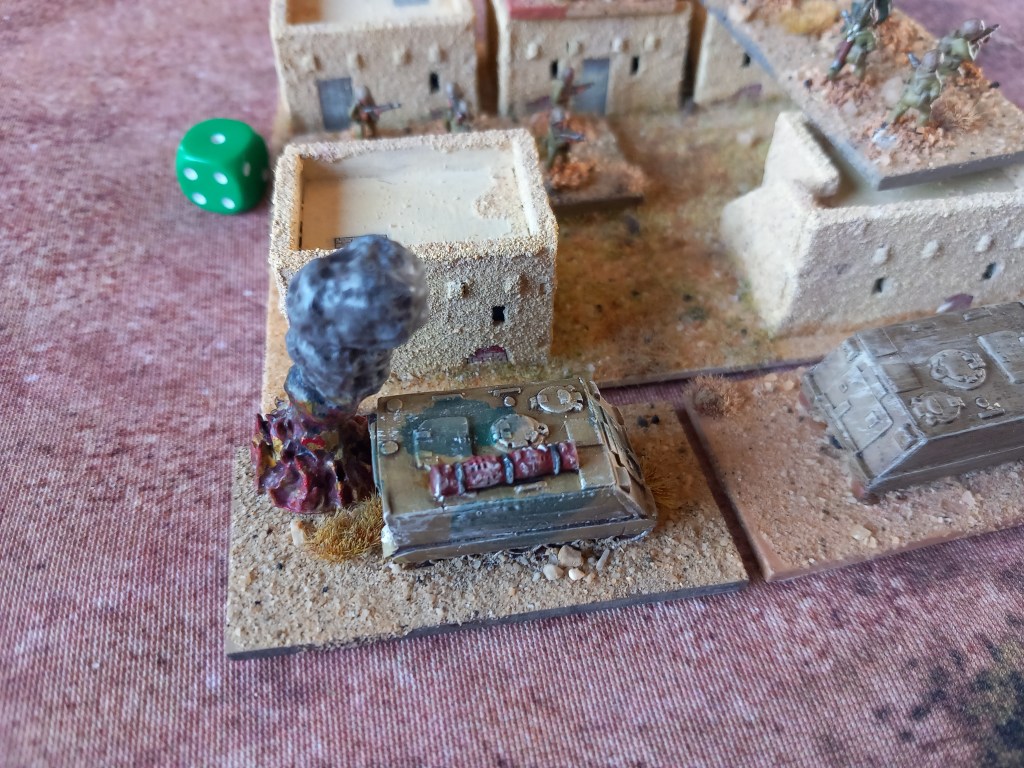
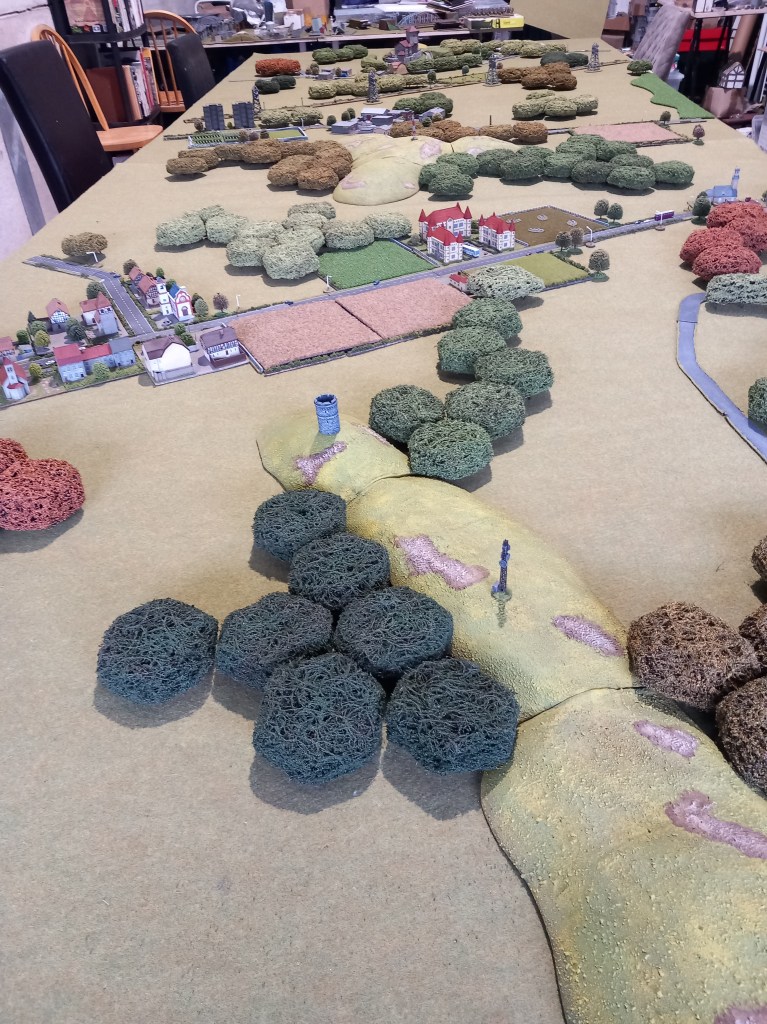
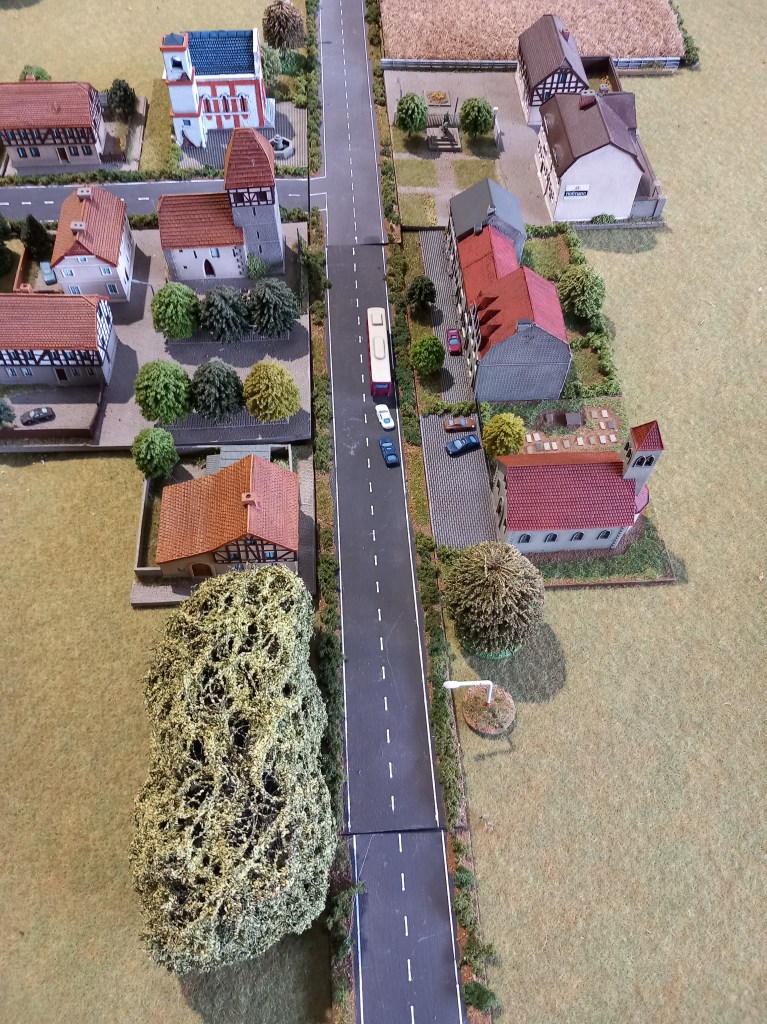
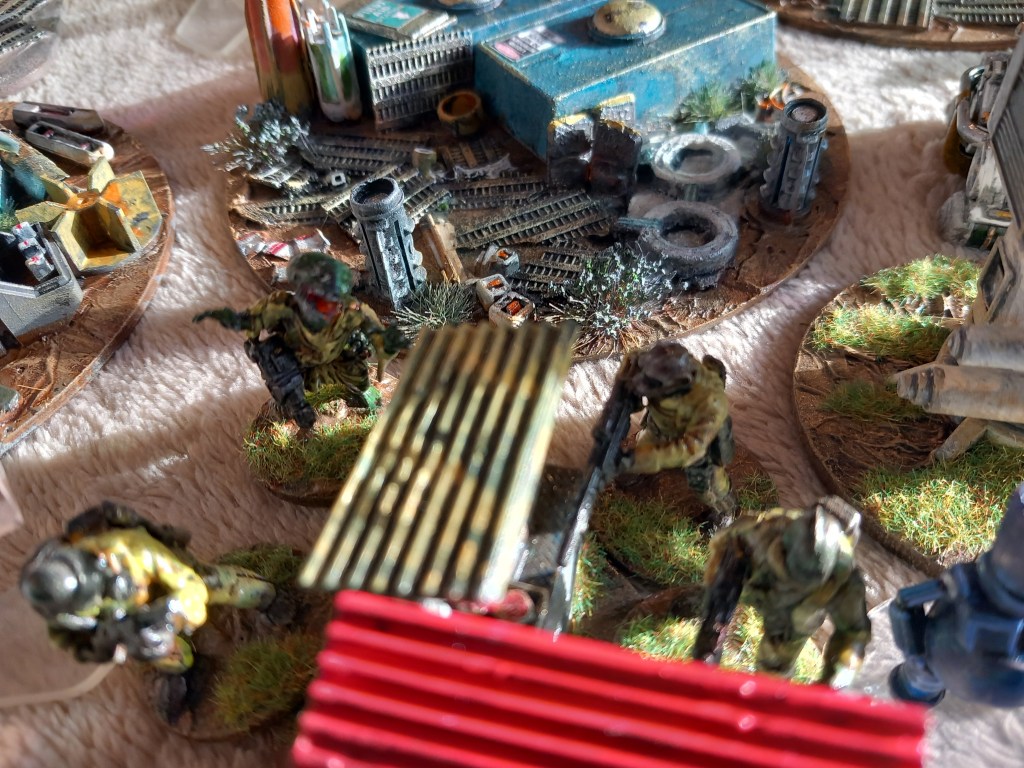
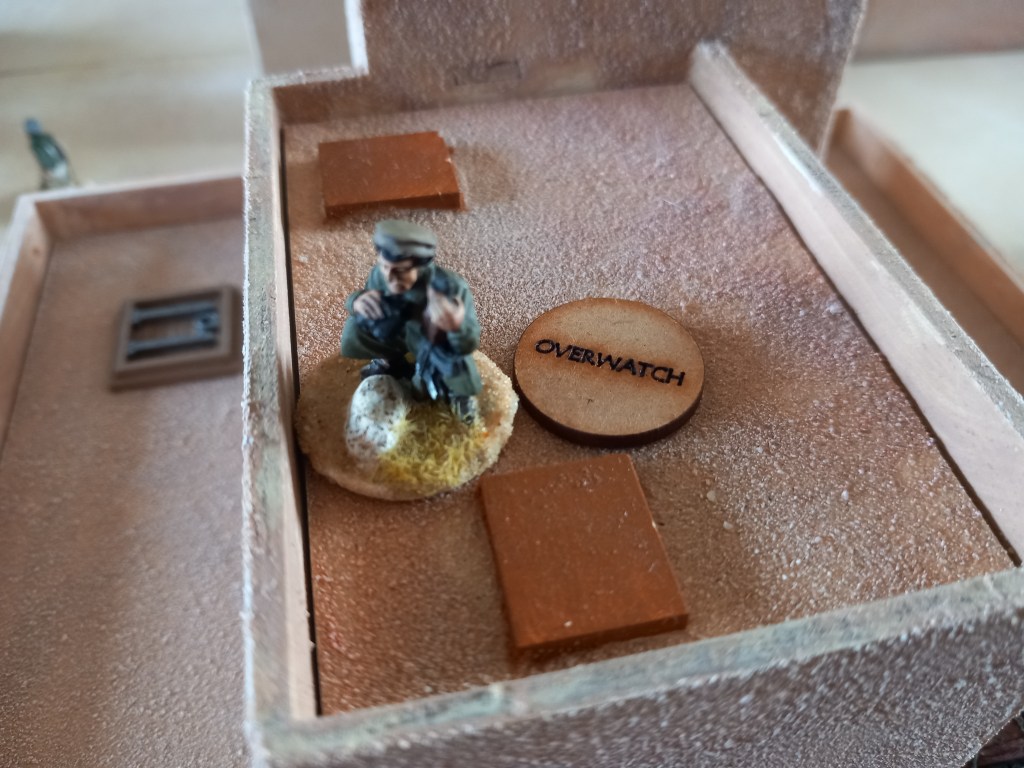
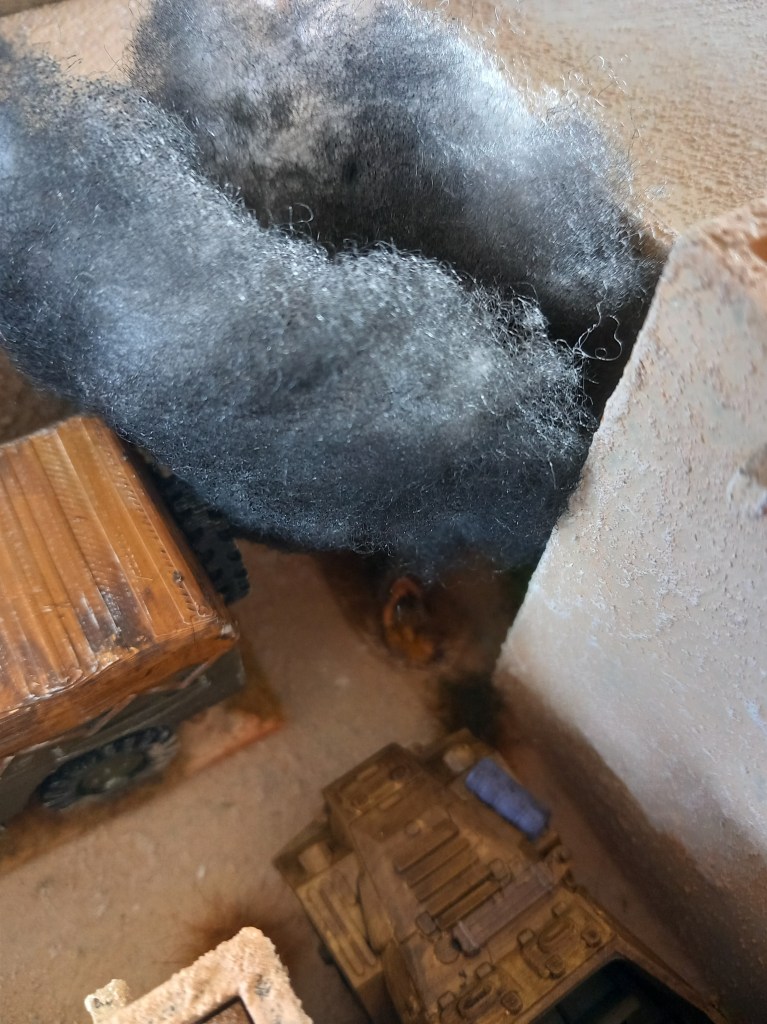
First up was a WWII encounter with an intriguing little narrative. A senior British officer and his escort have crashed on a country road somewhere in France leaving him seriously wounded. They managed to get a distress call out before the radio packed up and a mixed arms platoon has been dispatched to find him, unfortunately the Germans have got wind of the potential prize and have sent out their own lads. Unfortunately for both sides a thick fog has descended and so each squad moves randomly for the first half a dozen turns leaving them all over the place as the game starts seriously, just as the umpire wanted 😁😁

German squad proceed down one of the many lanes having no idea where anybody is.

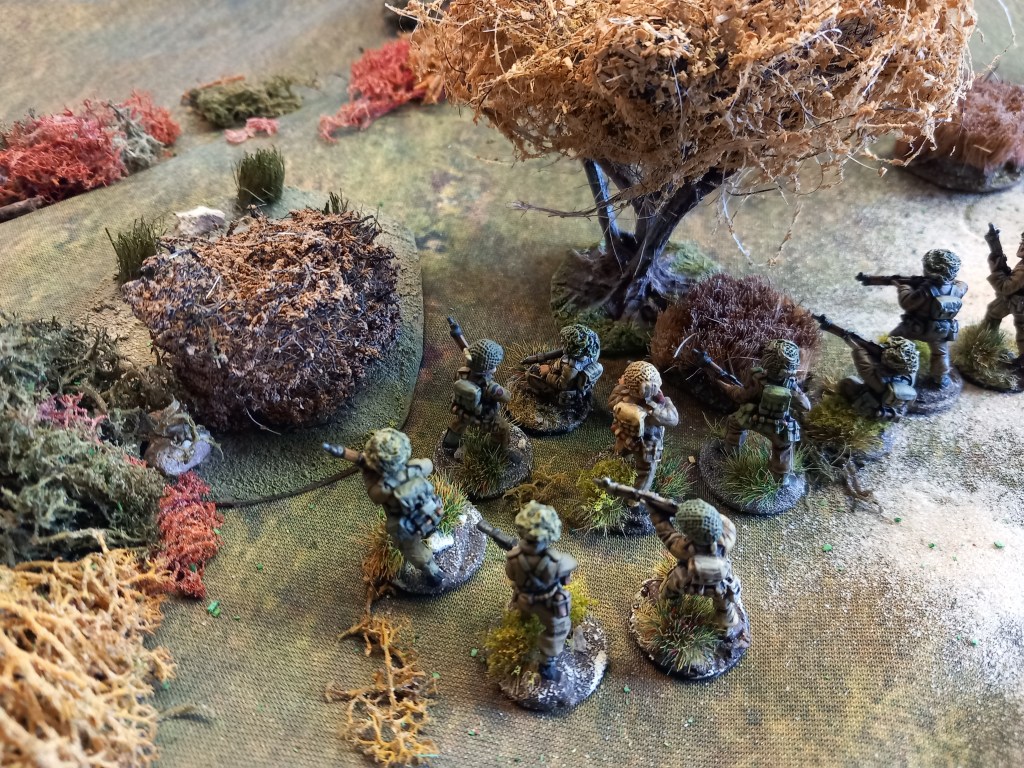
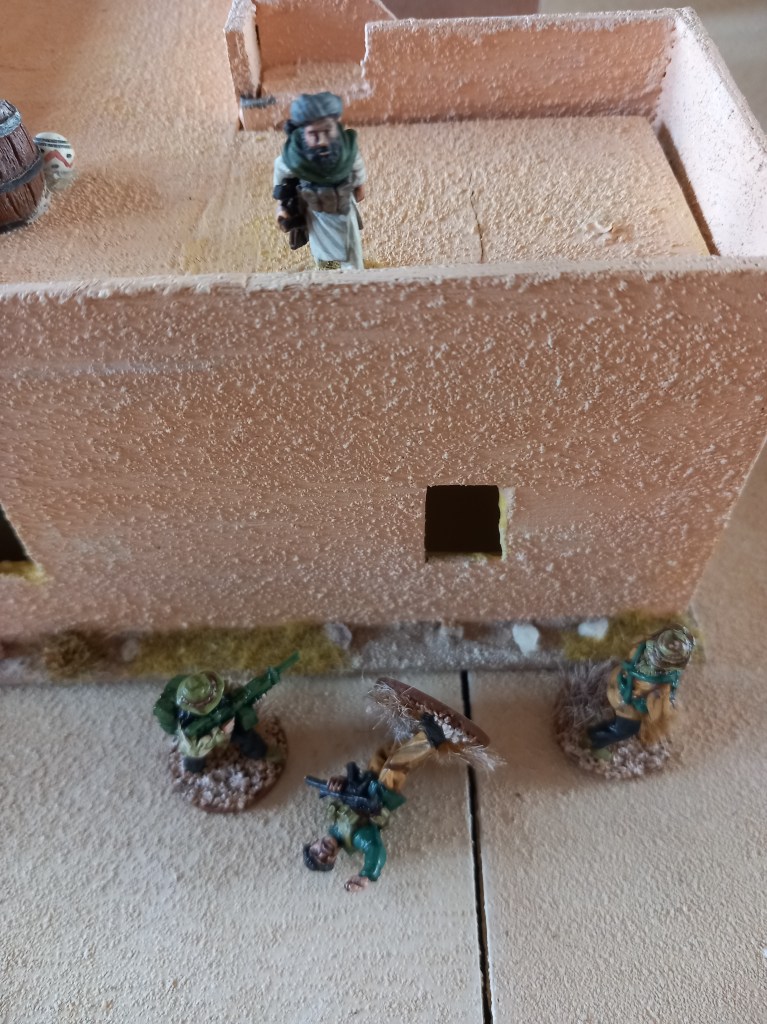
British take the high ground.

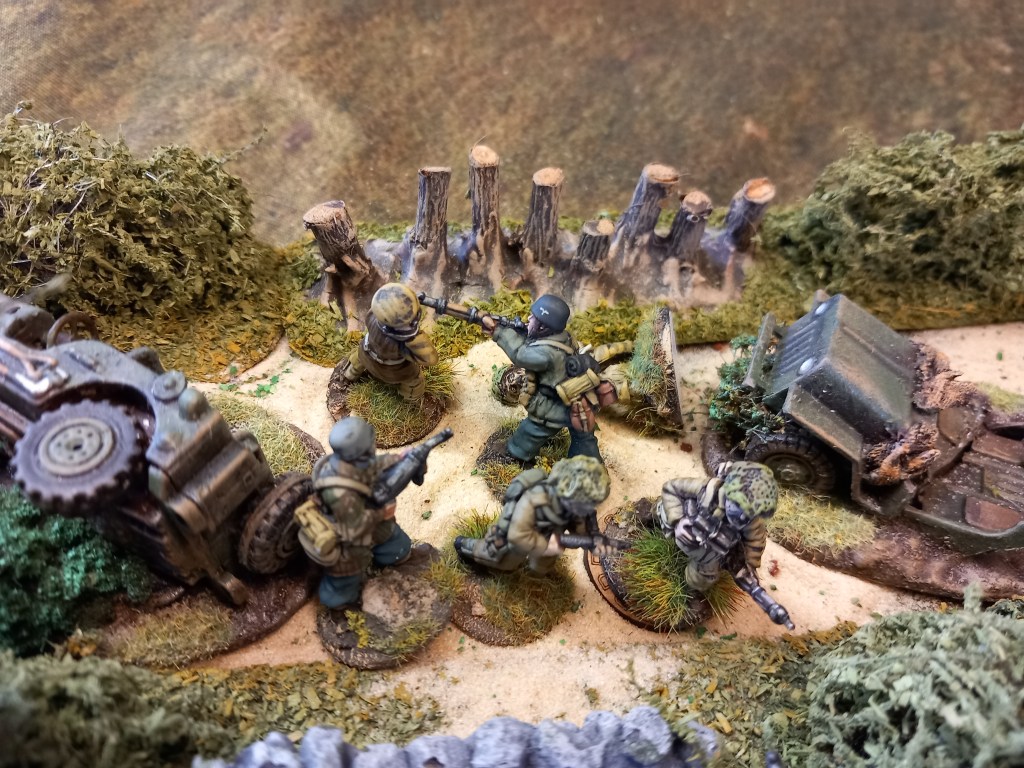
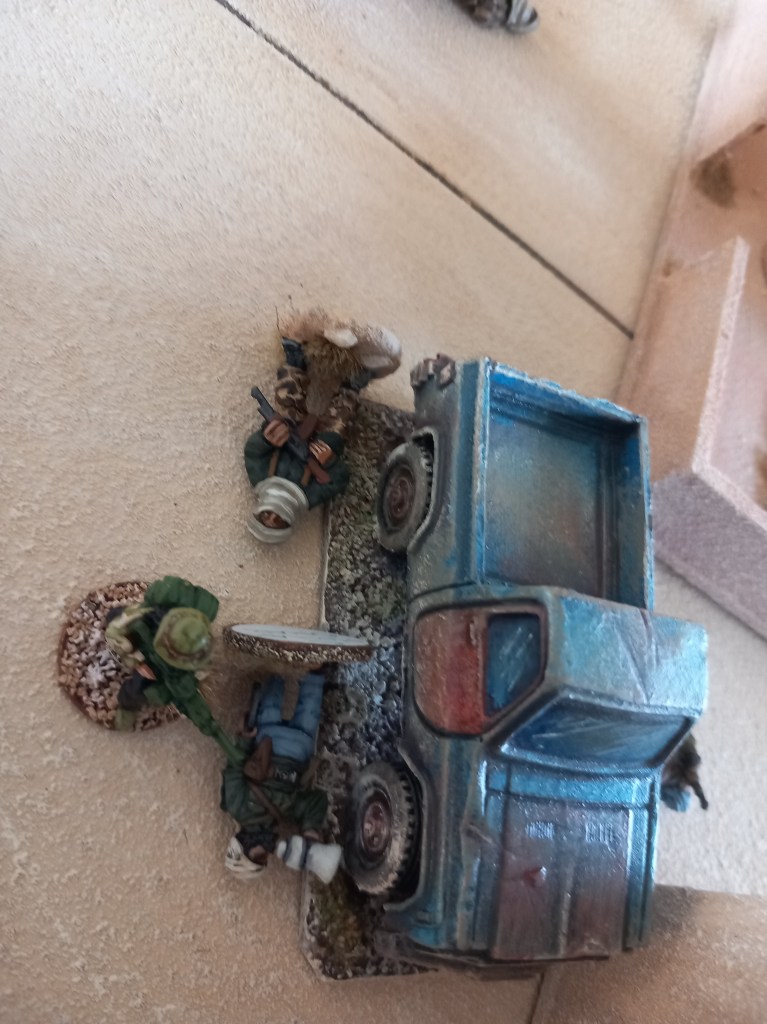
“Hande Hoch!” The Germans win the race.

And away they go. A fun little scenario that worked well.

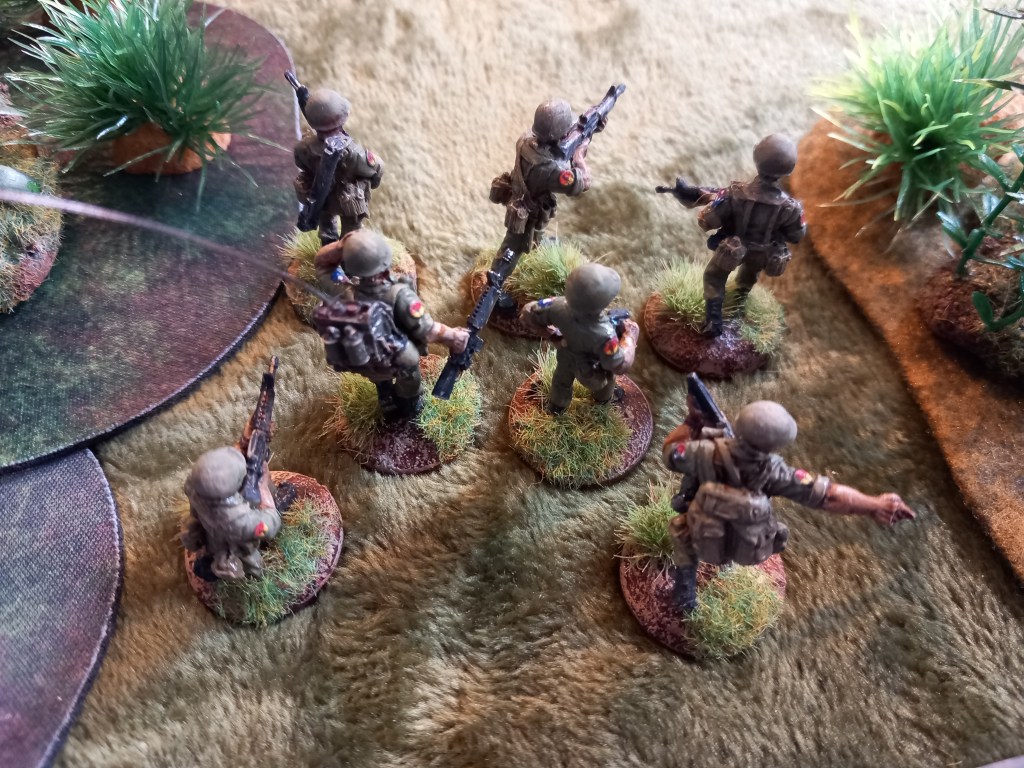
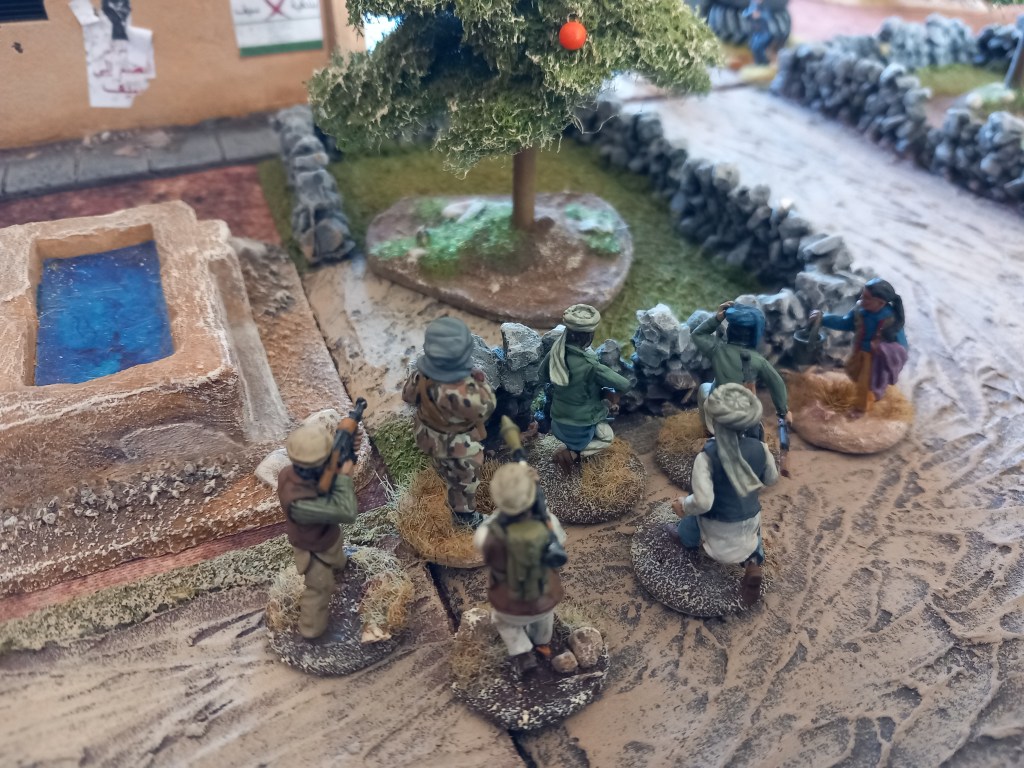
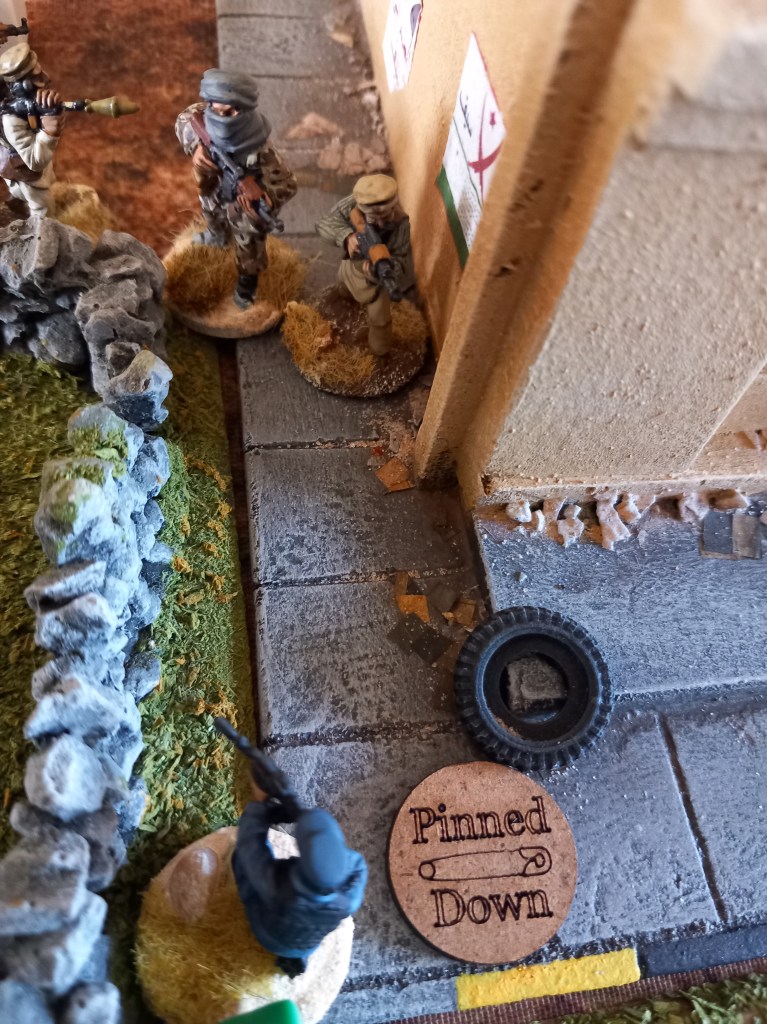
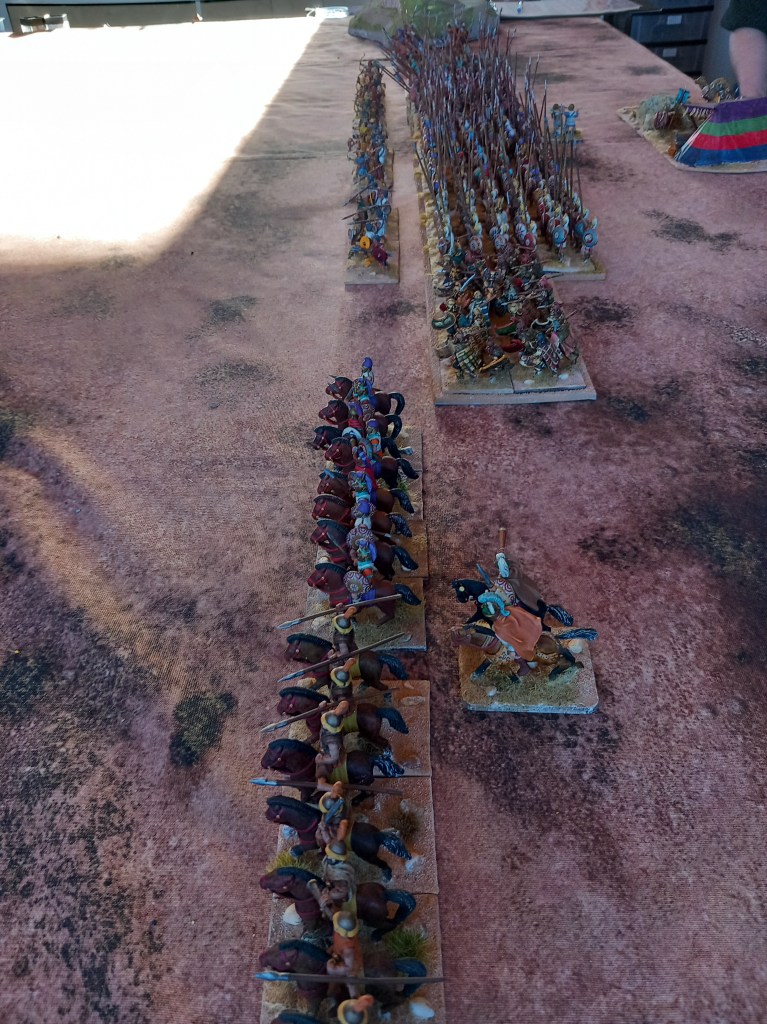
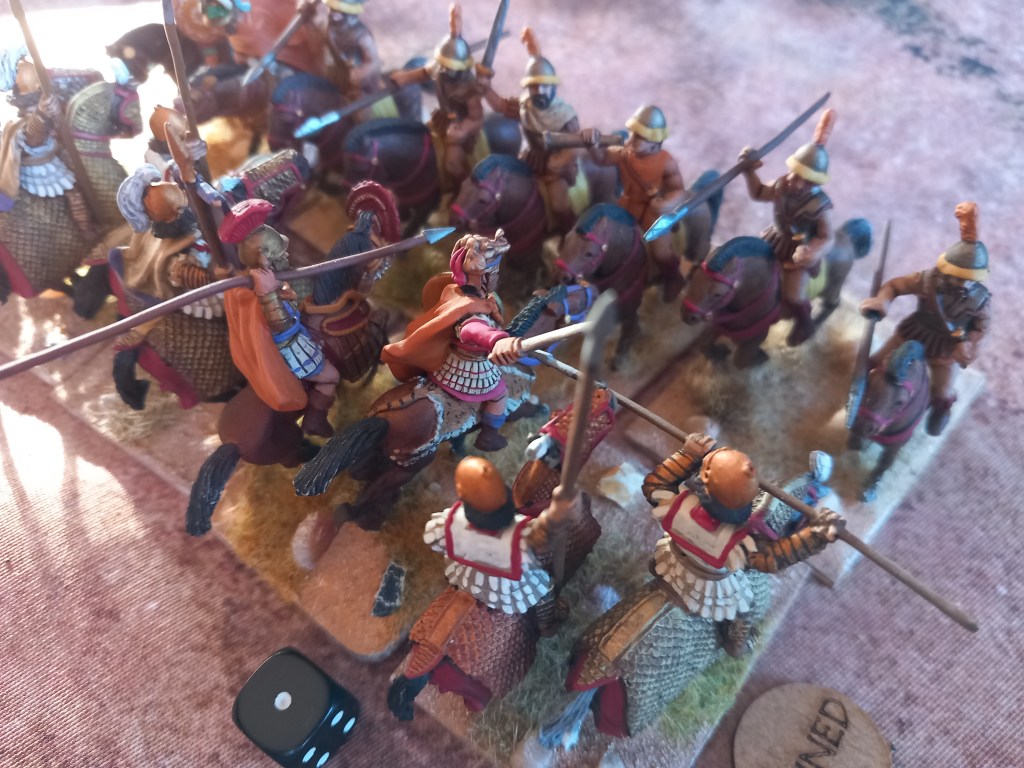
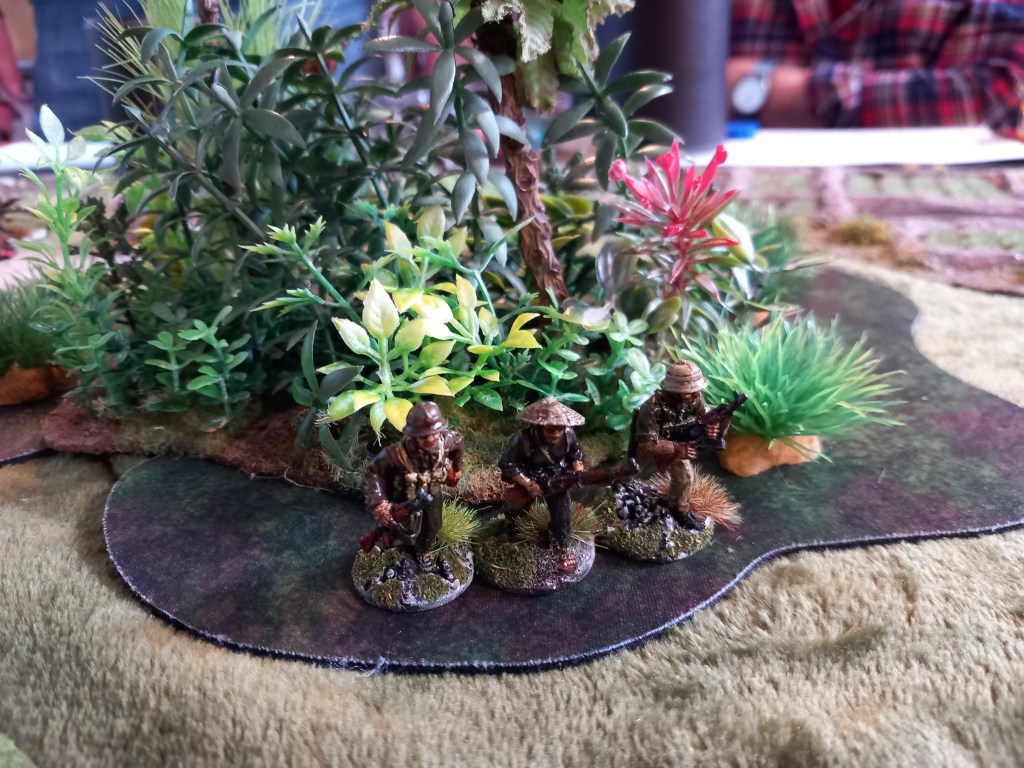
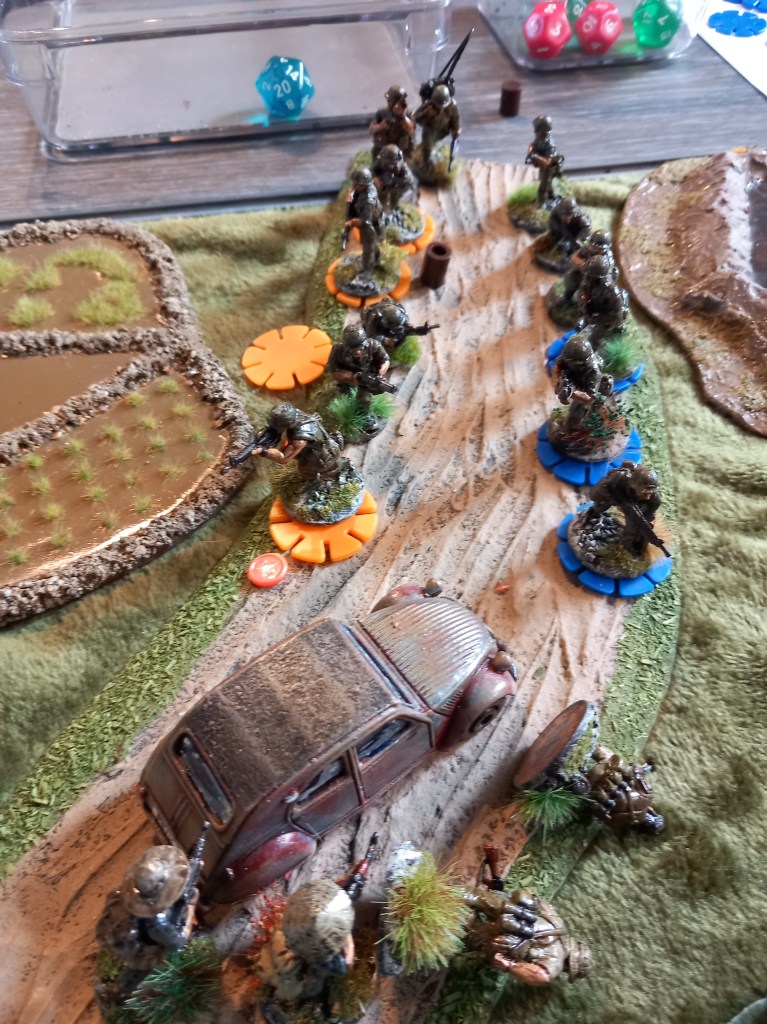
Our final game was an away day Vietnam skirmish using ‘Surviving Nam’ a set of rules in development from a guy on LAF.

Now I’ve played a lot of Vietnam games over the years using my own rules and a myriad of commercial sets and I think I know a reasonable amount about the period and recognise the difference between popular mythology and reality so I approached this in the hope of maybe this will be ‘the set’.

The basic premise of the rules is that each player is a squad/fire team of say half a dozen figures, all Free World Forces, on some kind of pre ordained mission, there are no VC/NVA players. In an agreed order each player nominates a figure from his squad to activate by rolling one or two D20 die, if they pass (different skill level, different score required) then they can move, fire, etc. If they fail they draw a random event(s) card which has something happen, usually some kind of VC/NVA action, hidden machine gun opens up, fire team deploys, etc. And that essentially is the game.

Now if you are a big fan of dungeon crawler games then this could be quite ‘fun’ but it is somewhat reductive. At best it reduces the enemy to random orcs or xenomorphs who pop up for the sole purpose of killing or being killed, at worst it could be seen as downright racist as the brown people, and lets face it in these types of games it is brown or black people who pop up not the white guys.

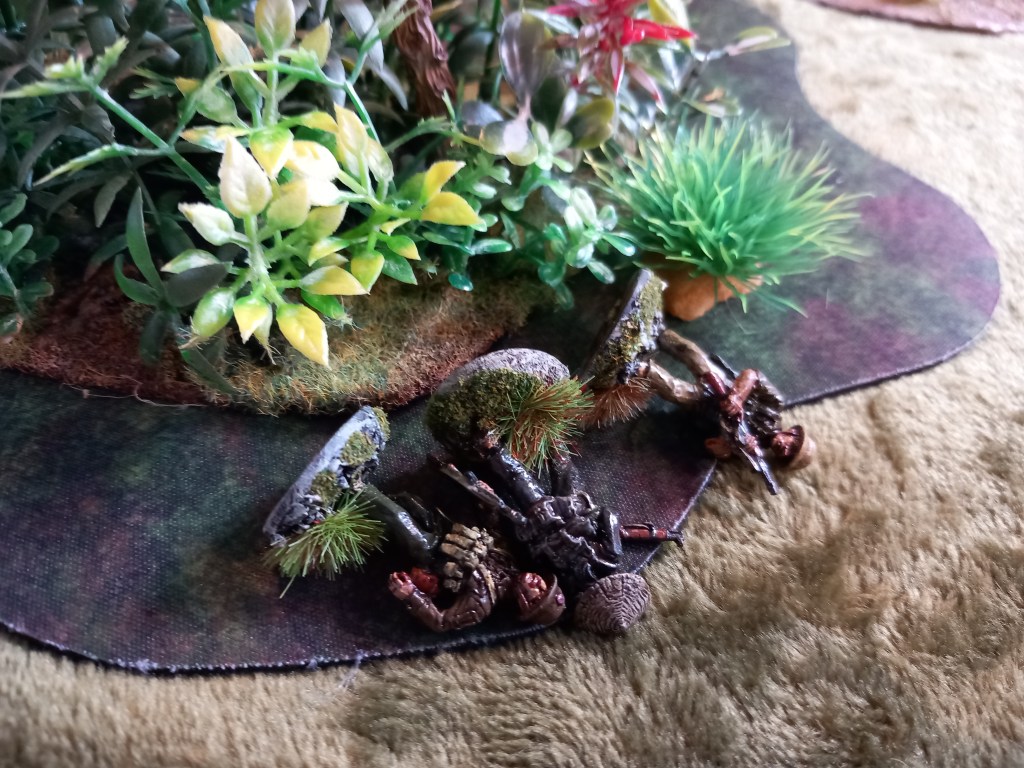
Putting aside me perhaps being over sensitive the other problem with this type of game is that no one has any agency. The Vietnamese certainly don’t as their actions are driven by the cards and the die rolling for their actions, like shooting, are done by the players who drew the cards. But neither do the players have much agency because once cards start to be drawn the game becomes a glorified ‘whack a mole’ which is justified by a vague notion that this is what Vietnam was all about. Really?

Now all that said I had a fine old time with my ARVN out performing the US Marines by miles. Again, really? The other guys had great fun and are motivated to paint up some more stuff so success but Vietnam it aint.

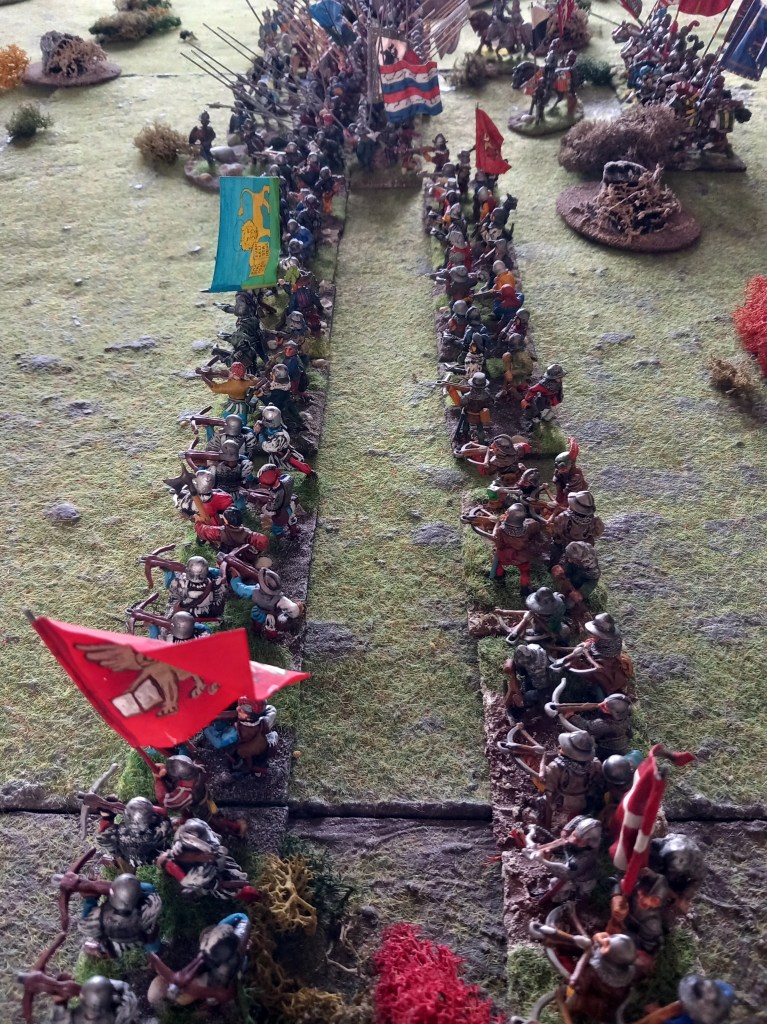
And that was the month. Pretty varied and generally successful. What will October bring? Well Partizan for sure but no game from us just visiting.

August 2025 Report

Summer is drawing to a close but the gaming keeps on going 😀 Seven games this month, a tidy number.

First outing was an away day game of DAK Attack! with some local gamers not of the group. I’d call the rules ‘Heroic History’, just enough history to make the game immersive enough but at the same time deeds of daring do is the general vibe.

In keeping with the above the players were assigned an LRDG group each and a sector of the German town and airfield to shoot up, get in and get out in one piece. The Germans were controlled by the umpire via a card system but were very much in reactive mode.

So, jeeps rolled in, shots were fired (a lot!), charges were planted and jeeps rolled out again.

Well some of the jeeps rolled out again 🤣 Losses were taken by the Brits but plenty of German kit was blown up so a very successful mission.

As a set of rules they worked very well and delivered exactly what they set out to do, I’d certainly play them again.

Back at base our next game was another of our 1980’s Cold War encounters, this time, Bundeswehr v DDR. Our narrative was that the Warsaw Pact invasion had commenced and in the opening days the BAOR had been displaced north by the Soviets and now the second echelon DDR troops were sweeping forward from the southeast aiming for a power station positioned in the northwest corner of the board, The Bundeswehr had hastily assembled a combat group in the southwest and were scrambling to cut off the enemy advance.

The game was designed as an 8 turn encounter game using mobile deployment in specific areas of the southern end of the board. Both sides had off table artillery but no air cover; the DDR had a full tank regiment – 3 x 9T72M tank battalions and a motorised infantry battalion in BMP1-1P’s, the Bundeswehr had 2 x mixed battalion of 8 x Leopard 2’s and 4 x Marder with attached infantry. The rules were Cold War Commander.

The Bundeswehr got on table straight away – better command values, and positioned the FAO and half a tank battalion on a convenient hill while everyone else headed north utilising the plentiful cover.

The DDR struggled to get on table and this definitely affected their ability to co-ordinate their efforts. The 1st Panzer roared came on and roared into a field where they got bogged down as the Leopards on the hill zeroed in on them and the FAO bought in M109 fire. Eventually the battalion was wiped out without firing a shot 😢

The 3rd Panzer, when they came on, executed a long right hook, utilising as much cover as possible and headed for the road to the power station.

The 2nd Panzer and BMP’s arrived late and were forever playing catch up which wasn’t helped by the panzers failing two first move rolls and rolling two blunders! Needless to say their contribution was minimal. The BMP’s nipped straight into a wood and kept out of the way but their ATGW advantage was negated by the electricity pylons stretching up the board. The pylons also affected the Marders but with their longer range tank guns this was less of a problem for the Bundeswehr.

The DDR did manage to get their off table into action but with zero effect.

And counter battery fire soon took them out anyway.

The exciting part of the game however was the actions of 3rd Panzer whose right hook had caught the Bundeswehr slightly off guard – they were too busy shooting the shit out of the rest of the opposition 🤣

And so it became a race for the bridge……..

The Bundeswehr threw everything they had at 3rd Panzer as turn 8 loomed.

But eventually 3rd Panzer were swept away and with the end of turn 7 the Leopards were on the bridge and the lights over West Germany could remain on 😁

Next up was a Reconquista game on the arid Spanish hillsides, Spanish Christian v Moslem Andalusian but with both sides having allied contingents from the other faith. Alfonso & El Cid commanded the Christians, co-operating for once.

The Christians had the better cavalry and took the fight to the Andalusians.

The opening skirmishing favoured the Andalusians.

Alfonso had to do a bit of steadying the infantry and the line held.

Meanwhile the Cid was leading his troops to victory with a sneaky flank attack – not very Christian 🙄

The game became quite the cavalry slog with both sides throwing in units and generals.

Ultimately it became a Christian victory with the Cid casting down his opposite number.

Next was the 2nd in our Guadalcanal mini campaign, this time Cape Esperance, influenced by the fallout from our first game. Again the battle was fought at night.

For this one we hade to think a bit. Our resident expert and umpire, Gerard, had us steaming by map in column – yes they deployed in column! Once visibility was determined the models came on but you still had to spot before you could fire and if a target fell out of spotting distance then it was no longer a target – very challenging.

Pretty soon the ships were all over the place and the spotting was a real pain but in a good way.

The Americans used their destroyers very effectively, getting in close to launch torpedoes, even though the early torpedoes were generally useless, but not always 😀

The more effective Japanese torpedoes certainly did their part – here the Boise goes to the bottom.

Followed by the San Francisco.

But American numbers (and guns and armour) told and the Japanese beat a retreat. Interestingly both flagships were sunk but the Japanese suffered higher overall losses.

Our next outing was on the plains of eastern Europe where an Ottoman incursion was being opposed by the troops of the Imperial borderlands.

The playing area was bisected by a meandering stream (representing the border) which was close enough to the Imperial left for them to use it to aid the defence by the Croatian horse and close enough in the centre of the line for the levy and mercenary pike to get to and defend the banks. On the Ottoman left their Tartar cavalry & Delis were poised to cross the bridge while across the centre & right were 6 bodies of Spahis screened by Azab foot.

The Ottoman advance was a bit of a mess, the Azabs wouldn’t move so didn’t provide a screen to the Spahis who advanced through them (at least they had bows) while out on the left the Tartars dithered and the Delis went home! The Imperialists were a bit more organised and on the right the Austrian and Hungarian nobles galloped forward.

Here come the nobles!

First contact was the Hungarian nobles splashing across the stream and hurtling into some waiting Spahi who were dispatched in short order.

Out on the Imperial left the Croatian contingents were doing nice work with their carbines.

On the Ottoman left the last unit of Tartars is about to run away and that flank will be gone.

In the Ottoman centre it all starts to go horribly wrong as the German mercenary horse and pike splash across the stream (out of shot) and start shooting up the Spahis.

Terror is infectious and the Ottoman centre dissolves. The Imperialists are not without casualties but no morale collapses were suffered which was a rot that set in amongst the Ottomans.

Our next foray was a Carlist War encounter. Government troops, being mainly the British Legion plus the Guards battalions, seeking to turf the Carlists out of a reinforced position.

Skirmishing was very much the order of the day for the opening moves with the Carlists having the better of it, particularly on their right wing.

Attempting to force the issue on the Carlist right the Government lost patience and rolled out the cavalry, perhaps a little bit too early…..

In went the Princess Hussars with plenty of “Huzzah!”

So much for “Huzzah!” 😂🤣😭

And then came the cuirassiers, who did a little better but had to fall back hurt.

But they came back for more and a Carlist general died trying to hold his troops together.

The cuirassiers finally chopped their way through and this part of the Carlist line was unhinged.

Out on the government right the lancers from the British Legion hurled themselves into the Carlist line.

And desperate squares are formed as the first line falls.

At them with the bayonet as opposing attack columns close.

Casualties on both sides mount but the Carlists now have three divisional generals dead on the field and so yield the ground. A bloody and pointless affair.

Our final effort was good old Successors, Antigonus v Eumenes.

To try and get away from the usual slog across the open field, historical though it undoubtedly is, a more narrative approach was tried. In this, Eumenes is marching for his camp, placed beyond a fast flowing stream and approachable by a single bridge. Antigonus and his son Demetrious have split their forces in an attempt to out manoeuvre their old enemy and have ended up on the opposite side of the table in two constrained areas, Demetrious upstream from the bridge and Antigonus separated from Eumenes by several low hills. Both sides had constraints about which troops (and Generals) could be where and then drew disposition maps.

Demetrious had all the good cavalry plus a single elephant backed by two pike battalions, which soon got left behind in the rush for the bridge.

Antigonus had the main body of the infantry backed by some satrap cavalry.

Eumenes opted to send his cavalry, backed by the Hypaspists, past the bridge to take on Demetrious and thus create a funnel behind them for the rest of the army to access the camp. But first those infantry were going to take on the host of Antigonus and see if they could do enough to make them pull back.

Eumenes had two elephant squadrons to the Antigonids one and so tried to use them as blockers. Here one crashes into the Antigonid veterans.

The result was inevitable but it did keep the veterans out of the pike clash which was about develop.

At the bridge, Demetrious just about won the race and the cavalry melees set in.

Out on the Eumenid right the big fight was about to happen and as can be seen the Antigonid veterans (top left) are delayed. in the foreground both of Eumenes infantry commanders have joined a battalion, Antigenes with the Silver Shields on the left and Teutamus in the centre. Antigonus himself, seen on the hill to the rear, didn’t commit himself and that would prove problematic.

After a couple of turns of bluster (also known as failure to charge rolls on both sides) it was the Eumenids who surged forward and the fight was on!

Back at the bridge the fight was in full swing as both sides fed horse and elephants into the fray. The action was favouring Demetrious but the killer blow was yet to be delivered.

On the hills the killer blow had been struck and the central Antigonid pike battalions collapsed and fled. The presence of Antigenes & Teutamus had kept the Eumenids in the fight at the critical moments.

There was still some fighting to do. The third Eumenid pike battalion was making hard work of finishing some hoplites but the inevitable would not be long and the Antigonid veterans were free and clear but alone.

At the bridge Demetrious was still battling away as Eumenes fed more troops into the fray but with his dad’s forces on the run we concluded discretion would be the better part of valour. The great Antigonous/Eumenes contest would continue for another season.

And that was the month, another fine one. Not much on the painting/modelling front, spare time has been spent on completing the rules for my Timurid forces and rebasing for the third (and last) time, hopefully they will see the table in a trial run next month. Until then, play nice and enjoy the weather.

July 2025 Report

Two shows and five games, a pretty reasonable month.

Our first game was WWII desert skirmish using our own tried and tested rules set. On this occasion a daring rescue attempt by SAS squads of two captured officers held at an Axis camp before transfer to the Gestapo for questioning.

The bulk of the Axis forces were asleep in their barracks while Askari patrolled the perimeter. The British were divided into 3 squads supported by an armoured car each, approaching from the cover beyond the main gate. Various scenario rules were in place for noise and and whether the guards would be alerted and how long it would take for sleeping soldiers to tumble out of bed.

The British de-bussed at a safe distance and advanced on foot with the armoured cars rolling on behind.

Impatience got the better of the British and before everyone was set the Rolls Royce opened up on the guard house eliminating the Askari inside. Now it was time to get a move on.

With the hornets nest duly disturbed the Axis troops began to tumble out into the square with the Italian tank crews leading the way into their fearsome tankettes 🤣

Unfortunately the lead tankette quickly went up in smoke and the Italians became a little more circumspect.

It wasn’t all wine and roses for the British however when the one tankette with an actual gun dropped a shell into one of the squads and downed two. Things were getting serious now!

As the British advanced into the compound the armoured cars gave very effective support fire.

It was starting to look like bullying now 😂

It was not all British hoorah though as once the Afrika Corps troops managed to push the Italians out of the way some serious fight back started to take place.

However it was all a bit too late by the Axis and with all the armour destroyed and most of the Italians & Askari dead or wounded the Germans had no choice but to surrender themselves and the prisoners.

Next was an interesting Successors game whereby Antigonus and his mighty host took on the western satrap Alcetas with both sides obscured by a belt of woods.

The Antigonids were pike heavy with 5 battalions ranging from Veteran to Levy supported by hoplite mercenaries. They were also heavy in horse with 6 units of formed cavalry. Where they were weak was in light troops, fielding only 1 unit of light horse and 3 of foot, but they did of course have elephants.

Alcetas on the other hand was falling over himself with light troops and that dictated his style of play. His heavy troops were 2 pike battalions and 2 hoplite battalions which he positioned opposite one of the breaks in the woods heavily screened by psiloi while his left was protected by 3 units of Psidian peltasts planning to take advantage of the woods opposite and his by some Thracians and more psiloi. The satrapal heavy & light horse was held back on the left to await orders to be committed to plug any holes that appeared.

The battle opened with a strong advance all along the Antigonid line but a far more cautious one from Alcetas – jibes about dragging his feet had no effect whatsoever 😂

The first serious action was the psiloi annoying the elephants which thy did very well and in due course we had panicking elephants and then dead elephants.

The early cavalry action was on the Antigonid right where Demetrious and half of the cavalry were massively outnumbered by the opposition and were ground down and eventually surrounded – lesson, don’t’ split your cavalry.

The other half of the Antigonid cavalry had a far better time beating up the Psidians.

And disappeared in a wild chase from which they never rallied.

At the two thirds point the game very much looked like it was going the way of the Antigonids. Demetrious was still holding his own on the right and the Median horse on the centre right under Peithon were making headway. Alcetas admitted he was worried.

The woods however were starting to become a bit of a pain in the arse – not least in trying to make sure weapons didn’t break off!

Eventually the heavy stuff got into contact with both sides mercenary hoplites slogging it out and both Antigonus and Menander (commanding for Alcetas) joining their troops to keep the combat going.

Then in a startling development the two Pantodapoi pike battalions, who had previously been protected by the Median horse, found themselves on their own, outflanked and showered with javelins and broke leaving a great big hole in the Antigonid centre.

Some consolation was gained when Antigonus’ veterans punched their way through but that just left them in a sea of enemy troops.

At game end Alcetas had the numbers and we called it a victory to him by a narrow margin.

Our next encounter was the final one of our Napoleonic north Italian odyssey, the battle of the Raab, 1809.

A much bigger game than our previous engagements (well for the French anyway 😉) the result was never really in any doubt, despite some early French efforts to completely cock it up, and it was all about how well the Austrians could do in defeat.

In an early effort to cock things up the French cavalry commander threw Guedin’s dragoon division across the Pancza stream and promptly lost it! Off to a great start.

A more circumspect approach was then adopted by the French and Laureston, supported by Sahuc, scored an early success on the French left.

This then led to a rapidly developing and fiercely fought contest on the Austrian right.

Meanwhile in the centre the French attack had gradually built and holes started to appear in the Austrian line.

Austrian grenadiers were desperately thrown in to plug the gaps but it was all a bit piecemeal.

French mass assaults turn the day.

Total Austrian collapse – every division is exhausted (Volley & Bayonet parlance). History does indeed repeat itself although our French paid a higher price.

Our final game was a GNW piece that stretched into two days. For this battle we had the table split by a major river, only crossable by a bridge leading into a town. A Russo Danish allied army was advancing up either bank of the river to contact a Swedish force reported as coming their way. The Russians and Danes had to deploy either side of the river although who took which side didn’t matter, the Swedes could deploy on either side or split to deploy on both sides and the split didn’t need to be even.

In the event the Russians took the right hand side with two brigades of foot, one of horse grenadiers and one of dragoons and the Danes the left with one brigade of horse and two brigades of foot. The Danes had the advantage of being on the side where the town was and maybe could beat the Swedes to it.

The Swedes opted to split their forces placing two brigades of horse and two of foot on the side facing the town and one each of horse and foot on the other bank facing the Russians.

In the opening moves the Danes won the race for the town (just) and this would prove to be a crucial event giving the Danes the advantage of receiving the forthcoming Swedish attacks at the halt.

Over on the Russian bank their horse (Kroptov and Tiernishov) splashed across the tributary stream to take the fight to the Swedes who lumbering forward.

The Swedes responded with their horse under Torstensson

The Russians were stopped but not overwhelmed and the Swedes fell back to regroup and the Russians realised they had got off lightly mixing it mounted so dismounted and started peppering away with muskets to keep the Swedes busy while their infantry hurried up.

Over on the other side of the river the Swedes threw in their first wave of cavalry under Hard but found that Danes weren’t quite so brittle as the Russians they were used to and so bounced off. No problem there’s another brigade to throw in.

In came the 2nd wave under Armfeldt and still the Danes held. Phew! The Swedes are now carrying some significant losses.

Back over the river the Russians are making a good show of it.

The Swedes have made a hole. Can they exploit it?

The Russian realise that they have more than enough troops to contain two Swedish brigades and so release Golovin’s brigade to march over the bridge to support the Danes – this will prove crucial.

In the town the Swedes and Danes slug it out. First with volleys and then with the Swedes trying to carry it with the pike & bayonet. Ultimately this is a failure and the Swedish brigade breaks with heavy casualties, ultimately rallying back at the table edge but spends the rest of the battle recouping its losses. The Danes now have the town and the Russians the bridge, its going to need a major Swedish effort to turn this around.

The Torstensson’s brigade breaks from accumulated casualties. It will rally but will need to recover losses.

The Swedes facing the Danes are now starting to gain ground so the Danes throw in their cavalry to stem the tide (see top corner). Sparre’s foot brigade is coming up behind the horse.

This is not good! The losses on Hard’s brigade reached critical mass and it only took one morale test for the brigade to crumble, The Danes breathed a sigh of relief.

The Danish line is finally breached by Sparre’s infantry but it has been an effort and they are not in a cohesive formation.

With the absence of Torstensson the infantry under von Liewen are being surrounded.

And breaks.

Golovin has shook out into line with 5 battalions of fresh troops and his right resting on the securely held town. His left is slightly in the air but about half of the Danish brigade has rallied and they are filtering in. The infantry under Sparre are too scattered to do anything in concert, Hard and Armfeldt are still recovering and Torstensson and von Liewen are lost. Emphatic Russo Danish victory.

In other news shows were attended! I’ve already spoken about Joy of Six but I also went to Attack! in Devizes.

The last time I went to Devizes I said I wouldn’t go again. Not because of the show but the distance, it is way too long a journey from Coventry in one day for what is an OK show, but circumstances meant I had to go so there I was.

My take on the show is that it is very old school and that has some charm but my impression was that numbers were low and two days is a stretch.

I did however manage to get some stuff done. This church and rectory for 6mm Cold War.

A power station for the 6mm.

A cypress grove for the 10mm Iran Iraq.

A copse for the Iran Iraq.

Acquired some pylons for the 6mm. Need a dark wash I think.

Another hill – because I haven’t got any of course 🙄

East Germans ready for action.

And I’ve chucked 3 years of work on a set of rules for my existing Timurid collection in the bin and been energised into doing something based on existing lines but different enough, hopefully!

And that’s it. Long may the summer continue. Be good and enjoy your gaming for as long as you can.

April 2025 Report

A third of the year gone but still we keep playing 😊

We opened the month with my personal favourite, Successors. For this one we had, Imperial Seleucid under Seleucus III facing down Ptolemaics under Ptolemy II Philadelphus around the time of the Syrian Wars.

The Seleucids were light on pikes having just the Silver Shields and one other but had the full range of exotics – scythed chariots & elephants, some decent cavalry and those wild Galatians (foot and horse), plus of course sundry skirmish types. The pike deployed in the centre screened by skirmishers, the good horse deployed on the right and the elephants, chariots and Galatians out on the left.

The Ptolemaics were heavy on pikes, four settler units and the Agema, far more cavalry but more variable in quality and a lot of skirmishers. When deployed all the cavalry were on the right, the settler pike took the centre with their sole elephant squadron out front along with some skirmishers while the left was curiously held by the Agema pike and a unit of Thureophoroi screened by more skirmishers.

We opted to use the terrain and scouting sections from the rules rather than just bang the armies down on the plain and this should have favoured the Ptolemaics with their superior scouting strength but they fumbled and ended up with a terrain board that helped rather than hindered the Seleucids.

Being inferior in numbers the Seleucids opted to hold back their pikes and rely on the exotics to make a mess of the massed Ptolemaic cavalry wing while their own cavalry swung round a convenient ravine to menace the centre. Some of this worked 🤨

The Seleucid elephants managed to get themselves between two woods which had the effect of drawing the Ptolemaic cavalry into a funnel of disorder while out on the extreme edge of the wing the chariots did exactly what they were supposed to do, charge in, crash, cause casualties and become inconvenient wreckage.

Sticking with the Ptolemaic right, the chariots soon shot their bolt (as expected) but the Greek and Thessalian cavalry took losses and more importantly were slowed down.

The Seleucid elephants had a good game, they frightened the children (oh no, sorry, the horses), had their mahouts killed and went into panic, rampaging about randomly – exactly what you want to see 😂

Ultimately the elephants died but their nuisance value had allowed the Galatian warbands to get up and get stuck in. The Galatians in fact had their best game so far, they duffed up a settler pike battalion and routed it, they saw off charges by both the Agema and the veteran Thessalian cavalry and killed the leader of the cavalry wing which paralysed it for the rest of the game. Result!

In the centre the Ptolemaic pike mass moved confidently forward but slowly (fairly obviously) and given the decision by the Seleucid general to hang back their only bright spot was the success of their Rhodian and Cretan mercenaries in driving off the opposition skirmishers.

Out on the Seleucid right the cavalry didn’t have the battle they hoped for, the rather odd deployment of Thureophoroi, pike and elephant initially worked and both Seleucid Xystophoroi regiments were seen off, one by the Thureophoroi and one by a combination of pikes and elephant. Unfortunately the Seleucid Hetairoi regiment sneaked through and opportunistically charged a shaken and disordered settler pike battalion and routed it – the stars really did align for that combat.

As we approached the end the Silver Shields were unleashed and……..failed to charge! What an embarrassment 🤣

The embarrassment of the Silver Shields not withstanding it was clearly a Seleucid victory, the Ptolemaic cavalry were paralysed and the settler pike were not having a good day.

Could it have gone differently? I think yes. The terrain decisions by the Ptolemaic general were definitely a factor effectively limiting the ability of the big cavalry wing to do anything and having all the cavalry eggs in one basket as it were definitely was a tactical limitation for the Ptolemaics. But so what, we had a fun game and that is what matters.

Next up was another Victory at Sea game but not the war in the Pacific this time instead we fought the Battle of the Denmark Straits. Yes two ships per side and that’s it 😲

Gerard came up with an intriguing little scenario for us and it really worked. First off we didn’t know what action we were doing until we were allocated sides and then we had restrictions on what we could see, what we knew and what we could do, all reflecting the original action.

Fairly obviously this wasn’t going to last us all day so we had one game in the morning, broke for lunch and then swopped sides for the afternoon session, sometimes it pays to go small.

In the first session the Hood was sunk quite early on in a repeat of history and Prince of Wales had its rudder jammed so was reduced to steaming in circles as the Bismarck sailed away with minimal damage leaving behind Prince Eugen at the bottom of the straits.

In our second game the British co-ordinated their efforts a lot better and zeroed in on the Bismarck ultimately crippling it to such an extent that all it could do was sail back up the straits into the arms of patrolling destroyers. The Prince Eugen was ultimately sunk.

This second game was a far more hard fought fight and at the end both Hood and Prince of Wales had serious damage but were still in the fight. A really good game and different.

Our third game of the month was a welcome return to the skirmish genre, this time we dusted off the Soviet Afghan collection and put together a mujahedeen attack on police and army units on the edge of a town.

The police started the game on duty outside the station, across the road was a government official and his bodyguards, inside the police station an army unit was resting prior to going out on patrol. The mujahedeen started at randomly generated points around the table edges.

One squad of Mujahedeen advance through an orchard.

A second squad nears the edge of the police station, local boy offers water fresh from the well. Have they been spotted?

Shots fired!

No need for cover now.

The army opens up from the police station – this is getting serious now!

This guy tried to three times to blow open the doors to the government building. Literally couldn’t hit a barn door 😂🤣

OK this isn’t looking too good. Time to change sides?

Government official makes a quick exit.

“He got away!” Mujahedeen withdraw with no casualties. Afghan police 3 x KIA, 1 captured. Afghan army 1 x KIA. It was nice to get one of the many skirmish collections out but truth is some of them need to be sold on now, just taking up too much space.

Next was another in our relatively new 6mm Cold War project this time giving the newly painted BAOR their first outing.

Like our March game this was another riff on the narrative in Jim Storr’s, ‘Battlegroup’. This time the 7th Armoured Brigade has been rushed forward from the divisional reserve to stop the Soviet 7th Guards Tank Division crossing the river Innerste.

The game was essentially an encounter game with battalions deploying to the table based on successful command rolls. The BAOR deployed one Chieftain brigade and one Challenger brigade along with a mechanised infantry brigade and some SP artillery. The Soviets deployed three tank battalions, one T80 and two T62, one of which was under strength, plus a trio of HINDs. Both sides had off table artillery.

The HINDs deployed early and, as usual, caused some heart stopping moments for the Brits – these damm things really are difficult to deal with.

As the Brits obligingly sat back the Soviets made a dash for the main suspension bridge.

Some decent shooting from infantry LAWs stops the Soviets on the bridge.

British infantry occupy villages on their side of the river.

Soviet advance continues.

The second bridge, ripe and ready for the taking.

Ultimately the Soviets seized both bridges and the British failed their breakpoint morale role so it was on to the Wesser for the Soviets.

On reflection this wasn’t one of our better games. The British overall commander was getting to know his army and so played an overly cautious game which manifested itself in some curious deployment decisions.

What turned out to be our final game of the month was a War of the Austrian Succession game set in northern Italy with a French army on one side and and an Austro Piedmontese army on the other approaching a town where there is thought to be a supply of shoes – sound familiar?

It wasn’t planned this way but this turned into a two day affair and it’s probably worth talking about that.

This was a lot of troops; the French fielded 6 brigades, the Austrians 5 and the Piedmontese 4, all marching to the table and in some cases getting each others way (that was the intention). What this meant was that by the end of the original day the battle had only really just got going and we were stuck with falling back on that old staple of “well I think this brigade would probably do this and that brigade would fall back…..” Then in a kind of epiphany moment, which we really shouldn’t have had to have, we realised that we could just leave the game up (because that’s what a permanent wargames room is all about 🤔) and because we’re retired we can game whenever we damm well please! And there was me thinking we were all pretty bright blokes 😂🤣

Anyway. The two brigade strong Austrian cavalry brigade marched up the right hand road aiming to pass through some walled gardens and smash some French cavalry seen deploying near some woods. On the opposite flank the Piedmontese single cavalry brigade was repeating the same scenario. In the centre all roads led to the town; the French foot had a only a single road to march down so were more strung out but there was less of them, the Austrians and Piedmontese had a road each but it met at a fork outside of the town and a road block was inevitable – the columns had to come down the road to enter the gaming area.

The first action of the game was the clash of the French and Austrian cavalry at the walled gardens. The French caught the lead Austrian dragoons as they shook out of column but failed to bounce them back and fell back themselves, a potential disaster which was rescued by the second French unit that charged in to stabilise the line and send the Austrians themselves packing. This set the tone for the whole game, the Austrians were stymied by the walls and gardens and just could not make enough headway against smaller and weaker opposition.

Out on the other wing the Piedmontese and French cavalry had a more even contest which ultimately saw the Piedmontese bounced back behind their gradually developing infantry lines which later in the game would save them.

In the centre the fight for the town was developing. The town consisted of two built up areas at the sides and one central walled garden area into which the French were establishing themselves just ahead of the Austro-Piedmontese who had been held up by the now infamous fork in the road.

The Austrians just keep on coming! Numbers are beginning to tell at this stage and the French have already recognised they don’t have enough to occupy all the built up areas.

It’s about what would be seen as the mid point of the game. The French hold the central gardens and the whole of the right built up area, the left is contested with the Austrians. The cavalry on both flanks are holding their own. This is the high water mark of the French effort.

Emboldened by their success the French cavalry right spurs its horses forward scenting victory. An infantry brigade is supporting to the rear. What could possibly go wrong?

In a bizarre turn of events the French left cavalry received orders to pull back to their original starting point allowing the Austrians the opportunity to sort themselves out and exit the gardens. The reasoning of the French CinC was that he thought the cavalry would be overwhelmed in due course but what this order did was to allow the Austrians to fight with the advantage of their numbers and it also exposed the left flank of the infantry brigade trying to stop the Austrian juggernaut coming round that side of the town.

The right hand side of the town (as seen from the French side)has fallen to the Piedmontese assault. Frankly they made hard work of this, this part of the town was only held by two skirmish regiments as the French didn’t have the numbers, none the less the French in the central gardens were now under serious threat.

The situation worsens in the town. The left hand side built up area has been given up to the Austrians and the weight of Austrian fire on the centre (look at all those battalions!) has driven the French out allowing the Piedmontese to begin occupying the ground.

Out on the Austrian right, their cavalry prepare to seize their moment, now it is their time!

“Onward to victory!”

Oh dear 🤣😂 In a stunning turn about the Austrians lost their bottle and retired without even crossing swords!

And it got worse. It just wasn’t the Austrians day. The French breathed a sigh of relief.

However out on the French right the cavalry brigade has all but been destroyed by Piedmontese musket fire and the supporting infantry brigade has also collapsed. Yes the Piedmontese have suffered losses but the French are in no position to do anything about it.

With night falling the French are finished. Despite the unlooked for success on the right the rest of the army is spent and retreat is the only option covered by the very lucky right flank cavalry.

I for one was really glad we carried this on to a second day. There was plenty of fight left in the game, in fact the bulk of the fight was in the second day. We had some knife edge moments, some lucky moments and some disastrous moments, in fact everything you could want in a good game. Well done all!

In theory that should have been it for the month but not for me because I went down to Basingstoke for a refight of the battle of Malplaquet hosted by Mark Freeth at the Wargames Holiday Centre. I say ‘at the Wargames Holiday Centre’ when in fact the WHC comes to you, because these days Mark sets up the 27 foot long playing area in an extended conference room at the local Holiday Inn, so you stay, eat and drink in the hotel and game in the conference room all very convenient.

I’d love to give a detailed account of the ebb and flow of the grand battle but I can’t. The one disadvantage (oh the trauma of it all!) of playing on such a large table is that you only really know what’s going on in your six foot square of action.

I can say that on the Friday night and all day Saturday we played a series of games that were a loose simulation of contacts leading up to the battle but were in reality a means to get people used to the rules – Kampfe In Reihen by Steve Thompson. Personally I think this this was a bit too long and it kind of took you out of the moment, maybe Friday night and Saturday morning would have been enough.

Sunday was the main event and as best as I could tell it went something like this. The French left cavalry (me) fought a long and bloody battle against superior numbers of allied cavalry but finally gave up the struggle. Way down on the French right a mixed force of horse and foot made little headway against inferior opposition. In the centre sheer weight of numbers drove in the French centre.

I’m, glad I went, it was an itch that I had wanted to scratch for years. I had been to the WHC in the very early years under Pete Gilder when I was a callow youth and then continued with it when Mike Ingham took over from Pete and amongst other things instigated the Marlburian period as a staple on the menu but despite meeting Mark at the centre under Mike and forming a friendship I had never been able to attend under his stewardship so that’s done now.

This kind of mass gaming can be seen as a bit of a relic of a different time in wargaming and I get that, certainly it’s not for everyone and it does have a cost attached to it. I’m glad I have finally got to play in it’s third iteration, whether I will again remains to be seen, but it was a nice note to end the month on.

January 2025 Report

Bloody hell January has gone! A better month than I thought it would be what with post Christmas & New Year activities to deal with so here are our efforts for the month.

First up was a game from our Reconquista/El Cid project which is progressing rather well.

In this one we had Christian Spanish v Moslem Andalusians, an ‘equal points’ game rather than a scenario driven game – it’s easy to deride ‘points games’ but if you are trying to formulate a set of rule mechanisms that work then this does give a level playing field to work from.

Our terrain was a line of ridges with a stream just behind running east to west, emerging from the hills and ending at one table edge, the ground opposite was fairly open.

As it was the beginning of the month our numbers were low so we actually played the game twice with different players. Strangely both sets of players chose almost exactly the same set up with no knowledge of the previous player choices.

The Moslem forces chose the ground behind the stream & ridge line and in the first game deployed their spearmen covered by skirmishers out of sight behind the hills, in the second they deployed the infantry on the left hoping to move to the stream and deny a crossing to the Christians. With their cavalry; in the first game they deployed their jinettes and two units of retainers on the left and their nobles and two other units on the right, in the second game the jinettes were behind the ridge line and all the cavalry on the right.

In both games the Christians deployed their infantry in the centre – militia spear and militia crossbows screened by skirmishing slingers and bowmen while on the right their caballeros (retainer cavalry) were deployed and on the left the military orders and noble cavalry.

In the first game it was all about the cavalry. On the Christian left the nobles and military orders swept away the opposing nobles and retainers and on their right fought a tougher but ultimately successful series of melees which saw that Moslem flank also collapse. In the centre the Moslem infantry gained the ridgeline and held off the Christian centre but with both flanks swept away it was a clear Christian victory.

In the second game it was a much more even handed contest. The attack of the caballeros at the stream was met by the spearmen who defended the stream with tenacity and despite the the caballeros forcing their way over at one point their losses were too much and they fell back. On the Christian left the veterans and military orders were met by more numerous opposition and a couple of decent class noble units which ultimately proved decisive and the Christians fled with severe losses. In the centre the Christian infantry gained the ridgeline with little hindrance but so what? and in fact the overspill of Moslem cavalry from the Andalusian right started to cause problems for the crossbowmen, one unit of which was ridden down. So with the stream held and the best Christian units seen off an Andalusian victory was declared.

Although two games of the same scenario is not really our thing this did in fact prove very useful in that we were able to prove out the last rules mods and now have something that will see us through some consistent play. The particularly positive outcome was that we now feel confident enough to do the game at the next Partizan so come and have a look if you are there.

Our next effort was a step back in time and a re-fight – the battle of Panium, 201BC.

I knew nothing of this battle until one of the guys pointed out the recent article in Wargames Soldiers & Strategy by Mark Backhouse. As it featured later Successors (Ptolemaics & Seleucids) it talked to one of our loves and as we had just finished up some more cataphracts it seemed very serendipitous!

If you want a detailed read then turn to Mark’s article or if you fancy yourself as a scholar dig out Polybius Book 16 but I warn you it is just as confusing as Mark says! A precis of the battle is as follows; the Seleucids deployed with their cataphracts on the right stationed on Mount Hermon, the centre was the usual array of pikes covered by skirmishing infantry & cavalry plus elephants and the left was a smaller cavalry force; the Ptolemaics were weak in cavalry and so deployed limited numbers on both flanks but had a strong infantry centre of pike & Thracians screened by numerous skirmishers. The Seleucids opened the battle with a furious charge of the cataphracts off the hill which swept away the opposition, seeing this the Ptolemaics pressed the attack in the centre and seemed to have gained the upper hand but the victorious cataphracts returned and enveloped the Ptolemaic left at the same time as the Seleucid left turned in on the Ptolemaic right and the game was up.

Our refight used the order of battle presented by Mark, translated into our rules and lists which came out as follows: On the Seleucid right, 3 x cataphracts under Antiochus the Younger, in the centre, under Antiochus the Great, 4 x pike (including the elite silver shields) screened by a unit of Cretan bow and a unit of Tarentine light horse with 5 x elephants placed at intervals between the pike, on the left a single unit of Agema heavy cavalry and a unit of local formed cavalry under Nicarchus (conjectural). On the Ptolemaic left was 2 x formed cavalry under Ptolemy, in the centre 6 x pike, and a unit of Thracians screened by 4 units of skirmishers of varying quality and out on the right the overall commander, Scopas, with a single unit of Agema cavalry.

Our refight was a classic example of how wargamers can break the historical narrative and the reason why we play.

As is always the case with these kind of games it’s all about the cavalry to start with. On the Seleucid right the cataphracts lumbered off the hill (hardly a furious charge 😂) but the Ptolemaics got the initiative when it came to contact and got in first precipitating a drawn out melee which ultimately saw the one unit of cataphracts fleeing. Fast forwarding, this flank then devolved into the other Ptolemaic unit being routed by it’s opposing cataphracts and the the third cataphract unit advancing to the Ptolemaic camp and begin looting. On the other cavalry flank the clash of the Agema resulted in the destruction of the Seleucid version and their supporting cavalry was shot down by Ptolemaic skirmishers, the Ptolemaic Agema however was in no state do do anything further.

In the centre we got to do the thing we love, shove long pointy sticks at each other 🤣

Both sides advanced steadily and in the initial missile exchanges the Seleucid Tarentines were quickly eliminated. The Ptolemaic levy skirmishers who made up half the total performed surprisingly well which demonstrated that crap troops can do well enough if not overly threatened. The Seleucid elephants had a good start when being used as a shooting platform and assisted in the destruction of the enemy Aetolian javelin men.

Once troops started to close then it became more hard core. The elephants had to start earning their keep and that was a bit of mixed bag. Two elephants (well squadrons) got stuck in with the veteran Ptolemaic pike and paid the ultimate price although it did slow those units down and broke up the nice neat lines. Unusually only one unit panicked and of course that ran into it’s own pike effectively pinning that unit, the other two essentially hung around never quite getting the courage up to get stuck in – well who would!

The battle of the pike battalions went pleasingly well from a game point of view but the Seleucids were having a far harder time of it than their historical prototypes. The Silver Shields destroyed the Thracians, great for them but probably a poor use of an elite unit. Further Seleucid success saw the rout of one levied pike and one mercenary pike on the Ptolemaic side with the loss of only one mercenary pike on the Seleucid side.

As we reached the prescribed number of turns assigned for the game it was clear a Seleucid victory had been obtained. The Ptolemaic camp was looted and so the focal point for rallying was lost and they had more units in the wind. Not the decisive victory of history but a dammed good game.

A bit of a sidebar note, I did speak to Mark about doing a write up of the game as a follow on from his article to offer a bit of a different perspective from his own rules but he advised that WS&S policy wasn’t to publish battle reports. Their loss your gain 😉

Up next was another Cold War Commander this time with our growing 6mm collection, both in terms of hardware but also the terrain, I think we have made some serious progress 🙂

We opted for the ‘Battle of Attrition’ scenario from the rules which is exactly that, kill more of the opposition than they kill of you within a fixed number of game turns.

Given that both sides start in fixed positions, somewhat randomised by the roll of the dice, this is a bit of a cat and mouse game and on reflection I’m not convinced of its historical veracity.

Regardless, both sides manoeuvred to try and get the advantage, the Soviets to use their superior numbers and the potentially devastating Hinds with their onboard ATGW arsenal, the Bundeswehr to get the best out of the superior range and superior armour of the Leopard 2’s.

The vulnerability of the Soviet armour was demonstrated several times although in fairness presenting your flank to enemy fire does tend to result in disaster 🤣😂

Ultimately the game was a NATO (Bundeswehr) victory but probably not one of our more satisfying games. The rules, like any set of rules, have bits where you go “really?” but I think it was the scenario that was a bit self defeating, more of a narrative game next time I think.

By way of a complete change our next effort was a Viking skirmish, two roving/allied bands out to loot a rival settlement getting ready for winter.

The raiding bands had the rather obvious objective of obtaining loot, ranging from livestock to hidden wealth, the settled Vikings the objective of seeing off the raiders and killing enough for them not to try again. Forces were positioned randomly on the board.

The raiders approached from the north and the east under Eanmund and Halfdane respectively. Eanmund headed for the isolated smithy to start while Halfdane skulked around the vegetable patches.

The village guard dogs were completely useless and it was complete luck that one of Hygellac’s crew saw Eanmund’s band at the smithy. Horns were sounded, to battle!

The game quickly became the battle for the smithy – not quite Beowulf level but hey ho 😆

The ‘battle’ eventually sucked in Hrothgar’s band from within the village and a lopsided fight saw Eanmund fleeing the scene bleeding from his wounds, his armour rent and his sword notched.

But what of Halfdane and his band I hear you ask? Well, with the guard dogs having wandered off and Hrothgar having heeded the call of the horn it was time for some easy looting.

In fact Halfdane was the clear winner, livestock taken and some of the lesser valuables looted, a fine day out 😄

Next up, Italian Wars, Florentine and Venetians squabbling about real estate in Mantua.

Both sides fielded pretty large forces. The Florentines were strong in militia crossbows & pike supported by mercenary condottierre and mounted crossbows. The Venetians slightly outmatched the Florentines in cavalry and did have the better quality Lanze Spezzate while their infantry was a more eclectic mix of professional crossbowmen and mercenary pike & crossbows. Both sides had a smattering of skirmish horse.

Both sides deployed their battle cavalry on the right flank, the Venetians screened by a wood and the Florentines planning to use the town to anchor their flank. Given the number of crossbows in their army the Florentines strung them out in one long line hoping to get the best out of their firepower, the pikes they deployed on the right centre. The Venetians had deployed their Provisionati (professional crossbow) opposite the Florentine condottiere so their plan automatically became shoot the heavy guys before they ride you down, the mercenary pike and crossbows were deployed in the centre. Both sides had formed units of crossbow cavalry, so not skirmishers, which they deployed on the flanks – history tells us there were thousands of these guys and generally ineffective they were too.

The initial aggression was shown by the Florentines who got their condottierre moving (after a bit of persuasion) in the direction of the Provisionati.

To fast forward a bit the Florentine condottiere weathered the storm of crossbow bolts that met them and ultimately swept away the Provisionati which ended the participation of both combatants for the game.

In the centre we had general disappointment, despite some fairly effective skirmishing neither side could get their pikemen to get stuck in. A mix of poor dice rolling and low rated captains meant that all they did was stand and stare – we did have a discussion about this and although not completely satisfying from a gaming perspective we had to acknowledge that historically these units weren’t that effective in the field.

The game was lost on the Venetian right. The cavalry block advanced late from behind the wood and ran into crossbow fire from the Florentine crossbows on this flank but it wasn’t the casualties that stopped them it was the death of two captains that stymied the advance and led to more casualties and ultimately morale failure.

With the centre deadlocked but the Venetian right stuck and the left lost we gave the victory to the Florentines.

Our final effort of the month was a refight of the battle of Vimeiro 1808 using Command and Colours in 15mm.

My understanding of Vimeiro is that Wellesley, with slightly superior numbers, defended his position at Vimeiro and the adjacent ridge against several uncoordinated attacks by the French under Junot and drove them off with significant losses and ended the French intervention in Portugal.

For our refight the troops were set out as per the historical prototype using the map supplied with the rules.

Being coordinated or otherwise is rather at the discretion of the cards drawn and the playing of them.

In the centre and right the British attempted to get as many units in and around the village of Vimeiro as the cards would allow as well as trying to wear down the French attackers.

On the British/Portuguese left there were a series of moves and counter moves with the French as each tried to seize a village I’ve forgotten the name of and was in fact completely unimportant.

The game was won in the centre where the British just couldn’t get enough troops around Vimeiro to defend it and the French didn’t obligingly launch piecemeal attacks. Conclusive French victory.

I’ll freely admit the rules don’t really do it for me, the card thing is just too abstract and the use of a unique dice mechanism too random. That said though the rest of the group are all Napoleonic fans and there are plenty of battles to fight so we will continue to feature these in our play.

Well that’s it I reckon, not much done on the painting scene although this Iranian armoured recon battalion did get finished along with some road sections, most of the month has been spent on terrain items for the 6mm. So, signing off, please feel free to comment and look forward to posting in a months time.

Dreams For 2025

January is usually a bit of a slow month to get going so with time on my hands I thought I’d reflect on what the group could tackle going forward.

Historical re-fights. Once the life blood of the hobby but not so much so these days. This year we have made a bit of an effort to stage some of these but it has to be admitted they take more organisation than a pick up game or even a narrative game and the reward v effort has to be weighed carefully.

Some of the periods of history in the collections lend themselves fairly well to a re-fight. Our Successors have achieved some good results as have the GNW, Sikh Wars, Wars of Religion and Carlist Wars and there is still more we can probably do with these – fight them through chronologically for example? Other periods suffer from the shear size compared to the scale we happen to have chosen to collect in, others from the dearth of information available, but maybe we just aren’t trying hard enough?

Going forward it would be nice to fight some Thirty Years War battles using Gerard’s 15mm collection under Tilly’s Very Bad Day. The re-vamped War of Austrian Succession in Italy might also be a possible choice, although this may need some additions. On a tricorne theme my French have been waiting patiently for Dave to complete his British for about 5 years now 😂and there are plenty of battles in Savory’s seminal work, maybe 2025 will be their year?

The Victory at Sea collection is most definitely big but the real thing is massive! No way can we fight any of these. Maybe this would lend itself to a mini campaign? Worth think about 🤔

Having conveniently mentioned campaigns above this is one of those things we haven’t tried at all. Certainly they can be a curse for any group/club no matter how big the group or how tight the players – certainly the experience of two of us in a medieval campaign away from home in 2023 was not positive despite the tremendous efforts of the umpire.

Despite the risks I’d like the group to to consider it but choosing the period/campaign will be tricky and the density of the campaign rules would need to be considered carefully. A limited theatre game using our modern collections might work – 10mm Iran/Iraq or 6mm 80’s Cold War or a more formal C18th game.

Weekend game. Or just a longer game. Currently we meet at 10.30am, chat a bit, play until lunch time, break for about 40 minutes for lunch and then crack on until tea time – anywhere between 4.30pm and 6.30pm. Usually perfectly adequate and luxury compared to those who have 3 hours max at a local school/community centre etc and we are well aware of how lucky we are. But occasionally we are left thinking, ‘if only’, a common wargamers complaint and usually when you have bitten off more than you can chew in the choice of the game or you have chatted on too much prior to the game starting – definitely guilty on both counts 😁.

The weekend game is definitely a wargamers holy grail and hiring a hall for a weekend wouldn’t be beyond us financially but would require some organisation by someone. What might be a consideration would be to play in the knowledge that the game is staying up until the next time – next day, next week, whatever. This might allow us to do a narrative where the first day (or part of it) was the initial probe – reinforced recce elements in a modern game, advance guards from C18th & C19th forces, etc.

As I’m typing away I’m thinking maybe this would be a way to ease us into a mini campaign, limited theatre, say the Shenandoah Valley campaign, some map movement, forces collide, games ensue, lasts two or three meet ups. Maybe it would work for the Victory at Sea idea of re-creating an historical engagement?

Skirmish games. In a previous incarnation skirmish games were a staple of the group mainly because we were constrained by the 3 hours and you’re done format. Over the last couple of years however the vibe has changed, we are no longer constrained by the 3 hour set up and around half of the group nowadays is pretty anti the whole skirmish thing.

This does present a bit of a problem. As the original creators of the group Dave and I have a ton of skirmish stuff which represents an obvious investment issue and because skirmish gaming is terrain heavy also gives a storage conundrum. The other week we had the hard conversation about what we could get rid of (along with the stuff we just aren’t using anyway) but each period has a level of emotional attachment which is difficult to break.

The alternative is of course to effectively recreate the 3 hour game by playing separately one afternoon or morning with those who fancy a bit of a gunfight or Viking raiding. Discussion to be had.

Joint projects. We have never discussed this in the group as it now stands but I think it could be worth the trip. There is always the risk that someone can’t/won’t commit but a couple of units in a wider project shouldn’t be too much of a stretch especially if we go for the mini campaign idea or if someone says “I’m thinking of doing……” and everyone else says, “I’ll do a couple of units”. The lead would have the task of basing other peoples troops to ensure a level of conformity but no big deal I reckon.

Sharing the burden. The simple fact of life is that 75% of games are played in my games room and therefor I organise the bulk of the games which can lead to creative staleness on my part. Some steps were made last year to remedy this and maybe if we do some of the things discussed above the staleness might go. Alternatively I just need to say, “guys, somebody else needs to organise”

I think I’ve waffled on long enough now and I’ve got NFL highlights to watch. Certainly given myself things to think about and ideas to float with the group, but not all at once 😀. So until the January round up, farewell and have a good new year.

December 2024 Report

Well the year is drawing to a close and the last game has been played; we managed 56 games as a group this year so we’re feeling pretty dammed pleased with ourselves, hopefully more of the same next year.

First game in December was another of our Successors encounters, this time Royal Ptolemaic v Late Imperial Seleucid, basically around the time of the 5th Syrian War. The Seleucids had a bit of everything, elephants, chariots, cataphracts, Bedouin camelry and of course a core of phalangites & psiloi. The Ptolemaics were also varied but in a different way, yes they had a core of phalangites but lacked significant numbers of psiloi so instead had Galatians & Thracians to supplement their numbers, on the horse front they outnumbered the Seleucids but lacked armour.

The Seleucids deployed their elephants in the centre astride the road that ran between the two armies. On the left was the cavalry wing comprising the line cataphracts, the Agema, the chariots, the Bedouin and the Tarentine skirmishers. On the right was the 4 pike blocks angled diagonally away from the centre with a unit of Thureophoroi anchoring the end of the line against some hills, levy psiloi screened the front. The Ptolemaics deployed their phalangites in the centre astride the road screened by their psiloi flanked to the left by the Thracians and to the right by the Galatians. In a curious move a single phalangite block was deployed to the right of the Galatians and to the right of that the allied and mercenary cavalry, Greeks, Thessalians, Galatians & Tarentines. The Kleruchoi (settler) cavalry were deployed to the left of the Thracians.

As is nearly always the case the game began with the cavalry. The mighty cataphracts trotted forward on the Seleucid left making sure to give the chariots plenty of room 😁. The Ptolemaic cavalry advanced on both wings, the Kleruchoi engaging in a wide sweep to come round the hills and roll up the Seleucid flank, the allies & mercenaries gulped and rode toward the men in tin cans and the idiots in chariots.

For once the chariots did what they were meant to do and blew up the enemy cavalry line. One routed the veteran Thessalians and the other was just a nuisance as the other cavalry tried to avoid it until the single phalangite block trampled over it – oh that’s what it was there for 🤔

The action on the Ptolemaic right continued to be disadvantageous as the cataphracts duffed up the Greek & Galatian heavy cavalry and pursued them towards the camp.

The elephants were fun as always. I completely get the attraction of these lumbering beasts for ancient generals despite their general lack of success, you just weren’t one of the cool kids if you didn’t have some 😂

Our elephants did manage to do everything we wanted in this game, they were a bloody nuisance, they panicked, they fought and they died. Perfect!

In actual game terms 2 of the elephant squadrons died in combat, both against the Galatians, the other panicked across the battlefield.

Still with cavalry stories, the Kleruchoi horse really didn’t fare very well. One got mixed up with the Thureophoroi and that didn’t go well and the other two got distracted chasing psiloi defending the low hills. The grand sweep around the flank was a bust.

As the cavalry side shows wound down the main attraction took place and the clash of the titans began.

The decision to place a pike block out on the wing was now felt by the Ptolemaics, their 3 faced 4, so a plucky Thracian unit took on the extra pike……and died. In the ‘push of pike’ the sides were equally matched so it was all down to the dice.

Ultimately the Seleucids prevailed and two out of the three Ptolemaic blocks broke.

Although it could be argued (by Ptolemy!) that all was not lost it kind of was. The left wing cavalry was dispersed and doing nothing of any tactical value, the Thracians were finished, the centre was broken and the right wing cavalry were either dead or on the run and their commander was dead. A decisive Seleucid victory was declared.

Next up was another from our Iran Iraq collection. This was a narrative driven scenario with an Iraqi commando battalion supported by an armoured artillery battalion holding an Iranian town and it’s highway & rail links; help is on the way in the form of an armoured brigade. The Iranians are approaching from several possible routes and comprised an armoured brigade of two tank battalions and a mechanised infantry brigade plus a motorised pasdaran battalion.

The Iran tank battalions, both of Chieftains, deployed with one aiming direct for the town and the other swinging off to where Iraqi reinforcements were thought to be coming – good guess.

In the early exchanges the Iraqi armoured artillery fared badly, poor armour made them easy pickings for the Chieftains once they got in range.

The Iraqi’s did however have a ace up their sleeve with a flight of SU-22’s on standby.

The aircraft didn’t arrive every turn and weren’t always that effective but they did look so cool on the table 😃

With the arrival of the Iraqi reinforcements the Iranian blocking force got into action and the superior range and shooting power of the Chieftains took a toll on the Iraqi Soviet kit.

The one sided nature of the tank duel compelled the Iraqis to re-evaluate and so they diverted 2 battalions toward the town and left one to soak up the pressure – this worked way better than they thought as the Iranian commander was having such a great time blowing up Soviet armour he forgot about the objective 🤣

Tanks weren’t going to take a town so the Pasdaran dismounted.

And began assaulting the outskirts of the town.

Napalm strike from an SU22 run.

The Iraqi armour now started to reinforce the town.

Mechanised infantry moved up to support the decimated Pasdaran as the fight for the town intensified.

The Iraqi’s held firm whittling away the Iranian attack.

Ultimately the Iranians reached their break point (we use Cold War Commander) before the Iraqis (just) and failed their test. The Iraqis held onto the town and gave thanks to the brave SU-22 pilots.

Our next effort was a French Indian War skirmish – we haven’t done a skirmish game for ages!

In this scenario two bands of trappers decide to wipe out the opposition ie the peaceful village by the banks of the river.

The Indians also had two groups, one in the village and one randomly placed in the woods hunting. The trappers could deploy at the ford (as seen above) and follow the stream down to the village or dice for random deployment, they went for random.

The deployment for one group of trappers saw them just outside the village in the cover of the woods. Without a moments hesitation they stormed forward with muskets held high as clubs and got stuck in – the rational here being that shots would alert the other Indians.

This attack went reasonably well except for the pesky Indian leader who thought meleeing with a perfectly good musket was a silly idea and so extricated himself from the melee and shot one of the trappers dead. Everyone was alert now.

The other group of trappers had wound up some distance away from the village and by the time they got close everyone was alert and the hunting party had returned. None the less they opened fire before anybody could spot them and downed a couple of Indians but then were marked and the the shots started coming back.

The fight continued and both the trappers and the hunting party lost their leader; both failed their morale test and ran; the Indians rallied, the trappers didn’t.

With one enemy gone it was time to settle with the others. Oblivious until an arrow dropped one of their number the other trappers cut and run. The village was defended but not without loss.

Next was a return to Victory at Sea, US v Japan as always, a points game chosen from the rules, so same points but different objectives.

I’ll admit some of the optics don’t fully work for me but if you want to do WWII naval and have ships you can actually see then this is a pretty good rendition.

The Japanese were outnumbered and definitely deficient in aircraft but for a while managed to fight just one half of the US battle fleet with some success.

However once the US air superiority kicked in then large ships like the Kirishima were vulnerable and went to the bottom of the sea.

Once part of the Japanese air cover arrived – it never all arrived, we did manage to have the fun of a dogfight.

Quite a few ships were sunk on both sides but at the end point the Japanese had completely failed in their objective and the US achieved a major victory.

Our final game was another in our ongoing development of an El Cid era set up using Dave’s superbly painted figures.

For this one we had an Almoravid host under Bin Yusuf against a Christian force under El Cid.

Once deployment was done it was obvious that the main game would be EL Cid and all the Christian cavalry attempting a flank march over a stream only to find that this was where Bin Yusuf had deployed his Black Guard and allies!

After two refusals to charge which meant they were sitting ducks for missile fire the Christians cavalry finally got stuck in. Unfortunately the Cid died and some minor successes elsewhere weren’t good enough to offset this disaster. A victory for Islam.

I reckon we’re nearly there with the rules now. A couple more games and we should be able to put on a demonstration game at a show in 2025.

Well that’s it for the year I reckon and a pretty good one it’s been. The Iran Iraq and Successors is done, anything else is just gravy. Our quick dip into 6mm Cold War has seen us table two decent sized battle groups and 2025 should see East Germans, British and maybe Belgians on the table. Dave’s El Cid is going well and Gerard’s Samurai is coming along nicely, hopefully both will see some action in 2025. Plans? There are always plans but let’s just see how the year rolls out. In the meantime a very happy new year to one and all.

November 2024 Report

November has been and gone and the year draws to a close – where the hell did 2024 go?

The first game of the month was the firm favourite, Successors, on this occasion Alexandrian Imperial under Perdiccas facing off to the Antipatrids under the old soldier himself.

Antipater’s army was strong in Phalangites (of varying quality) and mercenary Hoplites well screened by skirmishers deployed with their right against the stream while all the cavalry were deployed out on the left.

Perdiccas had the larger army and a varied one in terms of troop types and quality. The centre comprised the pike screened by skirmishers and the elephants, the right featured the Thracian mercenaries screened by Persian skirmishers and the left was the strike cavalry screened by skirmishers and supported by the Hypaspists.

Predictably it was the cavalry who got the ball rolling with both wings advancing. Antipater’s strike cavalry headed for the Thracians with the intention of turning the Perdiccan right. The cavalry of Perdiccas were on the wrong side of the stream so had a more difficult journey to make.

The initial clash between Thracians and Antipatrid cavalry saw the cavalry pause due to javelin volley casualties.

However, after a bruising melee the Antipatrid cavalry broke the Thracians and the wing was shattered – Alcetas bravely threw himself into the combat to try and stabilise the line but to no avail and he fled along with the hill tribesmen.

Due to the manner of deployment the centre infantry blocks weren’t directly facing each other which meant that, A) they were going to be slow to contact and B) the Perdiccan cavalry were going to have to attack the pikes – oh dear 😥

The initial action in the centre featured the skirmishers and the elephants which generally favoured the Antipatrids.

We did have the fun bits with the elephants though…

This going to end well 🤔

Yep 😂🤣

The Hypaspists did get into action and were doing well until a second pike unit joined the fray and then it didn’t matter how good they were…..

The Perdiccan cavalry just couldn’t make any headway and either broke or retreated, either from missile casualties in the case of the skirmishers or forlorn charges on pike blocks.

As we rolled into the final turns the Thessalian cavalry from Antipater’s left were busy looting the Perdiccan camp thus preventing the last chance of rallying broken troops.

Unfortunately we had to call time before the centres were fully committed which was a shame although we had a great game. Quite why this was I couldn’t work out, part of it might be to do with players having a C19th mindset where everything has to be spread out, the other is perhaps the slowness that comes with age 😂, or maybe the rate of movement is too slow? My take is that players don’t relate to the actions of the historical prototypes, concentrate in the centre and the peripherals will take care of themselves.

As sure as day follows night our next game was Iran v Iraq – mainly because the cloth is the same for Successors and modern desert 😉

The Iranians were on the defensive with the objective of retaining control of the tactically important high ground.

The Iraqis are the more challenging side to play having inferior armour on an historically open terrain so line of site favours the better Iranian armour. However in this scenario they did have the option for a flank march and took it with a mechanised infantry battalion.

Early success for the BMP1’s against the vulnerable M109’s.

Despite having deployed with the better tanks of the 10th Armoured (T72’s) the Iraqi’s still suffered from long range shots from Iranian Chieftains.

There was some relief for the Iraqis though when an Iranian air strike hit the wrong target 🤣

As the battle progressed the Iranian tank line held firm although by this point most of the M109’s were toast.

The T72’s continued their advance so as to get into range but losses mounted.

The Iraqi flank attack ground to a halt with significant losses – rule number one, always get out of the vehicles before somebody shoots it up 😮

Ultimately however the Iranians reached their morale break point (we were using Cold War Commander) and failed the test thus giving the Iraqis a minor victory. It was really close and thoroughly enjoyable.

Next up was an away game with the Cold War Commanders Facebook group in a very cold Stone in Staffordshire.

The premise of the game was a Warsaw Pact breakthrough being opposed by NATO at the second line of defence. The table was 16 foot by 6 foot with some lovely terrain which we duly took note off for our own burgeoning efforts. The scale was 6mm and this time I was able to take my own troops – Bundeswehr Panzer battalion and Gerard was able to bring his Soviet tank regiment with all the added extras.

It was always going to be an uphill struggle for the NATO players faced with the (historically) larger number of Warsaw Pact units but initially it went well – I was particularly proud of my Leopard II’s destroying a Soviet tank battalion which strayed into the open ground – line of site is really important.

The great thing about these larger (and longer) games is the opportunity to get more toys on the table – we had attack helicopters on both sides firing away with ATGM’s, multiple air strikes from various aircraft models and off table artillery barrages. Fantastic.

There was quite a lot of debate about how effective (or not) air strikes are in the rules – usually when somebody had completely crapped out 😂🤣 which was a bit of a distraction. For me I’m not overly bothered, the game is about units on the ground, not in the air, and if a group is not completely satisfied then come up with a local amendment, the rules police wont arrest you 😏

There was some hard fighting in and around an industrial centre – doesn’t it look lovely? And it was good to see infantry actually doing something – we haven’t quite mastered the infantry thing yet.

Come the second day the NATO left (me) had been turned which in turn exposed the Austrian centre who were holding on desperately against superior numbers.

NATO Starfighters roll in to stem the tide.

Ultimately time was called and a narrow Warsaw Pact victory declared (I think). Two days well spent, we learnt a bit more about the rules and managed to pass on some things we’d learned, got some hints about terrain and came away fired up for more. Success!

Back to the home front and it was a 15mm Napoleonic game for the first time re-fighting Austerlitz using Command & Colours.

Not being a Napoleonic’s guy I’ve no idea if this was representative or not. It certainly looked impressive with one base representing a brigade, so very much at a macro level, which takes some getting used to if you are used to playing at a battalion/regiment level.

The rules are fairly straight forward – they would have to be given the level you are fighting at, and the results from firing and fighting didn’t throw up anything glaringly ‘off’. That said I did find it somewhat abstract and lacking in flow.

In terms of the narrative, the French right made a mess of the Russian left but didn’t advance beyond the river, the Russians obligingly came to them, on the French left a slow advance chewed up the Austrians but it was in the centre that the French did the best to the extent that when we called time the French had won convincingly on points.

For a so called ‘simple game’ it took an inordinately long time to play, part of that was obviously unfamiliarity with the rules and another part was the inability to make a decision by some players which was frustrating when all you had to do was play a couple of cards. It was the longest game we have played so far and by the end I was done in but not with the high that can come from a long intense game. Most of the group are current or ex Napoleonic players so we will obviously play again we just need to think carefully about how much dilly dallying we allow.

The next effort was another round of the El Cid project and I think we might be getting there now.

In this fight we had Spanish Christians and allied Andalusians against other Andalusians with an Almoravid contingent.

This is a cavalry heavy period so we had several swirling cavalry melee’s which resolved themselves pleasingly both in terms of game play and as a perception of warfare in the historical period.

Despite some sterling work by the Knights of Navarre the Christian cause was ultimately lost and a general retreat sounded, the Almoravids did nothing other than look fierce 🤨

Our next game game was an eastern renaissance game using our Husaria rules, Muscovite v Cossack.

The main feature of the Cossack army was their tabor which they deployed in completely the wrong place but still managed to win 🤣😂

This was a missile cavalry game; both sides had infantry, all harquebus armed, but no real shock troops, the real action was going to be with the cavalry, all bow armed and some lance armed, the Muscovite advantage was that they were better armoured but the Cossacks had more lance armed. It was going to be a challenge for sides of players.

The Muscovites advanced all along their line (well apart from two units that just simply refused to move for most of the game!) in the hope of out shooting their opponents.

The Cossacks sent their boyars forward to try and bust the Muscovite centre but they were sent packing under a barrage of bow fire.

The Muscovites pressed their initial advantage to try and overwhelm the Cossack centre.

Out on the Cossack left the veteran retainers were having a more positive experience. There is no need to talk about the Cossack right because that was where the tabor was sitting doing nothing other than taking a few long range pot shots at the Muscovite centre.

The centre was where the action was and that was where being solely bow armed (the Mongol conquest influence) was starting to become a disadvantage for the Muscovites.

Now it really was starting to hot up in the centre as the Kazak lights tried to turn the Cossack right – out of shot is the tabor doing its one useful thing of shooting into the rear of the Kazaks who didn’t like that very much 😥

The make or break moment for the Muscovites was the Dvoriane charging home on the Zaporizhians – the Zaporizhians held firm.

The Kazaks gave up the fight and the tide was starting to turn.

A series of unfortunate morale checks and the Muscovites started to unravel. Time was called on a Cossack victory – despite the Cossack player being convinced he was going to lose 😁

The final effort was an away game of sci fi skirmish, Three teams of sundry adventurers arrive planet side looking for illegal fuel cells, can they barter their way through the market before the authorities realise what they’re up to?

In short, two teams went through the whole game without firing a shot, got what they came for and left the planet.

The third team got frustrated with being asked too many questions and so opened fire in a crowded market place. The cops came. The end.

Although I appreciate the amount of work that goes into creating the backdrops for these scenarios I think I’ve come to the conclusion that they’re not for me and I need to find a way of politely avoiding such in the new year.

In other news a battalion of 2S1 Gvozdika for the Iraqis.

Iraqi HQ element

That’s it for this month. Thank you for reading, see you in December.

September 2024 Report

Slightly late going to press due to holiday away in Spain being cultural – I now know the complete ins and outs of Romanesque and Gothic architecture 🤔

First game of the month was from the Iran Iraq collection, another scripted scenario. This one was set in June 1982 in the Central Front and involved a brigade level clash around the town of Chananeh with both sides tasked with securing the town and its rail link. As with previous games both sides were given an orbat of the basic level force and then a series of options to upgrade/reinforce the battlegroup.

The Iraqi’s chose to insert a commando battalion via helicopter as their option and the Iranians went for additional manpower in the guise of a motorised Pasdaran battalion.

The perennial problem of getting troops to deploy first time (or second time, or third time 😂) was no different in this game than in any other but the Pasdaran were game on and roared into town alone.

The bulk of the Iraqi mechanised infantry brigade soon deployed to contest the town and in the absence of the dreaded Iranian Chieftains pushed their T554/55s forward. The commando coup de main however was being slow to arrive and a vital opportunity was being lost.

Unfortunately for the Iraqis the Iranian Chieftains did arrive and stared taking long range pot shots at the Iraqi BMPs prior to the infantry debussing 😮

Despite losses from the Chieftains and off table 120mm mortar fire the Iraqis pressed the attack from the west and secured the immediate outskirts.

Finally the commandos arrived and started fighting their way into the town from the railway yards, but was it too late?

The battle for the town intensified with the commitment of the Iranian mechanised infantry supported by close up fire from the Chieftains; it was now two infantry battalions versus three but the Iraqis had already been whittled down.

Rightly scared of the Chieftains the Iraqi armour hung back and offered support fire but it was largely ineffective.

At the pre-programmed final turn neither side had achieved its primary objective but the Iraqis had reached their breakpoint and the subsequent test saw them fail their moral and cede the ground. Another excellent CWC game.

Next was another run at the El Cid project which is in danger of faltering due to a lack of a rule set 😔

Against my natural inclination I agreed to do a rough stripped out version of our Successors rules (mainly because they work and we know them well) and adapted them to suit the unit sizes and base sizes Dave had already gone with 😟

Not surprisingly there were some issues, mainly around unit sizes and numbers of figures to a base, but the overall effect was pleasing and we got ourselves a game. The down side, of course, is that I’ve now got another rule writing job 🙄😂

What a coincidence our next game was Successors! Well the mat was out so why not.

For this one we deployed Demetrian Antigonid against Imperial Seleucid – very historical. The army of Demetrius was the more numerous but very diverse in terms of troop types and troop quality, low on pikes but high in terms of Greek allied and mercenary foot an his cavalry were a bit of a mixed bag. Seleucus had the advantage of better shock cavalry and pikes but his lack of numbers might be a problem although he did have the scythed chariots! Both sides fielded elephants.

Demetrius opted to split his army either side of the river that ran diagonally through his deployment area. On the right he placed all of his hoplites screened by levied Persian skirmishers with the intent of advancing on the ford where the road from the enemy side cut the river – the plan seemed to be two fold, 1) prevent a possible Seleucid use of the road to gallop their cavalry up the road and onto the Demetrian flank and 2) to cross the river onto the Seleucid left flank if no such attack manifested itself. The forces on the other side of the river were the pikes flanked by peltasts and screened by elephants & psiloi in the centre and all the cavalry, light & heavy out on the flank to sweep around the Seleucid right.

The Seleucids chose to concentrate their elephants & chariots on the right flank supported by a single unit of Median cavalry mainly because this seemed to be the best cavalry ground – they were right 😀. Next to them and in the centre were the pikes, screened by psiloi and flanked by peltasts and out on the left were the Xystophoroi cavalry and on the extreme left an independent command of Tarentines and Hetairoi. Apologies for the non based elephants, a rare oversight.

Once the game got going it became pretty obvious that Demetrius’ allied Greeks were going to have very little to do and were largely reduced to the role of spectators.

The early blows of the battle were struck on the Demetrian left where first the skirmish cavalry and then the formed cavalry fought it out with the elephants and chariots. This contest occupied the bulk of the battle and was hard fought with elephants dying and chariots crashing, in fact quite a mess 😁

While the elephant/cavalry duel rumbled on the infantry centres closed with the elephants being the dammed nuisance they’re meant to be.

Elephants died and men died but no-one could make the breakthrough that was needed and unfortunately for the Seleucids they couldn’t make their strike cavalry count either.

Back on the Seleucid right it was all going a bit wrong and Demetrius was about to get the breakthrough he needed.

But what of the Demetrian right flank I hear you ask? Well, this was all a bit embarrassing. One of the hoplite battalions got itself a bit isolated and after being softened up by some skirmishing Tarentines it fell to a mighty charge by the Hetairoi. It didn’t make any difference to the battle but it did make the Seleucid commander feel good 😁

Ultimately the battle kind of petered out and once the Demetrian cavalry were amongst the Seleucid baggage it was over.

Our next foray was into the ice cold waters of the Pacific and another Victory at Sea with both sides picking their fleet from an umpire generated list.

Once initial dispositions were made this looked like it was going to be a Japanese walkover, the US forces were spread thin and seemed to have no chance of achieving their objectives – I’ll admit to some low level whinging here as a US commander 😳

As we are beginning to learn with these rules, aircraft can be crucial – here waves of Japanese aircraft roar into action.

Unless your anti aircraft fire is effective you are going down to the bottom of the ocean.

No further comment required 😏

The Missouri goes up in smoke, this was a seriously depressing moment for the American commanders.

But, in a late comeback, the Americans took out the big ass Kongo – what a glorious site!

And then the Mogami got torpedoed. It’s getting better and better!

It was a hard fought engagement and when time was called at the prescribed point the Americans had rallied and won a major victory which they sure as hell didn’t look anywhere near to doing for a good half of the game.

We returned to skirmish gaming for our next effort, Blue and Red teams from the SAS infiltrating a Taliban compound to capture a senior leader – the emphasis being on capture.

All proceeded well for the first few turns, entry into the town was made undetected and overwatch positions were set up. The clever bit would be finding which building the target was in.

Sooner or later someone is going to spot something not quite right and this guy did. Que gunfire.

Taliban start charging out of buildings – might be a good indicator of which buildings might house our man.

Grenades are your friend 😊

In these games (Spectre Operations V2) the advantage definitely sit with the elite tier troops – more accurate rates of fire, better resilience, but they can still die.

With bullets flying and his men dying the target made a break for it with his bodyguards.

Sometimes there are just too many of them – ultimately the SAS teams suffered 50% losses.

The target looks like he’s getting away. Can they cripple the vehicle and not the man?

Nope. The hail of bullets that bought the vehicle to a halt caught the target and he died as the SAS reached the crash site. Technically a failed mission particularly given the SAS casualties but there was a lot of dead Taliban and we did have a great game.

Our final game was our first game with our newly done 6mm Cold War Gone Hot collection again using Cold War Commander. The forces were an understrength Bundeswehr panzer brigade v a Soviet tank regiment.

We got so involved in this that the time just whizzed by and not enough photos were take, better luck next time.

Essentially the Bundeswehr were defending a main road route over a river and the bridge was the critical objective but in accordance with their historical tactical the Germans decided to attack and blunt the Soviet advance.

Soviet mechanised infantry on the move.

Soviet air cover was largely ineffective much to the relief of the dangerously exposed Leopards.

The Leopards were very effective against their Soviet counterparts and importantly could shrug off most damage.

Soviet T80’s taking some pressure – we ran out of suppression markers 😂

For reasons I cannot explain a whole load of photos of a Hind getting serious with ATGM’s have gone missing 😥 but suffice to say they were very effective.

This played as a very different game to the Iran Iraq affairs despite being the same rule set. First off the smaller scale means more stuff can deploy on the same square footage but move and shoot at the same ranges which has both it’s positives and it’s negatives. Secondly the kit is a lot better (and I mean a LOT better) despite the same time frame and that offers a real challenge to both sides. Thirdly terrain is key, we already knew this from Iran Iraq but here it is really important and we need to do some work both in terms of quantity and quality.

Anyway that’s it for the month, I leave you with a random battle painting from my holiday in Spain. See you next month.

June 2024 Report

A bit of a thin month, holidays and shift patterns rather curtailing our activities, but hey, there are plenty of people out there who dream of having idle time on their hands to indulge their hobbies 😟

Our first foray was the ever growing and ever popular 10mm Iran Iraq project. For this one we had an Iranian town seized by a heli borne Iraqi commando force and reinforcements on their way – all controlled by the Umpire. The players were commanders in the 37th Armoured brigade scrambling forces together to re-take the town so they were given a list of force & points values from which each could assemble his battlegroup to a capped points total – this was all CWC and each battlegroup was 2000 points.

The Iranians chose a tank battalion each (of course!) and then one added a mechanised infantry battalion and the other an armoured artillery battalion – M109’s. Both deployed on their table edge and we set too.

The game was fast and furious with the Iraqis throwing their reinforcements in as soon as they arrived which meant their mechanised infantry were taking on tanks!

In a game that featured SU22’s missing their target, Hinds brewing up tanks, BMP1’s being on the wrong side of a tank duel and an Iranian command element being eliminated – really, really lucky dice 🤣 we had an exciting see saw game that finally ended with the Iraqi command failing its break point roll and retiring from the table.

This went well and the idea of giving the players a limited roster to choose from gave them more of a sense of ownership, definitely going to try this idea again although of course I now need to paint more stuff to offer more choice 🤣

Our next outing was the equally popular Successors project, this time Royal Ptolemaic v Imperial Seleucid so scythed chariots, elephants, wild Galatians, Thracians, camels and of course pikes.

The armies were pre chosen and the terrain laid out – we actually had terrain! The Ptolemaic commander deployed all his foot on the left extending in an unbroken line up to the centre, his cavalry he split into two commands, one led by the army general in column on a road heading toward the Seleucid left via a ford with the intent of turning the Seleucid flank and the other, comprising the settler cavalry, deployed slightly back and facing forward which would join up with the infantry line as it advanced – none of this worked 😥 The Seleucids deployed more traditionally with the pikes in the centre flanked by the Thracians and Galatians and two cavalry commands on each far flank.

Early moves favoured the Ptolemaics, their advance to the ford went well, the infantry advance proceeded as planned. The Seleucids were caught on the hop a bit by the rush for the ford so had to redeploy their cavalry command to counter it but their other cavalry command sensed opportunity as the Ptolemaic infantry had no cavalry to protect the infantry line.

On the Seleucid right the commander launched his elephants and chariots into the attack dreaming of spoils and booty. However, just like history, the chariots were bloody useless 🤣 but they were certainly pretty and absolutely a pain in the arse when they crashed and created an obstacle. The elephants however fared better seeing off the opposing elephant and pinning one of the pike which effectively broke up the Ptolemaic line.

Back at the ford all kinds of fun was had as both sides threw troops into the fray “and the water ran red with the blood of the slain”. Eventually the Seleucids pushed the Ptolemaics back towards their camp but the victory would be decided elsewhere.

It was the centre infantry clash that decided the day. Despite being outnumbered in pikes the Seleucids gained a crushing victory; in part this was due to one of the Ptolemaic pike battalions getting distracted by elephants and in part due to the settler cavalry getting tangled up with the Thracians and so unable to help, but the real fun was the Galatians being able to charge just at the right moment onto already engaged pikes tumbling them into rout.

It really was a crushing Seleucid victory and a fine game.

Final effort was a WWII skirmish on our Dave Marshall cityscape which hasn’t seen the light of day for over a year.

American GI’s tasked with clearing the last vestiges of resistance from the next city on the way to Berlin.

Grenades were thrown, snipers open fire, lmg’s rattled from windows, resistance was tough.

Grit and determination saw the GI’s through and the allied advance continued.

The only painting completed was another battalion of Iranian infantry for the 10mm project – more choice for the next game 😉

So that’s it. Keep well and see you in July.